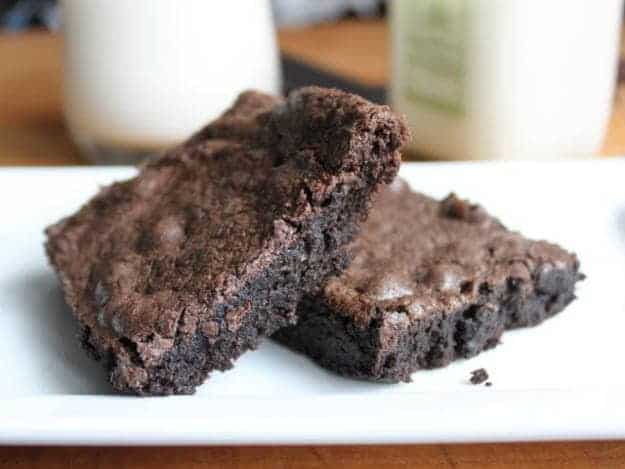
This recipe makes a 9-by-13-inch pan of fudgy, gluten-free brownies with a thin, crackled top. Since no baking soda or baking powder is present, the brownies get a slight lift from creaming the butter and sugar. However, this lift is really slight, and although the brownies will puff up in the oven, they sink down to a dense, fudgy texture as they cool.

Gluten-Free Brownies: The Flour Blend
Most brownie recipes use more cocoa powder than flour. This recipe…does not. To make these brownies, you’ll need one cup of white rice flour, half cup of cornstarch and and (only) a half cup of cocoa powder. At first glance, that might not seem like enough cocoa powder. It is. I promise!
See, when you use mostly cocoa powder, you get really rich brownies. REALLY rich. And richer is always better, right? Well…(hmmm) When we’re talking about a bank account, then yes, richer is always better! When we’re talking about brownies, I don’t think so. To test this theory, I baked one batch of brownies that used more cocoa powder than flour. Then I baked this recipe. I put them side-by-side and let my tasters have their way with them. Guess what happened?
They preferred the brownies made with less cocoa powder. Why?
I think at some point, the cocoa powder becomes a little too intense. You lose all the nuance that makes a brownie a brownie and not a chocolate bar. The white rice flour and cornstarch, actually, allow the cocoa powder to shine. It’s one of those rare times when using less gives you more.
More flavor. More chocolate. More YUM.
Gluten-Free Brownies: The Cocoa Powder
Since cocoa powder brings all the chocolate flavor to these brownies, you might wonder if you should reach for natural cocoa powder or Dutch process when mixing up the batter. In this recipe, both work!
Natural cocoa powder is acidic. It also isn’t as dark in color as Dutch process cocoa powder. In recipes that call for baking soda, you’ll often see natural cocoa powder used because the acid in the cocoa powder activates the baking soda. Dutch cocoa powder, on the other hand, has had it’s acid neutralized. This process darkens the cocoa powder. It also helps to bump up the intense cocoa flavor. Since the acid has been neutralized, recipes that use Dutch cocoa powder use baking powder as the leavener. Unlike baking soda, which requires an acid to activate it, baking powder contains both an acid and a base. As soon as you add liquid to baking powder, it will bubble.
These fudgy gluten-free brownies call for neither baking powder or baking soda. Therefore, you can use whichever cocoa powder you prefer!
Gluten-Free Brownies: Making Them Your Own
People tend to squabble over whether or not brownies should be cakey or fudgy. But if you really want to get them going, ask if they like their brownies with nuts or without. Or with chocolate chips or without.
I must confess that I like my brownies plain. No nuts. No chocolate chips*. No ‘nuttin. That’s just me. If you like nuts or chocolate chips in your brownies, stir in one cup of each. (Be sure to chop the nuts before adding them to the batter.)
Gluten-Free Brownies: Baking and Cooling
Once you’ve made the batter, spread it into a nine by thirteen pan. Place the pan into a preheated oven and bake. Done!
As you can see, I didn’t mention lining the pan with foil. Ahem. I HATE lining pans with foil. For some reason, I was not born with this skill. Each time I try, I end up ripping the foiling and swearing at the pan or myself or something. It isn’t pretty. If you have the awesome skills to line a pan with foil, I envy you. Also, go ahead and line the pan with foil. It makes clean up easier. (Or so they tell me.)
When a cake tester inserted into the center of the brownies comes out with just a few moist crumbs clinging to it, the brownies are done. Usually my nose tells me when the brownies are done, about 30 minutes after I put the pan into the oven.
Place the pan on a wire rack and allow the brownies to cool in the pan. This is one of the few baked goods that you let cool in the pan.
Cut the brownies into (generous) squares and enjoy!

Fudgy Gluten-Free Brownies
Ingredients
- 1 cup white rice flour (4 ounces; 113 grams)
- 1/2 cup cornstarch (2 ounces; 57 grams)
- 1/2 cup cocoa powder, either Dutch-process or natural (1 1/2 ounces; 42 grams)
- 1/2 teaspoon salt
- 1/4 teaspoon xanthan gum
- 2 cups granulated sugar (14 ounces; 396 grams)
- 2 sticks butter, softened (1 cup; 8 ounces; 226 grams)
- 4 large eggs (about 7 ounces; 200 grams out of shell)
- 2 teaspoons vanilla extract
- 1 cup chocolate chips, optional (6 ounces; 170 grams)
- Gluten-free cooking spray
Instructions
-
Preheat oven to 325 degrees F. Lightly spray a 9 x 13-inch baking dish with gluten-free cooking spray.
-
In a medium mixing bowl, white rice flour, cornstarch, cocoa powder, salt, and xanthan gum. Set aside.
-
In a large mixing bowl, cream together sugar and butter. (Use medium-high speed with a handheld mixer or medium speed with a stand mixer.)
-
Add eggs. Mix until combined. Reduce mixer speed to medium. Add dry ingredients and vanilla extract. (Add chocolate chips if using.) Mix until a batter forms. Spread batter into prepared pan.
-
Bake for 35 to 40 minutes. A cake tester inserted into the center of the brownies should come out clean or with just a few moist crumbs clinging to it. Remove pan from the oven and place on a wire rack to cool. When cool, cut into squares.


Studio Jiji says
My husband has requested gluten-free fudgy white chocolate brownies and I am wondering if you have any ideas on how to do this. I am not aware of any white chocolate powder that can be used instead of cocoa powder. I did try a different recipe that used semi-sweet chocolate baking squares instead of cocoa powder and I swapped in white chocolate squares, but found the results to be cakey not fudgy, slightly greasy, and much of the white chocolate flavour was lost. Thank you in advance for any suggestions!
Elizabeth says
Oh! I don’t have an answer but I want to think about this! If I create something, I’ll let you know.
Nicole says
A while ago my husband taught me a trick for lining pans with foil.
Rip the foil to the right size
Invert the pan (yes, upside down)
Wrap the foil around the base of the pan. Just smooth it over the edges & sides.
Now it’s formed properly.
Take foil off of pan.
Turn pan around (right side up)
Pop formed foil into pan and smooth into place.
Easy peasy, works every time! 😉
Hope this helps.
Elizabeth says
This is great! Thanks!
Melissa says
The best gluten free brownies we have made! We don’t eat rice or corn, so I substituted sorghum flour and arrowroot. With these substitutions, the brownies were a bit fluffy but still fudgy! Thanks for sharing your recipe.