
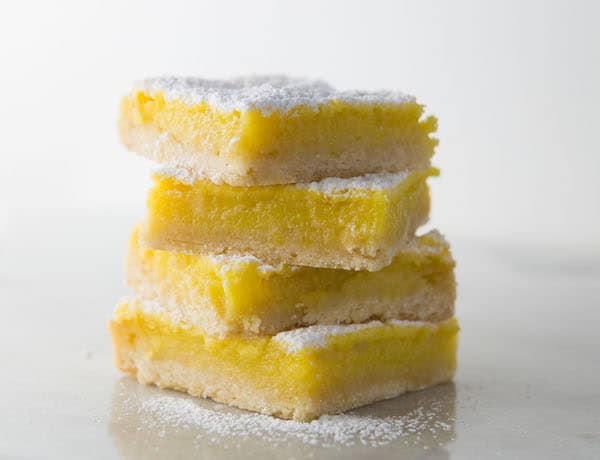
The BEST gluten-free lemon bars! A rich and tender shortbread base with a thick, lemony topping. Not too tart; not too sweet! Lemon lovers will adore these bars.
Urgh. Lemon bars. Why you gotta be so cruel?
In theory, lemon bars are awesome. I consider them a proud member of the classic cookie bar family. Other members? Gluten-free brownies, of course.
Part lemon meringue pie, part lemon tart, and 100% awesome. Only…most of the time, they’re not so awesome.
Most of the time that lovely topping causes problems. Big problems. Either there’s not enough of it or it’s too sweet or too tart.
Qualities of an ideal gluten-free lemon bar:
- tender, buttery shortbread crust
- thick sweet-sour lemon baked lemon topping
- easy-to-make
So this is what I set out to make. And, after lots of trial and error, I think I’ve finally nailed the perfect gluten-free lemon bar. (Woo-HOO!)
The Crust
Let’s start at the bottom: the crust.
The crust for these bars is a simple gluten-free shortbread. To make it, combine gluten-free flour with powdered sugar, baking powder, salt, and butter. Cut the butter into the dry ingredients. You can do this with a pastry cutter or food processor. Then add just enough water to form a dough. There’s no egg in the crust; however, these are not egg-free lemon bars. There are lots of eggs in the topping.
For the shortbread crust, I used Bob’s Red Mill’s gluten-free baking flour. Use whatever gluten-free flour blend you love*.
*Be sure the flour blend contains xanthan gum. If it doesn’t, add 1/4 teaspoon to the mix. This keeps the crust from crumbling under the filling.
Press the dough into a parchment-lined 8-inch pan, chill for about ten minutes and bake until golden brown.
Baker’s Tip: Line the pan with parchment paper before baking. This prevents the bars from sticking and makes them easy to remove. To do this, cut a piece of parchment 8-inches wide by 16 inches long. While you’re pressing the dough into the pan, use binder clips to prevent the parchment from moving. (Remember to remove the clips before baking. They’re not oven-safe.)
The Filling
After baking the shortbread base, make the filling. You don’t want to make it in advance because the acid from the lemons and the sugar can chemically cook the eggs, making the filling lumpy.
Mix the granulated sugar together with the cornstarch. This step seems like nothing but it’s important. It prevents the cornstarch from clumping when combined with the eggs. So don’t skip it.
Most traditional (read: not gluten-free) recipes call for flour in the filling. While I could have used a superfine rice flour, I worried about folks who don’t keep that in the house. So instead of flour, I used cornstarch. It makes for a lovely lemon filling with a custard-like texture. I really love it.
To give the filling a nice pop of lemon flavor, add the zest of one lemon. Take a second to rub the lemon zest into the sugar mixture. Then whisk in the eggs and lemon juice and you’re done.
For lemon bars (or any lemon dessert really) use freshly squeezed lemons, not the stuff from the bottle. There’s no replacing the flavor of a freshly squeezed lemon and the success of these bars depends on it.
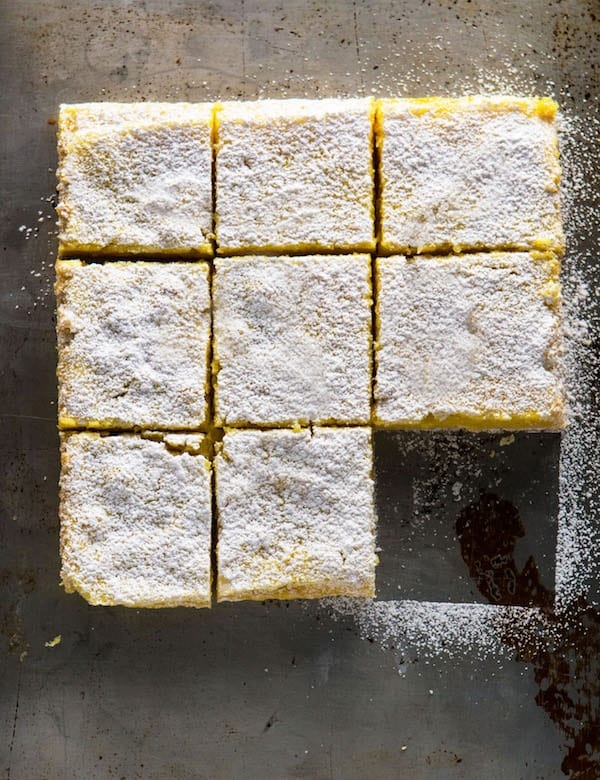
Baking and Topping
Pour the topping over the bars and bake until the topping sets. Allow the bars to cool and then, if you feel like it, sprinkle with a generous amount of powdered sugar. Since powdered sugar melts pretty quickly, it’s best to finish them right before you serve.
Ingredients
For the Crust
- 1 cup gluten-free flour
- 1/2 cup powdered sugar
- 1/2 teaspoon salt
- 1/4 teaspoon baking powder
- 1 stick butter, cold and cut into 8 pieces
For the Filling
- 1 cup granulated sugar
- 4 teaspoons cornstarch
- zest of 1 lemon
- 4 large eggs
- 1 egg yolk
- 1/2 cup lemon juice
Instructions
-
Preheat oven to 350 degrees F. Line a 8x8x2-inch square pan with foil. Lightly grease the foil with nonstick cooking spray.
-
Pulse together the the gluten-free flour, powdered sugar, salt, and baking powder in the bowl of a food processor. (Or whisk together in a large bowl.) Add the butter. Run the processor until a dough forms, about 30 seconds. (If mixing by hand, cut butter in with a pastry cutter.)
-
Press dough evenly into prepared pan. Bake until golden brown, about 25 minutes. Remove pan from oven, leaving the oven on, while you prepare the filling.
-
For the filling: Stir together the granulated sugar and cornstarch. Rub in the lemon zest. Add the eggs and egg yolk. Whisk until smooth. Add the lemon juice and stir. Pour mixture over baked crust.
-
Bake until filling sets, about 30 minutes. Remove pan from the oven and allow the bars to cool in the pan. When cool, sprinkle with powdered sugar, optional.
Annie says
There is no lemon zest listed in the ingredients. How much should I add? Thanks!
Elizabeth says
Hi Annie!
Sorry about that! You need the zest of one lemon. I’ve updated the recipe. It’s included in the ingredient list now. Gremlins must have gotten their hands on it before. 😉
Digit says
can you substitute arrowroot powder for the cornstarch?
Elizabeth says
That should work for this recipe!
Jeanine says
Is there a way to make these dairy-free as well?
Elizabeth says
Yes! Replace the butter called for in the dough with a dairy-free baking spread, like Earth Balance.
Bonnie Cook says
Can I replace the sugar with stevia?
Elizabeth says
Hi Bonnie,
I’m not sure. I haven’t tested the recipe with stevia. Sorry.
Angela Cobb says
These are delicious! Thank you for an amazing recipe. how do you store them?
Elizabeth says
Glad you like them! The best way to store these are covered in the refrigerator for up to five days. I’ll update the recipe to include this!
Dorothy Morrissey says
Please could somebody tell me, how big is a stick of butter. I’m in NZ and our butter comes in 500g packs. I know it’s smaller than that!
Thanks for the recipe. Looks great.
Dorothy
Elizabeth says
Hi Dorothy,
Sorry about that! I’ve been working on updating recipes to include weight. A stick of butter in the States is 4 ounces/ 113 grams. I’ll update the rest of the recipe tomorrow to include weights for all the other ingredients.
Enjoy!
Mary says
My granddaughter is gluten free and she loves them as well as the rest of the family! I have to double because they may last two days usually gone by that evening! Thanks for the recipe!