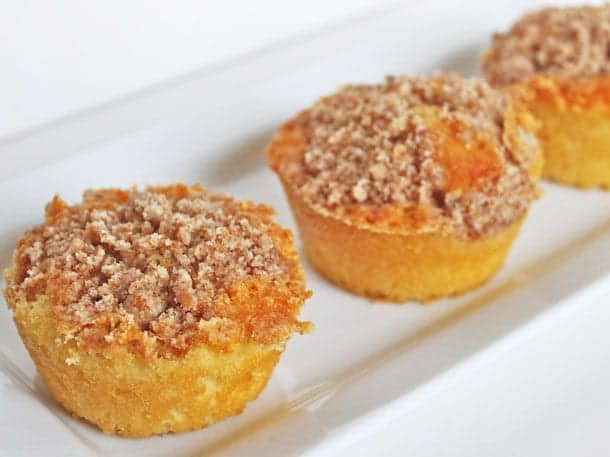
Miss those Drake’s coffee cakes? Then this is the gluten-free recipe for you! These mini-coffee cakes taste just like the ones you’d buy at the store, only better!
For years, before going gluten-free, I enjoyed a secret coffee cake ritual. Whenever I hopped on the train, I’d buy myself a Drake’s cake. (I probably resembled Newman when ripping into that package.) I also bought a cup of tea but, let’s be honest, that wasn’t what got me excited.
Those little cellophane-wrapped cakes were my favorite. Unlike most coffee cakes, which have a dense, heavy crumb, Drake’s is light; the texture similar to a moist sponge cake. And that delicate texture proved the hardest part of creating a gluten-free version of these cakes.
My early recipe attempts were delicious but not Drake’s delicious. At first I made the batter with butter. The result? Coffee cake with a tight crumb. I tried creaming the butter until very light. I tried sour cream. I tinkered with the flours and increased the amount of baking powder. Nothing. The cakes were still too dense. Then I made one easy but critical tweak to the recipe: I got rid of the butter. By replacing the butter with oil, I finally had the result I wanted: the crumb was moist and tender.
With the cake problem solved, there was still one small hurdle to clear. The topping.
Thankfully this was easy to solve. At first I rubbed together brown sugar with a little white rice flour and some softened butter. The “crumbs” melted all over the coffee cakes. By increasing the amount of flour and using half granulated sugar, half brown sugar, and melted butter instead of softened butter, the crumbs didn’t melt during baking.
Tips for Success
- This batter likes to stick. Generously grease your muffin pan with nonstick cooking spray prior to baking or use paper muffin cups.
- Allow the crumb topping to cool. Before preheating the oven, mix together the crumb topping. Allowing the mixture to cool while the oven preheats and you prepare the batter produces a topping that doesn’t melt during baking but rather remains nice and crumby atop the coffee cakes.
- Gently sprinkle the topping over the coffee cakes. Surprisingly this thin batter can hold up a lot of crumb topping. Just take care applying it. Sprinkling the topping gently over the batter in a circular motion, instead of “plopping” it all on at once, ensures the topping won’t sink to the bottom of the coffee cakes.
Allergy-Notes
Corn-Free: To make this recipe corn-free, replace the cornstarch with potato starch.
Dairy-Free: Use a dairy-free milk replacement (gluten-free rice milk or soy milk) instead of the milk.
Egg-Free: This batter relies on the structure and lift the eggs provide. When made egg-free, the cakes didn’t rise well and had a heavy, dense texture. I don’t recommend making this recipe egg-free.

Gluten-Free Mini Coffee Cakes
Ingredients
For the Topping
- 1 cup white rice flour (4 ounces; 113 grams)
- 1/4 cup cornstarch (1 ounce; 28 grams)
- 1/4 cup granulated sugar (1 3/4 ounce; 50 grams)
- 1/4 cup brown sugar (2 ounces; 56 grams)
- 1 teaspoon ground cinnamon
- 6 tablespoons butter, melted (3 ounces; 85 grams)
- 1/2 teaspoon vanilla extract
For the Cake
- nonstick cooking spray
- 2 cups granulated sugar (14 ounces; 396 grams)
- 1 3/4 cups finely ground white rice flour (7 ounces; 198 grams)
- 3/4 cup sweet rice flour (3 ounces; 85 grams)
- 1/2 cup cornstarch (2 ounces; 56 grams)
- 1 1/2 teaspoons baking powder
- 1 1/2 teaspoons salt
- 1/4 teaspoon baking soda
- 1 1/4 cups milk
- 3 large eggs (about 5 1/4 ounces; 150 grams)
- 1/2 cup vegetable oil (3 1/2 ounces; 100 grams)
- 1 teaspoon vanilla extract
- 1/2 teaspoon almond extract
Instructions
-
Prepare the topping: In small bowl, stir together white rice flour, cornstarch, sugars, and ground cinnamon. Add melted butter and vanilla extract. Stir until mixture resembles fine crumbs. You don't want too make large crumbs---those can sink to the bottom of the cake during baking. Set aside.
-
Prepare the cake: Preheat oven to 350 °F;. Spray 24 muffin cavities with nonstick cooking spray. In large bowl, whisk together granulated sugar, white rice flour, cornstarch, baking powder, salt, and baking soda. In small bowl, whisk together milk, eggs, oil, vanilla extract, and almond extract. Pour wet ingredients over dry ingredients. Whisk until smooth. Batter will be thin.
-
Fill prepared muffin cups half full. Generously and gently sprinkle prepared topping over each cake, about one tablespoon each. Bake cakes until golden brown. They should spring back to the touch, about 18 minutes.
-
Remove pan from oven. Allow cakes to cool in pan for five minutes before transferring them to a wire rack to cool completely. To remove cakes from the pan, run a metal spatula around the edges of the cake and use the spatula to lift the cake out of the pan. Store cakes in a covered container for up to three days on the counter or freeze cooled cakes for up to one month.


Hannah Elbaum says
Hi! I noticed that at some point you switched from making your own flour blends to the Bob’s Red Mill 1-1 Baking Flour. How would you modify this recipe to use the Bob’s Red Mill? Thanks!
Elizabeth says
Hi Hannah!
I’d replace the rice flours and the cornstarch with Bob’s. It should work great!
Kathy Thatcher says
Love this recipe! I’m not particularly experienced in using the various rice flours so I am directing this question to you and your more experienced followers.
Can I convert this recipe easily to a ringed or layered coffee cake? If so, what would be the recommended baking time & temperature? I’m planning to take this out of town soon & a single form will travel more easily. Thank you for your help.