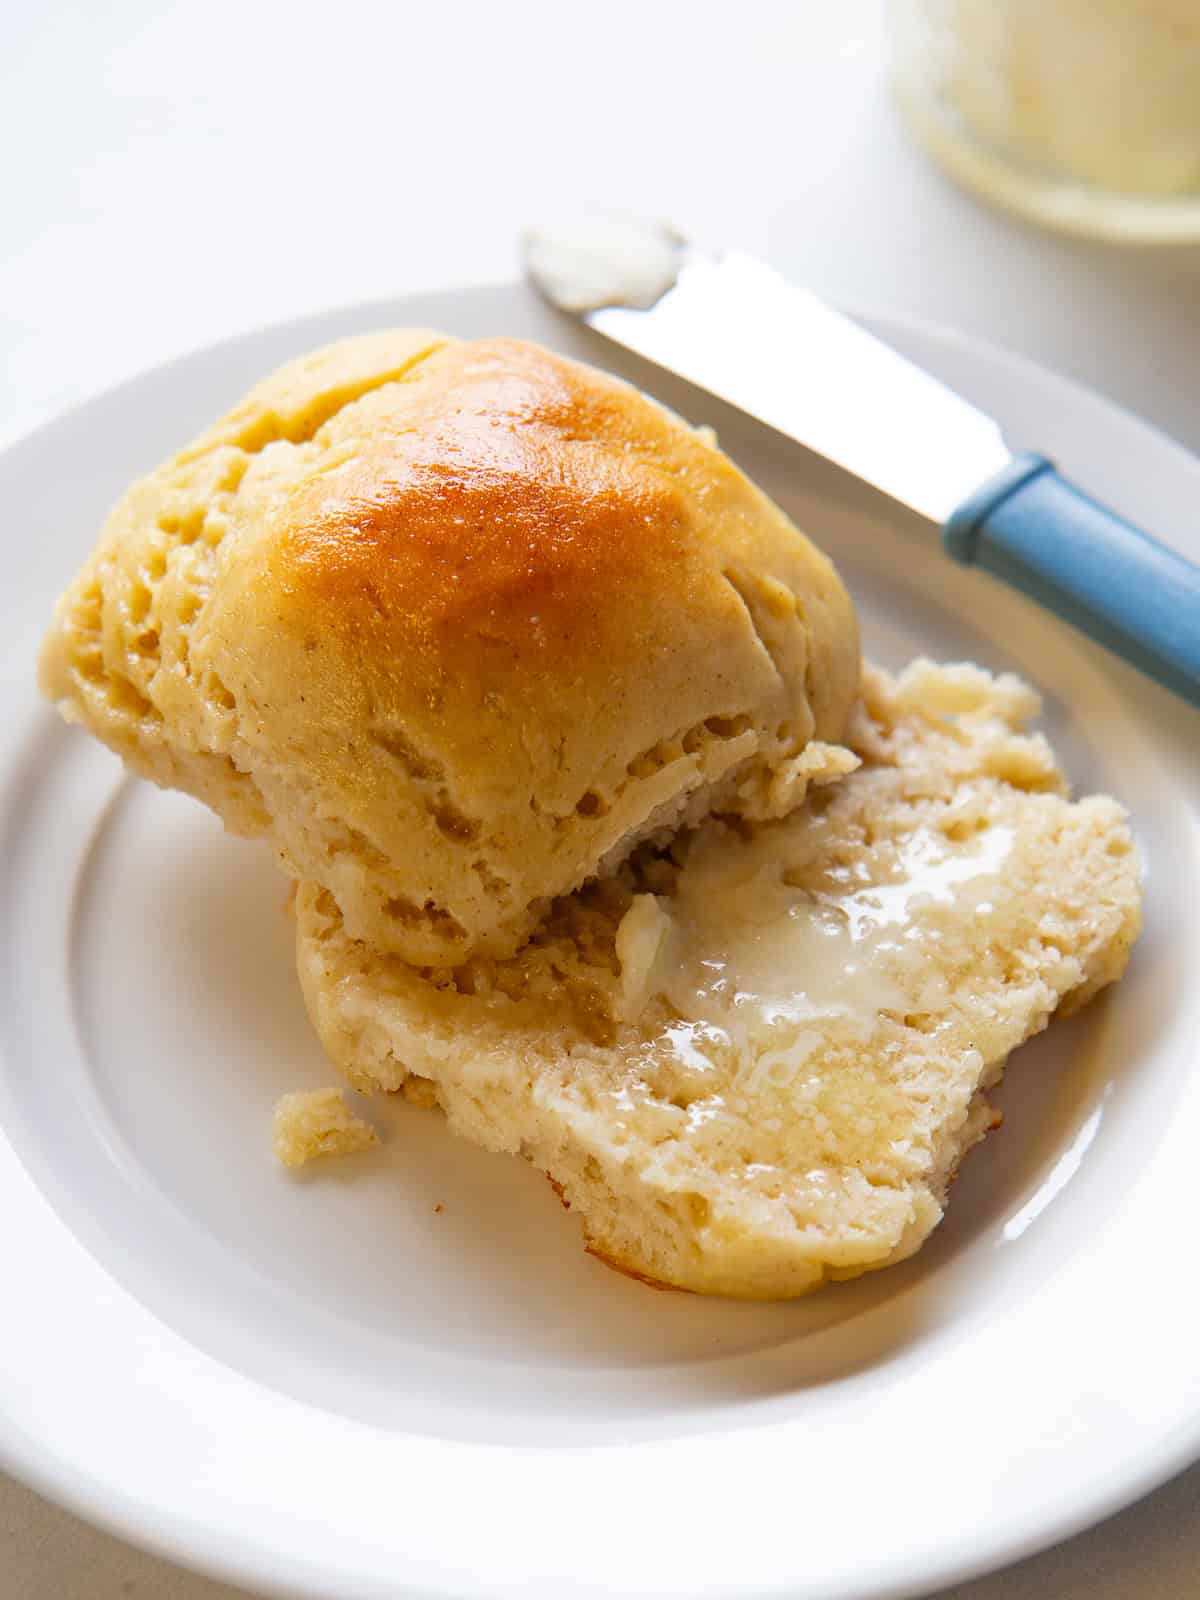
Soft Gluten-Free Dinner Rolls are easy to make! The rolls bake up soft and tender. Perfect recipe for a first-time bread baker.
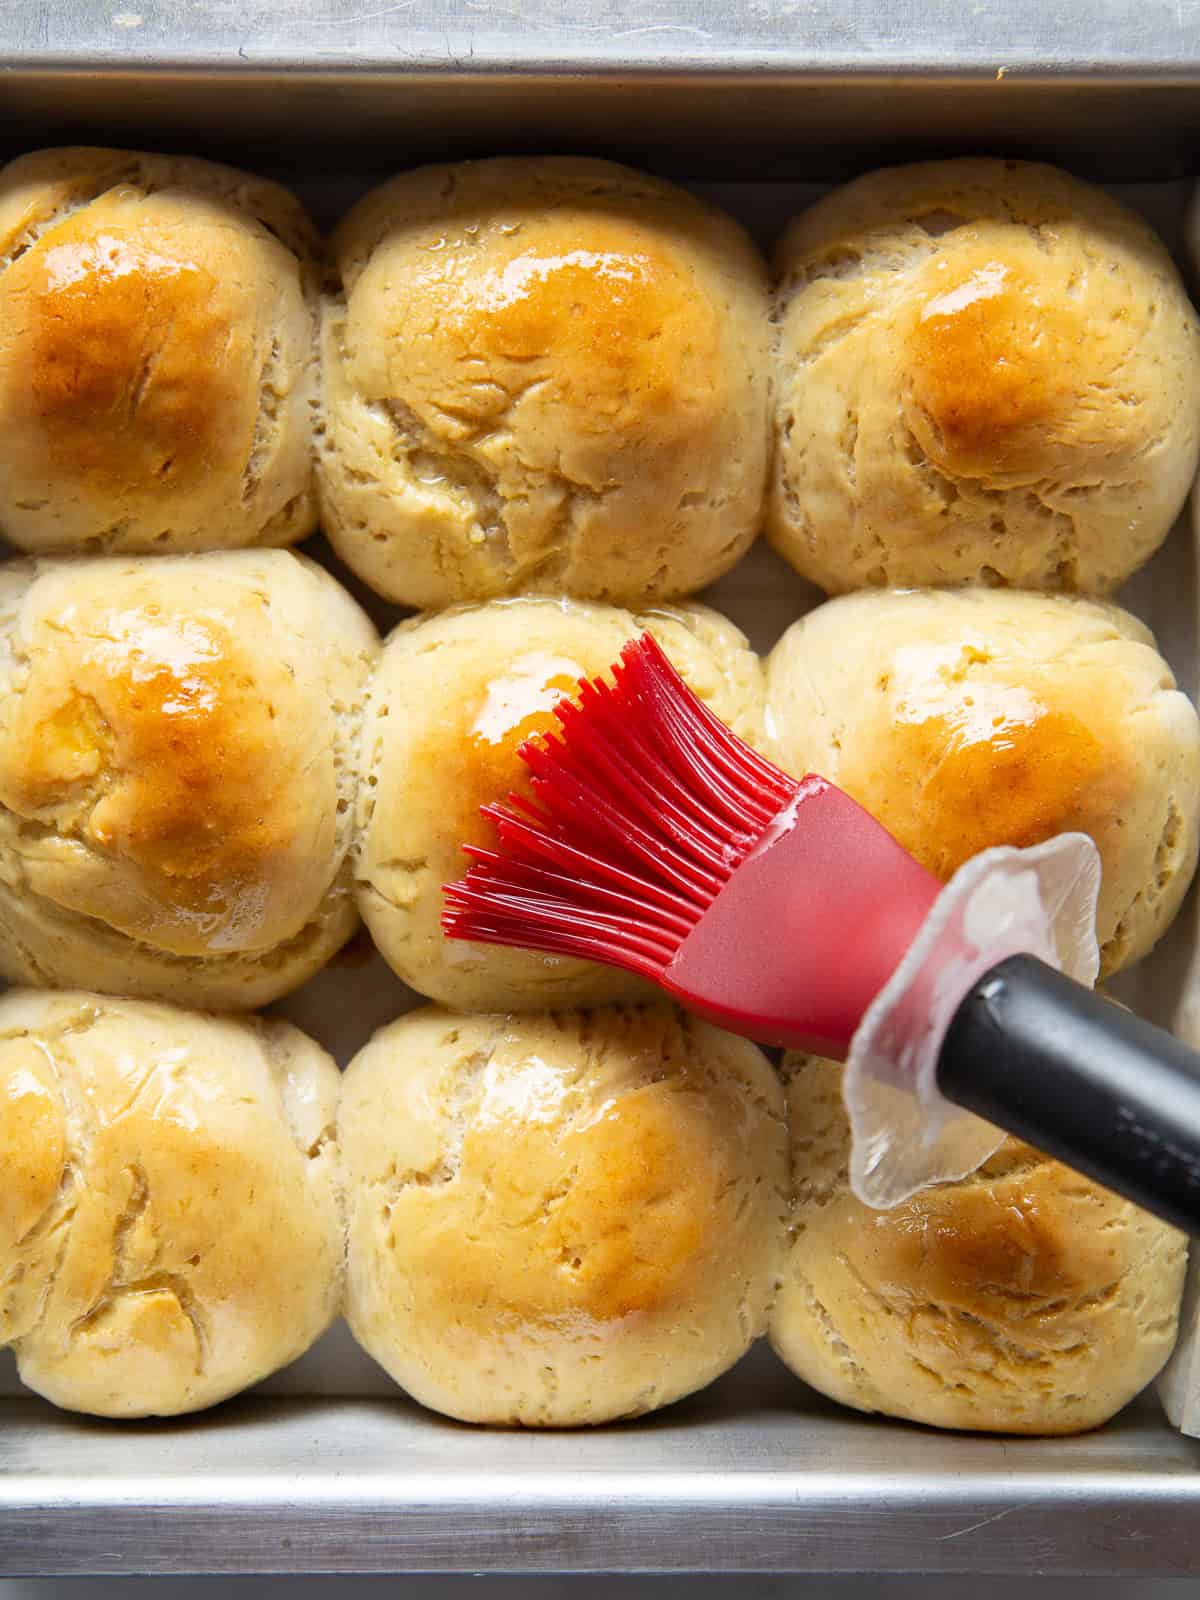
I first shared this recipe for gluten-free soft rolls in 2019, and I’m so glad so many of you have used it for your holiday meals! Some of you mentioned that the rolls could be a bit easier to make, especially since scooping sticky, gluten-free dough can be quite messy.
So, I decided to tweak the recipe. The result is the same soft, tender rolls you love—now a little easier to make.
Instead of scooping the dough, you’ll simply cut it into nine pieces and roll them into balls. I’ve also switched to baking them in an 8×8-inch pan instead of a 9×13-inch pan. This helps the dough touch as it rises, giving the rolls more support and making them taller.
I hope you loved the recipe before, and I’m sure you’ll love it even more now!
Happy Baking,
Elizabeth
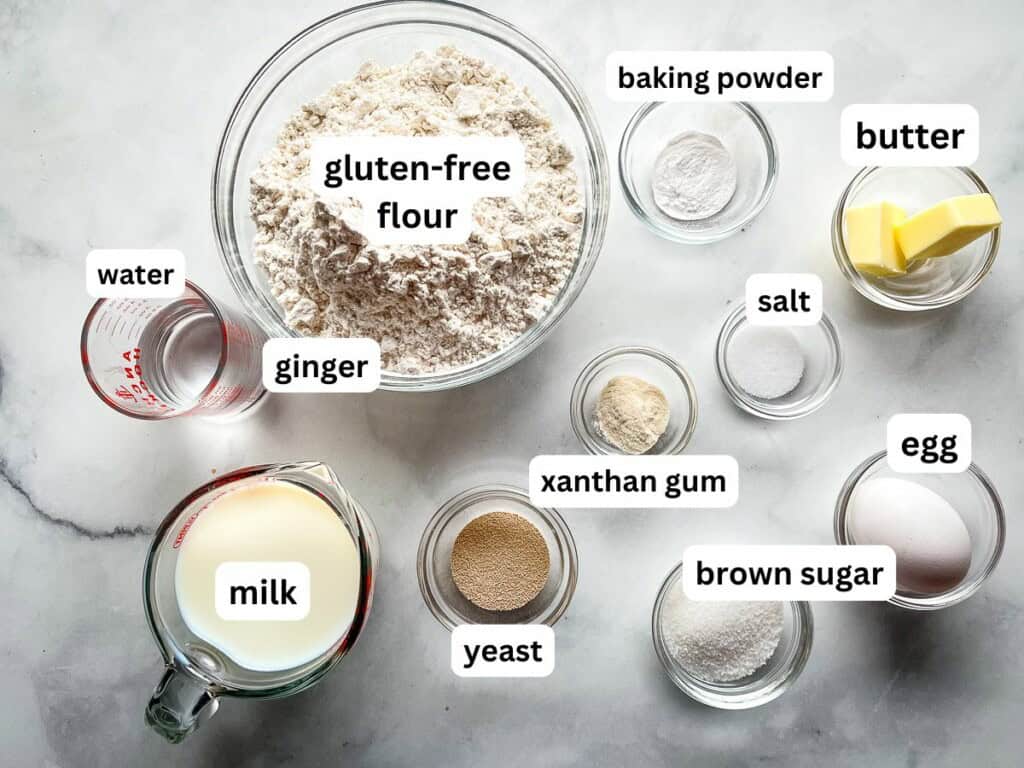
Ingredients Explained.
- Gluten-Free Flour. This recipe uses Bob’s Red Mill 1:1 Gluten-Free Flour Blend. If you prefer to mix your own flour, replace the flour with a mix of brown rice flour or millet and tapioca starch. The individual measurements are included with the recipe.
Ingredient note: Since all commercial flour blends vary, I can’t say if this recipe works with a different blend. - Egg. One egg brings the dough together. Without the egg, the rolls turn out dense and heavy.
- Milk and Butter. Whole milk and melted butter add richness and flavor
- Yeast. Instant dried yeast is my preferred yeast. Be sure to use a yeast that’s gluten-free.
- Baking Powder. Helps with rise.
- Xanthan Gum. A teaspoon of xanthan gum is needed for the best texture. (Use the xanthan gum even though the gluten-free flour already includes it.)
- Sugar. A little sugar helps with browning and flavor.
- Salt. Adds flavor and controls the yeast activity.
Dairy-Free Note: For a dairy-free version, use dairy-free milk and butter.
Rolls made without dairy tend not to brown as well as those made with dairy. They also stale a little faster without the fat from the whole milk and butter. To prevent the gluten-free/dairy-free rolls from stalling quickly, freeze the leftovers. (See directions below on how to best freeze gluten-free buns.)
How to Make Gluten-Free Soft Dinner Rolls: Step by Step.
There’s three parts to making this recipe: mixing the dough, letting it rise, and baking. Let’s take a look at each step.
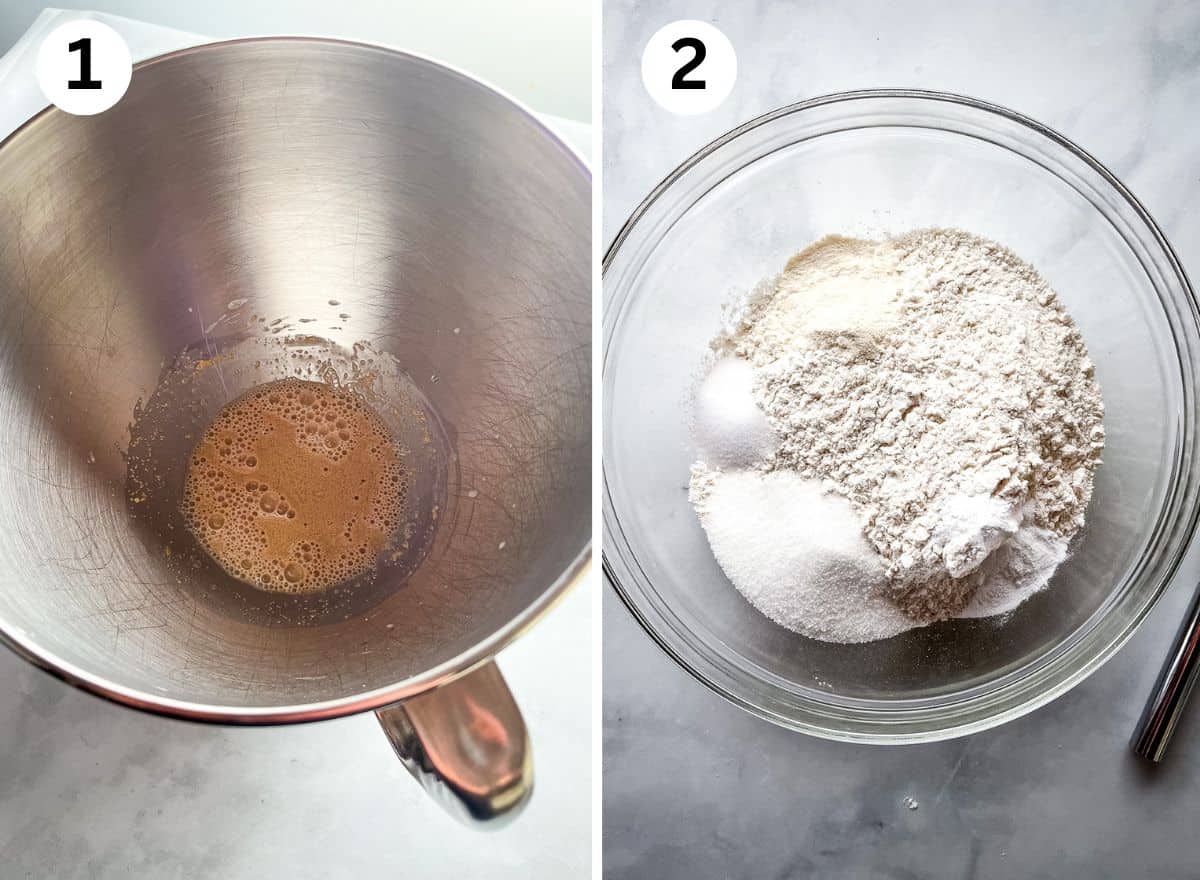
- Dissolve the yeast in a little warm water. I do this right in my mixing bowl.
- Whisk the dry ingredients together in a separate bowl. This helps the sugar, xanthan gum, baking powder, and salt mix evenly throughout the gluten-free flour.
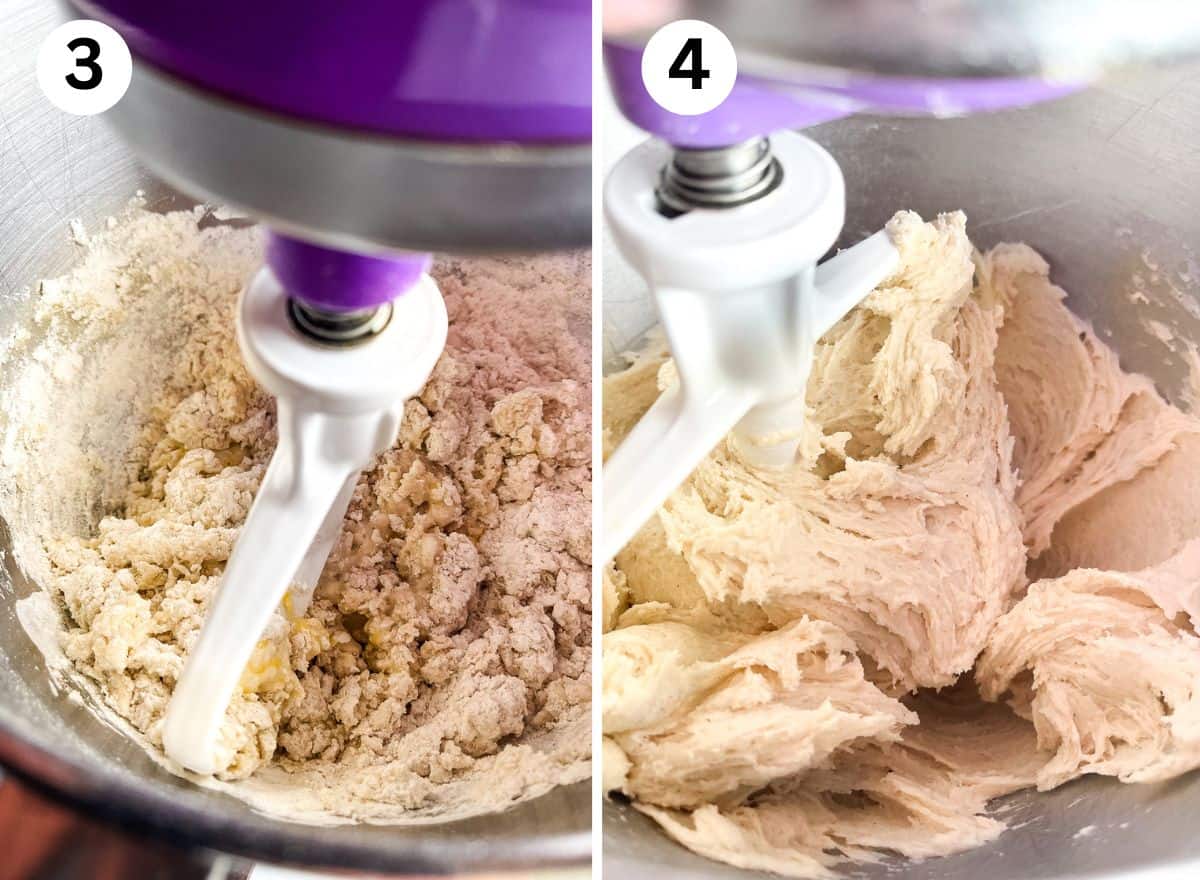
- Once the yeast is dissolved, add the remaining ingredients to the yeast mixture. Mix the dough on low speed. At first, the dough looks dry and crumbly. This is normal.
- Mix until a thick dough forms. This recipe makes a thick, sticky dough. For the best results, mix it together in a stand mixer with the flat paddle attachment. Note for new bakers: the dough won’t form a tight dough ball.
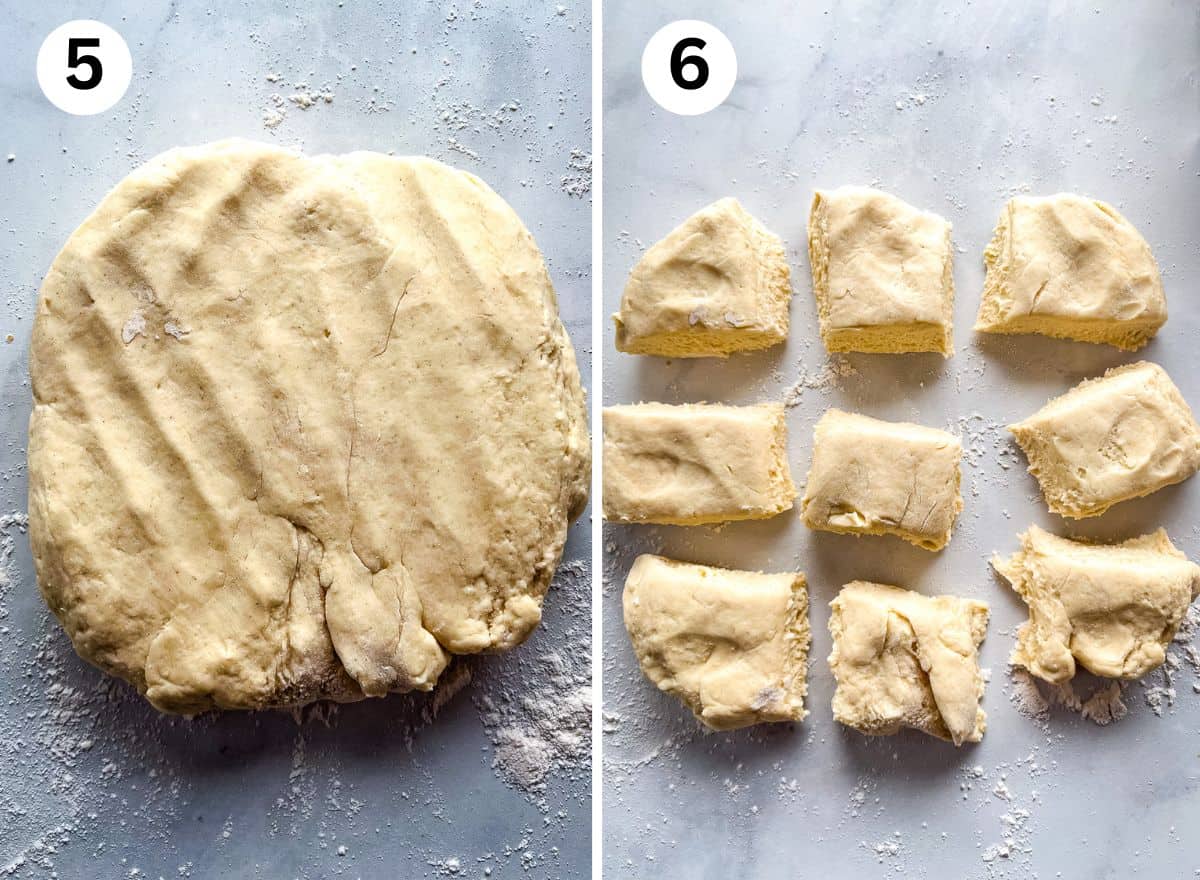
- Put a generous amount of gluten-free flour on your counter. Transfer the dough to the counter. Dust the top with additional gluten-free flour. Pat the dough into a rectangle.
- Cut into 9 pieces. Use a sharp knife for this.
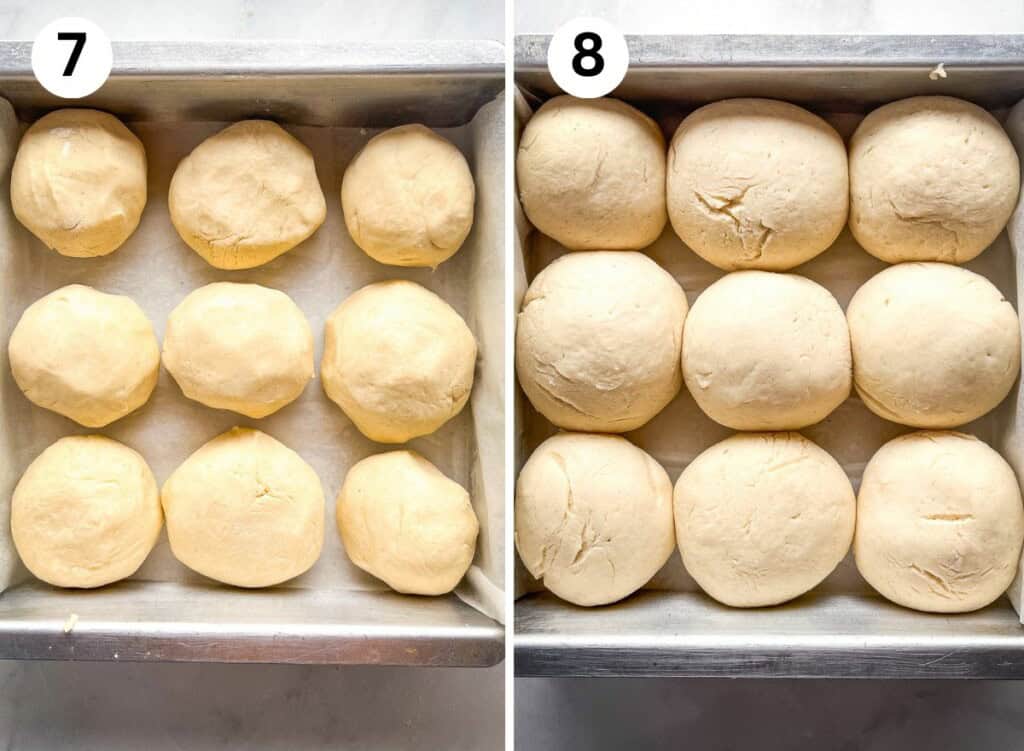
- Lightly dust each piece of dough with gluten-free flour. Then roll into balls between your palms.
- Place the dough balls into a parchment-lined and greased 8-inch square pan. Cover with plastic wrap-this keeps the dough from drying out. Let the rolls rise in a warm place for about an hour. You want the rolls to almost double in size and look puffy when they’re ready.
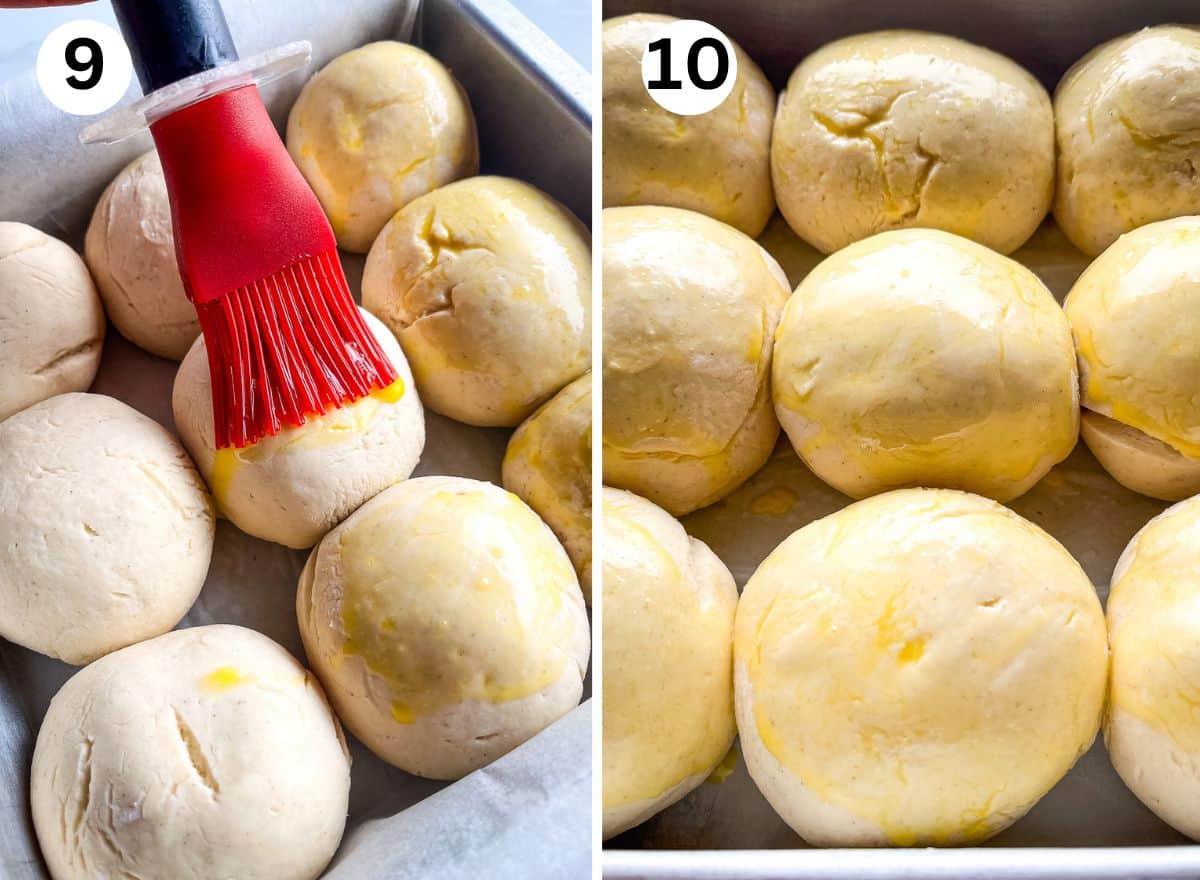
- Brush with egg. Once the rolls have risen, brush them with a whisked egg right before baking. This helps them to brown nicely as they bake.
- Gently coat each roll with egg to cover the entire top. I usually go back and coat them twice.
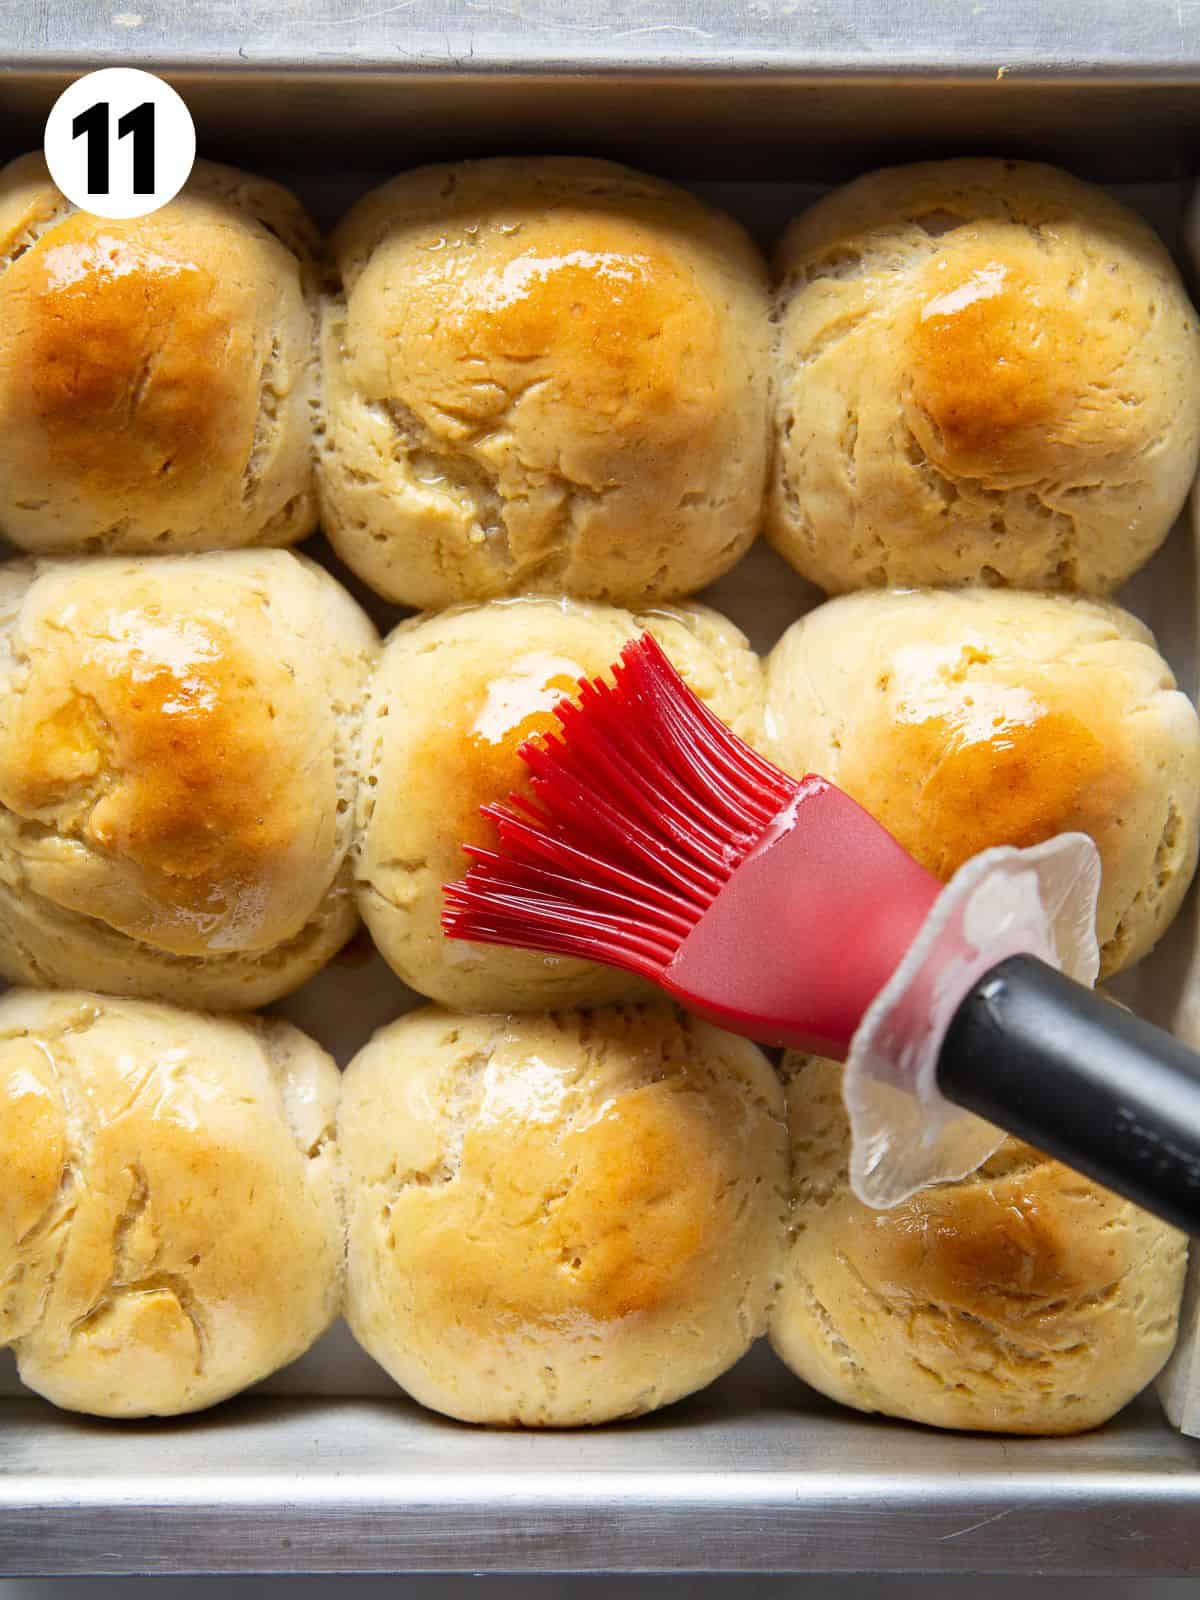
- A pan takes about 35 minutes to bake in a preheated 375℉ oven. To ensure the rolls are fully baked, I like to take the temperature. The center of the roll should reach 205℉.
Right after baking, I brush the rolls with a little melted butter. Not only does this add a nice shine, it also helps keeps them soft and tender.
Baker’s Tip: For a lightly sweet finish, mix equal parts melted butter with honey and brush it over each baked roll.
How to Store Leftovers
Gluten-free bread tastes best the day it’s baked. Wrap the leftover rolls in plastic wrap and store them at room temperature. Reheat the rolls lightly before serving for the best flavor and texture.
To freeze, let them cool completely, wrap in plastic wrap or place in a freeze container. Freeze for up to three months.

Gluten-Free Soft Dinner Rolls
These gluten-free dinner rolls are soft and tender. They’re the perfect addition to the holiday bread basket- or whenever the bread craving hits.
Ingredients
For the Dough
- ⅓ cup warm water, about 110℉ (2 ¾ ounces; 75 grams)
- 2 ¼ teaspoons instant dry yeast (1 packet; 7 grams)
- 3 cups Bob's Red Mill 1:1 Gluten-Free Baking Flour, plus extra for dusting counter (15 ounces; 425 grams)
- 2 tablespoons granulated sugar (1 ounce; 28 grams)
- 1 teaspoon baking powder
- 1 teaspoon xanthan gum
- 1 teaspoon salt
- 1 cup warm whole milk, about 110℉ (8 ounces; 226 grams)
- 1 large egg
- 2 tablespoons butter, melted (1 ounce; 28 grams)
For Brushing on the Dough
- 1 large egg
- 1 teaspoon water
For Finishing
- 2 tablespoons butter, melted (1 ounce; 28 grams)
Instructions
-
Combine warm water and yeast in the bowl of a stand mixer. Stir to combine. Allow to sit for five minutes.
-
While the yeast dissolves, whisk together the gluten-free flour, granulated sugar, baking powder, xanthan gum, and salt in a small bowl.
-
Add the gluten-free flour mixture, milk, egg, and melted butter to the yeast mixture. Mix on medium speed until thick and smooth, about three minutes. The dough will be very thick.
-
Dust counter with a generous amount of gluten-free flour. Transfer the dough from the mixing bowl to the counter. Dust the top with gluten-free flour. Gently pat the dough into a rectangle, about 8×8 inches.
-
Cut the dough into 9 equal pieces. (Three rows of three)
-
Roll the dough into rounds. If the dough sticks to your hands, coat it lightly with gluten-free flour before rolling.
-
Line an 8-inch square pan with parchment paper and lightly grease with gluten-free cooking spray.
-
Place the rolls into the pan in three rows. Cover with plastic wrap. This keeps the dough from drying out.
-
When rolls have almost doubled in size, preheat the oven to 375℉ (190℃)
-
Whisk together the egg and teaspoon of water together in a small bowl. Brush the egg wash gently on top of each roll.
-
Bake rolls until golden brown, 30 to 35 minutes. The middle of the rolls should reach 205℉ (96℃)
-
Remove the pan from oven. Let them cool for about 5 minutes and then brush the warm rolls with melted butter.
-
Cool for about 15 minutes before serving.
-
Rolls are best enjoyed the day they are made. Store leftover rolls wrapped on the counter or place cooled rolls in a freezer bag and freeze for up to two months. Thaw rolls at room temperature overnight.
Recipe Notes
Gluten-Free Flour Variation
Flour may be replaced with 2 cups brown rice flour or millet flour, ¾ cup tapioca starch, and 1 teaspoon xanthan gum. (If using this blend, the recipe will include a total of 2 teaspoons xanthan gum.)
Dairy-Free Variation
Replace the milk with an equal amount of dairy-free milk.
Replace the butter in the dough with an equal amount of dairy-free butter or canola oil.
Brush the baked rolls with melted dairy-free butter or olive oil.


Brandi says
My yeast did not rise… i used fleischmanns quick rise instant yeast. The package says to mix undissolved yeast into dry ingredients but i didn’t i followed your instructions to dissolve it. The batter was on the dryer side as well. Not sure what went wrong with the yeast
Elizabeth says
It sounds like the dough might have been very dense? That can make it hard for the yeast to provide rise. If the dough ever seems dry, add an additional tablespoon or so of liquid.
What gluten-free flour did you use? Let’s see if we can solve this!
Erin says
I started making bread a little while ago and I don’t use the xanthan gum because It is a thickening agent. I actually always add another half pouch of instant yeast. My bread comes out nice and fluffy. Hope that helps ya!
Pat says
Hi, can I add Psyllium Husk instead of more Xathan… Or maybe add more yeast as one comment that I read? I’ll use the same gluten free flour Red Bob’s …I like that They have different warehouse to.process the gluten free flour and grains.
Thanks
Christy W says
I made these using the old recipe. Turned out great. Also used oat milk instead of milk whole milk. Has anyone made these and froze them before baking?
Elizabeth says
Glad you liked them! I haven’t tested freezing the dough before baking. Sorry!
Kelly says
I made these for Thanksgiving, and they came out amazing!! Definitely adding this to our our dinner rotation. Thank you for sharing this recipe!
Elizabeth says
Yay! Glad you liked them!
Alex says
Has anyone tried this recipe using the king Arthur 1:1?
Jeannie Hinyard says
I made these for a gluten free friend and also wheat rolls for the rest of the family. Everyone said they could not tell the difference between the regular rolls and the gluten free. After years of trying to find a decent recipe, I would say these are the absolute best. I did add 8 grams of psyllium husk powder. Wow! Just Wow!
Elizabeth says
Oh yay!! At what step did you add the psyllium husk?
Leona says
I made 2 small loaves. They turned out perfectly! Thank you.
Cathy says
I made these using Bob’s Red Hill 1:1 flour following the directions exactly. They didn’t rise but I baked them anyway. They, of course, were very dense. Is there a trick to force a rise? The flavor was good.
We ate a couple with dinner anyway but the left over rolls are inedible. Suggestions?
Elizabeth says
It sounds like the yeast might have been the problem. Next time, mix a small amount of the dried yeast with some warm (100℉) water. Add a little sugar. If it foams after a few minutes, the yeast is good. If not, get a new packet.
If it was cold when you made the dough, it might have needed a warmer spot to rise. You can warm your oven (125℉) and then let it cool for a minute. Place the covered bowl into the oven and the dough should rise nicely.
Amanda says
The new version of this recipe is much too dry and dense. I used the exact flour called for in the recipe. My yeast was good. But the rolls still deflated while cooking. I’ll stick to the tried and true old version.
madison says
How far in advance can I make the dough? Want to make it for dinner on the 24th and might not have time to the day of, so want to make the dough now and bake the day of!
Thanks!
Elizabeth says
This dough doesn’t keep well. It would be better to fully bake the rolls, cool them and then freeze