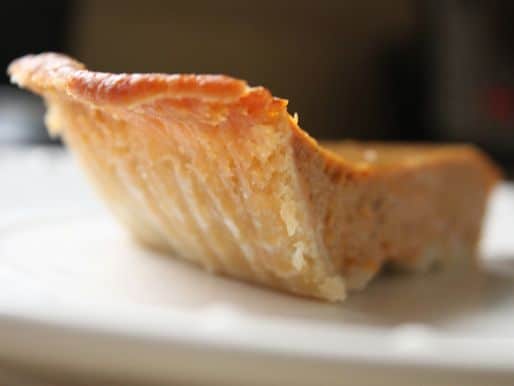
Pies are great “choose your own adventure” desserts, and you start the adventure by selecting a crust. Today, we’ll talk about traditional pastry-style gluten-free pie crusts and the super easy, crumb crust!
TRADITIONAL GLUTEN-FREE PIE CRUST
When I think of pie, the first crust that comes to mind is a traditional flaky pastry crust. At its heart, this crust is just fat, flour, and liquid. Let’s take a look at each of these components.
THE FLOUR BLEND
Over the years, I’ve experimented with several different flour blends for gluten-free pie crusts. While there are countless blends of flour you can use, I’ve happily settled on a blend of millet, white rice, and sweet rice flours plus a little tapioca starch. I know. It’s three flours and a starch. But it’s worth it, I promise! The millet provides the gluten-free pie crust with flavor, the white rice flour helps hold everything together, our friend sweet rice flour aids in the flakiness, and tapioca starch brings stretch to the party. Woah. That’s a lot, right? It is! By blending these flours you get, dare I say it?, a perfect gluten-free pie crust!
But what if you don’t want to measure out three different flours and a starch? You can use a “cup for cup” flour blend. Each pre-made flour blend works a little differently. Use a blend you already like or bake a test pie to see how it goes. Most gluten-free flour blends will give you a recipe for gluten-free pie crust. If they don’t have a recipe for you, check the ingredients of the flour blend. If it contains a gum, use my recipe starting with the granulated sugar. Simply replace the cup for cup flour for my flours and starches. If the blend doesn’t include gum, add the xanthan gum as directed in the recipe and proceed from there. Easy peasy!
FAT
For a flaky gluten-free pie crust, we need to use a solid fat, like butter, vegetable shortening, or lard. Here’s the thing, there’s no “right” solid fat to use. True story: my mom uses shortening. I prefer butter. And my husband bakes his pies with lard. Each fat brings something different to a pie. Use whichever fat fits your diet and your taste buds!
How Fat Makes Flaky Pie Crusts
Before we talk about different types of fats, let’s talk about what fat does in gluten-free pie crust. When you make a pie crust, you cut cold, solid fat into flour. The flour coats the cold fat. (If you cut fat into flour with your hands, you can feel this happening.) As the pie crust bakes, that fat melts, leaving spaces behind. Those spaces make pie crust flaky. If you use a warm fat or a liquid fat, it blends into the flour, instead of coating it. When the fat is blended into the flour, it’s more like a cookie. The finished texture will be sandy (think shortbread cookies) instead of flaky.
Vegetable Shortening
Makes a really flaky gluten-free pie crust. Shortening doesn’t have a flavor (unless you buy butter-flavored shortening). This means the flavor of the pie shines. Vegetable shortening, even when cold, remains fairly soft, unlike butter which gets brittle when cold. The texture of vegetable shortening makes it easy to cut into the flour. In fact, you want to take care not to overwork the fat into the flour. As soon as there are no large pieces of shortening in the flour mixture, stop. You’re done! Even after you chill a vegetable shortening-based pie crust, it remains fairly soft. This is a good thing! Since shortening doesn’t get brittle like butter, a shortening based crust is easy to roll! So if you want a fat that’s easy to work with and makes for a flaky crust, pick vegetable shortening!
Butter
Makes for a really flavorful pie crust. That’s one of the reasons it’s my favorite fat to use. To me, butter=YUM. Unlike vegetable shortening, butter turns brittle when it gets cold. If you try to roll a cold butter-based crust, chances are the pastry will crack and break as you try to roll it. To solve this frustrating problem, let an all-butter crust sit on the counter for about 10 minutes before you roll it out. The butter warms slightly and is easier to roll. Butter also differs from vegetable shortening in the water department. Shortening contains no water; butter contains water, about 19%. For gluten-bakers, this is an issue because water + wheat flour= gluten development. Too much gluten development in a pie crust means a tough crust. We don’t have gluten! (woot!) That means that the additional water won’t turn our crusts tough. Yay! But just because our crust won’t get tough doesnt’ meant that you want to overwork the butter into the flour. Butter has a finicky temperature personality. If it gets too warm, it will melt/blend into the flour. Keep the butter cold when cutting it into the flour and you’re all set!
Lard
Before the advent of vegetable shortening, lard was the fat of choice for pie crusts. It’s easy to understand why! Lard, like vegetable shortening, is easy to work with. It gets cold but not brittle. It also melts at a higher temperature than either butter or vegetable shortening. This means that it keeps those layers of fat and flour separate for a bit longer. During this time, the water in the crust heats up and turns to steam. The steam lifts the layers of fat and flour; then the fat melts, further separating the layers. All of this means you get a really flaky pie crust! Be sure to look for a fresh source for lard. It should not have an “off” or animal aroma. Even today, good lard can be hard to find. If you can’t find a trusted source of fresh lard, use butter or shortening.
XANTHAN GUM
Xanthan gum didn’t make an appearance in my pie crust for a long time. Years ago I tried a crust recipe that contained xanthan gum and it came out gummy. After that I avoided xanthan gum in my crust recipes. The problem with a xanthan gum-free crust is that it was really hard to roll. Jeanne Sauvage, author of Gluten-Free Baking for the Holidays, persuaded me to give xanthan gum another try. I did and haven’t looked back. The xanthan gum adds flexibility to the crust, making it easier to roll and handle.
SALT
Pie crust tastes a little boring. Forgetting the salt makes for a really bland crust! Since Kosher salt tends to be really coarse, I use table salt for my pie crust recipe.
WATER
Water turns the flour-fat mixture into a dough. As with wheat-based pie crusts, you want to use cold water. Really cold water. This keeps the fat from warming up and melting into the dough. When adding the water, use enough water that the crust holds together but not so much water that the dough becomes wet. An easy way to ensure you don’t add too much water is to add half the water called for in the recipe and stir the dough together with your hands or a wooden spoon. Then add the remaining water, tablespoon by tablespoon, until the dough holds together but isn’t wet.
PUTTING IT ALL TOGETHER
Food Processors
I love using a food processor to make pie crust. The blades cut the fat into the flour in no time. The only problem with using a food processor is that it’s easy to add too much water to the dough. By the time the food processor blades turn the fat/flour mixture into a dough, it often contains too much water. I think it’s worth the hassle to transfer the dough to a bowl and add the water by hand so you get a feel for the dough and don’t accidentally add too much water.
By Hand
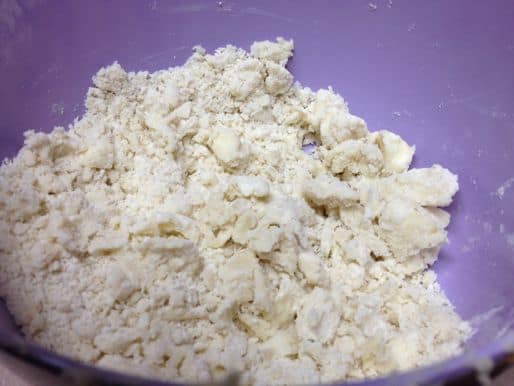
If you don’t own a food processor, no problem. Gluten-free pie crust turns out great when made by hand. Simply rub the fat into the dry ingredients using a snapping motion with your fingers. As you work the fat into the flour, lighten the mixture by almost tossing the fat/flour mixture between your hands. Rub the fat into the flour until no large pieces of fat remain. You want the mixture to pass the squeeze test. This means that if you take a fistful of flour in your hand and squeeze, the flour holds together.
If you’re unable to use your hands to cut the fat into the flour, a pastry cutter, or even two knives used in a scissor motion, work well.
CHILL
After making your crust(s), wrap them well in plastic wrap and chill. You want the fat to get cold so it doesn’t melt into the flour when you roll it out. However…I have to mention something. My mom, a master pie baker, doesn’t always chill her dough. I know. I know. Rebel, right? She uses shortening, mixes her pie dough pretty quickly and then rolls it out. Once it’s rolled out, she chills the dough in the pie plate. She finds this saves time and, according to the Mom, it’s a little easier to roll out a just-make pie crust. If you feel confident that your fat hasn’t gotten warm, go ahead and roll out that pie crust. But don’t tell anyone that I said this. Even mentioning rolling out just-made pie dough is heretical in some baking circles.
HOW TO ROLL OUT GLUTEN-FREE PIE CRUST
Since gluten-free crusts lack stretchy gluten, they can sometimes be a pain to roll out. If the crust breaks apart while you roll, stop and check two things. First is the dough too cold? A cold dough, especially dough made with butter, tends to crack and break. Allow your butter-based dough to come to almost room temperature before rolling.
If the dough is at the correct temperature and still breaks, it might be too dry. Thanks to the lack of gluten, a gluten-free pie crust won’t get tough if overmixed. So if the crust feels dry, gather it into a ball, put it back into a mixing bowl and add more water. (Don’t go crazy and add too much water. The dough won’t get tough but the texture will turn from pie crust to cookie dough-like very quickly!)
When the dough is the right texture and temperature, you should be able to roll it around a rolling pin to transfer it to the pie plate. However, I find it a little hard to roll dough around a rolling pin.
To make transferring dough to the pan easy, get out the parchment paper.
First, cut two pieces of parchment paper into 12- by 18-inch pieces. Dust one piece of parchment with rice flour and place the pie dough in the center of the paper. Coat the pastry with a generous dusting of rice flour and cover with another piece of parchment. Roll out the dough and gently peel off the top piece of parchment. Flip a pie plate onto the center of the rolled dough and slide one hand between the bottom piece of parchment and the counter. Place your other hand firmly on the pie plate. Then, in one swift motion, flip the pie plate over. Press the dough into the pan and then, gently and slowly, peel away the parchment. If any of the dough cracks, press it back together with your hands. If you’re making a double crust pie, repeat this step and set aside the second piece of pastry until needed. To top your pie, quickly flip the rolled out crust onto the filled pie. Trim the edges and crimp the two crusts together with your hands or with a fork.
That’s it! Now the hardest part…what are you going to fill that pie crust with?
Classic Gluten-Free Pie Crust (Single Crust)
Ingredients
- 1/2 cup millet flour (2 1/4 ounces; 64 grams)
- 1/2 cup finely ground white rice flour (2 ounces; 54 grams)
- 1/3 cup sweet rice flour (1 1/3 ounces; 38 grams)
- 1/3 cup tapioca starch (1 1/3 ounces; 38 grams)
- 1 teaspoons granulated sugar optional
- 1/2 teaspoon xanthan gum
- 1/4 teaspoon salt
- 5 tablespoons unsalted butter, shortening, or lard, cold (1/3 cup; 2 1/2 ounces; 73 grams)
- 2 to 5 tablespoons cold water (1 to 2 1/2 ounces; 28 to 70 grams)
- 1/2 tablespoon apple cider vinegar or white vinegar (1/2 ounce; 14 grams)
Instructions
-
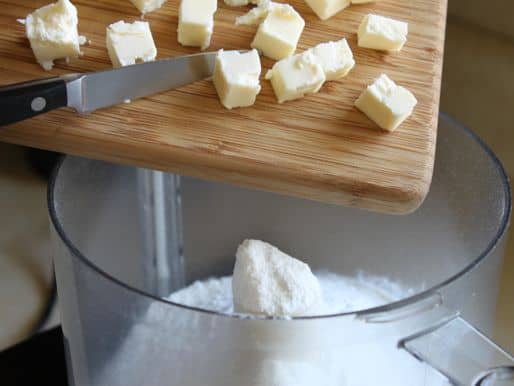
Food Processor Directions: Combine millet flour, white rice flour, sweet rice flour, tapioca starch, xanthan gum, and salt in the bowl of a food processor. Pulse to combine. Add butter. Pulse until no large pieces of butter remain. Transfer to a mixing bowl. Stir in half the water. Add remaining water tablespoon by tablespoon until a dough holds together. (go to step three)
-
To Make By Hand: Whisk together millet flour, white rice flour, sweet rice flour, tapioca starch, granulated sugar, xanthan gum, and salt in a large bowl. Cut in butter using a pastry cutter or with your hands using a snapping motion. Stir in vinegar and 2 tablespoons water. Mix. If dough doesn't hold together, add remaining water, one tablespoon at a time.
-
Pat dough into a round and wrap tightly with plastic wrap. Chill for 30 minutes or up to 4 days.
-
When you're ready to make a pie, remove the dough from the refrigerator. If your dough contains butter, allow the dough to sit on the counter for about five minutes. If you try to roll it right out of the refrigerator, the it will crack due to the cold butter. If your dough contains shortening, you can roll it right away.
-
Place a piece of parchment paper on your counter. Dust it generously with white rice flour. Roll dough out to about 11-inches. Invert a 9-inch pie pan in the center of the dough. Slide your hand under the parchment paper. (Between the parchment and your counter.) Place your other hand on the bottom of the pie plate. In one swift motion, flip the crust and pie plate. Press dough into pan. Slowly pull parchment away from the dough.
-
Trim edges of the dough with a sharp knife. Chill pie crust for 10 minutes before filling. Use as recipe directs.
-
If recipe directs to "pre-bake" your crust, preheat oven to 350 degrees F. Prick dough all over with a fork. Bake until lightly golden brown, about 20 minutes.



Lara says
Hi there! Love your recipes and I am looking forward to trying them out. I was wondering if I could substitute sorghum for millet. Thanks so much!
Elizabeth says
Sure! Sorghum has a slightly stronger flavor but it should work. Enjoy!
Lara @leebakers says
The cookies and cream crust looks delicious! I love how you go into so much detail explaining everything, thanks for posting!
Melody Hooper says
Your recipes look delicious! Could you please tell me what role the vinegar plays in your GF pie dough?
Elizabeth says
It enhances the flavor.
Connie says
Can this recipe be doubled to make the crust and the topping? I want to make a sour cherry pie 🙂
Elizabeth says
Yes!
Aly says
Hi! Thank you for explaining the difference in how shortening, butter, and lard work in a pie crust. I will definitely be referring back to it.
What is your opinion on using cold extra-virgin coconut oil as a fat, instead?
Elizabeth says
I don’t love it in pie crust. I find it to be too brittle of a fat and too sensitive to temperature changes–it goes to liquid very quickly. So a dough made with coconut oil is very hard to work with.
Leanne says
Hi Elizabeth! Your ‘scientific’ explanation of how the different solid fats work to create a pastry dough is what I needed to know in order to create more versatility in our heavily restricted diet. I used lard (dairy free & organic) and sorghum flour (low oxalate). I actually used this recipe to create a sausage roll pastry by adding more water so it could fold over the meat. The finished result was amazing! It was golden, flaky and I honestly don’t think anyone I serve it to would realise it was gluten free! It was super easy and I will be using this dough for many other dishes. My girls love it! Thank you thank you!
Pheb Goulet says
The best gluten free pie crust that I have tasted. I used lard in my recipe as that is what I used before I became gluten free. I am going to try making tarts next time I make the crust.
SHARON says
DO NOT MAKE THIS RECIPE. IT DOES NOT ROLL OUT. IT DOES NOT STICK TOGETHER. TOTAL WASTE OF MY TIME AND MONEY.
Elizabeth says
Hi Sharon,
I’m so sorry to read this comment. It has a very simple fix. If pie dough doesn’t hold together or is hard to roll out, it needs just a little more water. That would solve this problem.
YP says
Thank you for sharing this recipe! I used chilled coconut oil as the fat and it worked quite well. I appreciate your scientific explanation for cold fat. This explains why the amazing bakers in my family use ice water in their dough. Rolling the dough on the parchment paper was a necessity and there is absolutely no stretch. I used Bob’s Red Mill Gluten Free 1-to-1 Baking Flour which has most of the ingredients that you call for and premixed. I eliminated the vinegar as I had never heard of doing that before. I did not want to take a chance.
Overall, the crust turned out well. It held together yet was rather hard to cut. Thank you for sharing! I will make this again.
Adria Targas says
Hello Elizabeth,
Thanks for all your explanation about the fat. I made one by myself, but with some mistakes. So, it got sandy and hard. Next time, I will follow your recipe!
Jean says
Where did I go wrong???? I used Bob’s Red Mill 1-to-1 all purpose gluten free flour. I used 5 Tbsp. lard, 1/2 Tbsp. apple cider vinegar and I ended up using 7 Tbsp. ice water and it still didn’t hold together! I ended up dumping the crumbs into the pie pan and pressed and rolled it the best I could. The edges came out loose and crumbly but I’ll bake it (unfilled for my lemon filling) and hope for the best. I’m very disappointed…:(
I tried your GF blueberry pie last summer and although it. was hard to work with, it actually rolled and I was able to piece it together and get it into the pan. Everyone enjoyed it too.
Does this recipe need revamping???
Jean says
In addition to previous comment….
When comparing ….
Your “GF Pie Crust” recipe …..vs…. pie crust recipe included in your “Classic Blueberry Pie”
1 2/3 c. flour 2 1/4 c. flour
1/3 c. lard 1 c. lard
The blueberry pie crust has more lard per flour (4:9) than does the GF Pie Crust (1:5)
Just sayin….
Elizabeth says
Hi Jean–
Thanks for this! I can’t check today but I will check/retest on Monday to make sure the recipe doesn’t contain a typo. I’m so sorry this didn’t work for you!