
Sweet, tender, and cakey, these gluten-free corn muffins are just like the ones you remember from a bakery. They’re tasty enjoyed on their own or alongside a bowl of warm chili. If you’re dairy-free, these muffins are for you too! Replace the milk and butter with your favorite dairy-free substitutes.
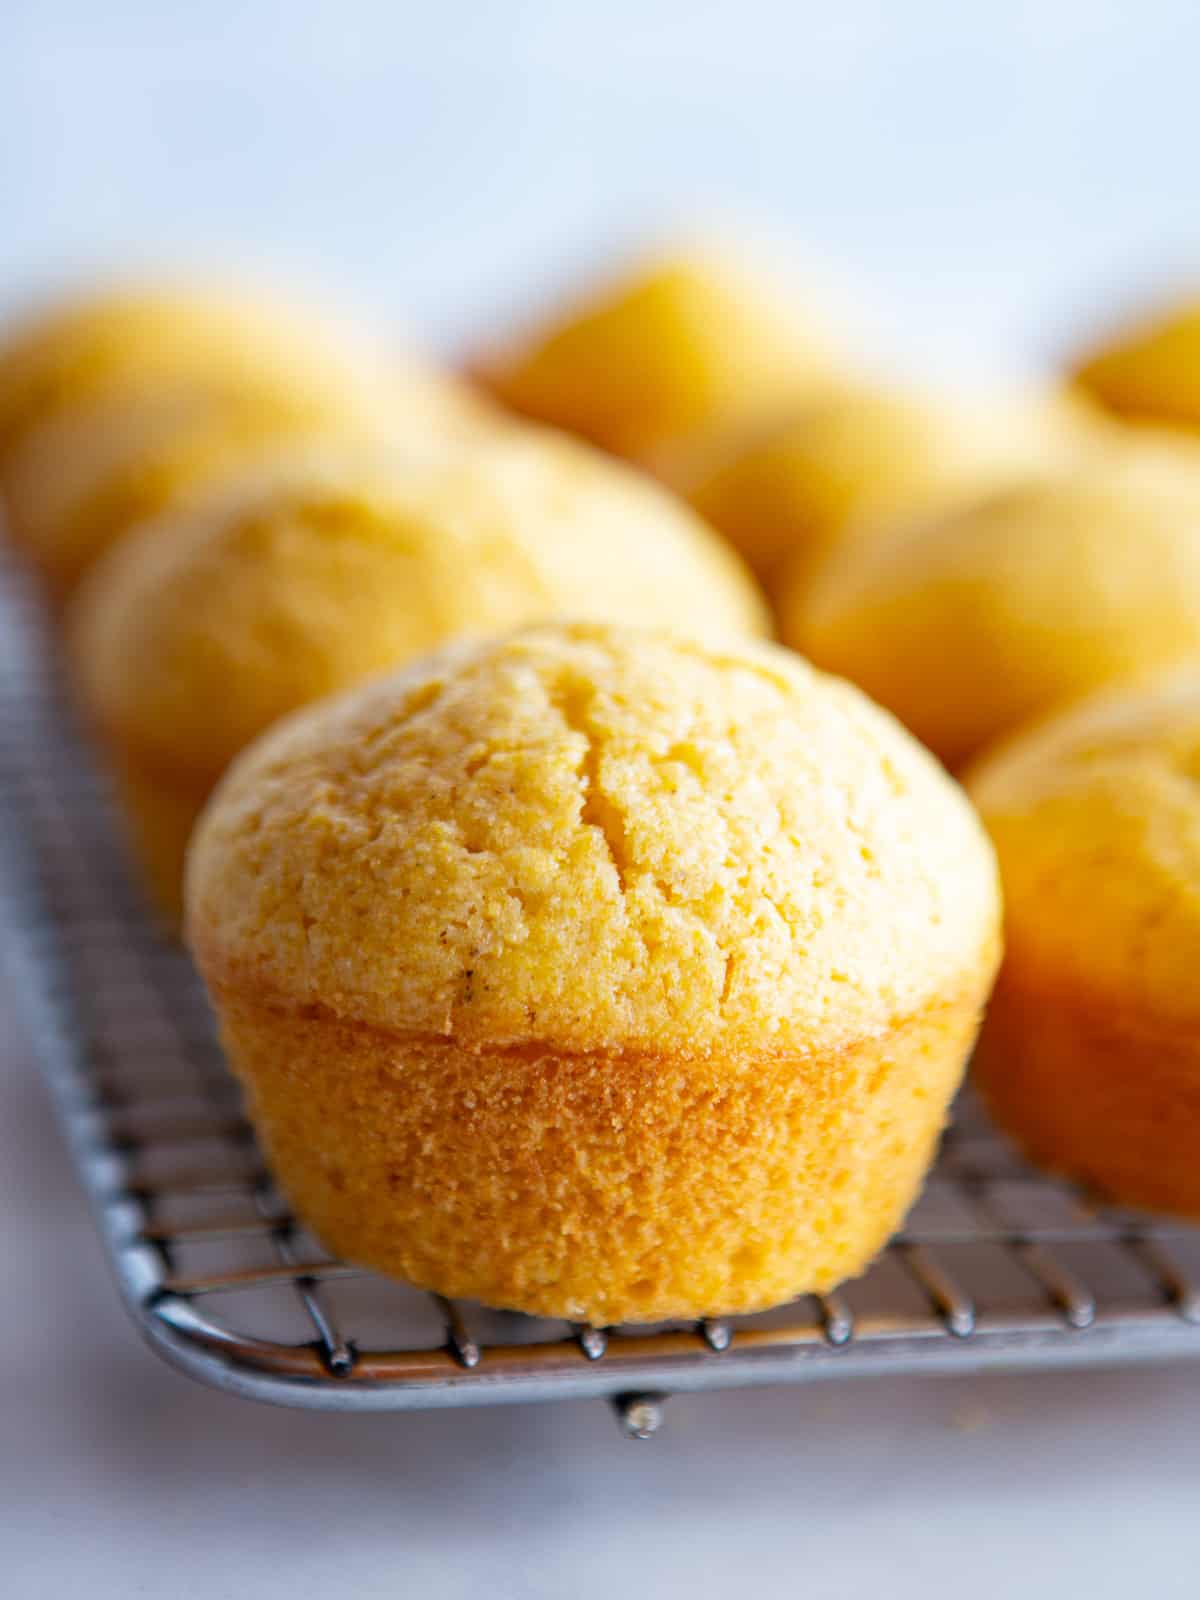
Gluten-free corn muffins are one of the tastiest—and easiest—gluten-free goods you can make. The recipe included below makes sweet muffins with a cake-like texture. Have fun changing it up to suit your tastes. Reduce the sugar for a more savory muffin to serve with chili. Or stir in blueberries for a yummy blueberry corn muffin.
If you love corn muffins, you’ll want to try this classic gluten-free cornbread recipe or this spicy and cheesy gluten-free jalapeno cornbread.
Ingredients
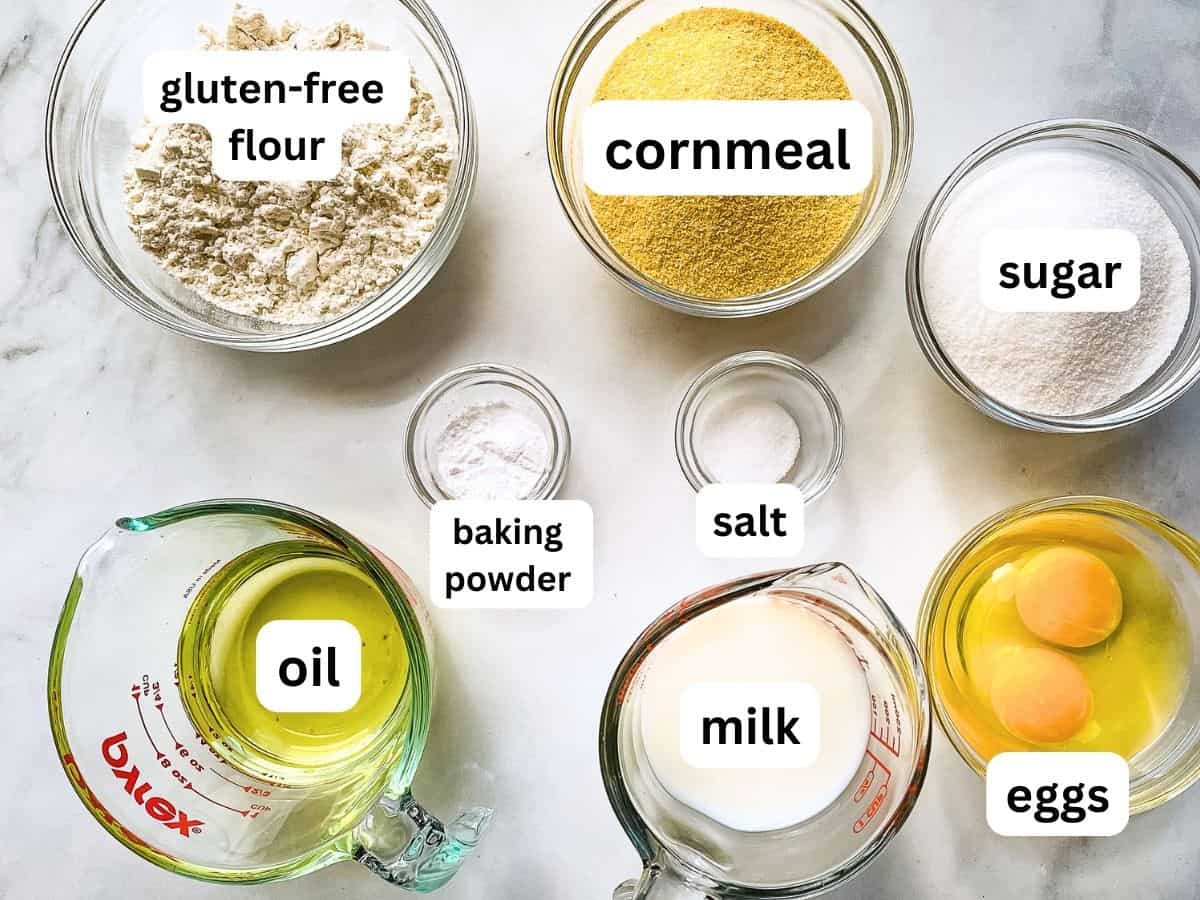
Here’s what you need to make a batch of these muffins.
- Gluten-Free Flour. I tested the recipe with Bob’s Red Mill 1:1 Gluten-Free Baking Flour. Using a different flour might change the texture of the muffins.
- Gluten-Free Cornmeal. Always use cornmeal that’s labeled gluten-free. Although corn is a gluten-free grain, some cornmeal isn’t considered gluten-free because of cross-contact with wheat during manufacturing
- Sugar. Adds sweetness and helps the muffins stay moist. You can decrease the total amount of sugar to ⅓ cup if you prefer less-sweet muffins. Reducing the sugar changes the texture. They’ll bake up a little less cakey and have a more crumbly texture.
- Salt. Fine (table) salt is the best for baking.
- Milk. This recipe works well with dairy or non-dairy milk.
- Oil or Melted Butter. Makes the muffins moist! Both oil and melted butter work. If you use melted butter, allow it to cool for a few minutes before adding it to the batter.
- Eggs. Two eggs add structure to the batter.
How to Make Gluten-Free Corn Muffins.
This recipe is so simple to put together. Here’s how to make the batter. (Full recipe with amounts and ingredients is listed below!)
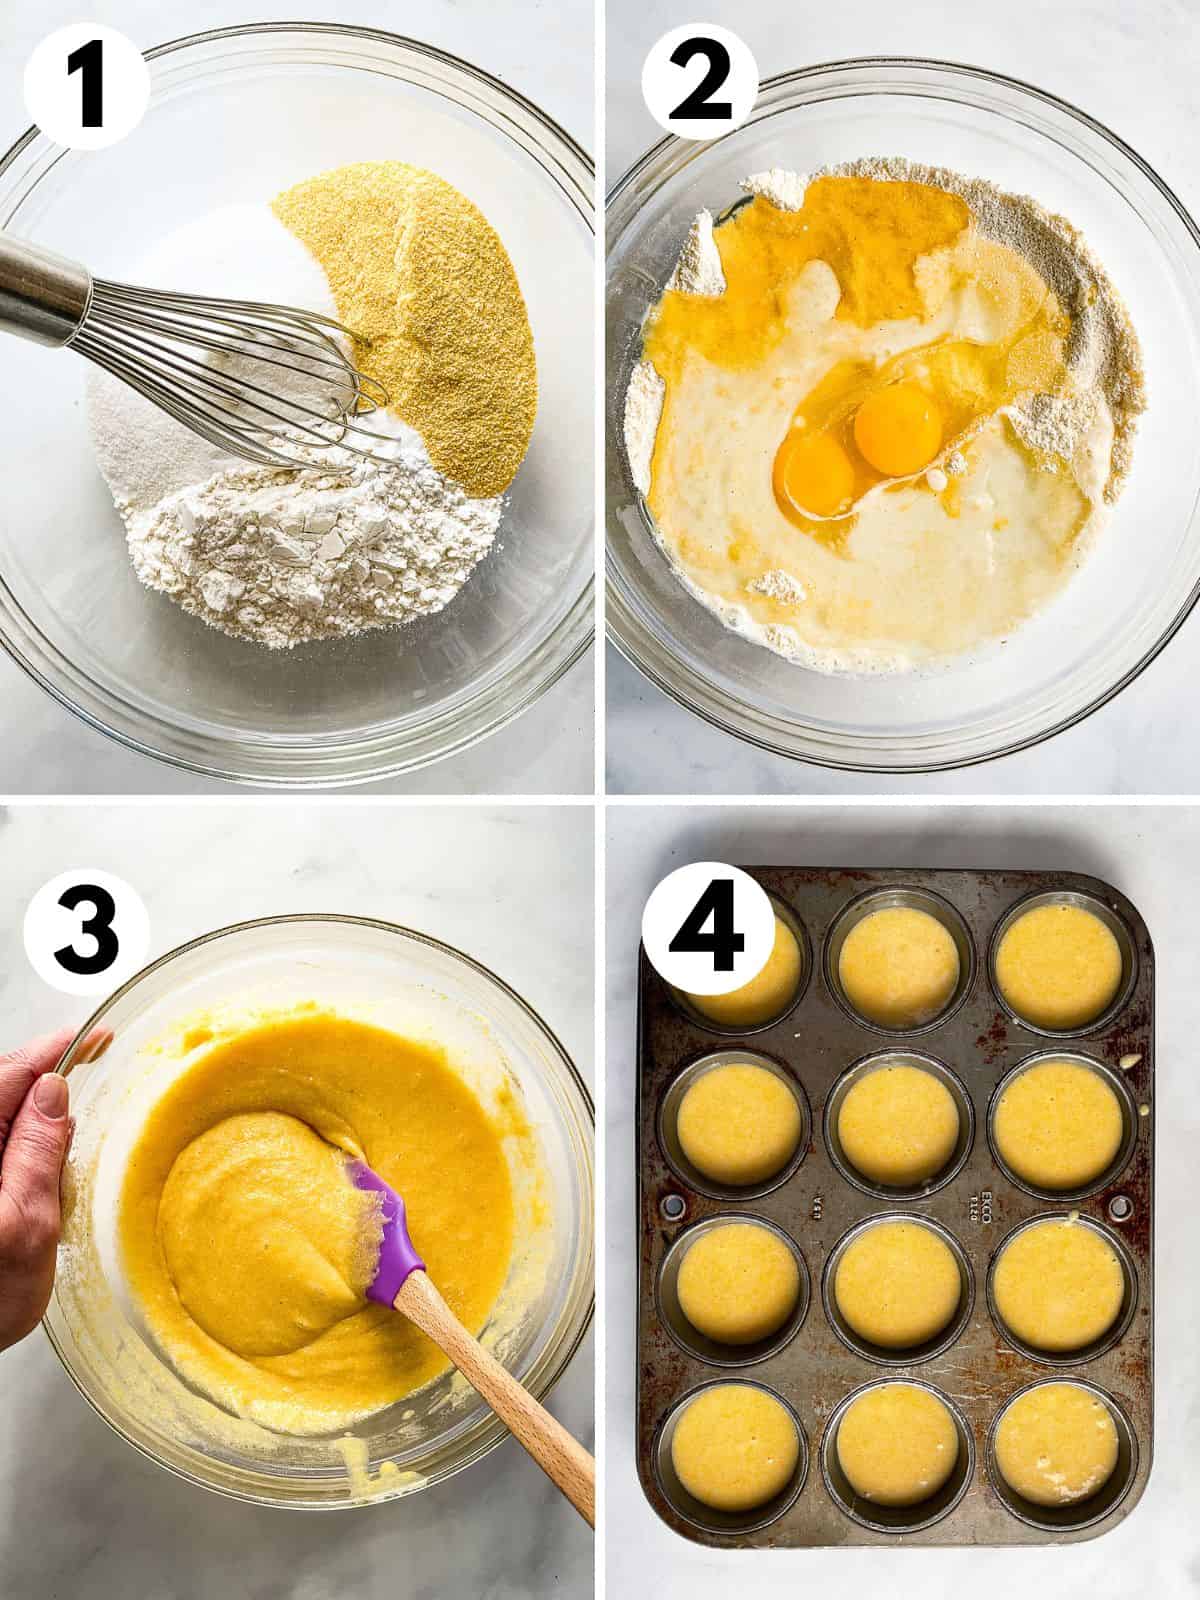
- Whisk together the dry ingredients in a large bowl.
- Add the milk, eggs and oil.
- Mix until the batter is smooth.
- Spoon batter into a prepared muffin pan. Bake for about 50 minutes.

How to Store and Freeze Gluten-Free Corn Muffins.
Gluten-free corn muffins stay fresh on the counter for about three days. Store them covered or wrapped to prevent them from drying out.
How to Freeze.
- Let the muffins cool completely. You don’t want to freeze hot or warm muffins or they’ll get crumbly when thawed.
- Place muffins in a freezer container. Freeze for up to three months. Allow the muffins to thaw at room temperature.
How to Reheat.
Place the muffin on a microwave-safe plate. Heat for 20 seconds on low. Repeat as needed.
Gluten-free muffins also taste great grilled or toasted. To grill, split the muffin in half and cook on a buttered skillet or grill pan until lightly brown. Toast the muffin in a toaster oven or air-fryer until warmed through.
Gluten-Free Corn Muffins
These gluten-free corn muffins are cakey and sweet, just like the ones sold at a bakery. To make the recipe, simply mix all the ingredients together in one bowl. Spoon the batter into a muffin pan and bake.
Ingredients
- nonstick cooking spray or paper muffin liners
- 1 cup gluten-free all-purpose flour, see note 1 (5 ounces; 140 grams)
- 1 cup gluten-free cornmeal, see note 2 (5 ¼ ounces; 148 grams)
- ⅔ cup granulated sugar (5 ounces; 140 grams)
- 1 ¼ teaspoons baking powder
- ¾ teaspoon salt
- ⅔ cup milk, see note 3 for a dairy-free variation (5 ⅓ ounces; 150 grams)
- ½ cup vegetable oil or melted and slightly cooled butter (4 ounces; 113 grams)
- 2 large eggs, whisked (about 4 ounces; 113 grams)
Instructions
-
Preheat oven to 350℉. Grease a 12-cup muffin pan with nonstick cooking spray or line with paper liners.
-
Whisk together gluten-free flour, cornmeal, sugar, baking powder, and salt in a large bowl. Add milk, oil, and eggs. Whisk until batter is smooth.
-
Fill prepared muffin cups about ⅔ full. Bake until muffins are golden brown and a cake tester inserted into the center comes out clean, about 20 minutes.
-
Allow muffins to cool in the pan for 5 minutes. Then transfer the muffins to a wire rack to cool completely. Store, wrapped, on the counter for up to three days or freeze, up to three months.
Recipe Notes
Note 1: Gluten-Free Flour. The recipe was tested with Bob’s Red Mill 1:1 Gluten-Free Baking Flour. For the best results, use a gluten-free flour blend that contains xanthan or guar gum. If your blend doesn’t, whisk ½ teaspoon into the recipe along with the other dry ingredients.
Note 2: Gluten-Free Cornmeal. If you prefer a soft, cake-like muffin, use finely ground cornmeal. For a muffin with a little crunch, use medium-ground cornmeal. I’d avoid coarsely ground or polenta-style cornmeal. It’s very coarse and will make the muffins unpleasantly crumbly.
Note 3: Dry-Free Variation. Replace the milk with your favorite dairy-free milk.
Variations
- Blueberry Corn Muffins. Stir in 1 cup fresh or frozen blueberries
1 cup frozen corn kernels. - Extra Corny Muffins. Add 1 (8.25) can creamed corn. Be sure to use the eight-ounce can. The 15-ounce size can make the muffins too moist and almost gummy.
- Cranberry or Cherry Corn Muffins. Add 1 cup dried cranberries or dried cherries suggested.
- Bacon Corn Muffins. Add ½ cup cooked and crumbled bacon.
Gabriele says
I had no baking powder, so used 1tsp of baking soda. Unfortunatelly even after mixing it with a vinegar I could still feel the aftertaste… But topping muffins with coconut cream helps a lot :p 😉 Thanks for the recipe!
Julie says
I want to let people know that I just purchased BRM gf corn flour this week and it is not in a purple bag, it is in a yellow bag.
Elizabeth says
Oh! They’ve changed their packaging. Thank you for letting me know. I’ll update the post!
Marisol Gaffney says
Can I can replace the gf flour for corn flour?
I’m on a grain-free diet and your corn muffins recipe sounds wonderful!
Elizabeth says
I haven’t tested the recipe with corn flour. So I can’t say if it would work. Sorry!
Michelle says
I love these so much! I make them all the time with fresh raspberries and they are amazing. I just substitute 2/3 cup of honey for the sugar which makes it less sweet but keeps it from being too crumbly and back to the more traditional muffin texture 🙂
Lucy says
Absolutely what I needed on a cold, drizzly afternoon in Scotland with a hot cup of tea. Thank you!!
Diana says
Thank you for this very easy to follow recipe with great explanations too. Our muffins turned out very moist and tender. To my taste 2/3 cups of sugar was a little too sweet. I’ll try adding just 1/3 cup next time. Thank you!
Erin Hernandez says
Hi there,
Thank you for this recipe! How long would you bake for a 24 count of mini muffins pan?
Elizabeth says
Good question! I’d say a pan would take about 15 minutes. But I’d start checking them at 12 minutes.
JennieLee says
I liked this recipe
Nice and soft with good texture.
Thanks
Katrina says
Yummy but only filled 8 muffins. My muffin tray holds a half cup fluid to the brim each, which must be a medium tray. The recommended tray must be smaller. 😉
Elizabeth says
That pan might be a little bigger than a standard muffin pan. They do tend to vary by maker. Glad you liked the recipe!
Katherine R says
Oh my word these are SO delicious! I didn’t post at first but after trying a dozen out on family, I just made two dozen more to take to a friends house for Canadian Thanksgiving this weekend! They are perfect! I didn’t change a single thing, I did use butter rather than oil. Thank you for a recipe I will be using frequently.
P.S. They taste devine hot out of the oven with some jam or a piece of cheese!
Mike says
These are amazing! I don’t know why I haven’t made them sooner. I used both fine and medium grind corn meal, roughly 100 gms medium and 48 grams fine just because I had both. Wonderful corn flavor and a nice texture between cake and crunch. I also added frozen blueberries. The whole house smells delicious and they taste delicious. Next time I might add some lemon zest with the blueberries and maybe cut down on the sugar a bit. I also thought about adding ground flax seed to boost the fiber, would I need to increase the liquid a bit more? Your recipes are always a joy to make and eat.
Caroline says
This is very similar to recipe found on Alber’s yellow cornmeal box – in the US – but w/ gf flour. Many gf flour blends have white potato and white rice flours. Both elevate blood sugars. I’m wondering if a sugar substitute would work? As is, this recipe is not Diabetic friendly. I usually use Almond, quinoa, & oat flours plus cornmeal.