• Skip to primary navigation
  • Skip to main content
  • Skip to primary sidebar
Gluten-Free Baking logo
  • Home
  • Recipes
  • About
    • About Me
    • Contact
    • My Cookbooks
    • Work with Me
menu icon
go to homepage
  • Home
  • About
  • Recipes
  • Contact
    • Facebook
    • Instagram
  • search icon
    Homepage link
    • Home
    • About
    • Recipes
    • Contact
    • Facebook
    • Instagram
  • ×
    Home

    How to Make Easy Gluten-Free Chocolate Chip Cookie Dough Ice Cream

    Gluten-free chocolate chip cookie dough ice cream in container.

    Gluten-free chocolate chip cookie dough ice cream in container.

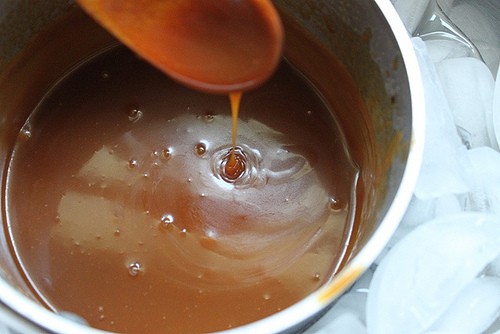
    Hailing from the birthplace of Ben and Jerry’s ice cream (Burlington, Vermont), my mom has strong feelings about their famous Chocolate Chip Cookie Dough ice cream. She hates it. She always says, “Who wants to eat gobs of raw dough in perfectly good ice cream?” Her daughter, that’s who! I love the stuff.

    When I thought about making gluten-free chocolate chip cookie dough, I knew I could make it by folding cookie dough pieces into soft, freshly churned ice cream. But what if someone doesn’t have an ice cream maker, or just doesn’t feel like making a batch of ice cream from scratch? Is it still possible to make this ice cream? I needed to find out.

    My first attempt was a total flop. Halfway through making it, I couldn’t stop laughing. Melted ice cream, everywhere. I even managed to get some in my hair. The reason it flopped? I allowed the ice cream to get really soft then attempted to fold the dough balls into the softened ice cream. Don’t do this. Trust me. The ice cream gets way too melty.

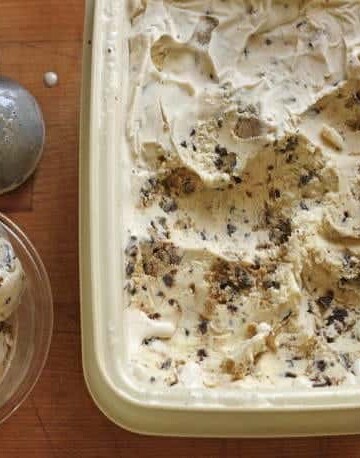
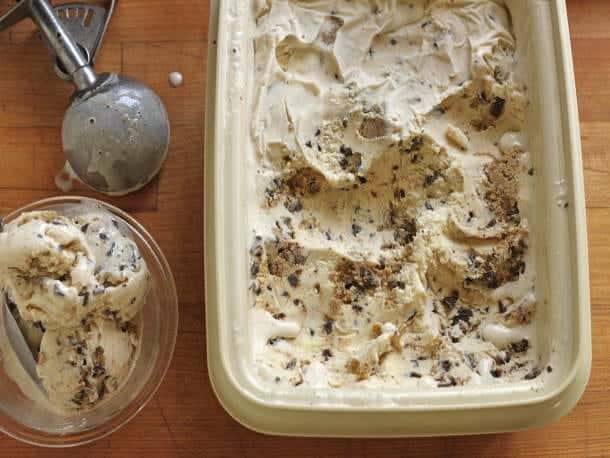
    But there is hope—I discovered an easier, much less messy way to make this ice cream. Simply allow store-bought vanilla ice cream to soften slightly. Then transfer the softened ice cream into a freezer-safe container. As you do, dot the ice cream with little balls of chocolate chip cookie dough. That’s it!

    Here’s how to do it!

    Allow ice cream to soften but not melt. Work from the outside to the inside of the carton. The ice cream melts first around the edges. If you wait for the entire carton to soften, the outsides edges will be soupy. As soon as the edges become soft, begin scooping the ice cream.

    Use small balls of dough. At first, I scooped the cookie dough into, approximately, two teaspoon balls. These seemed a little big. To make this process easy, I split the dough balls into smaller pieces as I pushed them into the dough.

    Freeze leftover cookie dough. This recipe makes a little extra cookie dough. You can freeze the leftover dough for the next time you make chocolate chip cookie dough ice cream. To do this: scoop dough into small balls, chill on a baking sheet, and then transfer firm dough balls to a freezer bag. Or, you could bake cookies with the leftover dough! Scoop dough, about one tablespoon each, onto a lined baking sheet and bake in an oven preheated to 350°F until golden brown, about 15 minutes. (And now I am thinking about an ice cream sandwich made with chocolate chip cookies and chocolate chip cookie dough ice cream.)

    Allergy Notes

    Egg-Free

    Since the cookie dough is consumed raw, the dough is egg-free to avoid salmonella from raw eggs. If you are egg-allergic, be sure to select a vanilla ice cream that’s egg-free.

    Dairy-Free

    Replace the butter called for in the chocolate chip cookie dough with a solid shortening and use dairy-free chocolate chips and dairy-free ice cream. If dairy-free chocolate chip ice cream is hard to find, use vanilla and dot the ice cream with dairy-free chocolate chips as you add the dough balls.

    Gluten-free chocolate chip cookie dough ice cream in container.
    Print

    Easy Gluten-Free Chocolate Chip Cookie Dough Ice Cream

    If you make homemade ice cream, use it in this recipe!
    Prep Time 30 minutes
    Cook Time 1 hour
    Total Time 1 hour 30 minutes
    Servings 1 /2 gallon ice cream
    Author GlutenFreeBaking.com

    Ingredients

    For the Cookie Dough

    • 1 1/2 tablespoons ground flax meal (about 1/2 ounce; 14 grams)
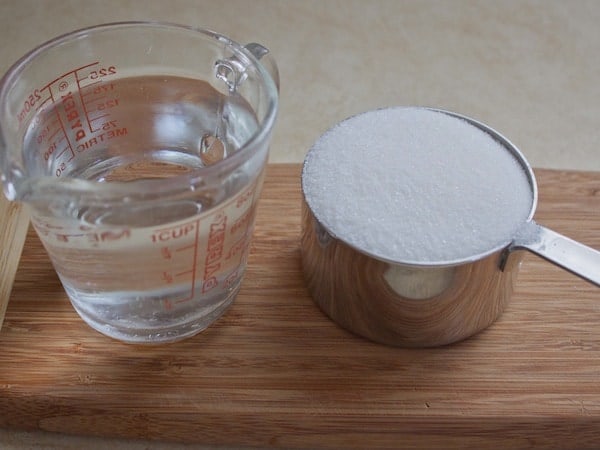
    • 2 tablespoons hot water (1 ounce; 28 grams)
    • 3/4 cup white rice flour (3 ounces; 85 grams)
    • 1/3 cup sorghum flour (1 1/3 ounces; 37 grams)
    • 1/2 teaspoon baking soda
    • 1/4 teaspoon salt softened
    • 3/4 stick unsalted butter, softened
    • 1/4 cup dark brown sugar (2 ounces; 56 grams)
    • 1/4 cup granulated sugar (1 3/4 ounces; 50 grams)
    • 1 teaspoon vanilla extract

    For the Ice Cream

    • 3/4 cup mini-chocolate chips (4 1/2 ounces; 128 grams)
    • 1/2 gallon gluten-free chocolate chip ice cream

    Instructions

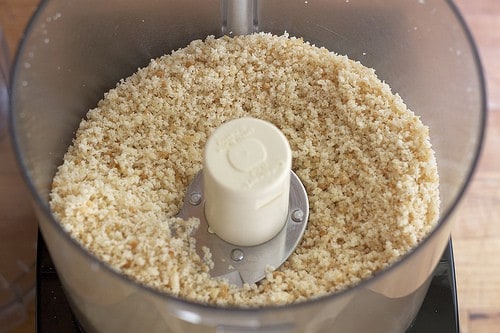
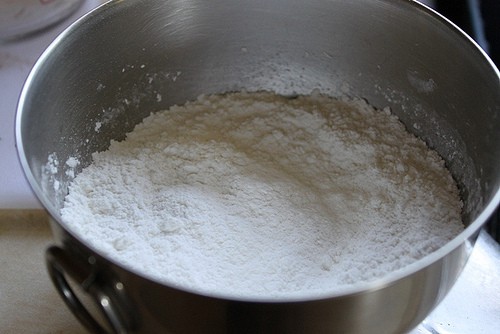
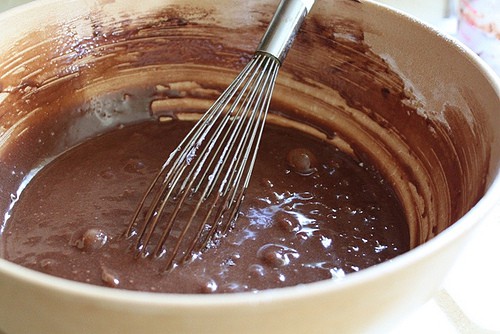
    1. Prepare the Cookie Dough: In a small bowl, whisk together ground flax and hot water. Set aside. In medium bowl, whisk together white rice flour, sorghum flour,baking soda, and salt.

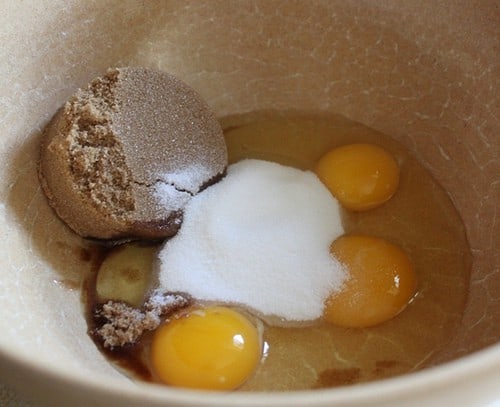
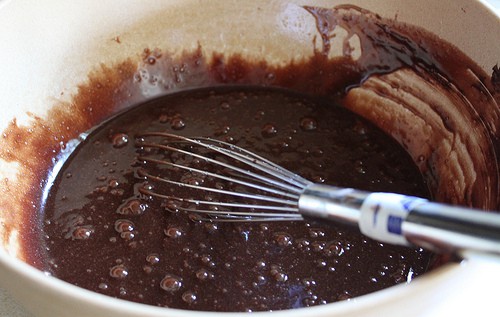
    2. In bowl of stand mixer fitted with paddle attachment (or large bowl), cream together shortening and sugars on medium high speed. Cream until a thick paste forms, about 30 seconds. Add flax mixture and vanilla. Cream until mixture is light and fluffy, about 45 seconds.
    3. Stop mixer and scrape down bottom and sides of bowl. Add dry ingredients. Turn mixer on to medium speed. Mix until dough forms, about 30 seconds. Turn off mixer and add chocolate chips. Turn mixer on to low speed. Mix until chips are combined, about 15 seconds.
    4. Drop dough, about 1/2 teaspoons each, onto prepared baking sheet. Cover pan with plastic wrap and chill until dough balls are firm, about one hour.
    5. Prepare the Ice Cream: Remove ice cream from the freezer. Place it on the counter to soften, about ten minutes. Using a large spoon, scoop softened ice cream, working from the outside of the carton toward the center, into a freezer-safe container. As you work, dot the ice cream with chilled dough balls. (If the ice cream begins to soften too much, return containers to the freezer, allow ice cream to harden, and then finish the recipe.)
    6. After all ice cream has been transferred, smooth ice cream with the back of a spoon.
    7. Press a piece of plastic wrap directly onto the surface of the ice cream. Cover container with a tight fitting lid. Freeze until firm and serve.


    How to Make a Gluten-Free Grilled Cheese

    Gluten-free grilled cheese on a cutting board.

    Gluten-free grilled cheese on a cutting board.

    I love getting e-mails from readers! Recently this one popped up in my in-box:

    Elizabeth–

    HELP! I don’t know how to make grilled cheese! I grew up eating grilled cheese made with American Cheese. The cheese always melted. Now when I try to make grilled cheese on gluten-free bread with cheddar cheese, my bread browns before all the cheese melts. Whenever I cut into the sandwich, the middle is NEVER melted. What am I doing wrong???

    I am using Udi’s white bread and grated cheddar.

    Thanks for your help! I knew you wouldn’t laugh at me even though I have no idea how to make grilled cheese, the easiest food in the world!

    Catherine

    This is such a great question! And of course I’m not laughing! Sometimes the “easiest” things to make in the kitchen require a bit of know-how that no one ever talks about. Well, I’m talking!


    Here’s how to make a great gluten-free grilled cheese.


    Two slices of gluten-free bread and a stick of butter.

    Bread and butter. The foundation of grilled cheese. Since Catherine uses Udi’s bread, that what I used. However, you can use whatever bread you love. (Including the “Easy Sandwich Bread” recipe from my book !)


    Spreading butter on gluten-free bread.

    Butter each slice. You don’t want too much butter; nor do you want “just a little.” While I’ve never measured it, I’m guessing you want about one teaspoon per slice of Udi’s. And be sure to butter right up to the crust.

    Buttered slice of gluten-free bread.

    Mmm! Bread and butter!

    Grated cheese for gluten-free grilled cheese.

    Next grate some cheddar. About one ounce is perfect for Udi’s slices.

    Shredded cheese on top of gluten-free bread in pan.

    Place one piece of bread in the pan, butter side down, and top with the cheese. Don’t worry if some cheese gets into the pan.

    Gluten-free grilled cheese cooking in pan.

    Top with the second slice of bread and turn on the heat to medium-low. This is important!

    Catherine mentioned that her bread would toast but her cheese would not fully melt. If you make a gluten-free grilled cheese over high heat, this happens. Over medium-low, the bread toasts as the cheese melts gently and fully.

    Flipping a gluten-free grilled cheese over in pan.

    Take a peek! Lift up one edge of the bread and look under it. If the bread it golden brown, flip the sandwich.

    Pressing down a gluten-free grilled cheese with spatula in pan.

    Press down! Unlike a hamburger, which you shouldn’t press down, grilled cheeses benefit from a little pressure. (Think panini!) Use your spatula and press down on the sandwich.


    Gluten-free grilled cheese in pan. The top slice of bread is light brown and crispy.


    Okay. YUM! See those little crispy pieces of cheese stuck to the bread? Those are my favorite!

    Allow the sandwich to cook for another few minutes. Then peek again. When the bread is golden brown. Remove the sandwich from the pan.

    Slicing a gluten-free grilled cheese.

    Cut!

    Gluten-free grilled cheese on a cutting board.

    Enjoy!

    Gluten-free grilled cheese on a cutting board.
    5 from 1 vote
    Print

    Gluten-Free Grilled Cheese

    This is a simple grilled cheese. Add sliced tomatoes or a few slices of turkey and ham if you want.
    Prep Time 2 minutes
    Cook Time 5 minutes
    Total Time 7 minutes
    Author GlutenFreeBaking.com

    Ingredients

    • Butter about two teaspoons
    • 2 slices gluten-free bread
    • Grated cheddar about one once for small slices

    Instructions

    1. Spread butter evenly over each piece of bread.
    2. Place one slice bread, butter side down, into a small non-stick pan. Top with cheese. Turn heat on to medium-low. Cook, about three minutes, until bread is golden brown. (Peek under sandwich to see how it's coming along.)
    3. Flip sandwich. Cook an additional few minutes until bread is golden brown. Remove from pan, cut, and serve.


    How to Make Over the Top Salted Caramel Gluten-Free Brownies

    Salted caramel brownie on a wire rack.

    Salted caramel brownie on a wire rack.


    I love caramel. I love brownies. And I love salty-sweet treats. So when I saw Dorie Greenspan’s recipe for Salted Caramel Brownies, I knew I had to make them.

    Oh.my.god.

    Calling them “brownies” feels like a bit of an undersell. This is an over-the-top dessert. And the prep time reflects that. The brownie is easy to make. The caramel isn’t so easy. It takes a bit of time. So allow yourself enough time in the kitchen. It’s not a recipe that you want to rush through or try to make while your dog nuzzles against your leg or you are texting with a friend.

    Let’s get going!


    Melted chocolate in measuring cup.(left). Melted butter in measuring cup. (right)

    Butter and chocolate! Lots of folks melt them together. I like to melt them separately in the microwave since they both melt at different temperatures. It is one more dirty dish but it is worth it!

    Eggs, brown sugar, and granulated sugar for gluten-free brownies.

    Eggs meet sugar. YUM!

    Whisking sugar and eggs together for gluten-free brownie batter.

    Whisk the eggs and sugars together until smooth. Doesn’t that already look good?


    Gluten-free brownie batter whisked until smooth.


    Add the chocolate, melted butter and vanilla. Inhale deeply to appreciate the scent! When you are done swooning, whisk it all together.


    Flour in bowl for gluten-free brownies.

    The dry ingredients, which have already been whisked together, go into the bowl. Whisk until a thick batter forms.


    Gluten-free brownie batter in brown bowl.

    This is what you are looking for with the batter. Smooth, thick, and shiny. It’s ready for the pan!


    Springform pan dusted with cocoa powder.

    When working with chocolate cakes or brownies, I like to butter and “flour” my pan with cocoa powder. This way I don’t have any white flour clinging to the outside of my baked goods.


    Gluten-free baked in springform pan.

    This is what comes out of the oven! As you can see, the brownie rose and then sank down. (Leaving that little funny bump in the center.) This is good! This is what you want! The caramel needs a place to rest. When the brownie sinks slightly, it provides a place for the caramel. Mmmm….caramel…


    Gluten-free brownie with sunken center.

    Cool the brownie on a wire rack. The bottom of the springform pan will cling to the brownie. That is okay! This is how you get it off…

    Gluten-free brownie with plate on top.

    Put a plate on top of the brownie.

    Removing gluten-free brownie from springform pan.

    Using the plate, flip the brownie over so the bottom of the springform pan is exposed. Carefully peel off the bottom of the pan. I use a blunt edge metal spatula to loosen the pan.


    Gluten-free brownie under wire rack.

    Now place your wire rack (upside down) on the brownie. Flip it over and your brownie is right-side-up!


    Allow the brownie to cool before you make the caramel sauce.

    Now it’s time to make the caramel.


    Cooking sugar syrup for caramel sauce.

    In a two-quart pot with a heavy bottom, combine your water and sugar. It will look like the pot is too big for this recipe. That is what you want! When we add the cream, we need the sauce to have LOTS of room to expand.


    Boiling sugar syrup on the stove.

    See that sugar that is clinging to the side of the pan? That sugar is a bad thing! Using a pastry brush and cold water, wash the side of the pan down to remove the sugar. This will help to prevent your caramel from crystallizing.


    Drops of cooked caramel, from clear to dark brown.

    Boil your sugar, never stirring, until it is amber in color. This will take some time. See the blob of caramel on the bottom left? That is what we are looking for!


    The large blob on the right is the finished sauce. The blob above that? Me being a slob! I slopped some sauce. Sorry!

    Dark brown caramel sauce.

    This is what you are looking for! Don’t let it get any darker or your caramel will taste burnt.


    Now the fun begins! We add the cream! This is what happens:


    Pouring cream into pot with caramel sauce.

    Cream goes in. (See how low the sauce is in the pot? Watch this!)


    Pouring cream into caramel sauce.

    As soon as the cream hits the hot caramel it begins to boil violently. This is why you want to use a 2-quart pot.


    Adding cream to caramel sauce. The caramel sauce bubbles quickly.

    It continues to boil.


    Adding cream to caramel sauce.

    And then it dies down just as quickly as it rose.


    Stirring caramel sauce in pan.

    Stir until everything is melted, add your vanilla and then cool the caramel.


    Caramel sauce in pot, cooling in an ice bath.

    I like to use an ice bath because then I can quickly cool my caramel sauce and get it on my brownie. If you don’t want to use an ice bath, cool the caramel at room temperature. This will take about 5 hours. An ice bath? 15 minutes.


    Caramel sauce cooling in pan.

    The cooled caramel will thicken and look just lovely!

    Salted caramel brownie on a wire rack.


    Pour the cooled caramel over the brownie, sprinkle on a little Kosher salt and you are ready to go!


    Salted caramel brownie on a wire rack.
    Print

    Over the Top Salted Caramel Gluten-Free Brownies

    adapted from Baking by Dorie Greenspan
    Prep Time 2 hours
    Cook Time 20 minutes
    Total Time 2 hours 20 minutes
    Author GlutenFreeBaking.com

    Ingredients

    For the Brownie

    • about 1 tablespoon cocoa powder for dusting pan
    • 2/3 cup white rice flour (2 2/3 ounces; 75 grams)
    • 1/3 cup cornstarch (1 1/3 ounces; 36 grams)
    • 1 teaspoon baking soda
    • 1/4 teaspoon salt
    • 1 stick unsalted butter, cut into 8 pieces
    • 5 ounces bittersweet chocolate, coarsely chopped
    • 3 large eggs (about 3 1/2 ounces; 100 grams)
    • 1/2 cup packed light brown sugar (3 3/4 ounces; 106 grams)
    • 1/4 cup granulated sugar (1 3/4 ounces; 50 grams)
    • 3 tablespoons light corn syrup (2 ounces; 56 grams)
    • 1/2 teaspoon vanilla extract

    For the Caramel Sauce

    • 1 1/2 cups granulated sugar (10 1/2 ounces; 298 grams)
    • 1/3 cup water (2 2/3 ounces; 75 grams)
    • 1 1/4 cups heavy cream (10 ounces; 283 grams)
    • 1 teaspoon pure vanilla extract
    • Kosher salt for sprinkling

    Instructions

    1. For the Brownies: Preheat oven to 375 degrees F. Butter and cocoa powder (or use white rice flour if you don't have cocoa powder on hand) an 8-inch round springform pan. Wrap the outside of the pan in foil and set it on a baking sheet.

    2. In a small bowl, whisk together the dry ingredients. Set aside.
    3. In the microwave, melt the chocolate and the butter. I like to melt them in separate 2-cup measuring cups. Remember, chocolate will appear to still be solid even when melted. Be sure to stir the chocolate every 45-seconds to prevent burning.
    4. Combine the eggs, brown sugar and granulated sugar in a large bowl. Whisk until smooth. Add the melted chocolate and butter. Whisk until smooth.

    5. Add the dry ingredients and whisk until the batter is smooth. Pour the batter into the prepared pan.

    6. Bake for 40-45 minutes or until the brownie is set. The brownie should not jiggle. (A cake tester inserted into the center of the cake might come out with a few wet crumbs attached.)
    7. Cool the cake in the pan for 10 minutes. After ten minutes, remove the brownie from the pan. (To do this: Remove the outer ring, place a plate over the brownie and flip the brownie and plate over. The brownie is now upside down on the plate. Slowly remove the bottom cake plate from the brownie. Once the plate is removed, put your wire rack on the brownie. Flip the brownie again so that it is right side up.)
    8. Allow the brownie to cool before you make the caramel sauce. Transfer the brownie to your serving dish.

    9. For the Caramel Sauce: Fill your sink with ice cubes and about two inches of water.
    10. In a 2-quart medium heavy-bottomed saucepan, combine the sugar and water. Stir to combine.
    11. Turn on heat to medium. Cook until sugar darkens. you want it to be an amber color. This will take about 15 minutes. While the sugar is cooking, be sure to check the sides of the saucepan for any sugar that is clinging to the side. If you see any, wash the side of the pan down with a pastry brush and cold water.
    12. Test the sugar by dropping a little from a spoon onto a white piece of paper. Again, you are looking for an amber color. If you notice your caramel is darkening in one area of the pan more than another, carefully swirl the pan. You don't want to stir as sugar crystals might form. A very gentle swirl will do the trick.
    13. When the caramel reaches the right color, turn off the heat. Standing back, pour the cream into the hot caramel. It will boil violently. Take care while doing this.
    14. As soon as all the cream is added, stir the mixture. If your caramel hardened in the bottom of the pan (this happens sometimes), turn the burner back on to low and stir until the sugar is dissolved.
    15. Stir for three minutes off the heat. Add vanilla and stir.
    16. Carefully set the hot pot into the water bath. (Be sure that the water isn't higher than the pan. You don't want any water getting into your caramel sauce. Cool until sauce has thickened.

    17. Pour a generous amount of caramel sauce onto the brownie. Sprinkle with a little kosher salt. (You will have made more caramel sauce than you can put on your brownie. Store the leftover sauce in the refrigerator.)

    18. Cut and serve. 


    Review: Gluten-Free Ronzoni Pasta

    Uncooked gluten-free pasta in white bowl. (left) Cooked gluten-free pasta in colander. (right)

    Ronzoni Gluten-Free Pasta box.

    I grew up eating a lot of pasta. How much pasta? Well, both my parents were Italian. Does that give you any idea? We ate so much pasta that in my memory of childhood meals, there’s always a pasta pot on the stove.

    So when I learned that Ronzoni, a very mainstream pasta brand across the United States, introduced a line of gluten-free pasta, I wanted to try it! Could this gluten-free Ronzoni pasta taste as good as the pasta I grew up eating?

    I grabbed a box of penne at my local supermarket. It surprised me to find the pasta in the “regular” pasta aisle and not shelved in the gluten-free section. The weight of the box disappointed me a little. Instead of a pound like other non-gluten-free Ronzoni pastas, the box gluten-free penne rigate weighed 12 ounces.

    What’s up with that? Why can’t gluten-free products include the same amount of product as their gluten-free counterpart? Flour doesn’t come in five pound bags, the Pillsbury cookies I reviewed yesterday are 14 ounces instead of one pound. It would delight me if gluten-free products weighed the same.

    Anyway, I digress. In addition to the small size, I noticed that the gluten-free Ronzoni cost considerably more than Ronzoni’s wheat pasta. Bummer. I’d hoped that such a large company could introduce a more budget-friendly gluten-free pasta to the market.

    In spite of this, I still couldn’t wait to try the pasta. What can I say? I love the stuff.

    Uncooked gluten-free pasta in white bowl. (left) Cooked gluten-free pasta in colander. (right)Cooking

    I followed my usual method for cooking pasta: a large pot of rapidly boiling water that’s heavily salted. While the Ronzoni box states that salt is optional, I don’t agree. But that’s just me. I like my pasta to contain, you know, flavor.

    Made from a blend of rice flours, corn, and quinoa, this blend is a bit different for me. Most of the time, I cook rice-based pasta. I use Tinkyada the most, followed by Trader Joe’s and Jovial. Occasionally I use corn pasta but, honestly, I don’t love it because the corn tends to taste too strong to me. I like my pasta to nicely fade into the background, instead of competing with the sauce or other ingredients.

    When rice or corn pastas hit the water, the boiling water turns cloudy. The Ronzoni pasta didn’t do this, at least not as much. The water clouded a bit but it wasn’t nearly as murky was the pasta water I’ve grown accustomed to seeing over the years.

    The box claims that the cooking time takes between eight to ten minutes. My pasta took about ten minutes to cook. At that point it wasn’t too tender and it certainly wasn’t mushy. It felt perfectly al dente which is how I like my pasta.

    As always, I reserved some of the pasta cooking water and then drained the cooked pasta. It looked….pretty. All of the noodles retained their shape. Sometimes rice pasta, even when al dente, loses its shape. It flattens out just a little. This pasta didn’t do that!

    Cooked gluten-free pasta in colander.

    Taste and Texture

    While my pasta cooked, I sautéed zucchini slices, onions, and grape tomato halves. In a small pot, I heated up some Alfredo sauce (confession: most of the time I make Alfredo sauce from scratch. But sometimes I don’t. On those days, I use Classico Roasted Garlic Alfredo. It’s pretty good. Just don’t tell my mother. She believes jarred sauce is an abomination. It’ll be our secret, okay?)

    It looked good. Even with the sauce and vegetables, the pasta retained its shape. I took a bite. YUM. Like serious YUM. It was as close to love at first bite that I get.

    The box of gluten-free Ronzoni pasta claims a “Delicious White Pasta Taste.” At first I wondered why they’d say “white pasta” instead of wheat pasta. Then it dawned on me: most people equate wheat with whole wheat. As you might remember, whole wheat pasta tastes different than “white” pasta. The box was right. This tasted very similar to traditional white pasta.

    Gluten-free pasta in white bowl with cream sauce, tomatoes, and artichoke hearts.


    The bite of this pasta really stood out to me. The texture wasn’t overly firm, nor was it gummy. It really tasted like what you expect from basic dry pasta.

    Ronzoni Gluten-Free Pasta Review
    White Rice Flour, Brown Rice Flour, Corn Flour, Quinoa Flour, Mono And Diglycerides.

    After marveling over the texture, I noticed the taste. Or should I say, I didn’t notice the taste. The pasta didn’t taste too much like corn or quinoa. Like a rice-based pasta, the flavor is mild but not too mild. The pasta added a mild grainy nuttiness to the dish that complemented the rest of the ingredients but didn’t compete with them.

    Ingredients

    The best part of the ingredient for me is this statement: Produced in a Dedicated Gluten-Free Facility. I worried that Ronzoni would make their gluten-free pasta in a shared facility. Nope! Oh, and the pasta comes from Italy which is interesting. As of this writing, the box didn’t contain any “top eight” allergen statements.

    This picture was taken on July 30, 2013. Be sure to read your package in case ingredients or nutrition information change.

    Ronzoni Gluten-Free Pasta $2.99 price sticker on shelf.

    Price

    At $2.99 for twelve ounces, this pasta costs more than the Tinkyada I currently use. (For me, Tinkyada runs about $2.99 for a pound, a dollar cheaper than the Ronzoni.) I wish it cost less and I wonder if Ronzoni coupons will apply to this product. Call me cynical but I’m guessing that the sales and coupons will only apply to their 16 ounces boxes. (let’s hope I’m wrong!)

    Is the price worth it? I think so. The pasta’s pretty great.

    Overall

    This gluten-free Ronzoni pasta is really lovely. The texture’s great; it tastes great. And since it’s made by a national brand, I’m hopeful that the pasta will be easy to find. That would be so nice! Often when I travel, I notice that gluten-free pasta isn’t always easy to access.
    Again, I just wish the box was larger and that it cost a little less. I can’t wait to try the other Ronzoni gluten-free pasta. When I do, I’ll report back!

    Old Fashioned Gluten-Free Doughnuts

    Old Fashioned Gluten-Free Doughnut coated with granulated sugar.

    Old Fashioned Gluten-Free Doughnuts

    Culinary confession: I love old fashioned doughnuts so much that I don’t even mind if they’re stale. In fact, a slightly stale doughnut dipped into coffee, in my opinion, is an under-appreciated delicacy.

    These doughnuts are a classic cake doughnut. The outside is crisp and the interior is soft, tender, and just lightly scented with nutmeg.

    Old Fashioned Gluten-Free Doughnut coated with granulated sugar.
    5 from 1 vote
    Print

    Old Fashioned Gluten-Free Doughnuts

    Roll these doughnuts in cinnamon-sugar or leave them plain. They are great either way.
    Prep Time 20 minutes
    Cook Time 5 minutes
    Total Time 25 minutes
    Servings 12
    Author GlutenFreeBaking.com

    Ingredients

    For Cinnamon-Sugar

    • 1 cup granulated sugar
    • 2 teaspoons ground cinnamon

    For the Doughnuts

    • 2 1/2 cups white rice flour (10 ounces; 283 grams)
    • 1/2 cup potato starch (2 ounces; 56 grams)
    • 1/2 cup tapioca starch (2 ounces; 56 grams)
    • 1/2 cup granulated sugar (3 1/2 ounces; 100 grams)
    • 1 teaspoon baking soda
    • 1/2 teaspoon baking powder
    • 1 teaspoon salt
    • 1 teaspoon xanthan gum
    • 1/4 teaspoon ground nutmeg or 1/2 teaspoon ground cinnamon
    • 1 large egg (about 1 3/4 ounces; 50 grams)
    • 1 cup buttermilk (8 ounces; 226 grams)
    • 2 Tablespoons vegetable oil (about 1 ounce; 24 grams)
    • Oil for frying

    Instructions

    1. Prepare the Topping: In a small bowl, combine the granulated sugar and ground cinnamon for rolling. Set aside.

    2. Make the Doughnuts: Whisk together white rice flour, potato starch, tapioca starch, granulated sugar, baking soda, baking powder, salt, xanthan gum, and nutmeg. 

    3. Add egg and buttermilk. Mix until a dough forms. (Use medium-high speed on a handheld mixer and medium speed on a stand mixer.) Dough will be thick and sticky.

    4. Generously white rice flour your counter. This dough is sticky. So, you need a good amount of white rice flour on the counter to prevent it from sticking.
    5. Turn half the dough out onto your floured countertop. Generously white rice flour the top of the dough. Pat the dough into a rectangle. Roll out, using a rolling pin, to about 1/2-inch thick using a doughnut cutter. (Or you can use two round cutters. First cut the large round, then cut the small center hole. This center hole, believe it or not, is important. It helps the doughnut to fry evenly.)
    6. Repeat with remaining dough.
    7. Place cut doughnuts on a lightly white rice floured baking sheet.
    8. Fill a fryer according to manufacturer's directions. Heat oil to 375 degrees.
    9. Depending on the size of your fryer, fry one to three doughnuts at a time. It is better to err on the side of frying fewer doughnuts. This will keep your oil hot and your doughnuts won't get greasy.
    10. After one minute, flip doughnuts over and fry until each side is golden brown.
    11. Using a heat-safe spatula, remove doughnuts from the hot oil. Drain on paper towels and toss into cinnamon sugar mixture.
    12. Repeat. And be sure to use the doughnut dough scrapes for doughnut holes! Don't let it go to waste.


    Gluten-Free Blueberry Ricotta Pancakes

    Gluten-Free Blueberry Ricotta Pancakes.

    Gluten-Free Blueberry Ricotta Pancakes with syrup on a plate.

    One day I had a little tub of ricotta in the fridge. It wasn’t really enough to do anything with but not enough to throw away. (Well, not enough to throw away until it got moldy from sitting in the fridge for too long.)

    In a flash of brilliance that rarely happens on a Sunday morning before I’ve had my coffee, I decided to add the ricotta to my blueberry pancakes.

    Instead of mixing the ricotta into the batter until it’s smooth, I left it lumpy. This was a good idea. Warm cheese dotted the pancakes and elevated blueberry pancakes from awesome to unbelievably awesome.

    If you make these pancakes, and I really hope you do, be sure to use full fat ricotta cheese. Low and no fat ricotta cheese are too watery for these pancakes.

    Gluten-Free Blueberry Ricotta Pancakes.
    Print

    Gluten-Free Blueberry Ricotta Pancakes

    Prep Time 15 minutes
    Cook Time 5 minutes
    Total Time 20 minutes
    Servings 4
    Author GlutenFreeBaking.com

    Ingredients

    • 1 cup finely ground white rice flour (4 ounces; 113 grams)
    • 1/2 cup cornstarch (2 ounces; 56 grams)
    • 1/2 cup sweet rice flour (2 ounces; 56 grams)
    • 1/4 cup granulated sugar (1 3/4 ounces; 50 grams)
    • 1 tablespoon baking powder
    • 1/2 teaspoon salt
    • 1/4 teaspoon xanthan gum
    • 2 large eggs (about 3 1/2 ounces; 100 grams, out of shell)
    • 1 cup milk (8 ounces; 226 grams)
    • 1/4 cup vegetable oil (1 3/4 ounces; 50 grams)
    • 1 teaspoon vanilla extract
    • 3/4 cup ricotta cheese (6 ounces; 170 grams)
    • 1 cup blueberries, washed and picked over to remove stems

    Instructions

    1. Whisk together the white rice flour, cornstarch, sweet rice flour, granulated sugar, baking powder, salt, and xanthan gum. Add the milk, eggs and oil. Whisk until a batter forms.

    2. Add the ricotta. Stir to just combine. You WANT lumps. This is important. The lumps of ricotta are what make these pancakes awesome. So don't stir too much or the cheese will disappear when you make them.
    3. Add the blueberries. Stir to just combine.
    4. Cook on a hot, oiled griddle, about 1/4 cup each. Serve with syrup. I find butter to be an overkill but you might think differently about this!


    Gluten-Free Brown Sugar Bundt Cake

    Gluten-Free Brown Sugar Bundt Cake.

    Gluten-Free Brown Sugar Bundt Cake on glass platter.

    I love simple desserts. And this brown sugar bundt cake is a perfect example of a simple dessert. It gets it’s flavor from brown sugar, butter, and vanilla. That’s it. There’s no nuts or chocolate or dried fruit stealing the attention. And that’s what makes this bundt perfect.

    Just one warning before you make it. Be prepared to make it again and again. It makes a wonderful gift when someone in your life needs a little comfort,


    Gluten-Free Brown Sugar Bundt Cake.
    Print

    Gluten-Free Brown Sugar Bundt Cake

    This simple bundt cake, which gets its main flavor from brown sugar, tastes lightly of molasses, vanilla, and butter. It's perfect with a cup of tea or coffee.
    Prep Time 20 minutes
    Cook Time 40 minutes
    Total Time 1 hour
    Servings 1 bundt cake
    Author GlutenFreeBaking.com

    Ingredients

    • 1 1/2 cups finely ground white rice flour (6 ounces; 170 grams)
    • 1/2 cup cornstarch (2 ounces; 56 grams)
    • 1/2 cup sweet rice flour (2 ounces; 56 grams)
    • 1 teaspoon baking powder
    • 1/2 teaspoon baking soda
    • 1/2 teaspoon xanthan gum
    • 1/4 teaspoon salt
    • 2 sticks butter, softened (1 cup; 8 ounces; 226 grams)
    • 2 cups packed dark brown sugar (15 ounces; 425 grams)
    • 3 large large eggs (about 5 1/4 ounces; 150 grams, out of shell)
    • 1 1/2 teaspoons pure vanilla extract
    • 1 cup buttermilk (8 ounces; 226 grams)

    Instructions

    1. Preheat oven to 350 degrees F. Grease a 10-cup bundt pan with non-stick cooking spray. Set aside.
    2. Whisk together white rice flour, cornstarch, sweet rice flour, baking powder, baking soda, xanthan gum, and salt. 

    3. In the bowl of a stand mixer fitted with a paddle attachment, cream together the butter and sugar until it just begins to light. Add the eggs, one at a time. Scrape down the sides and bottom of the after the last addition and cream for an additional 30 seconds.
    4. Add 1/3 of the dry ingredients. Add until just blended. Add 1/2 the buttermilk and the vanilla. Cream until combined. Repeat with remaining dry ingredients and buttermilk.
    5. After adding the last addition of the dry ingredients, increase mixer speed to medium-high. Blend for 20 seconds. Batter should be fluffy.
    6. Spoon into prepared pan. Bake for 35-40 minutes or until a cake tester inserted into the cake comes out clean.
    7. Remove pan from the oven and place on a wire rack. Allow cake to cool in the pan for five minutes and then remove from the pan and place back on the wire rack to cool completely. (Allowing the cake to stay in the pan longer than five minutes might cause it to stick.)


    Classic Gluten-Free Pumpkin Muffins

    Gluten-Free Pumpkin Muffin split and spread with butter. Pan of muffins and stick of butter in background.

    Gluten-Free Pumpkin Muffin split and spread with butter. Pan of muffins and stick of butter in background.

    Like anyone who loves to cook and bake, I’m smitten with Dorie Greenspan. Even though I can’t make her recipes as written, I still buy all her cookbooks. Reading her recipes and kitchen wisdom is worth it–plus I get the fun of adapting her beloved recipes.

    Since fall is here, I thought Dorie’s Pumpkin muffins would be a nice treat. I was not disappointed! These muffins are suburb. They’re light, tender, and spicy, just like pumpkin muffins should be. 

    Three notes about changes I made to Dorie’s original recipe (in addition to making it gluten-free, of course).

    1. I increased the amount of baking soda from 1/4 teaspoon to 1/2 teaspoon. This provided a little extra lift and, I think, the gluten-free muffins benefited greatly from the lift. 

    2. I added the flour in two steps instead of one. Dorie’s original recipe called for the pumpkin and buttermilk to be added directly to the butter-egg mixture. I found this “broke” the butter. (It became curdled.) By adding half the flour prior to adding the pumpkin and buttermilk, the batter remained creamy. 

    3. I didn’t add raisins or sunflower seeds. Why? I didn’t have any in the house! 

    One other tiny note about the recipe. It doesn’t use a full 15 ounce can of pumpkin. I usually don’t like recipes that leave me with leftover pumpkin. Since this recipe was so good, however, I’ll forgive it.

    Gluten-Free Pumpkin Muffin split and spread with butter. Pan of muffins and stick of butter in background.
    5 from 1 vote
    Print

    Classic Gluten-Free Pumpkin Muffins

    adapted from "Baking From my Home to Yours" by Dorie Greenspan (Houghton Mifflin Harcourt 2006)
    Prep Time 20 minutes
    Cook Time 25 minutes
    Total Time 45 minutes
    Servings 15 muffins
    Author GlutenFreeBaking.com

    Ingredients

    • 1 cup finely ground white rice flour (4 ounces; 113 grams)
    • 1/2 cup sweet rice flour (2 ounces; 56 grams)
    • 1/2 cup cornstarch (2 ounces; 56 grams)
    • 2 teaspoons baking powder
    • 3/4 teaspoon ground cinnamon
    • 1/2 teaspoon ground ginger
    • 1/2 teaspoon baking soda
    • 1/4 teaspoon xanthan gum
    • 1/4 teaspoon salt
    • 1/8 teaspoon ground nutmeg
    • Pinch ground allspice
    • 1 stick unsalted butter, softened (1/2 cup; 4 ounces; 113 grams)
    • 1/2 cup granulated sugar (3.5 ounces; 100 grams)
    • 1/4 cup dark brown sugar (2 ounces; 56 grams)
    • 2 large eggs (about 3 1/2 ounces; 100 grams)
    • 1 teaspoon vanilla extract
    • 3/4 cup pure pumpkin puree (7 ounces; 198 grams)
    • 1/4 cup buttermilk (4 ounces; 113 grams)
    • 1/2 cup raisins, optional
    • 1/2 cup chopped pecans or walnuts, optional
    • 1/3 cup raw sunflower seeds, optional optional

    Instructions

    1. Adjust oven rack to middle position. Preheat oven to 400 degrees F. Line 17 muffins cavities with paper liners or lightly grease muffin pan with gluten-free cooking spray.
    2. In a medium bowl, whisk together white rice flour, sweet rice flour, cornstarch, baking powder, cinnamon, ginger, baking soda, xanthan gum, salt, nutmeg, and allspice. Set aside.

    3. In a large bowl (or the bowl of a stand mixer), beat butter for 45 seconds or until light. Add sugars. Cream together for one minute.
    4. Add eggs, one at a time. Mix well between each addition to full incorporate eggs. Add vanilla extract and mix to combine. Turn off mixer and scrape down the sides and bottom of the bowl.
    5. Add half the dry ingredients. Turn on mixer to medium speed. Blend until combined. Batter will be thick. Add pumpkin and buttermilk. Mix until combined.

    6. Add remaining dry ingredients. Mix until a thick, fluffy batter forms. If using, stir in raisins and chopped nuts.

    7. Spoon batter into prepared muffin pan, about 2/3 full. Batter will be thick. If desired, sprinkle sunflower seeds on top of the muffin batter.
    8. Bake for 25-30 minutes or until muffins are golden brown and a cake tester inserted into the center comes out clean.


    15 Minute Roasted Garlic Shrimp

    Cooked garlic shrimp on platter.

    Cooked garlic shrimp on platter.


    During the week, I’m always looking for an easy meal. Few dinners are easier than roasted shrimp. You simply toss the shrimp together with olive oil, garlic, and herbs and bake. Serve with a large green salad and, if you feel like it,  some garlic bread.

    If you have any leftover shrimp, you can make a quick dinner the next night. Cook up some gluten-free pasta, I prefer spaghetti for this but use whatever you love. Toss the pasta with olive oil–or melted butter if you feel like splurging. Add the shrimp and throw in some cooked spinach. Season with salt and pepper. Dinner, done!

    Cooked garlic shrimp on platter.
    Print

    15 Minute Roasted Garlic Shrimp

    I prefer wild USA shrimp to the frozen shrimp from Thailand.
    Prep Time 5 minutes
    Cook Time 10 minutes
    Total Time 15 minutes
    Servings 4
    Author GlutenFreeBaking.com

    Ingredients

    • 1 1/2 pounds shrimp peeled and deveined
    • 2 teaspoons olive oil
    • 1/2 teaspoon salt
    • 1/2 teaspoon freshly ground black pepper
    • 2-3 cloves garlic, minced or put through a garlic press
    • dried herbs I use a pinch of chives, tarragon, and a smidgen of dill.

    Instructions

    1. Preheat oven to 400 degrees F.
    2. On a baking sheet, toss together the shrimp and olive oil.

    3. Add the salt, pepper, garlic and herbs. Toss together. Once coated, spread the shrimp on the baking sheet in one layer. 

    4. Roast for 10 minutes or until shrimp is firm and no longer opaque.


    How to Make Fresh Gluten-Free Bread Crumbs

    Fresh Gluten-Free Bread Crumbs in food processor bowl.

    Until the other day, I never thought of bread crumbs as a “seasonal” food. Sure strawberries are seasonal but bread crumbs? It seems, however, that in my kitchen fresh bread crumbs are seasonal.

    Most of the year I reach for dried bread crumbs. I use them to bread meats and throw them in meatloaf. But in the summer, when I make cod cakes and crab cakes, I find myself making fresh bread crumbs. So while bread crumbs aren’t really seasonal, they sort of feel like it to me.

    Making fresh bread crumbs is really easy. All you need is, you guessed it, fresh bread.

    Here’s how to make gluten-free bread crumbs:

    Gluten-free loaf of bread sliced on a cutting board.
    Grab about four slices of gluten-free bread.

    Cutting three slices of gluten-free bread in half for bread crumbs.
    Slice bread in half. Don’t worry about the slices being perfect. Slicing the bread just makes it easier to get the bread into the food processor.

    Gluten-free bread slices in the bowl of a food processor.
    Put the bread slices into a food processor. If your food processor is small, you might need to do this in two batches.


    Fresh Gluten-Free Bread Crumbs in food processor bowl.
    Pulse the food processor a few times and you’ll have fresh bread crumbs! That’s it. Seriously.

    Fresh bread crumbs don’t really last. They stale or get moldy (gross!) pretty fast.

    For this reason, just make your fresh bread crumbs when you need them–not a day or so before.

    Gluten-free loaf of bread sliced on a cutting board.
    Print

    Fresh Gluten-Free Bread Crumbs

    Use these breadcrumbs the day you make them. They don't hold well.
    Prep Time 5 minutes
    Total Time 5 minutes
    Servings 1 cup
    Author GlutenFreeBaking.com

    Ingredients

    • 4 slices fresh gluten-free bread sliced in half.

    Instructions

    1. Place bread slices into food processor. Pulse a few times. Crumbs should be fine. That's it!
    2. Use bread crumbs immediately.


    How to Make Gourmet Chocolate Covered Apples

    Chocolate dipped apple with M&M candies on the bottom.

    Dipping apple in melted milk chocolate.

    The other day, I got the BEST e-mail from a friend! She wanted to know how to make chocolate-covered apples. YES! Are you as excited as I was? Let me say that again, chocolate-covered apples. If you’ve enjoyed a chocolate-covered apple before, I bet you know two things: 1. They are delicious. 2. They cost a fortune! Seriously, I’ve seen some of these treats going for $15.00 per apple. The good news? They are easy to make at home!
    Here’s how to do it:

    Placing wooden stick in center of apple.
    Get some candy apple sticks from a cake shop (or craft store). You want the ones that are sharpened on one end. Twist the stick firmly into the apple. The stick becomes your dipping tool. So you don’t want it to be loose.

    I used honeycrisp apples because I love honeycrisp apples but any crisp apple will do.

    Apple in empty glass measuring cup.

    Find a small bowl or measuring cup and stick the apple into the cup. Why you ask? You want to make sure the apple fits in the bowl. Who wants to melt chocolate only to find out that your apple doesn’t fit into the bowl. See how there isn’t much room around my apple? That’s great. If the bowl was too big, I’d need lots of melted chocolate to fill the bowl for dipping. With a smaller bowl, I don’t need to melt as much chocolate.

    Dipping red apple in melted milk chocolate.

    Slowly dip your apple into the melted chocolate. Here I’m using milk chocolate but white or dark chocolate work just as well.

    Oh my…

    Dipping apple in measuring cup filled with melted milk chocolate.

    Twist the apple to cover it completely.

    Dipping a red apple in milk chocolate.

    Slowly pull the apple out of the chocolate. (YUM, right?)

    Red apple dipped in milk chocolate.

    Allow the excess chocolate to dip off the apple. You can give it a gentle shake to help this process. (This is important because the excess chocolate pools around the apple while it cools. And if you want to do a second coat, which, trust me, you do, the pooled chocolate becomes a pain to deal with.)

    Two apples dipped in milk chocolate.

    Allow the chocolate-dipped apples to set up on a piece of parchment paper. (See the little pool of chocolate around the base of the apple? Imagine how much would be there if I didn’t allow the excess chocolate to drip off.)

    Now you could stop there. Of course you could! But why would you want to?

    Plate of mini marshmallows.

    I wanted to coat my dipped apple in marshmallows. Whenever you add “goodies” (M&Ms, marshmallows, chopped nuts, crushed cookies) to a chocolate apple, you need to first apply a base coat of chocolate. If you don’t the weight of the “goodies” will drag the first coat of warm, melted chocolate off the apple.


    Be sure your first coat of chocolate has set before re-dipping the apple.

    Placing marshmallows on chocolate dipped apple.

    After dipping the apple again,  I slowly rolled the coated apple in marshmallows. There were a few bare spots. So I hand-placed some marshmallows. This goes quick.

    Apple dipped in milk chocolate and covered in marshmallows.

    If you don’t want the outside of any of the marshmallows to be coated in chocolate, you can always hand-place all of the marshmallows. It’s up to you. I like this kind of homemade look but if you want white marshmallows on a dark apple, I understand.


    I wasn’t done. Oh yes! Time for more chocolate!

    Dipping apple in melted milk chocolate.

    I decided that I only wanted a ring around the bottom coated with M&Ms. Therefore, I only dipped about 1/3 of the apple in chocolate.

    Plate of M&M candies.

    Since M&Ms are heavy, rolling the apple in the plate of M&Ms produced a so-so result, many of the candy pieces fell off. Pressing each M&M onto the apple, one at a time, worked much better. And, surprisingly, went pretty quickly.

    Chocolate Dipped Apples with M&M candies on the bottom.

    Now, you could dip the entire apple in chocolate and place M&Ms all over the apple. That wouldn’t be bad. At all. At all. 

    But what if you don’t want candy (or cookies or nuts) on the outside of your apples? How about doing a triple dip?

    First I coated the apple in melted white chocolate and allowed the chocolate to firm before dipping it into melted milk chocolate. (This is key. Whenever you are dipping multiple kinds of chocolate, always start with the lighter chocolate first. So you’d want to dip white—>milk—>dark. Or milk—>dark or white—>dark. You get the idea.)

    Melted dark chocolate for chocolate coated apple.

    Next up? Dark chocolate!

    Dipping apple in dark chocolate.

    After the milk layer set, in went the apple.

    Chocolate Dipped Apples coated in white, milk, and dark chocolate.

    Done!

    Placing wooden stick in center of apple.
    Print

    Gourmet Chocolate Covered Apples

    Making homemade chocolate-covered apples isn't only delicious, it's budget-friendly!
    Prep Time 20 minutes
    Total Time 20 minutes
    Servings 6
    Author GlutenFreeBaking.com

    Ingredients

    For Chocolate-coated Apples with Candy

    • 6 large apples, washed and dried (Water causes chocolate to seize. Be sure to dry the apples completely.)
    • 6 candy sticks
    • 1 pound milk, dark and/or white confectionery coating
    • about 2 cups small candies or chopped nuts

    For Triple Chocolate Dipped Apples

    • 6 large apples, washed and dried (Water causes chocolate to seize. Be sure to dry the apples completely.)
    • 8 ounces block caramel or 6 sheets caramel wraps, optional
    • 6 candy sticks
    • 8 ounces white confectionery coating
    • 8 ounces milk confectionery coating
    • 8 ounces dark confectionery coating

    Instructions

    1. For the Candy-coated Apples: Pierce apples with sticks. Be sure the sticks don't wiggle. You need to hold onto the stick while you dip your apple and you don't want the stick to slip out of the apple.
    2. Find a small bowl or 2-cup measure. "Test" each apple by placing it into the bowl. Do they all fit? Is there room around the apple? If yes, you have found your bowl! If not, find another bowl.
    3. In your selected bowl, place half pound chocolate. (or more depending on the size of your bowl. The chocolate should fill the bowl half way.) Microwave your chocolate for 30 seconds. Remove the bowl from the microwave. Stir. The chocolate won't be melted at this point. That's fine. You are removing "hot spots." This prevents the chocolate from burning. Return the chocolate to the microwave and repeat, stirring every 30 seconds, until chocolate is melted. (Note: If your apple bowl isn't microwave-safe, melt the chocolate in a microwave-safe bowl and transfer the melted chocolate to the bowl. If you don't have a microwave, place the chocolate in the top of a double boiler. Heat over medium heat (there should be water in the bottom of your double boiler.). Stir until chocolate melts. Transfer melted chocolate to the bowl you'll be dipping the apples in.)
    4. Dip each apple, one at a time, into the melted chocolate. Rotate the apple in the chocolate to coat completely. Slowly pull the apple out of the chocolate, shaking off excess chocolate.
    5. Place dipped chocolate on a piece of parchment paper.
    6. Spread selected toppings on a plate(s). Dip apple again in the chocolate. Either roll or place the toppings onto the apple. Covering as much or as little of the apple as you want.
    7. Return the dipped, coated apple to the parchment paper.
    8. For the Triple Chocolate Apples: Pierce each apple with a candy apple stick. Be sure the stick is tightly inserted into the apple.
    9. Roll out caramel, if using a block. Wrap caramel around apple.
    10. Place half pound chocolate. (or more depending on the size of your bowl. The chocolate should fill the bowl halfway.) Microwave your chocolate for 30 seconds. Remove the bowl from the microwave. Stir. The chocolate won't be melted at this point. That's fine. You are removing "hot spots." This prevents the chocolate from burning. Return the chocolate to the microwave and repeat, stirring every 30 seconds, until chocolate is melted. (Note: If your apple bowl isn't microwave-safe, melt the chocolate in a microwave-safe bowl and transfer the melted chocolate to the bowl. If you don't have a microwave, place the chocolate in the top of a double boiler. Heat over medium heat (there should be water in the bottom of your double boiler.). Stir until chocolate melts. Transfer melted chocolate to the bowl you'll be dipping the apples in.)
    11. Dip apple. Rotate apple in chocolate to coat completely. Slowly pull apple out of the chocolate. Shake to remove excess chocolate. Place dipped apple on a piece of parchment paper. Sprinkle with salt. Allow to set.


    How to Make Chocolate-Covered Salted Caramel Apples

    Dipping caramel coated apple in dark chocolate.

    Chocolate-covered Salted Caramel Apple.


    I know that the combination of apples and chocolate sounds weird. But throw in some caramel and salt and, trust me, it’s a winner. These apples are one of my favorite fall treats! Be sure to use crisp apples, like honey crisp or granny smith.

    Here’s how to do it:

    Placing wooden stick in center of apple.

    Wash and dry your apples. You want to remove all the wax so the caramel sticks. Pierce the candy apple stick.

    Red apple sits on top of rolled out caramel.

    Roll out a piece of caramel or buy gluten-free caramel sheets. I prefer the taste of block caramel. It’s a little more work but totally worth it.

    Wrapping a red apple in caramel.

    Wrap the caramel around the apple. Pressing as you go so that caramel sticks to the apple.

    Caramel coated apple on red cutting board.

    Okay, you could just stop here. But…chocolate is waiting!

    Caramel coated apple being dipped in chocolate.

    Oh, yes. Dip the apple into melted dark chocolate.

    Dipping caramel coated apple in dark chocolate.

    Rotate the apple to evenly coat it.

    Sprinkling salt on dark chocolate coated apple.

    Sprinkle with coarse sea salt or kosher salt.

    Chocolate-covered Salted Caramel Apple.

    Done! Allow the chocolate to harden at room temperature.

    Placing wooden stick in center of apple.
    Print

    Salted Caramel Chocolate Apples

    Firm caramel makes the best caramel apples. Look for Merckens block caramel. It's wonderful!
    Prep Time 20 minutes
    Cook Time 20 minutes
    Total Time 40 minutes
    Servings 6
    Author GlutenFreeBaking.com

    Ingredients

    • 6 large apples, washed and dried. (Water causes chocolate to seize. Be sure to dry the apples completely.)
    • 6 candy sticks
    • 8 ounces block caramel or 6 caramel sheets
    • 1 pound dark confectionery coating
    • Kosher salt

    Instructions

    1. Pierce apples with the sticks. Be sure the sticks don't wiggle. You need to hold onto the stick while you dip your apple and you don't want the stick to slip out of the apple.
    2. Find a small bowl or 2-cup measure. "Test" each apple by placing it into the bowl. Do they all fit? Is there room around the apple? If yes, you have found your bowl! If not, find another bowl.
    3. Roll out the caramel and cut into six 4 x 6-inch rectangles. Wrap the caramel sheets around the apples. Set aside.
    4. Place the confectionery coatings into a glass bowl. Microwave for 30 seconds. Remove the bowl from the microwave. Stir. The chocolate won't be melted at this point. That's fine. You are removing "hot spots." This prevents the chocolate from burning. Return the chocolate to the microwave and repeat, stirring every 30 seconds, until chocolate is melted.
    5. Dip each apple, one at a time, into the melted chocolate. Rotate the apple in the chocolate to coat completely. Slowly pull the apple out of the chocolate, shaking off excess chocolate.
    6. Place dipped chocolate on a piece of parchment paper. Sprinkle with kosher salt. Allow to set.
    7. Spread selected toppings on a plate(s). Dip apple again in the chocolate. Either roll or place the toppings onto the apple. Covering as much or as little of the apple as you want.
    8. Return the dipped, coated apple to the parchment paper.


    How to Make Homemade Eggnog

    Two glasses of eggnog next to a candle and stack of old books.

    Two glasses of eggnog next to a candle and stack of old books.


    I think eggnog might be the candy corn of the Christmas season. People either love it or loathe it and, just like candy corn, they’ll passionately tell you which camp they’re in. Me? I love eggnog. Love it. But the last few years, disappointment instead of delight accompanied my annual eggnog purchase. The reason? High fructose corn syrup IHFCS). Health reasons and the HFCS debate aside, I just don’t like the mouth feel it brings to beverages. I find eggnog (and even soda) made with HFCS to be, well, syrupy, instead of smooth. (For soda, I find sugar-based sodas “crisper” than their more prevalent HFCS-sweetened cousins.

    Then this year, hope of a HFCS-free eggnog sprung up! My friend Rachel mentioned that a local creamery (which will remain nameless because I usually love their stuff) was offering eggnog. She said it was was the best nog she’d ever had. After hearing this, I ran so fast to the store to pick up a glass bottle of the stuff that it could have qualified as a cardio workout. Then I scanned the ingredients and saw….high fructose corn syrup. I.was.so.bummed. “That’s it! I’m making my own!” I muttered to Greg. And I did! After the first sip of homemade eggnog, I knew I’d never buy pre-made nog* again. Like most things, it’s just so much better homemade. It’s eggy and rich without being cloying sweet or as thick as a semi-melted milkshake.

    *Statements like that one are always so full of hope, aren’t they? Watch, next year I’ll get busy and throw a carton of commercial nog into cart. You know how that goes, don’t you?

    Making homemade eggnog isn’t hard but you do need a few tools:

    Heavy-bottomed 4 quart pot (I used a 2 quart pot. This was a mistake. A big one.)

    Balloon whisk

    Thermometer Ice Bath (Fill a large bowl with lots of water and ice.)

    Ladle


    After gathering your tools and preparing the ice bath. It’s time to make nog! (feel free to cue up the Christmas music while you make it!)


    Adding sugar to the egg mixture for homemade eggnog.

    Egg nog contains eggs. And while we want to cook the eggs, we don’t want bits of eggs (think scrambled eggs) floating in our nog. So we are going to temper the eggs. To do this, whisk together the eggs, half the granulated sugar, and one cup of the milk. Set it aside near the stove.

    Ingredients for egg nog in measuring cup.

    And place your ladle and whisk near the bowl. (Or in my case, a four-cup measure.)

    Ingredients for homemade eggnog. Milk in saucepan.

    Bring milk and remaining sugar to a boil

    Tempering eggs for homemade eggnog.

    Slowly ladle one cup of the hot milk into the egg mixture. (This slowly raises the temperature of the eggs without cooking them.) Don’t add the hot milk too fast. you want to whisk the egg mixture as you add the hot milk.

    Pouring tempered egg mixture into pot of milk for homemade eggnog.

    Now, whisk the egg mixture into the hot milk in a slow and steady stream. You can see why I use my four-cup measure. It makes pouring the eggs into the milk easy.

    Cooking eggnog on the stove.

    Cook until the eggnog thickens. It needs to reach 185°F. The finished nog should coat the back of a spoon.

    Cooling a pot of eggnog in an ice-water bath.

    Immediately transfer the pot to the waiting ice bath. Whisk the eggnog to cool it quickly. You want the mixture to come down before 70°F.

    Once the eggnog cools, add the vanilla and nutmeg. Chill and serve the next day. And if you want to add a glug of something adult in your glass, go right ahead. It is the holiday season after all.

    Adding sugar to the egg mixture for homemade eggnog.
    5 from 2 votes
    Print

    Homemade Eggnog

    I like my eggnog with the traditional flavors of vanilla and nutmeg. However, if you like a spicier nog, egg some ground cinnamon and allspice to taste.
    Prep Time 10 minutes
    Cook Time 15 minutes
    Total Time 25 minutes
    Author GlutenFreeBaking.com

    Ingredients

    • Ice
    • Cold water
    • 6 large eggs (10 1/2 ounces; 300 grams)
    • 1 cup granulated sugar (reduce to 3/4 cup granulated sugar for a less sweet eggnog) (7 ounces; 198 grams)
    • 4 cups whole milk (32 ounces; 900 grams)
    • 1 teaspoon vanilla extract
    • 1/2 teaspoon ground nutmeg

    Instructions

    1. In a large bowl, combine ice and cold water. Bowl should be large enough to place your saucepan without having the ice and water slop over the sides and into your cooked eggnog.
    2. In small bowl, whisk together eggs, 1/2 the granulated sugar, and 1 cup of the milk. Combine remaining milk and sugar in a heavy-bottomed 4 quart pot.
    3. Bring milk to a boil over medium high heat. Reduce heat to low and slowly whisk one cup of hot milk into the egg mixture.
    4. In a slow and steady stream, whisk egg mixture into the hot milk. Increase heat to medium hight. Cook, whisking constantly, until mixture reaches 185 °F. Eggnog should thicken and coat the back of a wooden spoon.
    5. Immediately place pot into the ice bath and whisk until cool. Add vanilla and nutmeg. Transfer to a covered container and chill overnight. Serve with a little nutmeg sprinkled onto of the eggnog, if desired. Or with a splash of bourbon or your favorite adult spirit.
    6. *If some of your eggs cooks and your nog is a little lumpy, fear not! Simply strain the eggnog once it cools and serve.


    World’s Easiest Gluten-Free Granola

    Gluten-Free Granola in small canister.

    Gluten-Free Granola in small canister.

    For me, good granola doesn’t have a dominant flavor– it doesn’t holler, “oats!” or “raisins!” or “cinnamon.” Rather I like my granola flavors to work together. And this recipe does just that! One of my favorite things about the recipe (if I do say so) is the use of ground almonds instead of whole almonds. While there is no problem with almonds sprinkled here and there throughout granola, I wanted a more pronounced almond flavor. Ground almond flour does just this, bringing a subtle almond flavor to each bite of granola.

    To make this granola, you simply dump everything together in one large bowl, stir, and bake. You want to use two baking sheets for the granola. If you crowd the ingredients on one pan, the granola never gets nice and crisp.

    Gluten-Free Granola in small canister.
    Print

    Easy Gluten-Free Granola

    Be sure to use gluten-free oats when making this recipe. Not all oats are safe for people on a gluten-free diet.
    Prep Time 10 minutes
    Cook Time 25 minutes
    Total Time 35 minutes
    Servings 4 cups of granola
    Author GlutenFreeBaking.com

    Ingredients

    • 3 cups gluten-free oats (10 1/2 ounces; 297 grams)
    • 2/3 cup almond flour (2 2/3 ounces; 75 grams)
    • 1 teaspoon ground cinnamon
    • 1 teaspoon kosher salt
    • 1/3 cup vegetable oil (2 2/3 ounces; 75 grams)
    • 1/2 cup maple syrup (5 1/2 ounces; 156 grams)
    • 1/2 cup dark brown sugar (3 3/4 ounces; 106 grams)
    • 1 cup raisins, optional (about 5 1/4 ounces; 149 grams)

    Instructions

    1. Preheat oven to 300°F;. In large bowl, combine oats, almond flour, ground cinnamon, and kosher salt. Toss to combine. Add the oil. Stir with a wooden spoon to coat.
    2. In a small bowl, combine maple syrup and brown sugar. Pour over oat mixture. Stir to coat thoroughly.
    3. Divide granola evenly between two large baking sheets. Bake until golden brown, tossing every ten minutes on the baking sheet.
    4. Allow granola to cool. Transfer to a large bowl and stir in raisins.


    Easy Holiday Gluten-Free Butter Cookies

    Gluten-Free Holiday Butter Cookies with Sprinkles.

    Gluten-Free Holiday Butter Cookies with Sprinkles.

    These cute butter cookies take only minutes to make! The finished cookies come out of the oven already decorated with a sweet, buttery flavor.

    Here are some tips to make these easy cookies even easier!

    Mix the dry ingredients the night (or week!) before you plan on baking. Measure out the dry ingredients into a large plastic bag and label the bag. When you are ready to bake, simply add the wet ingredients.

    Use a cookie scoop. If you want all the cookies to bake at the same time, avoiding some that are burnt and some that are raw, use a cookie scoop to shape the dough. It’s also a nice timesaver!

    Freeze the dough. When you have a little extra time, make up a batch of dough. Scoop into balls, roll into sprinkles, and place in a freezer container. (Line the freezer container with parchment paper.) When you are ready to bake, preheat the oven as directed and bake. The cookies take a few extra minutes to bake.


    Gluten-Free Holiday Butter Cookies with Sprinkles.
    Print

    Easy Holiday Gluten-Free Butter Cookies

    I like soft sprinkles, often called JImmies, for these cookies. I find nonpareils too crunchy for these cookies.
    Prep Time 15 minutes
    Cook Time 12 minutes
    Total Time 27 minutes
    Servings 24 cookies
    Author GlutenFreeBaking.com

    Ingredients

    • 2 cups white rice flour (8 ounces; 226 grams)
    • 1/3 cup cornstarch (1 1/3 ounces; 38 grams)
    • 1/3 cup sweet rice flour (1 1/3 ounces; 38 grams)
    • 1 teaspoon baking powder
    • 1/2 teaspoon xanthan gum
    • 1/2 teaspoon salt
    • 1 3/4 cups granulated sugar (12 1/4 ounces; 348 grams)
    • 2 sticks butter, softened (If you are dairy-free, shortening works well in this recipe.) (1 cup; 8 ounces; 226 grams)
    • 2 teaspoons vanilla extract
    • 2 large eggs (about 3 1/2 ounces; 100 grams)
    • about 1/2 cup coarse or colored sanding sugar, sprinkles, or quins

    Instructions

    1. Preheat oven to 350 degrees F. Line baking sheets with parchment paper.
    2. Whisk together white rice flour, cornstarch, sweet rice flour, baking powder, xanthan gum,and salt. 

    3. Cream together sugar, butter, and vanilla in a large mixing bowl until a thick paste forms, about 1 minute. Add eggs, one at a time, and mix until well combined. Reduce speed to low and add the dry ingredients. Mix for 45 seconds.

    4. Chill dough for 15-20 minutes.
    5. Roll dough, about 2 tablespoons each, into a ball. Dip the top of the dough ball into the sanding sugar. (To make this step go faster, I use a cookie scoop.) Place coated dough ball onto prepared baking sheet. Be sure to space cookies about 2 inches apart. Flatten cookies very slightly with the palm of your hand.
    6. Bake cookies, about 12-15 minutes, or until lightly golden brown.
    7. Remove cookies from the oven and allow to cool for 3 minutes on the baking sheet. After 3 minutes, transfer cookies to a wire rack to cool. Store cookies in an airtight container.


    How to Make Easy Gluten-Free Garlic Bread

    Gluten-Free Garlic Bread on baking pan.

    Gluten-Free Garlic Bread on baking pan.

    Another culinary confession! You know Udi’s bread? (Of course you do!) Well, I’m not wild about their hot dog buns. They are too bready/dry/something for me. But then, THEN, I realized that they’d make fabulous garlic bread! And now, well, now I love em! (Just not for hot dogs!)

    Remember the warm, cheesy garlic bread that Italian restaurants serve before a meal? This recipe makes that style garlic bread. It isn’t fancy bread. And it doesn’t use fresh garlic. Did I lose you there? I hope not! Because here’s a secret: most inexpensive Italian restaurants–at least the “mom and pop” ones around here—don’t use fresh garlic either but even without fresh garlic, this bread is AMAZING.

    Here we go!

    Drizzling olive oil on gluten-free bread for garlic bread.

    Thaw as many Udi’s hot dog buns as you think you’ll need. (This recipe doesn’t really have a “recipe.”) Drizzle the face of each bun lightly with olive oil.
    Spreading butter on gluten-free bread for garlic bread.

    Spread on a generous amount of softened butter. Yes, both oil and butter. Trust me. Truuuuuuust me.

    Sprinkling garlic powder on gluten-free bread for garlic bread.
    Sprinkle on some garlic powder. Just be sure it’s garlic powder and not garlic salt. To make this easy, you can use the handle of a spoon to control the amount of garlic on each bun. And, really, you just want a sprinkle.


    Sprinkling cheese and herbs on gluten-free bread for garlic bread.

    Top with a generous amount of–wait for it–canned Parmesan cheese (Like the garlic powder, canned cheese is important if you want the bread to taste like “restaurant bread.”) Sprinkle on a little dried basil and you’re done!


    Gluten-Free Garlic Bread on baking pan.
    Bake in a preheated 425°F. oven until golden brown. If you want, cut into slices and enjoy!
    Antipasto platter with cheese, fresh tomatoes, olives, cucumbers, and stuffed peppers.
    You can serve garlic bread with just about anything. This time of the year, I serve it with antipasto. But it’s good with anything.

    Garlicky Yours,

    Elizabeth

    Drizzling olive oil on gluten-free bread for garlic bread.
    Print

    Easy Gluten-Free Garlic Bread

    This super easy garlic bread comes together in just a few minutes. Serve it alongside a salad or soup.
    Prep Time 10 minutes
    Cook Time 15 minutes
    Total Time 25 minutes
    Author GlutenFreeBaking.com

    Ingredients

    • Udi's gluten-free hot dog buns split
    • olive oil
    • butter
    • garlic powder
    • Parmesan cheese
    • dried basil

    Instructions

    1. Preheat oven to 425 degrees F.
    2. Drizzle a little (about one teaspoon) olive oil on each hot dog bun. Spread with a generous amount of butter, about 2 teaspoons. Sprinkle on a tiny bit of garlic powder and dried basil.
    3. Bake until golden brown and crispy.


    Cucumber Lemon Water

    Glass of lemon cucumber water.

    Glass of lemon cucumber water.

    For Christmas my aunt gave me a SodaStream. Do you own one? I thought they only made homemade soda. So when I opened the box I thought, “Wait. I don’t drink soda. I’ll never use this!” Of course I didn’t say that out loud.

    But, oh my, I was so wrong!  The soda stream quickly became my favorite thing EVER. I still don’t drink soda. But now I do drink lots of carbonated water. And that’s why she got it for me, for the water it makes.  I didn’t realize it at the time but she has a soda stream and LOVES it.

    The other day, I threw some lemons and cucumbers into a glass of homemade seltzer. I honestly exclaimed, “Wow. That’s refreshing!” I felt a little silly because 1. no one was home and 2. calling a drink “refreshing” seems like something one only says in commercials, not at home. Alone.

    I laughed at myself but I had to admit, the lemon-cucumber water was insanely refreshing.

    Now I know lemon-cucumber water has been around for years, but since we’re heading into the serious days (read: hot days!) of summer, I thought I’d remind you about this super refreshing drink. And if you’ve never had it, do yourself a favor and make a glass or a pitcher. It’s wonderful!

    Glass of lemon cucumber water.
    Print

    Cucumber Lemon Water

    Here it is, a recipe for water.
    Prep Time 1 minute
    Cook Time 1 minute
    Total Time 2 minutes
    Servings 1 glass
    Author GlutenFreeBaking.com

    Ingredients

    • ice cubes
    • 2-3 cucumber slices
    • 2 lemon slices
    • seltzer water

    Instructions

    1. Place the ice, cucumber, and lemon slices into a large glass. Pour water into glass. Drink and enjoy!


    How to Make Simple Syrup for Summer Drinks

    Pitcher of iced tea, bottle of simple syrup, lemon slices, and straws.

    Pitcher of iced tea, bottle of simple syrup, lemon slices, and straws.

    “One lump or two?”

    Ah, beverage sweetness. It’s personal, isn’t it? I like my iced tea with just a whisper of sweetness (unless I’m in the south and then pass the sweet tea!), my lemonade tart, and, I have to admit, my iced coffee fairly sweet. That’s what tastes good to me. My husband, however, likes lemonade sweet and iced coffee with no sugar at all. Instead of making separate batches of summer beverages, I make simple syrup. This easy-to-make sweetener allows us to personalize the sweetness level of our drinks.

    And the best part about simple syrup isn’t how easy it is to make (it requires only granulated sugar and water) but how you don’t have granulated sugar sitting at the bottom of your iced beverage. I hate that! A little–or a large–splash of simple syrup sweetens drinks without any grit!

    Here’s how to make it, ready?


    One cup of water. One cup of granulated sugar.

    To make simple syrup, combine equal parts water and granulated sugar. I usually make a batch with one cup of sugar and one cup of water. However, if you are having a party, just increase the batch!


    Water and sugar in pot for simple syrup.

    In a small pot, combine the sugar and water.


    Boiling water and sugar for simple syrup.

    Bring to a boil. This is important! We want the sugar to dissolve.


    Cooked simple syrup in pot.

    Once the syrup reaches a boil and all the sugar dissolves, shut off the heat. You don’t want to boil the syrup too long or it will get too thick.

    Store in a container in the refrigerator for up to two weeks. That’s it!

    You can flavor your syrup by adding vanilla or other extracts. Just add the flavor as the syrup cools. Stir and adjust the flavor as needed.

    Pitcher of iced tea, bottle of simple syrup, lemon slices, and straws.
    Print

    How to Make Simple Syrup for Summer Drinks

    Prep Time 5 minutes
    Cook Time 15 minutes
    Total Time 20 minutes
    Servings 1 1/2 cups
    Author GlutenFreeBaking.com

    Ingredients

    • 1 cup granulated sugar (7 ounces; 198 grams)
    • 1 cup water (8 ounces; 226 grams)

    Instructions

    1. In small pot, combine sugar and water. Heat, over medium-high heat, until syrup boils and sugar dissolves.
    2. Allow syrup to cool. Pour into container and store in the refrigerator for up to two weeks.


    • « Go to Previous Page
    • Page 1
    • Interim pages omitted …
    • Page 15
    • Page 16
    • Page 17
    • Page 18
    • Page 19
    • Page 20
    • Go to Next Page »

    Primary Sidebar

    Get Recipes Delivered to Your Inbox! (Free Weekly Newsletter!)


    Elizabeth Barbone

    I'm Elizabeth. Welcome to GlutenFreeBaking.com --- a judgment-free baking space. Here you'll find easy recipes, product reviews, and other good stuff that makes gluten-free living easy and a lot more fun!

    Read More About Elizabeth →

    • Facebook
    • Instagram
    • Pinterest

    Foods You Miss the Most

    • A stack of gluten-free pancakes topped with maple syrup and butter on a plate.
      The Best Gluten-Free Pancakes
    • Gluten-free chocolate chip cookies on a cooling rack.
      Gluten-Free Chocolate Chip Cookies
    • Loaf of Baked Gluten-Free Sandwich Bread on Red Cutting Board.
      How to Make the Best Gluten-Free Sandwich Bread: An Easy Recipe for Everyone!
    • Gluten-free flour tortillas on plate.
      How to Make the Best Gluten-Free Flour Tortillas

    Footer

    ↑ back to top

    Terms

    • Privacy Policy
    • Terms & Conditions
    • Disclaimer
    • Accessibility Statement

    Follow Us

    • Facebook
    • Instagram
    • Pinterest

    About

    • Contact
    • About

    Copyright © 2026 Gluten-Free Baking