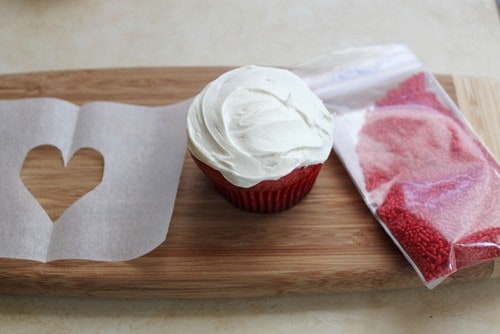
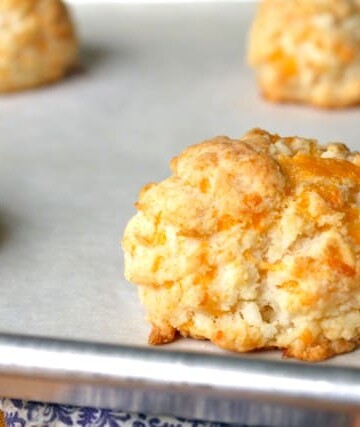
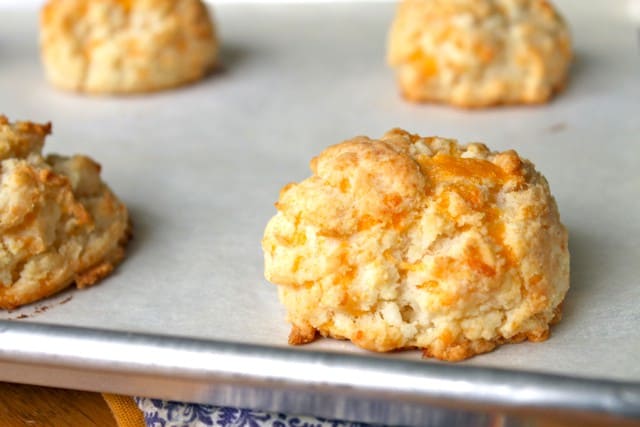
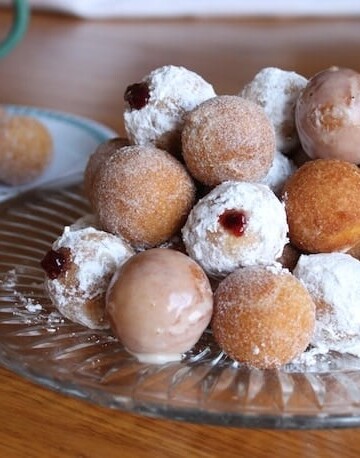
• Skip to primary navigation
  • Skip to main content
  • Skip to primary sidebar
Gluten-Free Baking logo
  • Home
  • Recipes
  • About
    • About Me
    • Contact
    • My Cookbooks
    • Work with Me
  • Nav Social Menu

    • Facebook
    • Instagram
menu icon
go to homepage
search icon
Homepage link
  • Home
  • About
  • Recipes
  • Contact
×
Home

Gluten-Free Doughnut Holes

Jul 23, 2015 · 6 Comments

Gluten-Free Doughnut Holes | GlutenFreeBaking.com


Gluten-free doughnut holes on plate.

As a kid, I knew one thing about Hanukkah: it included latkes and doughnuts and Christmas didn’t. This made me more than a little sad that my family didn’t celebrate the holiday. In my opinion, even the best Christmas cookie can’t compete with a latke or doughnut fresh from the fryer.

Thankfully my mom’s friend Judy provided all the laktes and doughnuts I could eat. This year I asked for her doughnut recipe—I didn’t want to spend another holiday season jelly doughnut-less.

The doughnuts Judy made were jelly doughnut bites. “They’re not doughnut holes because I don’t make the full-size doughnut!” Judy told me after I asked for her “doughnut hole” recipe. (When I mentioned that jelly doughnuts don’t actually have a hole, Judy laughed at me.) Thinking it might be a family tradition, I asked why she made doughnut “bites” and not full-size doughnuts. Did her mom make doughnut bites?

Her reply showed Judy’s no-nonsense nature: “Tradition? No! My mother made regular doughnuts. Bites are just easier. I got the idea from Dunkin Donuts’ Munchkins. They were new at the time and my kids loved ’em.”

After I worked with the recipe, I understood what she meant about bites being easier. The recipe makes a soft dough. Not so soft that it’s hard to fry but soft enough that rolling it out into large doughnuts might present a challenge. The size of the doughnuts isn’t the only place Judy sidestepped tradition. Her doughnut bites are cake doughnuts—yes, cake jelly doughnuts—instead of traditional yeast-raised doughnuts.

The resulting doughnuts, which include just a little nutmeg and lemon extract, are a delicately flavored and tight-crumb “home style” cake doughnut. (Actually, they are very similar to the Munchkins that inspired the recipe.)

Like Judy, you could squeeze a little jam into the finished doughnut holes. Or, if you aren’t in the mood for a jelly doughnut, dip them into a honey glaze or roll the doughnuts into granulated sugar and ground cinnamon. You could even leave them unadorned, even plain these doughnuts bites are a treat.

Gluten-free doughnut holes on plate.
5 from 1 vote
Print

Gluten-Free Doughnut Holes

You want to keep the doughnut holes small, about two teaspoons each. Any larger than this and the center of the doughnut might be raw while the outsides are cooked.
Prep Time 30 minutes
Cook Time 5 minutes
Total Time 35 minutes
Servings 24 doughnuts
Author GlutenFreeBaking.com

Ingredients

  • 2 1/2 cups white rice flour (10 ounces; 283 grams)
  • 3/4 cup granulated sugar (5 1/4 ounces; 148 grams)
  • 1/2 cup potato starch (2 ounces; 56 grams)
  • 1/3 cup tapioca starch (1 1/3 ounces; 38 grams)
  • 1 teaspoon baking soda
  • 1 teaspoon baking powder
  • 1 teaspoon salt
  • 1 teaspoon xanthan gum
  • 1/4 teaspoon ground nutmeg
  • 1 cup buttermilk (8 ounces; 226 grams)
  • 2 large eggs (about 3 1/2 ounces; 100 grams, out of shell)
  • 2 tablespoons butter, melted (1 ounce; 28 grams)
  • 1 teaspoon vanilla extract
  • 1/2 teaspoon lemon extract
  • Vegetable oil for deep frying

For Finishing

Jelly Doughnuts

  • 1 cup powdered sugar (4 ounces; 113 grams)
  • 1/2 cup jelly (raspberry, strawberry, or sour cherry are especially nice) (4 ounces; 113 grams)

Cinnamon Sugar

  • 1 cup granulated sugar (7 ounces; 198 grams)
  • 2 teaspoons ground cinnamon

Milk and Honey Glaze

  • 1 cup powdered sugar (4 ounces; 113 grams)
  • 2 tablespoons milk (1 ounce; 28 grams)
  • 2 teaspoons honey (1/2 ounce; 14 grams)

Instructions

  1. In bowl of stand mixer, combine white rice flour, potato starch, tapioca starch, baking soda, baking powder, salt, xanthan gum, and ground nutmeg. In small bowl, whisk together buttermilk, eggs, melted butter, vanilla extract, and lemon extract. Fit mixer with paddle attachment. Mix dough until smooth, about 45 seconds. Cover dough with plastic wrap to prevent a skin from forming and allow to rest for 15 minutes.
  2. Heat oil to 375°F. Pinch off large, about two teaspoons, pieces of dough. Roll dough into a ball and slip into hot oil. Depending on the size of your fryer, you can fry a few at a time. Don't crowd the fryer or the oil temperature will drop, giving you greasy doughnuts. Fry until golden brown, about three minutes.
  3. Using a metal slotted spoon, remove doughnuts from oil an place on a paper towel lined plate. Repeat with remaining dough.
  4. For Jelly Doughnuts Place powdered sugar into a small bowl. Roll doughnuts to coat. Fit a pastry bag with a bismarck tip and fill with jam. Insert tip about halfway into doughnut and squeeze a little jam into doughnut.
  5. For Cinnamon-Sugar Doughnuts Combine granulated sugar and ground cinnamon in small bowl. Roll doughnuts into mixture to coat. If desired, fill with jam.
  6. For Milk and Honey Glaze In small bowl, combine powdered sugar, milk, and honey. Stir until smooth. Dip doughnuts into glaze.


How to Make Gluten-Free Apple Fritter Bites

Jul 23, 2015 · 4 Comments

Gluten-Free Apple Fritters on a blue plate.

Gluten-Free Apple Fritters on a blue plate.

The last apple fritter I ate before going gluten-free was an abomination. I bought it at a cute bakery. It looked a little smoother than a traditional apple fritter but I didn’t think much about it one way or the other. Then I bit into the fritter and—What the hell?—apple pie filling burst into my mouth.

Apple fritters should not be jelly doughnuts in which the jam is merely replaced with an apple filling. No, an apple fritter is a nubby affair with crisp bits of chopped apples scattered throughout and just the slightest hint of confectioner’s glaze.

For years, I’ve meant to make a gluten-free apple fritter. The only thing standing in my way? My own laziness. Apple fritters sounded like a lot of work and I just didn’t feel like futzing with them.

This year, I set my laziness aside (not an easy task) and heated up a pot of oil. The results were meh—the fritters tasted like apple doughnuts and not fritters. I texted a professional baker-friend and asked what I was doing wrong.

Here’s our exchange: (shared with permission)

Me: My apple fritters taste like doughnuts. Blerg.

Steve: ?

Me: I want to make commercial-like apple fritters and I’m getting apple-studded flat doughnuts.

Steve: How are you leavening?

Me: Baking powder.

Steve: Use yeasted dough. Laminate the filling into the dough. Roll and cut into small pieces, then press together. We use leftover dough.

Me: MIND BLOWN.

Steve: Don’t use pie filling. That’s crap. Fresh apples. Sautéed. Apple cider and thicken. Done. You’re welcome.

Me: Thank you!!!

It’s funny. Even though the recipe now sounded 100x more complicated than I originally anticipated, I suddenly really wanted to make the fritters.

I did a little more digging and found some videos backed up exactly what Steve had described. But I knew the dough needed elasticity and I didn’t want to rely solely on xanthan gum for it. So I grabbed a box of Chebe mix (it’s made with tapioca starch and modified manioc flour) and added it to my flour blend. A small amount of modified starch mimics a glutenous dough pretty well. I’m just bummed that it’s almost impossible for consumers to buy modified starch. To get it, you need to use a plain mix, like Chebe.

The dough rose nicely and rolled out nicely, but I ran into problems as I tried to cut the dough into small pieces and then work it back together. Without those lovely strands of gluten, the dough sort of smushed back together. The little squares of dough were lost. And the dough was incredibly hard to work with. It kept sticking to everything. Yet I kept moving forward, lying to myself that this would work.

It didn’t.

The fritters burnt on the edges and were raw in the center. All the work of cutting the dough into pieces was lost too. The finished fritters were just like doughnuts with apple bits here and there.

Frustrated, I almost threw the remaining dough in the garbage. Then I looked at it, grabbed two spoons, and pulled off a little dough from one of the sloppily formed raw fritters. Perhaps size was my problem here. I made some new fritters, this time smaller, more like hush puppy size.

I let one cool, always a challenge with a hot-from-the-fryer doughnut before trying. It tasted good. Like a wheat-based fritter, it wasn’t too sweet and contained bite-sized pieces of apples.

A few days later, I tried the fritters again. I skipped the messy process of laminating the apples into to the dough. Instead, I let the dough rise, punched it down, and then stirred cooked apples in. After another rise, I simply dropped small pieces of the dough into a hot fryer. Perfect.

I won’t lie. Homemade apple fritters are a little time-consuming to make. However, the steps are just that—time-consuming, but not hard. For this recipe, you need Chebe mix. You also need time. The dough takes several hours to rise and the filling is a two-step affair that requires time for cooling.

But, in the end, the fritters are totally worth it.

As I sat eating a fritter, I noticed that the yeast-raised dough tasted really great. Now I’m pondering what I can make with it beyond these fritters. Glazed doughnut holes, perhaps?

Gluten-Free Apple Fritters on a blue plate.
5 from 1 vote
Print

How to Make Gluten-Free Apple Fritter Bites

Be sure to use original Chebe mix, not the pizza mix or cinnamon roll mix.
Prep Time 2 hours
Cook Time 3 minutes
Total Time 2 hours 3 minutes
Servings 24 small doughnuts
Author GlutenFreeBaking.com

Ingredients

For the Fritters

  • 1 (7.5 ounce) pacakge Chebe original cheese bread mix (see note above)
  • 1 1/2 cups finely ground white rice flour (6 ounces; 170 grams)
  • 1/2 cup sweet rice flour (2 ounces; 56 grams)
  • 1/4 cup granulated sugar plus 1 teaspoon, divided (1 3/4 ounces; 50 grams)
  • 1 teaspoon ground cinnamon
  • 1/2 teaspoon xanthan gum
  • 1/2 teaspoon salt
  • 1/4 cup water, warm (2 ounces; 56 grams)
  • 1 (1/4 ounce) packet active dry yeast (2 1/4 teaspoons; 7 grams)
  • 1 cup milk, warm (8 ounces; 226 grams)
  • 1 large egg (1 3/4 ounces; 50 grams, out of shell)
  • 2 tablespoons butter, melted and cooled (1 ounce; 28 grams)
  • 1/2 teaspoon vanilla extract
  • Oil or nonstick cooking spray for greasing the bowl
  • 2 tablespoons butter
  • 4 tablespoons dark brown sugar

For the Apples

  • 3 large cooking apples, peeled, cored, and diced (Granny Smith work best) (about 3 1/2 cups)
  • 1/2 cup apple cider (4 ounces; 113 grams)
  • 2 1/2 teaspoons corn starch
  • about 2 cups vegetable oil, for frying

For the Glaze

  • 2 cups confectioner's sugar (8 ounces; 226 grams)
  • 4 tablespoons half-and-half (2 ounces; 56 grams)
  • 1 teaspoon vanilla extract

Instructions

  1. For the Dough: In large bowl, whisk together Chebe mix, white rice flour, sweet rice flour, 1/4 cup granulated sugar, cinnamon, xanthan gum, and salt. Set aside.
  2. In small bowl, whisk together warm water and 1 teaspoon sugar until sugar dissolves. Add yeast. Whisk until yeast dissolves. Set aside until doubled in size, about five minutes. (If yeast doesn't bubble and double in size, it means the yeast is dead. Discard it and start with a new packet of yeast.)
  3. Add warm milk, egg, melted butter, and vanilla extract to the yeast mixture. Pour milk-yeast mixture over the whisked dry ingredients. Stir, using a wooden spoon, until a stiff dough ball forms. Generously flour your countertop and turn sticky dough out onto counter. Dust dough with white rice flour and knead dough until smooth, about one minute. Lightly oil a medium bowl. Place dough in oiled bowl. Cover with plastic wrap and allow dough to double in size, about 2 hours.
  4. For the Apples: In large cast iron or stainless steel skillet, combine butter and dark brown sugar. Melt butter and sugar over medium heat, stirring occasionally. Add apples and stir to combine. Cook until apples darken slightly and just begin to soften. In a small bowl, whisk together cider and cornstarch. Pour cider over the apples. Stir. Bring to a boil and cook until thick, about 3 minutes. Transfer apples to a bowl and allow to cool.
  5. When dough doubles in size, punch down or stir with a rice floured wooden spoon. Stir in cooled apple mixture. Cover and allow to rise until dough almost doubles in size, about 1 hour.
  6. To Fry: Line a rimmed baking sheet with paper towels. Heat oil, about two cups,  in a 12-inch cast iron skillet, Dutch oven, or wok to 350°F.  (Fill skillet about 1/2 wayAdjust flame during cooking to maintain temperature. Using two spoons, carefully drop balls of dough about 2 tablespoons each into the oil. Cook until edges turn golden brown. Turn and repeat. Using a wire skimmer, remove fritters from hot oil. Place on prepared baking sheet. Repeat until all the dough is fried.

  7. Prepare the glaze: whisk together confectioner's sugar, half and half, and vanilla extract. Line a rimmed baking sheet with parchment paper. Place a wire rack over the baking sheet. One by one, dip the fritters into the glaze. Shake excess glaze off and place fritters on wire rack.
  8. Fritters are best served the day they are made but may be held overnight. Store leftover fritters on a plate and cover with plastic wrap.


Gluten-Free Cheerios: Yay? Or Cautious Optimism is okay.

Jul 23, 2015 · 1 Comment

Gluten-Free Cheerios | GlutenFreeBaking.com

Box of Cheerios.

Yesterday General Mills announced that Cheerios cereal would carry a gluten-free label later this year. (you can read more about that here.)

This news spread pretty fast in the gluten-free community. On my own Facebook pages—both personal and public— folks were pretty excited. Then something happened.

People began to question the oats that General Mills would use in the cereal.

That’s a good thing to do. I’m curious and cautious about it too.

What I don’t support is what happened soon after. Many people who questioned the gluten-free status of the oats began telling folks who were excited about the cereal that they shouldn’t “fall for it.” People were accused of being foolish, not understanding the complexities of the diet, and not caring about gluten-free safety.

Urgh.

Here’s my two cents: you can be both excited and cautious. Feeling excitement doesn’t make you a fool.

I think it’s great when new gluten-free foods are available—especially if it’s something that you’ve missed. It’s also great to question things to ensure they are safe. It’s not okay or nice or cool to get nasty about someone’s excitement.

For all you know Cheerios holds a special place in someone’s heart because a beloved grandfather gave them the cereal and now he’s gone and they want to enjoy it again.

Or, you know, they just like the taste

All are valid.

So if you’re excited about the idea of gluten-free Cheerios. Yay!

And if you are worried about it, I understand that.

But, for the love of all that’s gluten-free, could we not squabble over excitement vs. safety?

Read more information about Cheerios from the Gluten-Free Watch Dog here.

Love ya!


The Only Recipe for Pizza Sauce You’ll Ever Need!

Jul 23, 2015 · Leave a Comment

Pizza sauce cooking in pot.

Pizza sauce cooking in pot.

A good pizza is only as good as the sauce that tops it. Today let’s make an easy tomato-based pizza sauce.

Chopped onion and minced garlic on a cutting board.

Chop an onion and a few cloves of garlic. Increase or decrease the amount of onions and garlic depending on how oniony and garlicy you like your sauce.

Heat olive oil in a pot over medium-high heat. Add the onions. You want the onions to sizzle when they hit the oil.

Chopped onions cooking in pot.
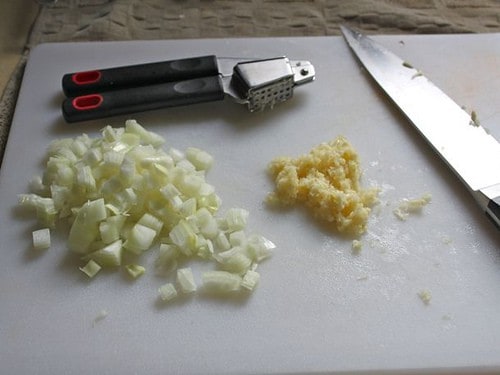
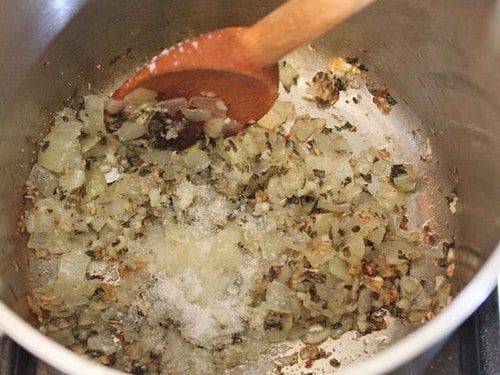
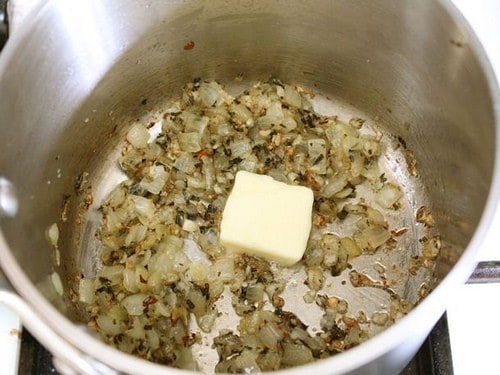
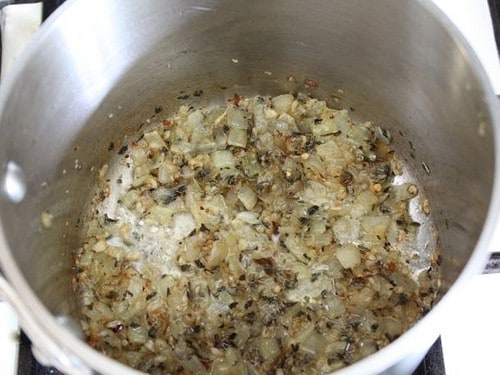
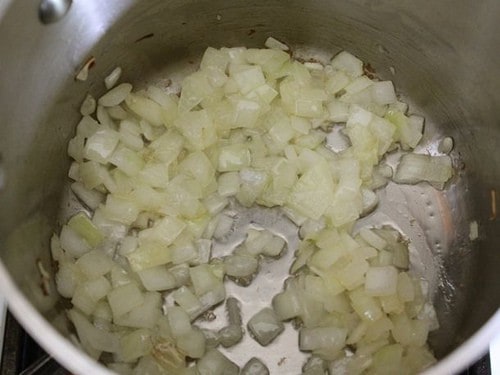
Cook until they soften. You don’t want the onions to turn brown. Soft and light are what you want at this stage. Be sure to stir frequently as the onions cook.

Chopped onions and minced garlic cooking in pot.
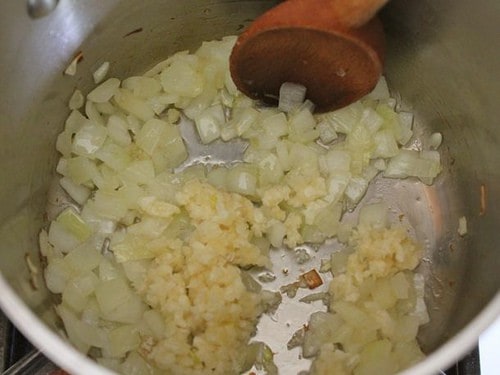
Add the garlic. Stir it all together. Since garlic takes less time to cook than onions, it would burn if we started it along with the onions. Staggering the cooking prevents the garlic from burning. And since burnt garlic tastes awful taking the time to do this is well worth it.

Stirring cooked onion in a pot.

Cook until the garlic just begins to turn brown. The onions are soft and almost yellow-brown at this point.

Cooked onions, garlic, and herbs cooking in a pot.
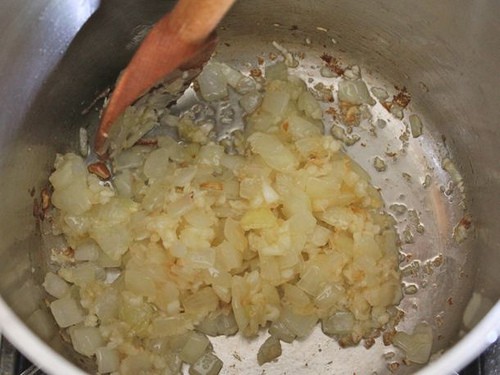
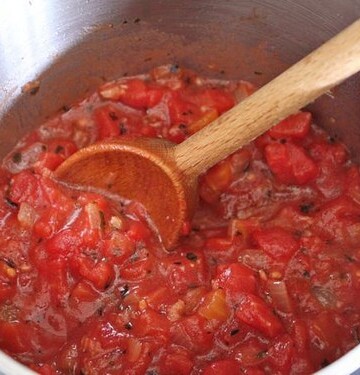
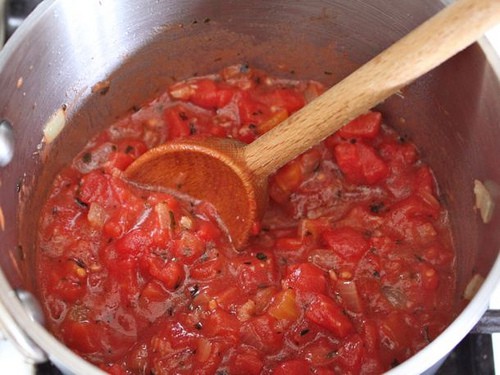
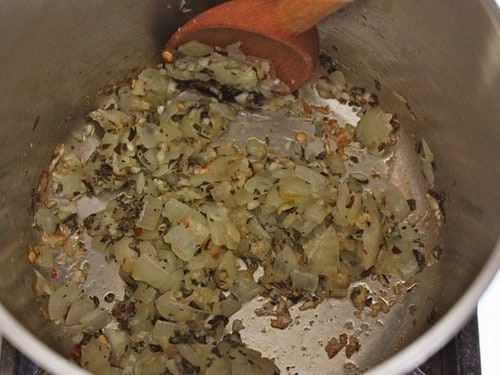
Add the basil, oregano, and hot red pepper flakes. Stir. You can always adjust the spices later, adding fresh herbs right before serving your sauce, if you wish.

Cooked onions, garlic, and herbs in a pot. Salt and sugar added.

Now add the salt and–dare I say it–sugar. Yes, sugar! You only use a little and, I promise, it adds a nice “roundness” to the sauce without making it sweet. (I don’t like sweet sauce either.)

Pat of butter added to cooked onions, garlic, and herbs in a pot.

Now add butter. Oh, yes! This recipe contains butter. It’s an odd ingredient in tomato sauce, I know. But the richness of the butter adds a little something that’s really nice. If you aren’t dairy-allergic, I encourage you to add the butter. If you’re dairy-free, just skip it.

Cooked onions, garlic, herbs, and melted butter in a small pot.

Cook until butter melts. Stir frequently. The onions, garlic, and spices cooking together produce my favorite scent in the world. No matter how many times I make this, I am still smitten by the aroma. (Can you get smitten by an aroma? Let’s say yes!)


Pizza sauce with chunky tomatoes in a pot.

For this recipe, I wanted a quick, chunky pizza sauce. One small can (14.5 ounces) of petite diced tomatoes were perfect for the job. If you don’t need a pizza sauce, you could add tomato puree or tomato sauce or fresh tomatoes. The base works with any tomatoes. It’s that good. I also added two tablespoons of tomato paste to thicken the sauce a bit.

That’s it!

Pizza sauce cooking in pot.
Print

The Only Recipe for Pizza Sauce You'll Ever Need!

This easy recipe makes a fabulous pizza sauce.
Prep Time 20 minutes
Cook Time 5 minutes
Total Time 25 minutes
Servings 2 cups
Author GlutenFreeBaking.com

Ingredients

  • 1 tablespoon olive oil
  • 1 small onion diced
  • 3 cloves garlic minced or put through a garlic press
  • 1 teaspoon dried basil
  • 1/2 teaspoon dried oregano
  • 1/8 teaspoon red pepper flakes
  • 1/2 teaspoon kosher salt
  • 1/4 teaspoon granulated sugar
  • 2 teaspoons butter increase to one tablespoon if you feel like it.
  • 1 14.5 ounce can petite diced tomatoes OR 15 ounce crushed tomatoes OR s OR 2 cups approx fresh tomatoes, chopped
  • 2 tablespoons tomato paste increase to three tablespoons for a thicker sauce.

Instructions

  1. In a small pot, heat olive oil over medium high heat until shimmering. Add onions. Cook until soft. Stir frequently while cooking. Add the garlic. Stir. Cook until soft and aromatic. Add basil, oregano, red pepper flakes. Stir to combine. Add salt and sugar. Stir. Cook for two minutes. Add butter. Cook, stirring constantly, until butter melts.
  2. Reduce heat to medium-low. Add tomatoes. Cook as desired. You could cook the sauce for just a minute to warm or you could cook for an hour for a rich, thick sauce.


How to Make Gluten-Free Pizza Crust in 20 Minutes

Jul 23, 2015 · 10 Comments

Gluten-free pepperoni pizza in a pan.

Gluten-free pepperoni pizza in a pan.


During the ten years I’ve taught gluten-free baking classes, two questions are asked more than any others: “How do I make bread?” and “How do I make pizza?” Bread and pizza. My favorites.

You want a great, easy pizza crust, right? Here’s what to do: start with a Chebe bread* mix. My students have never gasped but, I can tell, they’ve come close. They know that I bake from scratch. This recipe is the exception to that rule.

*Chebe also sells pizza mix. Be sure to select their bread mix. 

Why a mix? Because of the modified tapioca starch it contains, Chebe makes an excellent pizza crust with the “chew” that’s so often missing from gluten-free baked goods. Since buying modified tapioca starch is a pain, I use the Chebe mix.

I’m not a food scientist. So, honestly, I don’t fully understand the process of making modified tapioca starch. My research proved somewhat futile, likely because modifying tapioca starch is a proprietary process. All I’ve been able to glean is that when an inorganic material is added to the starch, the characteristics of the starch change. In the case of tapioca starch, we are left with a super-stretchy starch.

How stretchy? Gluten-like stretchy.

You could almost toss this dough over your head like they do at pizzerias. Prepared as the package directs, I find Chebe unpleasantly chewy. Slightly doctored, however, it makes a great pizza.

Add white or brown rice flour, baking powder, and salt to the mix. That’s right—baking powder. Telling pizza-savvy SE’rs that this crust can be made without yeast makes me a little nervous. But it’s the truth: this crust is excellent without yeast. Since restaurants serving safe gluten-free pizza are still hard to find, it’s great being able to make this last-minute crust without having to allow it to rise.

If the thought of a yeast-free pizza is anathema to you, no problem! Replace the baking powder with one packet of active dry yeast. When leavened with yeast, the dough needs to go through about an hour of bulk fermentation (rising in the bowl) and about 45 minutes of pan rise. The baking powder dough? Just mix it up, place it into the pan and bake.

Speaking of baking, no matter which version you use, yeast or baking powder, bake the crust before you top it. Topping the raw dough and then baking makes for one really soggy pizza. I like all types of pizza, but soggy crust pizza isn’t one of them.

Let’s make a pizza!

Gluten-free pizza dough being mixed in a bowl.

After adding the wet ingredients to the flour and Chebe mix, the dough looks chunky. Turn the dough onto your counter and begin kneading.

Kneading gluten-free pizza dough on a counter.

At first the dough isn’t smooth. As you knead it, it becomes smooth and elastic.


Gluten-free pizza dough ball on a counter.

The finished dough looks like this. Pretty, isn’t it?

Gluten-free pizza dough being lifted off of counter.

Roll out the dough and lift it into the pan.

Bake the crust until golden brown.

Gluten-free pepperoni pizza in pan.

Top the dough, and return pizza to the oven. Bake until cheese is golden brown and bubbling.


Gluten-free pepperoni pizza in a pan.
Print

Easy Gluten-Free Pizza Crust

Remember to use Chebe bread mix, not Chebe's pizza crust mix for this recipe.
Prep Time 20 minutes
Cook Time 1 hour
Total Time 1 hour 20 minutes
Servings 1 large pizza
Author GlutenFreeBaking.com

Ingredients

New York Style

  • 1 (7.5 ounce) package Chebe Original Bread Mix (not Pizza Mix)
  • 1 cup white rice flour (4 ounces; 113 grams)
  • 2 teaspoons baking powder
  • 1 teaspoon salt
  • 3/4 cup water plus additional as needed (6 ounces; 170 grams)
  • 2 large eggs (about 3 1/2 ounces; 100 grams, out of shell)
  • 2 tablespoons olive oil (about 1 ounce; 24 grams)

Instructions

  1. Preheat oven to 425°F.
  2. In large bowl, whisk together Chebe mix, white rice flour, baking powder, and salt. In small bowl, whisk together water, eggs, and olive oil.
  3. Pour water mixture over dry ingredients. Stir with a wooden spoon to combine. Dough should almost form a ball. If dough is dry, add one or two more tablespoons of water.
  4. Lightly white rice flour your counter. Turn dough out onto counter. Knead dough until elastic and pliable, about one minute.
  5. Round dough into a ball. Grease 18”x13” baking pan. Again, white rice flour your counter. Roll dough out into large rectangle. I usually roll it out about 15”x13”. In a quick movement, transfer dough to baking pan. Using you hands, press dough evenly into pan. Dough will be thin but will cover the entire pan.

  6. Bake until lightly golden brown, about 18 minutes.
  7. Remove pan from oven. Top as desired. Return pizza to oven and bake until toppings are hot. Time varies depending on topping.
  8. Remove pizza from oven. Allow to cool for five minutes. Cut into squares and enjoy.


The Best Gluten-Free Funnel Cakes

Jul 23, 2015 · 11 Comments

Gluten-free funnel cake dusted with powdered sugar on paper towel.

Gluten-free funnel cake dusted with powdered sugar on paper towel.

Who knew a funnel cake could make a person nervous? It’s not that I have a frying phobia, but I wondered how drizzling gluten-free batter into hot oil would work. Without gluten holding things together, would the cakes fry up into the classic lacy funnel cake shape? Or would I end up with solid disks of fried batter? Turns out, they work really well gluten-free. They key is to get the batter right.

Similar to a pancake batter, funnel cake batter needs to flow easily from a funnel. My first few attempts were far too thick. The batter plopped, rather than flowed. After thinning the batter, it drizzled easily into the hot oil. This is key to create the ribbons of fried batter that make up a funnel cake. It’s also what makes creating one a bit tricky.

With the batter running freely from the funnel, my first few cakes were funnel duds. Instead of cute, circular cakes, these were misshapen dough blobs. Funnel amoeba, if you will. Even after practice, I found making funnel cakes with a funnel to be a bit unwieldy. Don’t get me wrong, it works. But I wanted to play around with other tools to see if there was an easier way to make these treats.

Before attempting a funnel-less funnel cake, I swapped my large funnel for a small one. This helped a lot! The smaller funnel opening, about 3/8-inch, gave me more control over the batter as it ran into the pot. With more control, I created funnel cakes that were actually circular!

Since a small opening seemed key to a successful funnel cake, I wondered how a pastry bag would work. I popped a number eight (small) tip into a bag and heated up my oil. It worked well. However, when I handed the bag to a friend, who’d never used a pastry bag before or made a funnel cake, she found the bag troublesome to control, even after several attempts.

But the batter almost escaped from the top of her bag… Enter the squeeze bottle!

Most of my squeeze bottles have very small tip openings. One or two have a more generous opening, about 3/16-inch—an opening that’s still smaller than a funnel. I grabbed one, filled it with batter, and made a funnel cake. It was perfect. I handed it to my friend. She, too, made a perfect funnel cake! The squeeze bottles offered the control of a pastry bag while being much easier to handle—and refill.

Squeeze bottles turned out to be my favorite tool to make funnel cakes, yet all three tools did work to create funnel cakes. No matter which tool you use, keep these three things in mind:

  1. Heat your oil to 375°F. Hotter oil fries the funnel cakes too quickly–the center is done before the edges. Cooler oil creates greasy funnel cakes.
  2. Swirl. As soon as the batter hits the oil, begin swirling it in tight circles to make one cake. I found starting from the inside and going out was the best method.
  3. Know when to stop. Big funnel cakes might be popular at the fair but at home, smaller is better. Keep your cakes about four to five inches across.
Gluten-free funnel cake dusted with powdered sugar on paper towel.
5 from 7 votes
Print

The Best Gluten-Free Funnel Cakes

Crunchy and light, these are the perfect funnel cake.
Prep Time 20 minutes
Cook Time 4 minutes
Total Time 24 minutes
Servings 12 funnel cakes
Author GlutenFreeBaking.com

Ingredients

  • 1 cup finely ground white rice flour* (4 ounces; 113 grams)
  • ½ cup cornstarch or tapioca starch* (2 ounces; 56 grams)
  • ¼ cup sweet rice flour* (1 ounce; 28 grams)
  • 2 tablespoons granulated sugar (1 ounce; 28 grams)
  • 1 teaspoon baking powder
  • ½ teaspoon salt
  • ¼ teaspoon xanthan gum*
  • 1 cup milk (8 ounces; 226 grams)
  • 2 large eggs (3 1/2 ounces; 100 grams)
  • 1 teaspoon vanilla extract
  • Vegetable oil for frying about one quart
  • Powdered sugar for dusting

Instructions

  1. In medium mixing bowl, whisk together white rice flour, sweet rice flour, cornstarch, granulated sugar, baking powder, salt, and xanthan gum. Add milk, eggs, and vanilla extract. Allow to stand for ten minutes. (Begin preheating oil while batter rests.)
  2. In either a deep fryer or deep, heavy pot with four-inch sides, heat oil to 375°F i. Pour batter into either funnel, pastry bag fitted with a #4 tip or plastic squeeze bottle with a large opening. Don't overfill. Cover funnel opening and place over deep fryer. Allow the batter to flow into the fryer. Starting in the center of the oil, swirl the batter to make a four-inch disk. Fry disk for about two minutes. Carefully turn and fry until golden brown.
  3. Remove funnel cakes and place on paper towels to drain. Sprinkle with powdered sugar and serve warm.

Recipe Notes

*Using All-Purpose Gluten-Free Flour

This recipe was tested with individual flours. If you want to try the recipe with a gluten-free flour blend, omit the rice flour, cornstarch, sweet rice flour, and xanthan gum. Replace it with 1 3/4 cups of your favorite gluten-free flour blend. 

If your gluten-free flour blend doesn't include xanthan gum, don't leave it out. Use the amount called for in the recipe.


How to Make Gluten-Free Panettone

Jul 23, 2015 · 18 Comments

Gluten-Free Panettone slice.

Gluten-Free Panettone slice.

To me, Christmas morning smells like burnt panettone. After spending Christmas Eve cooking a huge meal, my mom did not make Christmas breakfast. Instead she burned panettone. And I loved it.

I’m sure she didn’t mean to burn the panettone. But the Italian holiday fruit bread never seemed to make it out of the toaster without singeing—sometimes a little, sometimes a lot. Looking back, I can see that paper-thin slices of a sweetened, rich bread never stood a chance in our toaster. And now, it’s hard to find a gluten-free way to recreate that taste memory.

Unless, of course, I made my own gluten-free panettone. With a little patience (this bread takes about 16 hours from start to finish), a sturdy mixer, and a few gluten-free flours, homemade gluten-free panettone is fairly easy.

If you’ve never made gluten-free bread before, you might want to check out my recipe for sandwich bread for a few tips on gluten-free bread baking.

Getting Ready

Traditional panettone uses a biga—a pre-ferment made from a mixture of flour, yeast and water that ferments overnight—to achieve a high rise and a nice deep flavor. This is good news for gluten-free baking—thanks to the lack of gluten and the amount of fat and sugar in the dough, this loaf needs all the help rising it can get. (By the way, the biga doesn’t work alone. The finished loaf contains a generous amount of active dry yeast and a little baking powder to aid its rise.)

To get the full benefit of the biga, mix it about twelve to fifteen hours before you plan on baking. Just stir the ingredients together and let the yeast do its thing while you sleep. You might find the consistency of the biga a little startling. This gluten-free biga is wet, thick, and sticky. It looks a bit like marshmallow fluff.

After mixing your biga, combine the dried fruits with lemon and vanilla extract. Macerating the fruits overnight infuses them with flavor. Since many people dislike the classic panettone fruits of citron and candied lemon and orange peel, I’ve include a list of alternative dried fruit options for the recipe. No matter which fruits you choose, all benefit from an overnight soak.

Mixing the Dough

To prepare the dough, you’ll first mix the wet and dry ingredients together until a dough forms. Like most gluten-free bread dough, this dough does not form a firm ball. Instead it’s a really thick, wet dough, almost a cross between a dough and a batter. To chug through the dough, you’ll want to use a stand mixer fitted with a paddle attachment.

After the dough forms, add the butter. Be sure to use very soft butter for this step. Anything harder leaves clumps of butter throughout the dough. To test the butter’s softness, stick your finger (or a fork) into it. If your finger sinks easily into the butter, it’s the right consistency.

The dried fruits go in last. Reduce the mixer speed to low and add the fruits, mixing until the fruits are just incorporated.

Rising and Punching

The panettone goes through two rises. For the first rise, just cover your bowl with a piece of greased plastic wrap and allow the dough to rise for about two hours. In approximately two hours, the dough should double in size. Once it doubles it needs to be punched down.

Since this dough is so sticky, you don’t want to punch it with your bare hands or you’ll end up with dough all over yourself. Instead, stir it gently with a greased wooden spoon or rubber spatula until it is almost fully deflated, or use the piece of greased plastic wrap that covers the bowl to help punch down the dough. I prefer the second option. Simply remove the plastic wrap from the bowl and place it loosely over the dough. Deflate the dough by using your knuckles. The plastic wrap barrier between your hand and the dough prevents the dough from sticking to you.

No matter how you do it, deflate the dough about 75% and then spoon it into a prepared pan.

Shaping: A Pan or a Paper?

Tradition dictates that you bake panettone in paper. While pretty, paper doesn’t make the best vessel for baking gluten-free bread. Each time I made this recipe in paper, I ended up with raw spots in the center of the loaf. Gross!

Baking panettone in a tube or Bundt pan can help to prevent raw spots. The rod in the center of the pan gets hot during baking and thoroughly bakes the center of the loaf. Of course, it doesn’t look quite like a traditional panettone, but I’d rather have a funny-looking panettone over a raw one.

Baking

This loaf takes about one hour to bake. The finished loaf should be between 207-211°F. (Take the temperature in the center of the loaf, not near the sides.) When the bread reaches the correct temperature, remove it from the pan and place on a wire rack to cool.


Serving and Storing

I love this bread served as is or toasted. To avoid burning panettone like my mom did so many times, slice the pieces at least 1/2-inch thick. And be sure to keep your eye on the bread as it toasts.

Wrapped, this bread keeps for about three days on the counter. If you don’t plan on eating the entire loaf in three days, wait until the panettone cools, slice it, and freeze.

Ready to Bake? Here’s the Step-by-Step

Gluten-free panettone dough on stand mixer attachment.

The dry ingredients are mixed with the wet ingredients and the biga. At first the dough is thick.

Butter on spatula for gluten-free panettone.

Softened butter goes in a little at a time. You want your butter soft, not cold.

Mixing gluten-free panettone dough.

After you add all the butter, the dough looks very soft. This is totally normal. 

Gluten-free panettone dough after being mixed.

After the fruit is added, transfer the dough to a large greased bowl. Why large?

Gluten-free panettone dough risen in green bowl.

The dough doubles in size! Hence the need for a big bowl.

Punching gluten-free panettone dough.

Have a bit of pent-up holiday anger? Take it out on the dough! It needs to be “punched” down before the second rise. Don’t have holiday anger? Punch it anyway!

Gluten-free Panettone in tube pan.

Once you’ve punched the dough, transfer it to a well greased bundt pan.

Gluten-Free Panettone rising in pan.

The dough rises again. This rise takes about one hour. And then…

Gluten-Free Panettone in pan.

You bake it! Isn’t it pretty?

Gluten-Free Panettone slice.

Slice it up. Pour yourself a cup of coffee and call it day!

Gluten-free panettone dough on stand mixer attachment.
5 from 2 votes
Print

How to Make Gluten-Free Panettone

A holiday classic made gluten-free. This panettone is studded with dried fruit. However, if you don't like raisins and other dried fruits, you can use chocolate chips!
Prep Time 16 hours
Cook Time 1 hour
Total Time 17 hours
Author GlutenFreeBaking.com

Ingredients

For the Biga

  • 3/4 cup water (6 ounces; 170 grams)
  • 1 teaspoon active dry yeast
  • 1 1/2 cups finely ground white rice flour (6 ounces; 170 grams)
  • 1/2 teaspoon xanthan gum

For the Fruit

  • 1 cup raisins (about 4 ounces; 113 grams)
  • 1/3 cup candied orange peel (about 1 1/2 ounces; 42 grams)
  • Zest of one lemon
  • 1 tablespoon freshly squezed lemon juice (1/2 ounce; 14 grams)
  • 2 teaspoons vanilla extract
  • 1 1/2 teaspoons lemon extract

For the Dough

  • 2 1/3 cups brown rice flour (11 1/2 ounces; 326 grams)
  • 3/4 cup sorghum flour (3 3/4 ounces; 106 grams)
  • 1/2 cup potato starch (2 ounces; 56 grams)
  • 1/2 cup granulated sugar (3 1/2 ounces; 100 grams)
  • 1 1/2 teaspoons xanthan gum
  • 1 teaspoon baking powder
  • 1 teaspoon salt
  • 1 cup milk (whole or 2%), warmed to about 100°F. (8 ounces; 226 grams)
  • 2 (1/4 ounce) packets active dry yeast
  • 3 egg yolks (about 1 1/4 ounces; 33 grams)
  • 2 large eggs (about 3 1/2 ounces; 100 grams, out of shell)
  • 2 tablespoons vegetable oil (3/4 ounce; 24 grams)
  • 2 tablespoons corn syrup or honey (1 1/3 ounces; 39 grams)
  • 1 stick unsalted butter, softened (1/2 cup; 4 ounces; 113 grams)
  • non-stick cooking spray

Instructions

  1. Prepare the Biga: Combine water and yeast in a small bowl. Stir. Allow mixture to stand until yeast dissolves, about two minutes. Whisk together white rice flour and xanthan gum in a small bowl. Add water and yeast. Stir to combine. Mixture will be thick and sticky. Cover bowl with plastic wrap and let rise overnight at room temperature.
  2. Prepare the Fruit: Combine raisins, candied orange peel, lemon zest, vanilla extract, lemon extract, and lemon juice in a small bowl. Stir. Cover bowl with plastic wrap and let sit overnight at room temperature.
  3. Prepare the Dough: In a small bowl, stir together milk and yeast. Allow to stand for five minutes.
  4. In bowl of stand mixer, whisk together brown rice flour, sorghum flour, potato starch, granulated sugar, xanthan gum, baking powder, and salt. Add yeast mixture, egg yolks, eggs, vegetable oil and corn syrup. Mix on medium speed with flat paddle attachment until dough is thick, about three minutes.
  5. Add biga. Mix for one minute to combine. Scrape down bottom and sides of bowl with rubber spatula.
  6. With mixer on medium speed, add butter one tablespoon at a time. Wait for each tablespoon of butter to incorporate before adding next tablespoon.
  7. After all butter is added, mix dough for one minute. Dough should be thick and smooth. Reduce mixer speed to low and add dried fruits. Mix until fruits incorporate throughout dough.
  8. Lightly oil medium bowl with non-stick cooking spray. Transfer dough to greased bowl.
  9. Cover bowl with plastic wrap and allow dough to rise until doubled in size, about two to two-and-half hours.
  10. Deflate dough by about 75%. Do this by either punching down dough with a piece of plastic wrap between your hand and dough or stir dough using a rubber spatula.
  11. Generously grease 12-cup Bundt pan with non-stick cooking spray. Spoon dough into pan and smooth top with rubber spatula.

  12. Cover pan with greased plastic wrap and set aside until dough almost reaches top of pan, about one hour.
  13. Preheat oven to 350°F. Bake loaf until internal temperature reaches 207-211°F, about one hour. Loaf will be dark brown. If loaf gets too dark before internal temperature reaches 207°F, cover pan with a piece of aluminum foil and continue to bake.
  14. Invert loaf onto wire rack to cool. Store tightly wrapped in plastic for up to three days or freeze.

Recipe Notes

For the Fruit

The listed fruits are suggestions. Any dried fruit works well in this bread. Dried cranberries, apricots, and cherries are especially nice.


Easy Gluten-Free Yellow Cake

Jul 23, 2015 · 17 Comments

Gluten-Free Yellow Cake slice on white plate.

Gluten-Free Yellow Cake slice on white plate.

There’s one go-to recipe I believe all bakers need: a single-layer cake. There’s a time and place for multi-layered cake (usually birthdays and other celebrations). But a single-layer cake isn’t about celebration, it’s about simplicity.

My love for single layer cakes comes from my mom. Occasionally, I’d come home from school and find one sitting on the counter. It was always a yellow cake, iced with chocolate buttercream, and, if she felt like dressing it up, a single maraschino cherry in the center. Before baking, she’d throw a couple of chocolate chips into the batter. She said whoever got the slice with the chips was guaranteed a “good luck day.” Who am I to argue with that mom-logic?

The yellow single-layer cake I bake tastes very similar to the ones I ate growing up. It’s just butter, sugar, eggs, and gluten-free flour. The funny thing is the method. It doesn’t require you to cream the butter and sugar together. You simply dump all the ingredients into a bowl and mix. That’s it. The only thing to watch out for is the butter. You want it soft. Not melty. Not microwaved where the ends are hard and it’s melted in the center. You want the butter soft.

If you don’t have room-temperature butter ready when you want to bake this cake, try this trick: set up a double boiler. (Nest a small bowl on top of a small pot of very hot but not boiling water. You don’t want the water to touch the bottom of the bowl.) Place the butter, still wrapped, into the bowl. Turn the stick every few minutes until it’s soft. If you’re microwave is gentle enough, go ahead and soften the butter in the microwave. Use a very low setting and heat the butter in 15 second bursts, then turn the stick. If you are very careful, this works. I’ve noticed that if I stand my butter up while nuking the center doesn’t melt but that could just be my microwave.

As for finishing the cake, frost it with a simple buttercream. Or not. This cake works well without any type of frost. If you don’t want buttercream but want to finish the cake with something, I’d strongly recommend a citrus glaze. I prefer lemon but any citrus works. Stir together some powdered sugar and a little milk (or water) until you have a thick glaze. Then add the zest of your favorite citrus and pour the glaze over the top of the cake.

From start to cooling, this cake takes less than an hour to make. Of that time, only about fifteen minutes requires any activity. So remember this recipe on a busy days when you want a little something sweet but don’t have the time—or the energy—to do much in the kitchen.

Gluten-Free Yellow Cake slice on white plate.
5 from 5 votes
Print

Perfect Gluten-Free Yellow Cake

Prep Time 15 minutes
Cook Time 40 minutes
Total Time 55 minutes
Servings 8
Author GlutenFreeBaking.com

Ingredients

For the Gluten-Free Yellow Cake

  • Gluten-free non-stick cooking spray
  • 1 1/4 cups white rice flour (5 ounces; 142 grams)
  • 1 cup granulated sugar (8 ounces; 226 grams)
  • 1/2 cup potato starch (2 ounces; 56 grams)
  • 1 1/4 teaspoons baking powder
  • 3/4 teaspoon salt
  • 1/2 teaspoon xanthan gum
  • 1 stick unsalted butter, softened (4 ounces; 113 grams)
  • 2/3 cup milk or water (5 1/3 ounces; 150 grams)
  • 3 large eggs
  • 2 teaspoons vanilla extract

For Chocolate Buttercream

  • 2 cups powdered (confectioner's) sugar, sifted (8 ounces; 226 grams)
  • 6 tablespoons cocoa powder, sifted (2 1/4 ounces; 65 grams)
  • 1/2 teaspoon salt
  • 1 stick unsalted butter, softened (4 ounces; 113 grams)
  • 4 tablespoons milk (2 ounces; 56 grams)
  • 1 teaspoon vanilla extract

Instructions

For the Cake

  1. Adjust oven rack to middle position. Preheat oven to 350°F. Spray an 8x8x2-inch square cake pan or a 9x2-inch round cake pan with nonstick cooking spray. Set pan aside.

  2. In large mixing bowl, whisk together white rice flour, granulated sugar, potato starch, baking powder, salt, and xanthan gum. Add butter, milk (or water), eggs, and vanilla. Using a handheld mixer,mix until a thick batter forms, about one minute. Spread batter evenly into prepared pan. Bake until cake tester inserted into center of cake comes out clean, about 40 minutes. Place cake, in pan, on wire rack to cool. If desired, frost with buttercream icing when cool. 

For the Chocolate Buttercream

  1. Whisk together powdered sugar, cocoa powder, and salt in a medium bowl. In a large bowl, beat butter until light. Add powdered sugar-cocoa mixture, milk, and vanilla extract. Cream until smooth. Adjust thickness, if needed, by adding more milk, one tablespoon at a time. Frosting should be thick and spreadable.


How to Make Gluten-Free Cinnamon Bun Waffles

Jul 23, 2015 · 4 Comments

Gluten-Free Cinnamon Bun Waffles with sugar glaze.

Gluten-Free Cinnamon Bun Waffles with sugar glaze.

One Sunday I woke up craving cinnamon buns. Yum, right? But making a batch of cinnamon buns means mixing dough, allowing it to rise, and then, of course, baking. All told, I wouldn’t have eaten the cinnamon buns I craved until the afternoon.

And my craving didn’t want to wait that long! I had things to do. (Like eating breakfast.) Since it was a “waffle-Sunday” in our house, I decided to try making a batch of “cinnamon bun waffles.”

Oh my goodness. Just writing about them makes me want to run into the kitchen and make a batch! I love these waffles.

At first I thought about simply adding ground cinnamon to my waffle recipe. But that wouldn’t have tasted like a cinnamon bun! It would have tasted like cinnamon waffles. Which might have tasted good but wasn’t what I wanted.

What I craved was that delicious swirl that makes a cinnamon bun a cinnamon bun. I don’t know about you but that’s my favorite part of a cinnamon bun! In my pre-gluten-free days, I’d “unwind” a cinnamon bun before eating it. (Odd eating habits? Oh yes! I have them!) Unwound meant the cinnamon-sugar filling hit my tongue first with each bite.

Happily, It was ridiculously easy to add a swirl to waffles!

Here’s how to do it:

Mixing brown sugar and butter together for gluten-free cinnamon waffles.

In a bowl, combine ground cinnamon, dark brown sugar and soft butter. (My cinnamon hid under the brown sugar. You can’t see it but it’s in there.)


Brown sugar and butter mixed together into a thick paste in a bowl.

Mash with a fork until a paste forms.


Gluten-Free Cinnamon Bun Waffles filling in mixing bowl.

Add the milk. The mixture might look “broken”–almost curdled. Usually you want to avoid a broken batter but in this case, it’s fine.


Gluten-Free Cinnamon Bun Waffle topping in pastry bag.


Transfer mixture to a piping bag. If you don’t own a piping bag, put the mixture into a large ziplock bag and snip one of the corners of the bag.

Gluten-Free Cinnamon Bun Waffle batter in pan. Cinnamon topping in pastry bag.

Fill waffle-iron with batter. Right away, grab your piping bag.


Gluten-Free Cinnamon Bun Waffle batter in pan.


Squeeze cinnamon filling all over the waffle iron. Be sure your waffle iron is nonstick. Most are but if you have an old one, it might not be.


Gluten-Free Cinnamon Bun Waffles on brown plate.


Bake until golden brown.


Gluten-Free Cinnamon Bun Waffles with sugar glaze.


Drizzle with cinnamon bun icing or maple syrup. Both are delicious!

Enjoy! (How good does that look? Really good, right? I’m so thankful I woke up craving cinnamon buns!)

this page may contain affiliate links to products or services I love. I am NEVER paid for my opinion. Ever.  

Gluten-Free cinnamon bun waffles on plate with glaze.
Print

How to Make Gluten-Free Cinnamon Bun Waffles

Prep Time 15 minutes
Cook Time 10 minutes
Total Time 25 minutes
Servings 4 waffles
Author GlutenFreeBaking.com

Ingredients

For the Cinnamon-Swirl

  • ¼ cup dark brown sugar, packed (2 ounces; 56 grams)
  • 1 tablespoon butter, softened (increase to 2 tablespoons for a richer swirl.) (½ ounce; 14 grams)
  • 2 teaspoons ground cinnamon
  • 2 tablespoons milk (1 ounce; 28 grams)

For the Waffles

  • 1 cup finely ground white rice flour (4 ounces; 113 grams)
  • ½ cup cornstarch (2 ounces; 56 grams)
  • ¼ cup sweet rice flour (1 ounce; 28 grams)
  • 1 tablespoon baking powder
  • 1 tablespoon granulated sugar (½ ounce; 14 grams)
  • ½ teaspoon salt
  • ½ teaspoon xanthan gum
  • 1 ¼ cups milk (10 ounces; 283 grams)
  • 2 large eggs (about 3 ½ ounces; 100 grams)
  • ¼ cup vegetable oil (1 ¾ ounces; 50 grams)
  • 1 teaspoon vanilla extract

For the Glaze

  • 1 cup powdered sugar (4 ounces; 113 grams)
  • 2 tablespoons milk, plus more as needed (1 ounce; 28 grams)
  • 1 teaspoon vanilla extract

Instructions

  1. Make the Icing: Stir together the powdered sugar, milk, and vanilla extract in a small bowl. It should flow easily from a fork. Adjust with additional powdered sugar (to thicken) or additional milk (to thin) as needed. Set aside. 

  2. Make the Swirl: In a small bowl, combine dark brown sugar, butter, and ground cinnamon. Mix until a thick paste forms. Add milk. Stir to combine. Mixture will be thick and look curdled. This is normal. As long as it's thoroughly combined, you're fine. Transfer mixture to a pastry bag fitted with a small (number 4) tip or, if you don't have a tip, cut a hole in the bag later. Set aside.

  3. Make the Waffle Batter: In medium mixing bowl, whisk together white rice flour, cornstarch, sweet rice flour, baking powder, granulated sugar, salt, and xanthan gum. Add the  milk, eggs, oil, and vanilla extract. Whisk until smooth.

  4. Heat waffle iron according to manufacturer's directions. Spray iron generously with non-stick cooking spray. Spoon batter onto hot iron (amount of batter will vary depending on your iron).

    Quickly squeeze the cinnamon-swirl over the batter.

    Cook until crisp. Serve with icing. (Note: to clean your waffle iron. Heat on the low setting. This loosens the stuck-on sugar. Wipe (carefully) with a damp cloth while the iron is warm. 

Gluten-Free Blueberry Pie

Jul 23, 2015 · 8 Comments

Gluten-Free Blueberry Pie on cooling rack.

Gluten-Free Blueberry Pie on wire rack.

Apple pie. Pumpkin Pie. Blueberry Pie. To me, those are the holy trinity of pies. If I’m honest, in this area, I’m a terrible Foodie. Or food enthusiast. Or gourmand. Or Food Lover. Or whatever the current term for someone who enjoys putting good food in her face hole is called.

I prefer the classic versions of these pie. I know. I know. There’s a million ways to make each of those pies. Yet I always some back to the classics.

In this case, it’s just blueberries, a little lemon, enough sugar to sweeten, and just enough cornstarch to hold the whole thing together. That’s it.

Now, if you were to top my slice with, say,  a scoop of vanilla ice cream, I wouldn’t say no to that. Of course I wouldn’t! Pie a la mode is a classic.

Gluten-Free Blueberry Pie on cooling rack.
5 from 1 vote
Print

Classic Blueberry Pie (Gluten-Free, of course)

Classic blueberry pie, made gluten-free. I love this pie served warm. But it's just as good cold. Eaten for breakfast. (ahem)
Prep Time 1 hour
Cook Time 45 minutes
Total Time 1 hour 45 minutes
Author GlutenFreeBaking.com

Ingredients

For the Crust

  • 1 1/4 cups brown or white rice flour (6 1/4 ounces; 177 grams)
  • 1/2 cup sweet rice flour (2 ounces; 56 grams)
  • 1/2 cup tapioca starch (2 ounces; 56 grams)
  • 1 teaspoon xanthan gum
  • 1/2 teaspoon salt
  • 1 cup butter or solid shortening, cold and cut into tablespoon-size pieces (8 ounces; 226 grams)
  • 5 tablespoons water, more if needed (2.5 ounces; 70 grams)
  • 1 tablespoon apple cider vinegar

For the Filling

  • 3/4 cup granulated sugar (5 1/4 ounces; 150 grams)
  • zest of one lemon
  • 5 tablespoons cornstarch (1 1/4 ounces; 35 grams)
  • 2 tablespoons sweet rice flour (1/2 ounce; 14 grams)
  • 1/8 teaspoon salt
  • 6 cups blueberries, washed and picked over (about 2 1/2 pounds; 1 kilo)
  • 3 tablespoons butter, cold and cut into six pieces (1.5 ounces; 42 grams)

For the Topping

  • 1 large egg whisked
  • granulated sugar
  • Ice cream or whipped cream for serving (optional)

Instructions

  1. In a large bowl, whisk together brown rice flour, sweet rice flour, tapioca starch, xanthan gum, and salt. Using your hands or a pastry cutter, cut butter into the flour mixture until it resembles a coarse meal and contains little nuggets of butter. Add water and vinegar. Stir with a wooden spoon until a dough forms. If the dough is dry, add an additional tablespoon of water (more if needed) until the dough holds together. Pat dough into a rectangle and wrap tightly in plastic wrap. Chill for one hour.
  2. Preheat the oven to 425 degrees F.
  3. Cut dough into two equal pieces. Return one piece to the refrigerator. Dust your counter with white or brown rice flour. Roll out one of the dough pieces. Roll out the dough into a 13-inch circle. Move the dough several times to prevent it from sticking on the counter. Working quickly, roll the dough around the rolling pin and transfer to a 9-inch deep pie pan. Don't trim the edges of the pastry yet. Place the pie pan in the fridge while you prepare the filling.
  4. In a large bowl, combine the sugar and lemon zest. Rub it together so no there are no clumps of zest in the sugar. Add the cornstarch, sweet rice flour, and salt. Stir to combine. Add the blueberries. Stir to combine.
  5. Remove the pie pan from the fridge. Spoon the berries into the crust and set aside. Place the six pieces of butter evenly on top of the berries. Roll out the remaining piece of pastry. Roll out the dough into a 13-inch circle. Move the dough several times to prevent it from sticking on the counter. Working quickly, roll the dough around the rolling pin and transfer the dough to cover the berries. Fold the top pastry under the bottom and crimp, either with your hands or by pressing the pastry together with a fork.

  6. Brush the egg over the crust and sprinkle with granulated sugar. Cut several slits in the pastry. This allows steam to vent. Place the pie on a rimmed baking sheet. Bake the pie until the crust is golden brown and filling bubbles, about 45 minutes. If the crust turns brown before the filling bubbles, remove the pie from the oven, cover the top with foil and return the pie to the oven.
  7. Allow pie to cool for at least four hours before serving. Serve with ice cream or whipped cream, if desired.


The World’s Easiest One Bowl Gluten-Free Lemon Cake

Jul 23, 2015 · 25 Comments

Gluten-free lemon cake squares on wood board.

Gluten-free lemon cake slices on wood board.

When friends visit in the summer, I like to have something a little sweet on hand that they can munch on whenever the mood strikes. So I’ll put out a bowl of fruit and this all-day lemon cake. It’s one of those cakes that goes equally well with a morning cup of coffee or a post-dinner, end-of-day drink.

Although the finished cake tastes like you spent a lot of time on it, the only prep required is a bowl, a whisk, and about five minutes. The recipe is what my mother would call a “dump cake:” You throw all the ingredients into one bowl, whisk by hand, plop the batter into a greased cake pan, and bake it for about thirty minutes. That’s it. And the best part? Your minimal effort is rewarded with a delicate, lemon-scented cake that’s a bit like a cross between a coffee cake and a birthday cake.

To finish the cake, I sometimes make a thick white icing from powdered sugar and lemon juice. Other times, I’ll boil simple syrup with some lemon zest. Both glazes intensify the lemon flavor without making the cake too sweet. The simple syrup glaze changes the texture of the cake a little, making it damp, while the powdered sugar icing leaves the coffee cake-like texture in tact.

By the way, if you have extra berries on hand, toss them into the batter. This cake welcomes fruit. Blueberries are my favorite, but that’s because I’m partial to anything lemon-blueberry. Or, if you don’t want to put berries in the cake, put them on top. Macerate some ripe, chopped berries with just enough sugar to make the juices run and spoon the berries over the cake. Either way, with berries or without, this cake tastes like summer all day long.

Gluten-free lemon cake squares on wood board.
5 from 5 votes
Print

One Bowl Gluten-Free Lemon Cake

Prep Time 10 minutes
Cook Time 30 minutes
Total Time 40 minutes
Servings 8
Author GlutenFreeBaking.com

Ingredients

  • Nonstick cooking spray
  • 1 1/4 cups white or brown rice flour (5 ounces; 142 grams)
  • 1/4 cup tapioca starch (1 ounce; 28 grams)
  • 3/4 cup granulated sugar (6 ounces; 170 grams)
  • 2 teaspoons baking powder
  • 1/2 teaspoon table salt
  • 1 cup buttermilk (8 ounces; 226 grams)
  • 1 tablespoon grated lemon zest from 2 to 3 lemons
  • 1/2 cup vegetable oil (3.5 ounces; 100 grams)
  • 2 large eggs

Lemon Icing Option 1: Simple Syrup Glaze

  • 3/4 cup granulated sugar (5 1/4 ounces; 148 grams)
  • 2 tablespoons zest and 6 tablespoons fresh juice from about 4 to 6 lemons

Lemon Icing Option 2: Powdered Sugar Icing

  • 1 1/3 cups powdered sugar sifted
  • 2 tablespoons lemon juice

Instructions

  1. Adjust oven rack to middle position. Preheat oven to 350°F. Spray an 8-inch square baking pan with nonstick cooking spray.
  2. Adjust oven rack to middle position and preheat oven to 350°F.
  3. In large mixing bowl, whisk together rice flour, granulated sugar, tapioca starch, baking powder, and salt. In a measuring cup or a small bowl, whisk together buttermilk and lemon zest. Pour buttermilk mixture over dry ingredients. Whisk in vegetable oil and eggs until smooth.
  4. Pour batter into prepared cake pan. Bake until a cake tester inserted into center of cake comes out clean, about 30 minutes.
  5. Icing Option 1: Simple Syrup Glaze Combine granulated sugar, lemon zest, and lemon juice in a small saucepan. Bring to a boil over medium-high heat, stirring gently until sugar dissolves. Reduce heat to low and cook syrup until it thickens slightly, about 5 minutes. Remove from heat and set aside.Store cookies in a covered container on the counter for up to four days.
  6. While cake is still warm, poke it all over with a fork. Brush top of cake with syrup and allow to absorb fully, about 5 minutes. Repeat until all syrup is absorbed.
  7. Icing Option 2:  Powdered Sugar Glaze. Allow cake to cool completely. In small bowl, combine powdered sugar and lemon juice. Stir with a fork until smooth. Icing should be thick but spreadable; if the icing is too thick, add a little more lemon juice. Spread icing on cake and allow to set for 15 minutes before serving.


Cupcake Decorating Hacks to Make You Look Like a Pro!

Jul 23, 2015 · 1 Comment

Cupcake frosted with red and white swirl of frosting.

Cupcake frosted with red and white swirl of frosting.

Some folks are real artists when it comes to decorating cupcakes. Then there are the rest of us. Who want pretty cupcakes but don’t have the time to create mini-masterpieces. These techniques, using just frosting, food coloring, and sprinkles, make you look like a pro. And take only minutes!

You’ll Need

Favorite vanilla cupcake recipe or mix

Paper cupcake liners (For fun, I used red.)

Red and pink food color

Red and Pink Sprinkles (Jimmies)

Parchment paper (if making the “Sprinkle Heart” cupcakes)

Icing, homemade or gluten-free canned

Tie Dyed Cupcakes

Since Valentine’s Day is a great excuse to create slightly over-the-top baked good, I decided to make tie-dyed cupcakes. (Skip this step if you don’t feel like messing around with food dye or if you are making chocolate cupcakes.)

Pink and red cupcake batter in white bowls.


Divide batter evenly among three bowls. Color one bowl pink and another red. Leave one bowl plain. Or color it another color. You do you!

Pink and white cupcake batter in muffin cups.

Drop batter evenly into cupcake cavities. (Fill each cavity about 2/3 full with batter.)  It doesn’t matter how much of each color you put into the pan. Have fun!  Each cupcake will be slightly different.

Baked pink and white tie dyed cupcakes in a muffin pan.

Bake cupcakes according to recipe/mix directions. Remove from pan and allow to cool. When they’re cool, it’s time to decorate! If you frost warm cupcakes, the icing melts and I cry. Seriously, I could be out with my family and just burst into tears because you are frosting warm cupcakes. Now you don’t want that, do you? I didn’t think so!

First Decorating Hack: Edgy!

White frosted cupcake with red sprinkles on the edge.

The first cupcake we’ll make is the easiest.

White frosted cupcake. Red sprinkles on dinner plate.

Slather some frosting on the cupcakes. Vanilla, dyed or not, is the best. Sprinkles don’t pop the same way on chocolate frosting. the cooled cupcakes. Put your sprinkles on a plate. Gather them near the edge of the plate.

Rolling edge of white frosted cupcake in red sprinkles.

Roll edge of the cupcake in the sprinkles. That’s it!

White frosted cupcake with red sprinkles on the edge.

Done!

Next Decorating Hack: Stripey


White frosted cupcake with red and pink sprinkles.

The next cupcake is almost as easy to decorate. This one uses two colors of sprinkles.

Dipping top of white frosted cupcake in red sprinkles.

Ice cupcakes. Fill plate with one color of sprinkles. Dip about 1/3 of cupcake into the sprinkles.

White frosted cupcake with red sprinkles on the right side.

Now, that’s cute, right? You could stop there. But let’s go for a little more zing!

Dipping top of frosted cupcake in pink sprinkles.

Fill another plate with sprinkles. Dip another 1/3 of the cupcakes into those sprinkles.


Gluten-free cupcake with white frosting and red and pink sprinkle stripes.


As you can see, I left the center uncoated. I like how this looks. If you wanted to, you could coat each half with sprinkles, leaving no white icing showing in the center. That’s cute too!

Neck Decorating Hack: Heart-y


Cupcake with white frosting and red sprinkle hearts.

What’s Valentine’s day without an abundance of hearts? Boring. That’s what!

Heart paper template. Frosted cupcake. Bag of sprinkles.

Ice cupcakes and cut a heart out of a piece of parchment paper.

Paper heart templated on top of frosted cupcake.


Ice cupcakes and allow the icing to firm up a little. (Usually by the time you’ve iced the last cupcake, the first one has a thin sugar crust. That’s what you want.) Put the stencil over the top of the cupcake.


Red sprinkles in paper template on top of frosted cupcake.

Sprinkle red or pink sprinkles over the stencil. Using your fingers, press the sprinkles down into the icing so they’ll stick.

Cupcake with white frosting and red sprinkle hearts.

Gently pull stencil off the cupcake. (If your icing firmed up a little, it should not stick.)

Decorating Hack: Swirly

Gluten-free cupcake with red and white frosting on wood board.

Isn’t that pretty?

Plastic pasty bag on wood board with two jars of food color and a small paint brush.

You’ll need a few disposable decorator bags to make these cupcakes, a food-safe paintbrush, gel food colors, and a large star tip.


Plastic pastry bag stripped with red food coloring.

Inside the bag, paint two stripes of color (you can use the same or different colors) on opposite sides.


Filling pastry bag with white frosting. Bag is striped with red food color.

Carefully fill bag, trying not to disturb the icing stripes as little as possible.


White frosting in decorate bag with red food color stripe.

The icing stripes spread over the white icing. Pipe icing onto cupcakes. If you run out of icing, you’ll need to make another bag. This is the only thing that makes this a little putzy. Reusing the bag, gives you pink icing, instead of white icing striped with red.


Gluten-free cupcake with frosting swirl and pink sugar heart.

Each cupcake is unique. (I put a little gluten-free candy heart on this cupcake.) That’s it!


Okay, one more!

Decorating Hack: The Lazy 😉

Don’t feel like doing any of the projects above but want to decorate the cupcakes a little? Coating cupcakes in completely in sprinkles is always a fun and pretty (and easy!) way to decorate! Ice your cupcakes, fill a plate with sprinkles, turn the cupcakes over to coat, and you’re done!


Gluten-free cupcake topped with frosting and covered with pink sprinkles.

Just ice your cupcakes. Plunk the entire thing into sprinkles and call it a day.

Messy

Messy kitchen counter with frosting, sprinkles, and cupcakes.

At the end of the project, your kitchen might look like this…

The Pioneer Woman’s Chocolate Sheet Cake, Made Gluten-Free!

Jul 23, 2015 · 4 Comments


Like most of the internet, I fell in love with “The Pioneer Woman,” several years ago.

Anyway, two years ago she posted a recipe for “The Best Chocolate Sheet Cake. Ever.” At the time, I wanted to make the recipe gluten-free. Somehow life intervened and I never got around to doing it.

Well, Ree’s new cookbook was just released. To celebrate, I sat down a few weeks ago and converted the recipe. I’ll admit, I was curious. In the introduction, she calls the cake, “The Best Chocolate Sheet Cake. Ever.” That sets the bar pretty high! And I love chocolate cake — that’s why there’s a chocolate cake slice on the cover of my cookbook? I am a woman who really loves chocolate cake!

I have to say, this recipe lived up to its name. Between the cake and the icing, the recipe uses almost two pounds of butter; so, you know it is going to be good. Every person I handed a slice to tipped back their head and moaned with pleasure upon taking a bite. (Okay, maybe they didn’t do that exactly but I knew they wanted to. The cake is that good!) A cross between a brownie and rich chocolate cake, this recipe is a winner. Plus, you’d never know the converted recipe is gluten-free. The texture is smooth and silky. I don’t even think Ree would be able to tell the difference between her version and my gluten-free version.

The cake is big. In fact, you might know this recipe as “Texas Sheet Cake.” If you are hosting a party, this is the cake to make. Everyone will swoon with joy and, I promise, your party will be a hit. And if you aren’t hosting a party? Make the cake anyway! It freezes nicely, icing and all!


Print

Chocolate Sheet Cake

Prep Time 15 minutes
Cook Time 25 minutes
Total Time 40 minutes
Author GlutenFreeBaking.com

Ingredients

For the Cake

  • 2 cups granulated sugar (14 ounces; 396 grams)
  • 1 cup finely ground white rice flour (4 ounces; 113 grams)
  • 1/2 cup sweet rice flour (2 ounces; 56 grams)
  • 1/2 cup cornstarch (2 ounces; 56 grams)
  • 1 teaspoon baking soda
  • 1/4 teaspoons salt
  • 2 sticks unsalted butter (8 ounces; 226 grams)
  • 5 tablespoons natural cocoa powder (about 1 ounce; 26 grams)
  • 1 cup boiling water (8 ounces; 226 grams)
  • 1/2 cup buttermilk (4 ounces; 113 grams)
  • 2 large eggs (3 1/2 ounces; 100 grams
  • 1 teaspoon vanilla extract

For the Icing

  • 1 3/4 sticks butter (7 ounces; 198 grams)
  • 3 1/2 cups powdered sugar (14 ounces; 396 grams)
  • 5 tablespoons natural cocoa powder (about 1 ounce; 26 grams)
  • 6 tablespoons milk (3 ounces; 85 grams)

Instructions

  1. Make the Cake: Preheat oven to 350 degrees F. Grease a 12x18x1 pan with nonstick cooking spray. Set aside.

  2. Whisk together granulated sugar, white rice flour, sweet rice flour, cornstarch, baking soda, and salt.  

  3. Melt the butter over medium heat in a small saucepan over medium heat. Add cocoa powder and stir to combine. Reduce heat to low and allow mixture to cook for 3 minutes. Stir in boiling water and cook for 30 seconds. Remove from heat and allow to cool for 30 seconds.

  4. Pour mixture over dry ingredients. Stir to combine. (You can use a balloon whisk for this.) Blend until smooth. Add buttermilk, eggs, and vanilla. Mix until a batter forms. Pour batter evenly into prepared pan.

  5. Bake for 25 minutes or until cake springs back to the touch. Remove cake from the oven.

  6. Make the Frosting: Melt butter in a small saucepan over medium heat. Add cocoa powder. Stir to combine. Turn off heat. Add the powdered sugar, milk, and vanilla. Stir until smooth. Pour over warm cake.


How to Make a Gluten-Free Gingerbread House

Jul 23, 2015 · 16 Comments

Gluten-free gingerbread house.

Gluten-free gingerbread house.

If you have children, this project is wonderful. If you don’t have children, this project is wonderful. There’s just one thing to remember.

It takes time.

And that’s a good thing! The time it takes to make the dough, assemble the house, and decorate means lots of talking and laughing.

On, and there’s one other thing to remember.

Don’t stress about it.

No matter what it looks like, your gingerbread house will be perfect. Why? Because it’s yours. It doesn’t need to be blog-worthy or magazine-worthy or anything else. So what if the roof dips a little? If the candy looks gaudy. It’s a gingerbread house. It’s should be fun. Remember that.


And…remember to laugh and eat candy while you put it together. It’s good for the soul, I promise.


Ready to make a gluten-free gingerbread house?

Here’s how it’s done:

You’ll Need


Template and dough for gluten-free gingerbread house.

gingerbread dough (recipe below)

pizza cutter

parchment paper

rimmed baking sheet

Gingerbread House Template (this is a PDF download)

rolling pin

cake cardboard

royal icing (recipe below)

piping bag

pasty tip (half-inch round)

candy, if desired


Gluten-free gingerbread dough for gingerbread house.

Divide the one of the dough round in half.  Center the dough on a piece of parchment paper.


Gluten-free gingerbread dough dusted with white rice flour.


Lightly dust the dough with white rice flour.


Gluten-free gingerbread dough between two pieces of parchment paper.


Cover the dough with parchment paper and roll dough out until it’s about  1/4-inch to 1/2-inch thick. Don’t worry if your dough is a wee bit larger than the paper. You can take care of that in a second.

Gluten-free gingerbread dough rolled out.


Remove the top piece of parchment.


Gluten-free gingerbread dough rolled out and trimmed into a large square.


Use a ruler and pizza wheel to trim the edges of the dough.


Roof template on gluten-free gingerbread cookie dough.


Lightly dust the dough with white rice flour. (This prevents the paper template from sticking to the dough.) Place the template on the dough. Cut with your pizza wheel.


Pulling gluten-free gingerbread cookie dough away from roof template for gingerbread house.


Pull excess dough away.


Gluten-free gingerbread dough cut into three rectangles.


For this piece (I’m working with the roof pieces here.), there was excess dough between the two roof pieces. You want to remove this extra dough.


Dough cut for gluten-free gingerbread house.


Roll the dough away, if needed.


Two pieces of dough for gluten-free gingerbread house.


Quickly slide the parchment, with the gingerbread pieces, onto a baking sheet. By sliding the parchment onto the baking sheet, you won’t disturb the cut outs, ensuring they are the correct shape for assembling your house later on in the process.


Side house pieces for gluten-free gingerbread house.


Repeat. Here are the sides of the house.


Side wall template on gluten-free gingerbread house dough.


And the front.


Cutting window into dough for gluten-free gingerbread house.


Use a small knife to cut any windows or doors.


Front wall for gluten-free gingerbread house.


Remove all templates.


Rectangle of gluten-free gingerbread cookie dough on parchment paper.


For my house, I wanted the back windowless. This is just a preference. So for this piece, I used the same template I used for the front of the house but I didn’t cut in windows or a door.


Bake gingerbread pieces. Allow to cool completely.


Pastry bag filled with royal icing for gluten-free gingerbread house.


Place royal icing in a pastry bag fitted with a large round tip.


Back wall and side wall baked pieces for a gluten-free gingerbread house.


Decide where you want to place the house on the cardboard. Lay the back and one side of the gingerbread on the cardboard (face down).


Piping royal icing beneath baked gluten-free gingerbread house wall.


Pipe royal icing along the cardboard below the gingerbread pieces. This ribbon of royal icing helps hold the house up.


Piping frosting on white cardboard to secure a gluten-free gingerbread house.


Repeat under the side wall.


Laying out gluten-free gingerbread house with frosting.


Pipe a ribbon of icing along the edge of the gingerbread back wall.


Placing side and end of gluten-free gingerbread house together.


Stand the gingerbread pieces up (centering them in the royal icing you pipped on the cardboard). Hold the back and side wall together for a minute.


Frosting the edges of a gluten-free gingerbread house.

Repeat for the side wall. Pipe another ribbon of icing on the cardboard and one on the side of the back wall.


Putting together a gluten-free gingerbread house.


Stand up side wall. Hold for a moment.


Putting together gluten-free gingerbread house.


Center the front of the house. (Again, the gingerbread piece should be face down.)


Putting together a gluten-free gingerbread house with frosting.


Pipe icing on the cardboard and along the edges of the wall. Stand up front wall.


Gluten-free gingerbread house with gap on right wall.


Inspect the house. See this space? We need to fix this.


Placing icing on sides of gluten-free gingerbread house.


Use your piping bag to squeeze icing into any space between the gingerbread pieces.


Gluten-free gingerbread house with no roof.

Allow icing to dry for an hour or so. If you put the roof on before the walls are dry, the entire house can fall apart.


Placing icing on gluten-free gingerbread house.


Pipe icing along the edge of the side walls.


Gluten-free gingerbread roof with icing on the top edge.


Pipe icing along the top of the roof piece.


Placing roof on gluten-free gingerbread house.


Position roof. Hold in place for a moment.


Gluten-free gingerbread house.


Allow the house to dry. (Ignore my thumbprint on the roof. It adds…character!) Now you have a blank canvas. Have fun creating your house. Add candy. Colored icing. Leave it alone and just enough the scent of gingerbread! There’s no wrong way to decorate a gingerbread house.

FAQ

My gingerbread house fell apart! 

Two things could have happened: 1. Your icing might have been too wet. 2. Your area might be humid. Too much water, either in the icing or in the environment can cause a house to collapse.

My roof wants to slide off!

You really need to hold it in place for a few minutes. If you are unable, you can try to find something tall enough and wide enough to place under the roofline to prop up the roof piece while it dries.

Can we eat it?  

…yes. I hesitate because it’s a very dry gingerbread. If you want a tasty gingerbread, I suggest making a recipe for homemade gingerbread men.

Template and dough for gluten-free gingerbread house.
Print

Gluten-Free Gingerbread House

Prep Time 1 hour
Cook Time 45 minutes
Total Time 1 hour 45 minutes
Servings 1 house
Author GlutenFreeBaking.Com

Ingredients

For the Gingerbread House

  • 3 cups brown rice flour (15 ounces; 425 grams)
  • 1 1/4 cups white rice flour (5 ounces; 142 grams)
  • 1 cup sweet rice flour (4 ounces; 113 grams)
  • 1/2 cup cornstarch (2 ounces; 56 grams)
  • 1 tablespoon ground ginger
  • 2 teaspoons ground cinnamon
  • 1/2 teaspoon ground allspice
  • 2 teaspoons xanthan gum
  • 1 cup vegetable shortening, melted (6 1/2 ounces; 192 grams)
  • 1/4 cup water, plus more as needed (2 ounces; 56 grams)
  • 1 1/2 cup unsulphered molasses (12 ounces; 340 grams)
  • 1 cup granulated sugar (7 ounces; 198 grams)

Royal Icing

  • 3 tablespoons Meringue Powder
  • 4 cups powdered sugar (16 ounces; 453 grams)
  • 6 tablespoons warm water (3 ounces; 85 grams)

Instructions

  1. In bowl of stand mixer, whisk together brown rice flour, white rice flour, sweet rice flour, cornstarch, ginger, cinnamon, allspice, and xanthan gum. In small bowl, whisk together melted shortening, water, molasses, and granulated sugar. Stir until smooth.

  2. Pour wet ingredients over dry ingredients. Fit mixer with flat paddle attachment. Mix, on medium speed, until a thick dough forms. If dough is very dry, add a tablespoon or more of additional water.
  3. Lightly white rice flour your counter. Turn dough out onto the counter. Pat into a large round. Cut in half. Wrap each half in plastic wrap. Chill overnight. (Or, if you are in a rush, chill at least five hours.)
  4. Preheat oven to 375 degrees F.
  5. Cut out the template for the house. Set aside.
  6. Divide dough in half. Place one half of the dough on a piece of parchment paper. Sprinkle the dough lightly with white rice flour. Cover with a second piece of parchment paper. Roll out dough to 1/4 inch thickness.
  7. Remove top piece of parchment paper. Trim dough into a rectangle. Place the template on the dough. Follow the template with a pizza cutter or sharp knife. Remove excess dough from between the pieces. (Be sure to keep similar size on each pan. If you bake a large piece along with a small piece, the small piece will burn before the large piece is done.)
  8. Bake dough until aromatic, about 15 minutes.
  9. Repeat with remaining templates and dough. Re-rolling dough as needed.
  10. Allow gingerbread pieces to cool.
  11. Make royal icing
  12. In bowl of stand mixer, whisk together meringue powder and confectioners' sugar. Add water. Beat, using flat paddle attachment, until icing is stiff, about seven minutes. Icing should be stiff and shiny. Cover bowl of icing with a damp (not wet) paper towel to prevent a sugary crust from forming on the icing.
  13. Place the royal icing in a bag fitted with a large pastry tip.
  14. Ice sides, front and sides of house together at corners using royal icing. Hold the pieces together. Repeat with back and other side. Check the house for any gaps. Fill in with royal icing. Allow the house to dry for 30 minutes before attaching the roof.
  15. Attach the roof. Check the roof for any gaps. Fill in with royal icing.
  16. Using the remaining royal icing, decorate the house, attaching candy as desired.


How to Make the Easiest Ever Gluten-Free Christmas Cookies

Jul 23, 2015 · 5 Comments

Easy gluten-free Christmas cookie dough coated with powdered sugar on a baking sheet.

I’ve had a busy end to 2010! The last few months included lots and lots (and lots) of travel. This means that I’m more than a little behind getting ready for Christmas. Do you know the feeling?

Even though I’m struggling to get things done, I’ve finally headed back into the kitchen. Starting today, I’m sharing easy recipes for holiday treats–because right now it feels like no one needs quick recipes more than I do. From now until December 24th, I’ll post a recipe for an easy holiday treat. I’m kicking off the series with The Easiest Christmas Cookies Ever*

If you can make chocolate chip cookies, you can make these buttery, sugary, vanilla-y Christmas cookies. The technique is pretty much the same. You cream butter and sugar together, add an egg and then the dry ingredients.

What Makes These Cookies Special

Thanks to the butter and vanilla in the recipe, these cookies melt in your mouth. Their flavor tastes like a celebration of butter, sugar, and vanilla. Since they’re rolled in powder sugar before baking, they’re left with a very light glaze that’s pretty special too!

How to Make Them Easier

Honestly? I can’t think of anything. Since they take a little less than an hour from dough to cookie, I mix the dough and bake in one shot. However, you could always mix the dough the night before baking.

How to Modify

I love these cookies scented with vanilla extract. But vanilla isn’t the only flavor that would make these cookies special. Lemon extract or peppermint extract would transform these basic butter cookies into something really special.

How to Modify Part 2

Dairy-Free? While these cookies rely on butter for their great flavor, you can substitute shortening for the butter. Bump up the vanilla extract to 1 teaspoon. In addition to the flavor difference, you’ll also noticed that when made with shortening, these cookies don’t spread.

How to Modify Part 3

Replace the white rice flour with millet flour for a whole-grain recipe.

*And by “Ever” I mean until I find a quicker recipe next year, of course.


Creaming butter for easy gluten-free Christmas cookies.

Like most cookie recipes this one begins by creaming together butter (or shortening) with granulated sugar. You want the butter soft but not melted.


Beating butter and sugar for easy gluten-free Christmas cookies.

The egg and vanilla go in. At first the mixture will look “broken” or curdled. This is okay. Just cream it on medium-high speed until it becomes smooth. And don’t forget to stop the mixer once or twice to scrape down the bottom and sides of the bowl.


Gluten-free Christmas cookie dough in a bowl.

Add the dry ingredients.  After about 45 seconds, a firm dough forms. It’s almost time for cookies!

Easy gluten-free Christmas cookie dough coated with powdered sugar on a baking sheet.

After chilling the dough for ten minutes, roll them in powdered sugar. Bake in a preheated oven for about 12-15 minutes and you’ll have, you guessed it, COOKIES! (“COOKIES!” must be said in a cookie monster-like voice, of course!)

Of course, if you don’t have the time to roll them in powdered sugar, skip this step. It add a pretty sugar glaze but isn’t essential.

Easy gluten-free Christmas cookie coated with powdered sugar on a baking sheet.


COOKIES!

Easy gluten-free Christmas cookie coated with powdered sugar on a baking sheet.
5 from 3 votes
Print

How to Make the Easiest Ever Gluten-Free Christmas Cookies

Easy-to-Make. Buttery Christmas cookies.

Prep Time 10 minutes
Cook Time 12 minutes
Total Time 22 minutes
Servings 15 cookies
Author GlutenFreeBaking.com

Ingredients

  • 1 1/4 cups gluten-free baking flour, Bob's 1:1 Gluten-Free Baking Flour recommended (see note below) (5 ounces; 142 grams)
  • 1/2 teaspoon baking powder
  • 1/2 teaspoon salt
  • 1/2 cup granulated sugar (3 1/2 ounces; 100 grams)
  • 6 tablespoons butter, softened (3 ounces; 85 grams)
  • 1 large egg (1 3/4 ounces; 50 grams)
  • 1/2 teaspoon vanilla extract
  • 1 cup powdered sugar (4 ounces; 112 grams)

Instructions

  1. Preheat oven to 350 degrees F. Line a baking sheet with parchment paper and set aside.

  2. Whisk together gluten-free flour, baking powder, and salt in a small bowl. 

  3. In bowl of stand mixer, cream together butter and granulated sugar until well combined, about 45 seconds.
  4. Add egg. Cream until thoroughly incorporated. Be sure to stop mixer and scrape down sides and bottom of bowl at least once.
  5. Stop mixer. Add whisked dry ingredients. Turn mixer to medium-low. Mix until a dough forms.
  6. Chill dough for ten minutes.
  7. Scoop dough, about two teaspoons each, and toll into balls. Roll dough balls into powdered sugar. Place cookies, about two inches apart, on prepared baking pan.
  8. Bake cookies for 12-15 minutes or until cookies are firm and edges are golden brown. Transfer cookies to a wire rack*. Repeat with remaining dough.

  9. *If sugar melts during baking, roll warm cookies in powdered sugar.

  10. Store cookies in an airtight container for up to five days.

Recipe Notes

Ingredient Note:

The original version of this recipe used individual gluten-free flours. It has since been updated and tested to use a gluten-free flour blend. If you enjoyed the original recipe, here are the flours:

3/4 cup white rice flour (3 ounces; 85 grams)

1/4 cup sweet rice flour (1 ounce; 28 grams)

1/4 cup potato starch (1 ounce; 28 grams)


How to Make Chewy Gluten-Free Soft Pretzels

Jul 23, 2015 · 19 Comments

Gluten-free pretzels on a plate with a jar of mustard sitting to the right.

Gluten-free pretzels on a plate with a jar of mustard sitting to the right.

Soft pretzels are just about perfect. They’re chewy, salty and great with everything from a beer to a salad. The thing is: they’re chewy. And gluten-free flour doesn’t do chewy well.

But this year I decided I didn’t want to go through another football season or Oktoberfest without a soft pretzel.  So I headed into the kitchen.

Since gluten, the protein found in wheat and other grains, is responsible for the distinctive soft pretzel chew, I began by focusing on the flour blend. The flavor of pretzels is rather subtle I first used white rice flour and tapioca starch.  I hoped the white rice flour would be bland enough to fade into the background while the tapioca starch, along with a little xanthan gum, provided chew. It worked. Sort of.

The white rice flour was so bland that the pretzels tasted flat, and since I only used a little tapioca starch, there was very little chew.  One of my first tasters said, “These taste like they want to be soft pretzels but just aren’t. They’re odd.”

Since I didn’t want bland pretzels, I replaced the white rice flour with brown rice flour. While the flavor was better, the pretzels were unappetizingly grainy.  Combining the white rice flour and brown rice flour solved this problem.

During testing, I increased the amount of tapioca starch in the recipe.  From previous experience, I knew that too much tapioca starch could make a recipe gummy. I added it cautiously, and one day, after using 3/4 cup of tapioca starch, I pulled a baked pretzel apart. There was some resistance as I tore the pretzel and the crumb had the tight appearance of wheat-based soft pretzels.  When I took I bite, the pretzel felt chewy! Finally, a gluten-free soft pretzel that was chewy and flavorful.

But texture isn’t the only characteristic unique to soft pretzels. They need to be dark brown and shiny. Commercial bakers achieve this by boiling the pretzels in water with a little food-grade lye, a powerful alkaline.  The solution turns the dough slightly yellow during boiling and aides the Milliard reaction during baking ,causing the pretzels to darken.

Since I didn’t have any lye on hand, (and I’m guessing you don’t either!) I used an alkaline that I did have in the kitchen: baking soda. While baking soda isn’t nearly as powerful an alkaline as lye, it did turn the dough slightly yellow during boiling. The finished pretzels, however, were a little too light for my liking.

Adding additional baking soda wasn’t solving the problem. On a whim, I added some granulated sugar to the solution. I hoped the sugar would help turn the pretzel a nice golden brown.

It worked! And best of all, the additional sugar didn’t add sweetness to the pretzels, just a lovely golden brown color.

Now, with a pretzel in hand, I’m ready for football season!

Here’s how to make ’em!


Gluten-Free Soft Pretzel dough being mixed in a stand mixer.

You want the dough stiff but not dry. Don’t worry if it doesn’t form a dough ball in the stand mixer. It won’t.

After two minutes of mixing, no dry ingredients should cling to the bottom or sides of the mixing bowl. If dry ingredients remain, add one to two tablespoons additional water.

Gluten-Free Soft Pretzel dough on a flour covered counter.

Turn dough out onto a lightly white rice floured surface. Don’t use too much flour. A light dusting to prevent the dough from sticking to the counter is all you need.


Gluten-Free Soft Pretzel dough on a white rice flour coated counter.

Gently knead dough into a ball. Gluten-free dough requires a light touch. Once the dough forms a ball, stop kneading and place into a lightly oiled bowl to rise. Brush or spray the top of the dough with oil to prevent a skin from forming.

Gluten-Free Soft Pretzel dough risen in a white bowl.

Allow dough to rise until doubled in size. This usually takes about an hour but the time varies depending on temperature.

Gluten-Free Soft Pretzel dough on a counter.

Turn dough onto a very lightly white rice floured counter. Too much flour on the counter makes it hard to shape the pretzels. A light dusting of white rice flour will do.


Gluten-Free Soft Pretzel dough cut into 12 pieces.


Divide dough into equal portions. (A bench scraper works well for cutting the dough.)


Gluten-Free Soft Pretzel dough rolled into a log.

Knead each dough ball until it becomes smooth. It should lose its shaggy appearance.

Roll out into 12-inch log. Take care not to use too much flour on the countertop. If the dough has too much flour on the surface, brush it off with a pastry brush. Cover the other pieces of dough with a piece of plastic wrap.

Gluten-Free Soft Pretzel dough rolled into a log and shaped into a "u" shape.

Gently turn dough into an upside down “U.”

Gluten-Free Soft Pretzel dough being shaped into a pretzel.

Twist ends together.

Gluten-Free Soft Pretzel dough shaped into a pretzel.

Press the ends into the bottom of the “U”. You want to be sure the dough sticks to itself, so it doesn’t come apart while boiling.


Gluten-Free Soft Pretzel floating in simmering water.

Boil the pretzels until they float.

Gluten-Free Soft Pretzel dough shaped on a baking sheet.

Once boiled, the pretzels turn slightly yellow. (The four pretzels on the left have been boiled. The two pretzels on the right have not been boiled.) Sprinkle some kosher salt on the pretzels and bake.

Gluten-free pretzels on a plate with a jar of mustard sitting to the right.

Enjoy!

Gluten-free pretzels on a plate with a jar of mustard sitting to the right.
5 from 2 votes
Print

How to Make Chewy Gluten-Free Pretzels

Prep Time 1 hour 30 minutes
Cook Time 25 minutes
Total Time 1 hour 55 minutes
Servings 12 pretzels
Author GlutenFreeBaking.com

Ingredients

For the Pretzels

  • 2 cups finely ground white rice flour (8 ounces; 226 grams)
  • 1 cup brown rice flour (5 ounces; 142 grams)
  • 3/4 cup tapioca starch (3 ounces; 85 grams)
  • 1 teaspoon salt
  • 1 teaspoon xanthan gum
  • 1/2 teaspoon baking powder
  • 1 cup warm water plus 2 tablespoons (9 ounces; 255 grams)
  • 1 packet active dry yeast (2 1/4 teaspoons)
  • 1 large egg (1 3/4 ounces; 50 grams)
  • 3 tablespoons light corn syrup (2 ounces; 56 grams)
  • 2 tablespoons vegetable oil (3/4 ounce; 21 grams)

For the Water Bath

  • 16 cups water (128 ounces; 3.6 kilos)
  • 1/4 cup baking soda
  • 2 tablespoons granulated sugar (1 ounce; 28 grams)

For the Topping

  • Kosher Salt

Instructions

  1. For the Pretzels: In the bowl of stand mixer, combine white rice flour, brown rice flour, tapioca starch, salt, xanthan gum, and baking powder. Whisk to combine.

  2. In a small bowl, combine 1 cup warm water and active dry yeast. Stir with a fork. Allow to stand for three minutes. Add water-yeast mixture, egg, light corn syrup, and vegetable oil to dry ingredients.
  3. Fit stand mixer with paddle attachment. Mix on medium speed until dough forms, about 4 minutes. The dough should be firm but not dry. If any dry ingredients remain at the bottom of the bowl or if the dough seems dry, add the additional 2 tablespoons water.
  4. Turn dough out onto lightly white rice-floured counter. Dust your hands with white rice flour and knead dough into a ball until smooth. Take care not to use too much pressure while kneading.
  5. Transfer dough to lightly greased bowl. Lightly brush the dough with oil. Cover the bowl with plastic wrap and allow to rise until almost doubled in size, about 1 to 1 1/2 hours.
  6. Adjust oven racks to middle position and preheat oven to 425°F. Bring 4 quarts of water to a rolling boiling. Turn dough out onto a very lightly white rice floured countertop. Punch down dough gently to deflate. Cut into 12 pieces. Cover dough with plastic wrap. One at a time, knead each piece of dough until smooth. Then, roll out the dough pieces into 12 to14-inch logs. (You want little to no white rice flour on the area of the counter where you are rolling the dough. If there is too much flour on the outside of the dough, the pretzel dough won't stick to itself when you go to shape it.)
  7. Line two rimmed baking sheets with parchment paper. Working one log at a time, form the dough into a into "u". Twist each end together and then press the rope into the bottom of the "u". You want to press the dough firmly to ensure the ends stick to the "u" or the pretzel can unravel during boiling. Place shaped pretzels on prepared baking sheet.
  8. Prepare the Water Bath: Add the baking soda and granulated sugar to the boiling water. One at a time, boil the pretzels. If the pretzel floats, boil for about five seconds. If the pretzel sinks, wait for it to float to the top of the water and then remove. Return boiled pretzels to the prepared baking sheets. Sprinkle generously with kosher or pretzel salt.

  9. Bake until golden brown, about 25 minutes, rotating baking sheets halfway during baking. Remove and allow pretzels to cool. Pretzels are best served the day they're made. If desired, freeze once cooled and reheat in a warm oven.


Fluffy Lemonade Pie

Jul 23, 2015 · Leave a Comment

Gluten-free lemonade pie.


Fluffy Lemonade Pie Gluten Free

Recently, a friend threw a casual summer potluck barbecue. The theme was “summer foods you loved as a kid.” I immediately thought of fluff pie, a Jell-O®-based dessert that always made an appearance at picnics when I was a kid. In fact, I think of it as a summer pie—even though there’s really nothing seasonal about it.

If you aren’t familiar with this pie, it’s one of those classic back-of-the-box recipes. You whip soft-set lemon Jell-O® with whipped topping and spoon it into a crumb crust. That’s it. The filling is basically an impossible-to-mess-up Bavarian cream.

As I went to make the pie, I remembered that my friend’s son can’t eat yellow food color. It makes him break out in hives. For a moment, I thought about making crispy treats for the barbecue but there was just something about that pie. So I decided to make it without the lemon Jell-O®.

The first thing I did was check to make sure that freshly squeezed lemon juice wouldn’t inhibit the gelatin from setting. The usual offenders, like pineapple and papaya, were on the list but, thankfully, lemon juice seemed ok. I bloomed powdered gelatin in freshly squeezed lemon juice, whisked in a water-sugar mixture and let it set up for about two hours. Then I whisked the soft gelatin into some sweetened whipped cream, spooned it into a pie shell and hoped it would set. I was a little unsure how much gelatin I’d need to set a filling that was firm enough to slice. The process took a little extra time but, honestly, most of it was inactive.

 The filing set up firm enough to serve the pie sliced and placed on paper towels. Yup, it’s one of those pies that doesn’t require a fork—unless you want one. Without the food color from the Jell-O®, the filling came out almost white. A quick sprinkle of lemon zest added just the right amount of color and another whisper of lemon flavor. And although the color turned out pale, the flavor was a far cry from anemic. The fresh lemon juice combined with the sweetened whipped cream to create a lemonade-like flavor; at the party, it was the first dessert to go. Since there are still plenty of summer barbecues left, I’m already wondering, what flavor of fluff pie do I want to make next? Hmm…
Gluten-free lemonade pie.
Print

Fluffy Lemonade Pie

Prep Time 35 minutes
Cook Time 8 hours
Total Time 8 hours 35 minutes
Author GlutenFreeBaking.com

Ingredients

For the Crust

  • 1 1/2 cups finely ground gluten-free vanilla cookies about 22 cookies or 1 (10.5-ounce) package, such as Schar brand
  • 4 tablespoons unsalted butter, melted (2 ounces; 56 grams)

For the Filling

  • 1/4 cup fresh lemon juice from 2 lemons (2 ounces; 56 grams)
  • 2 tablespoons cold water (1 ounce; 28 grams)
  • 1 tablespoon unflavored gelatin
  • 3/4 cup cold water (6 ounces; 170 grams)
  • 1/2 cup granulated sugar (3 1/2 ounces; 100 grams)
  • 1 1/2 cups cold heavy cream (12 ounces; 340 grams)
  • 1/4 cup powdered sugar (2 ounces; 56 grams)
  • Zest of 1 lemon

Instructions

  1. For the Crust: Preheat oven to 350°F. In small bowl, combine vanilla cookie crumbs and melted butter. Stir with a fork to combine. Mixture should be damp and hold together when pressed. Press crumb mixture onto the bottom and sides of a 9-inch pie plate. Bake until set and aromatic, about 10 to 12 minutes. Remove crust from oven and place on a wire rack to cool.
  2. For the Filling: Combine lemon juice and 2 tablespoons water in a small saucepan. Sprinkle gelatin on top and allow to stand for 5 minutes.
  3. In a separate small saucepan, combine 3/4 cup water and granulated sugar. Heat over medium-high heat, stirring occasionally, until sugar dissolves. Set aside.
  4. Cook gelatin mixture over low heat, without allowing liquid to boil, until gelatin is dissolved, about 4 minutes. In a small bowl, stir together gelatin mixture and sugar mixture. Chill until soft set, about 2 1/2 hours (the gelatin should wiggle but you don’t want it totally set).
  5. In the bowl of a stand mixer fitted with the whisk attachment, combine heavy cream and powdered sugar and whip to medium-firm stiffness. Add gelatin and whip until the gelatin is combined. Spoon into prepared pie crust. Sprinkle lemon zest over the top of the pie. Chill for 6 hours or until fully set. Serve. Leftover pie can be refrigerated for up to 4 days.


Chewy Gluten-Free Granola Bars

Jul 23, 2015 · 2 Comments

Copycat Recipe: Quaker's Chewy Granola Bars.

Chewy gluten-free granola bars are loaded with chocolate chips and almonds.

Chewy granola bars on red cutting board.


You know those crazy dietary promises you make to yourself as a kid? Like, “When I grow up, I’ll eat frosting straight from the can whenever I want!” And then you grow up and forget all about them. Well, I once made such a promise to myself about Quaker’s Chewy Granola Bars…and I didn’t forget.

The reason for the promise? My mom used to buy the bars, believing they were healthy (ha!). Then one day she ate one. “This is a candy bar!” she said after one bite. Duh—why did she think I loved them? From that moment on, the days of Chewy bars as a snack were over. I promised myself that when I grew up, I’d buy them whenever I felt like it.

And you know what? I held true to it. Or I did, until I started my gluten-free diet and Quaker’s Chewy Granola Bars were, once again, out. I tried making gluten-free versions, and while the base of oatmeal and crispy rice wasn’t difficult, the texture tripped me up. I wanted the bars to be, well, chewy. I tried honey. I tried a homemade sugar syrup. I even tried baking the bars. But the bars either fell apart, were too hard, or were just plain off.

Until now.

I have finally nailed a copycat version of Chewy bars. The secret to that elusive chew? Marshmallows.

But marshmallows alone don’t achieve the right flavor. A quick scan of the ingredients on the Quaker box reveals that there’s brown sugar in the originals. So I balanced the marshmallow with some brown sugar, and now they’re perfect.

Plus, these bars are ridiculously easy to make. If you’ve ever made a batch of crispy bars, you already know everything you need to about making this recipe. You simply melt some butter (or coconut oil, if you don’t eat dairy) with brown sugar. Then melt in the marshmallows and stir in some gluten-free oats, crispy rice cereal, and—if you’re feeling crazy—nuts and chocolate chips. That’s it! You can make a batch of these in less than 15 minutes (not including the somewhat painful 2 hours of waiting for them to set in the refrigerator).

If you’re wondering if these bars are too sweet with the marshmallows and brown sugar, just remember what my mother said: They’re basically candy bars. And they’re wonderful.

Chewy granola bars on red cutting board.
Print

Copycat Recipe: Quaker Chewy Granola Bars

A copycat gluten-free recipe for Quaker's Chewy Granola Bars
Prep Time 15 minutes
Cook Time 10 minutes
Total Time 25 minutes
Servings 24 bars
Author GlutenFreeBaking.com

Ingredients

  • Nonstick cooking spray
  • 2 cups gluten-free quick-rolled oats (6 1/4 ounces; 178 grams)
  • 2 cups gluten-free crisp rice cereal (about 2 ounces; 56 grams)
  • 1/4 cup chopped almonds (about 1 ounce; 28 grams)
  • 1/4 cup chocolate chips (1 1/2 ounces; 42 grams)
  • 1/2 teaspoon kosher salt
  • 6 tablespoons unsalted butter or coconut oil (3 ounces; 85 grams)
  • 1/3 cup dark brown sugar (2 1/2 ounces; 70 grams)
  • 3 cups marshmallows (about 5 ounces; 142 grams)

Instructions

  1. Spray 9- by 13-inch baking dish with cooking spray. Set aside. In large bowl, toss together oats, crispy rice cereal, almonds, chocolate chips, and salt.
  2. In large saucepan, melt butter over medium-low heat. Add brown sugar and cook, stirring constantly, until sugar melts. Add marshmallows and continue to cook, stirring, until marshmallows melt. Turn off heat and stir in oat mixture until just combined.
  3. Press mixture evenly into prepared baking dish and refrigerate for 2 hours. Remove from refrigerator. Using thin metal spatula, lift granola out in a single layer. Cut into 24 bars. Store in an airtight container for up to two weeks.


  • « Go to Previous Page
  • Page 1
  • Interim pages omitted …
  • Page 16
  • Page 17
  • Page 18
  • Page 19
  • Page 20
  • Go to Next Page »

Primary Sidebar

Get Recipes Delivered to Your Inbox! (Free Weekly Newsletter!)


Elizabeth Barbone

I'm Elizabeth. Welcome to GlutenFreeBaking.com --- a judgment-free baking space. Here you'll find easy recipes, product reviews, and other good stuff that makes gluten-free living easy and a lot more fun!

Read More About Elizabeth →

  • Facebook
  • Instagram
  • Pinterest

Foods You Miss the Most

  • A stack of gluten-free pancakes topped with maple syrup and butter on a plate.
    The Best Gluten-Free Pancakes
  • Gluten-free chocolate chip cookies on a cooling rack.
    Gluten-Free Chocolate Chip Cookies
  • Loaf of Baked Gluten-Free Sandwich Bread on Red Cutting Board.
    How to Make the Best Gluten-Free Sandwich Bread: An Easy Recipe for Everyone!
  • Gluten-free flour tortillas on plate.
    How to Make the Best Gluten-Free Flour Tortillas

Footer

↑ back to top

Terms

  • Privacy Policy
  • Terms & Conditions
  • Accessibility Statement

Follow Us

  • Facebook
  • Instagram
  • Pinterest

About

  • Contact
  • About

Copyright © 2025 Gluten-Free Baking