• Skip to primary navigation
  • Skip to main content
  • Skip to primary sidebar
Gluten-Free Baking logo
  • Home
  • Recipes
  • About
    • About Me
    • Contact
    • My Cookbooks
    • Work with Me
menu icon
go to homepage
  • Home
  • About
  • Recipes
  • Contact
    • Facebook
    • Instagram
  • search icon
    Homepage link
    • Home
    • About
    • Recipes
    • Contact
    • Facebook
    • Instagram
  • ×
    Home

    Gluten-Free Waffles

    Stack of gluten-free waffles with butter and syrup on a plate.

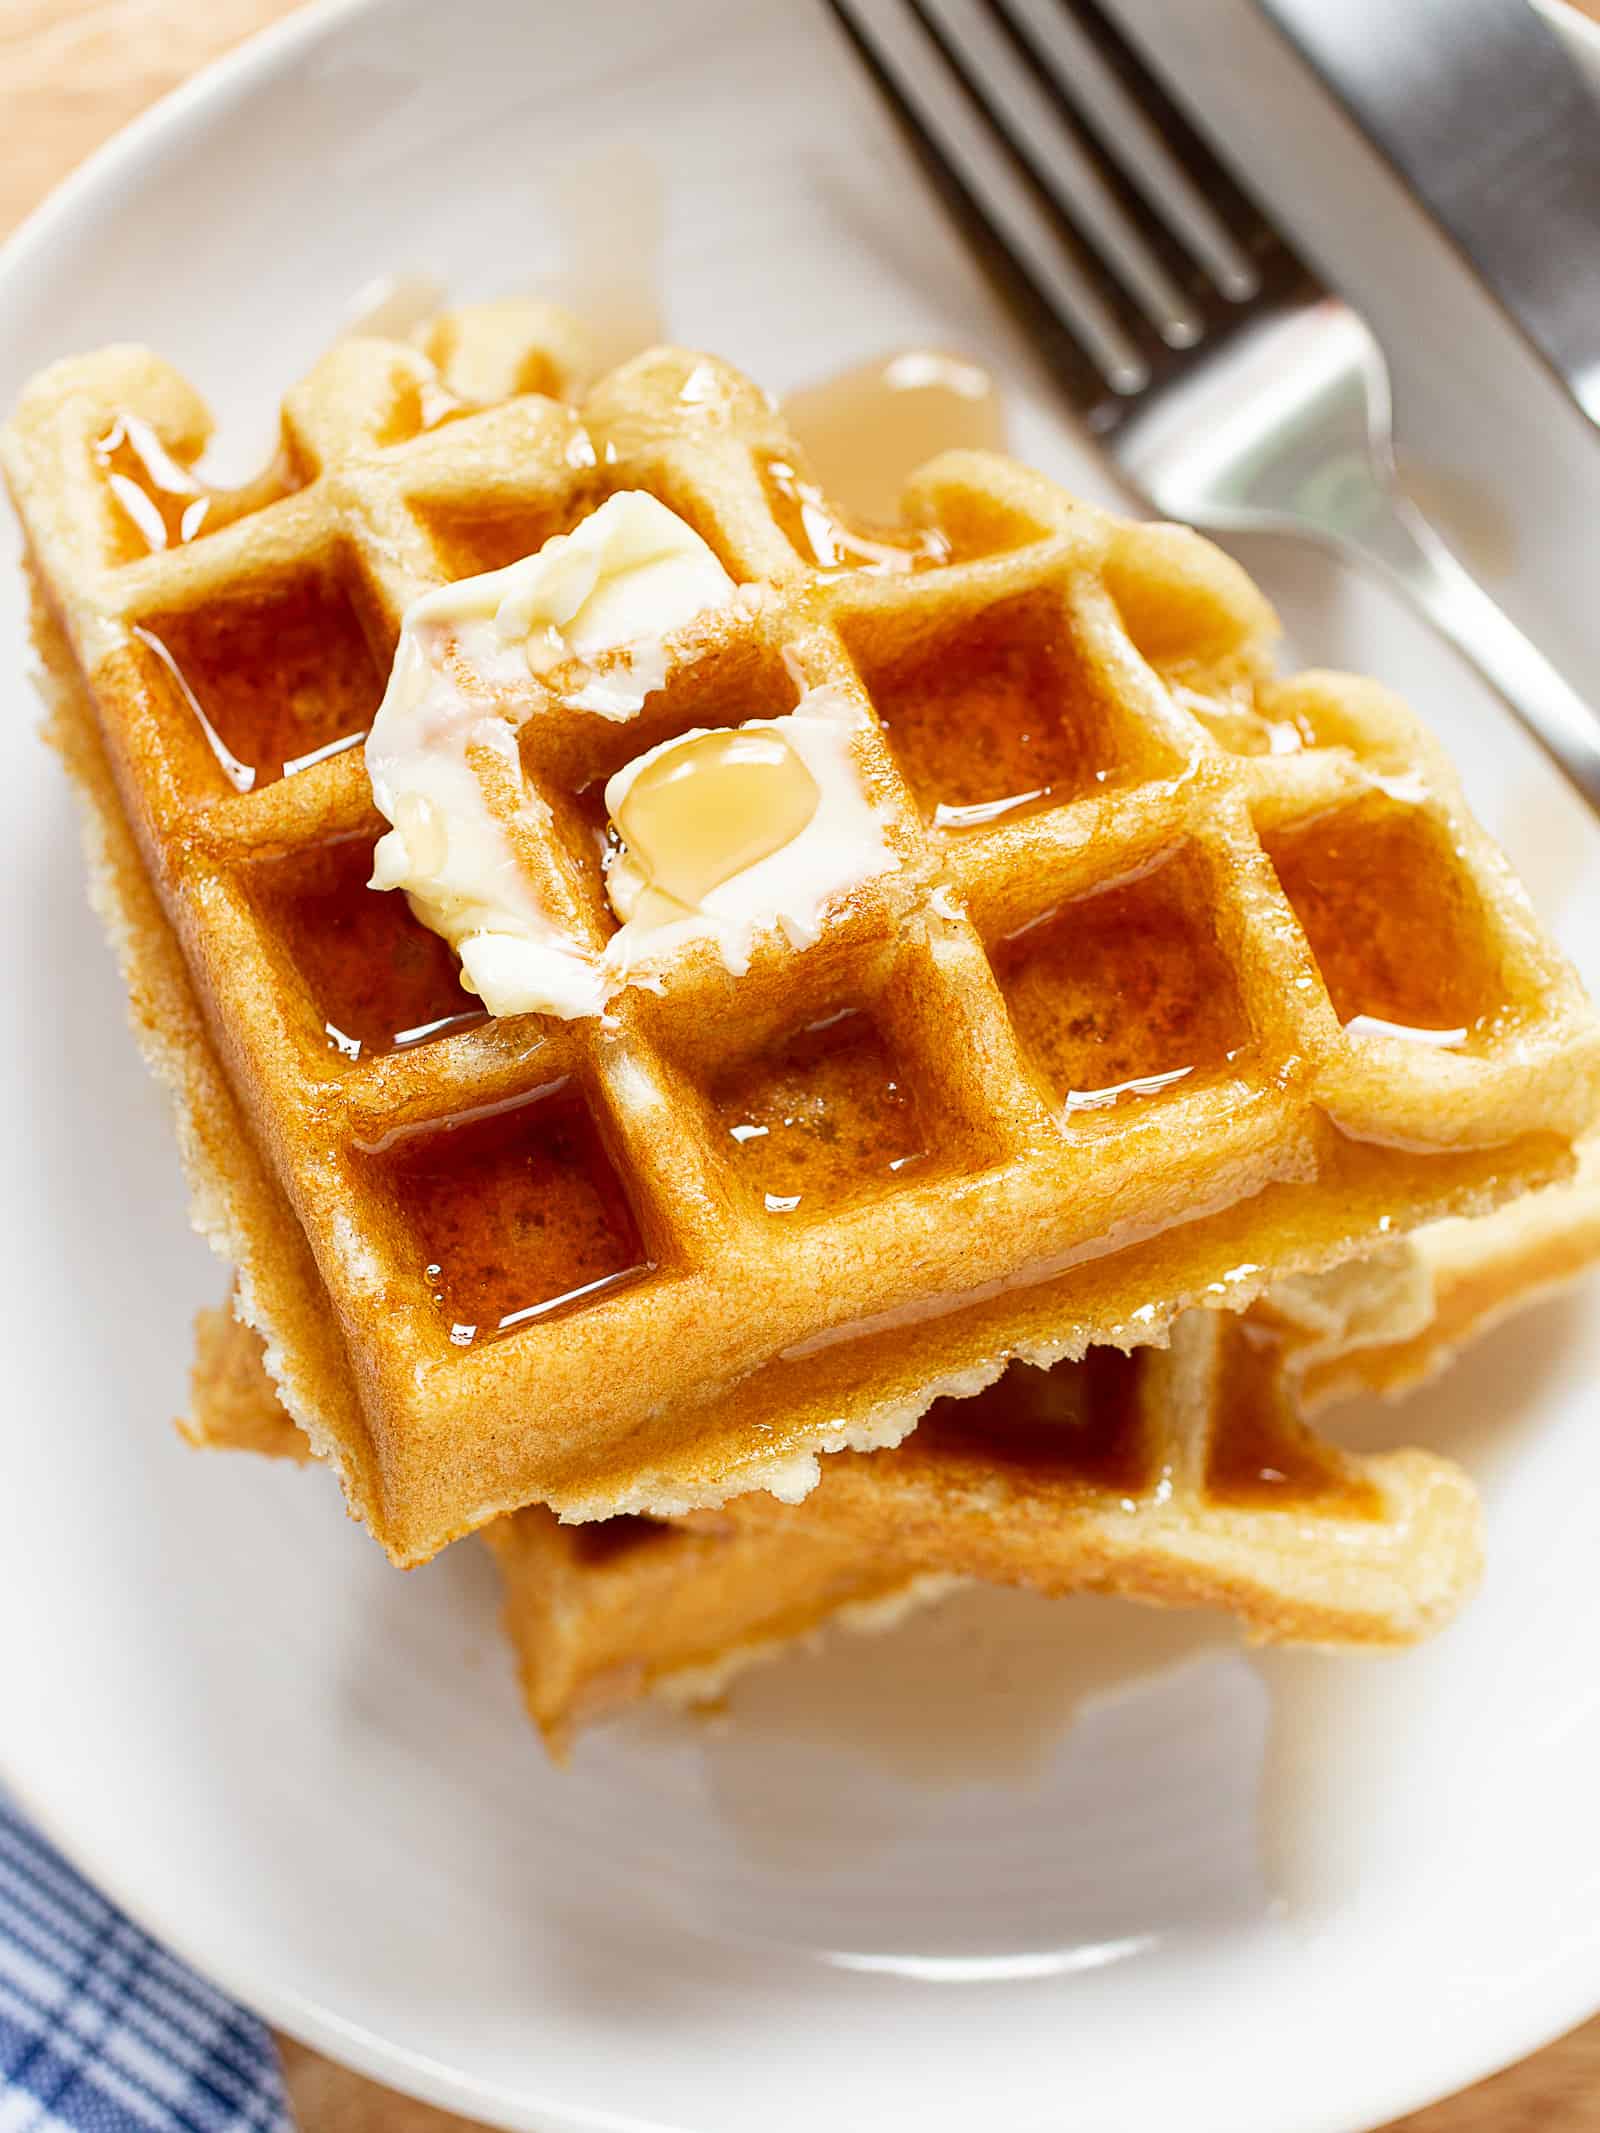
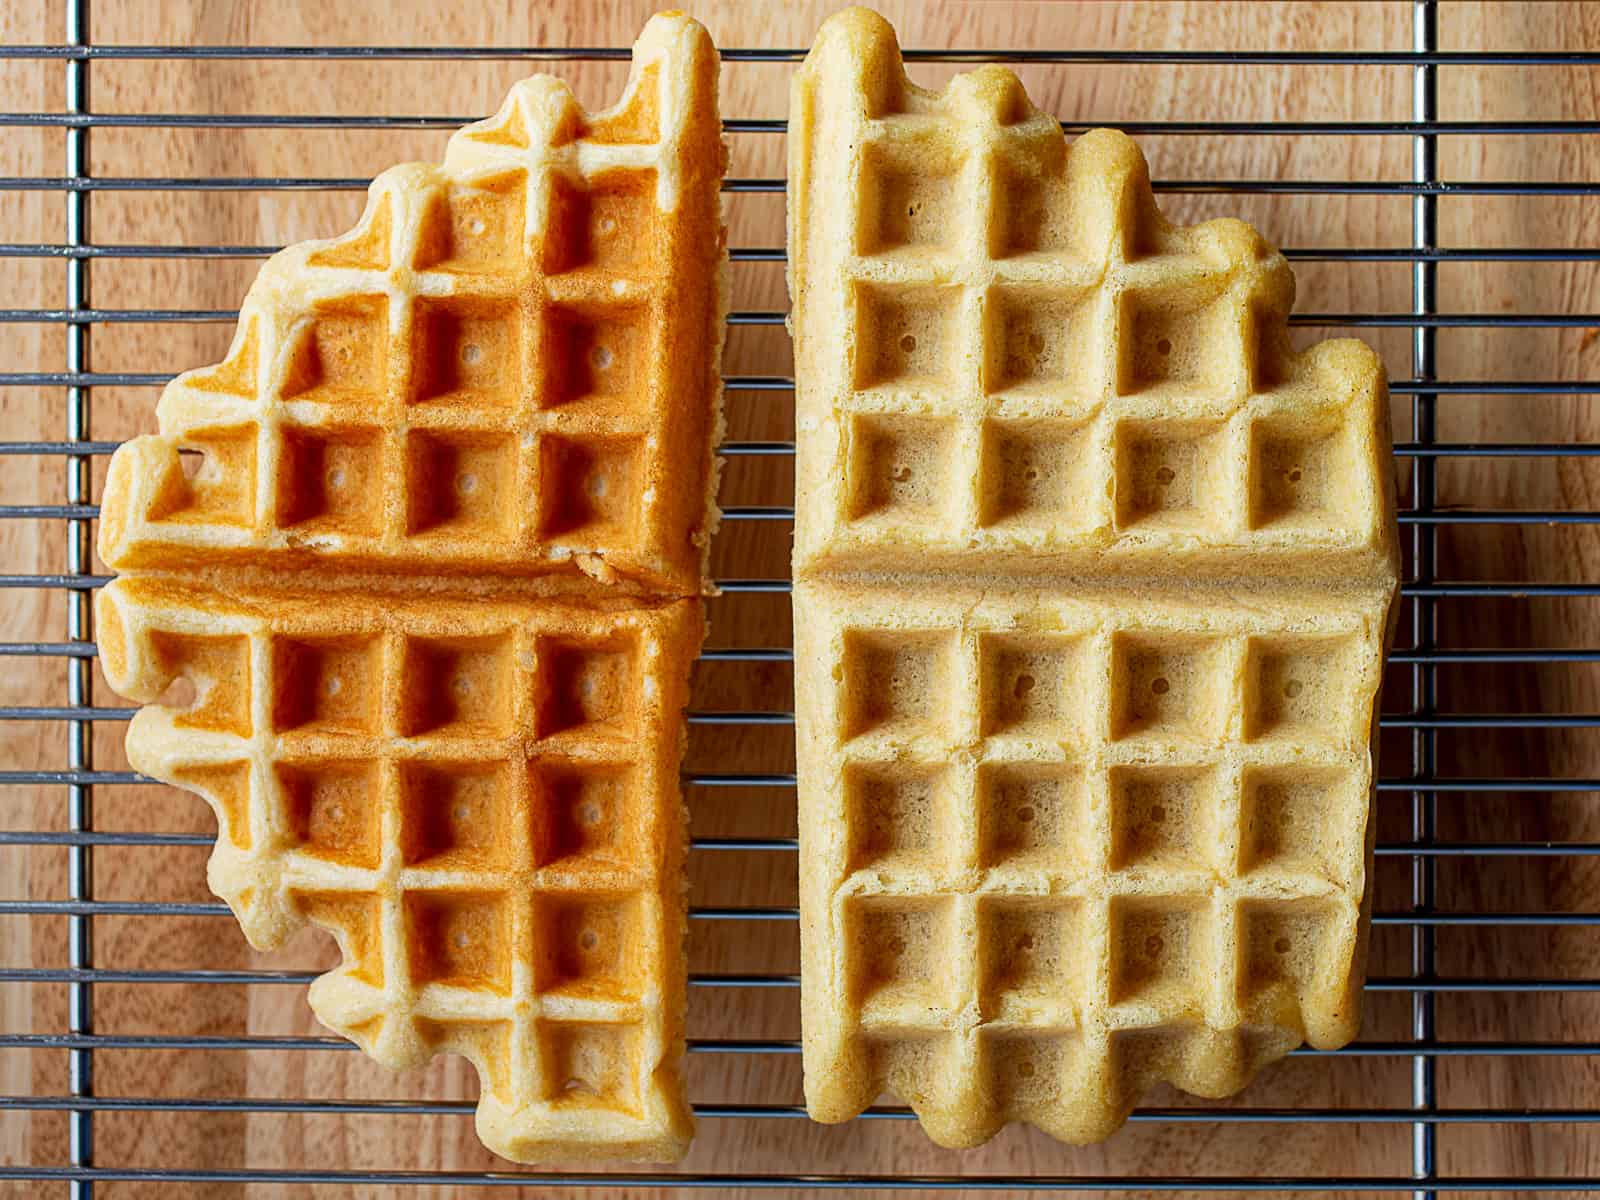
    This recipe makes a perfect gluten-free waffle. They’re crispy on the outside and tender in the center. Egg-free and dairy-free variations are included.

    Stack of gluten-free waffles with butter and syrup on a plate.

    Ah, waffles—they make breakfast extra special, don’t they? And while they always feel like an indulgence, they’re pretty easy to make. You just whisk all the ingredients together in a large bowl. (There’s no need to fold in whipped egg whites or do anything fancy.) Then you pour the batter into a hot waffle iron. In just a few minutes, breakfast is ready. 

    If you’ve got the time, make a double batch—these freeze wonderfully and are ideal for a quick “grab and go” breakfast. You can even use them for breakfast sandwiches, swapping out the usual gluten-free bread for waffles.

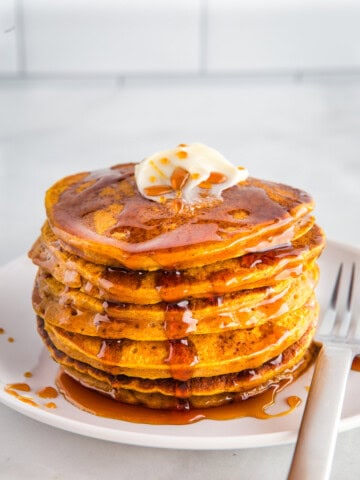
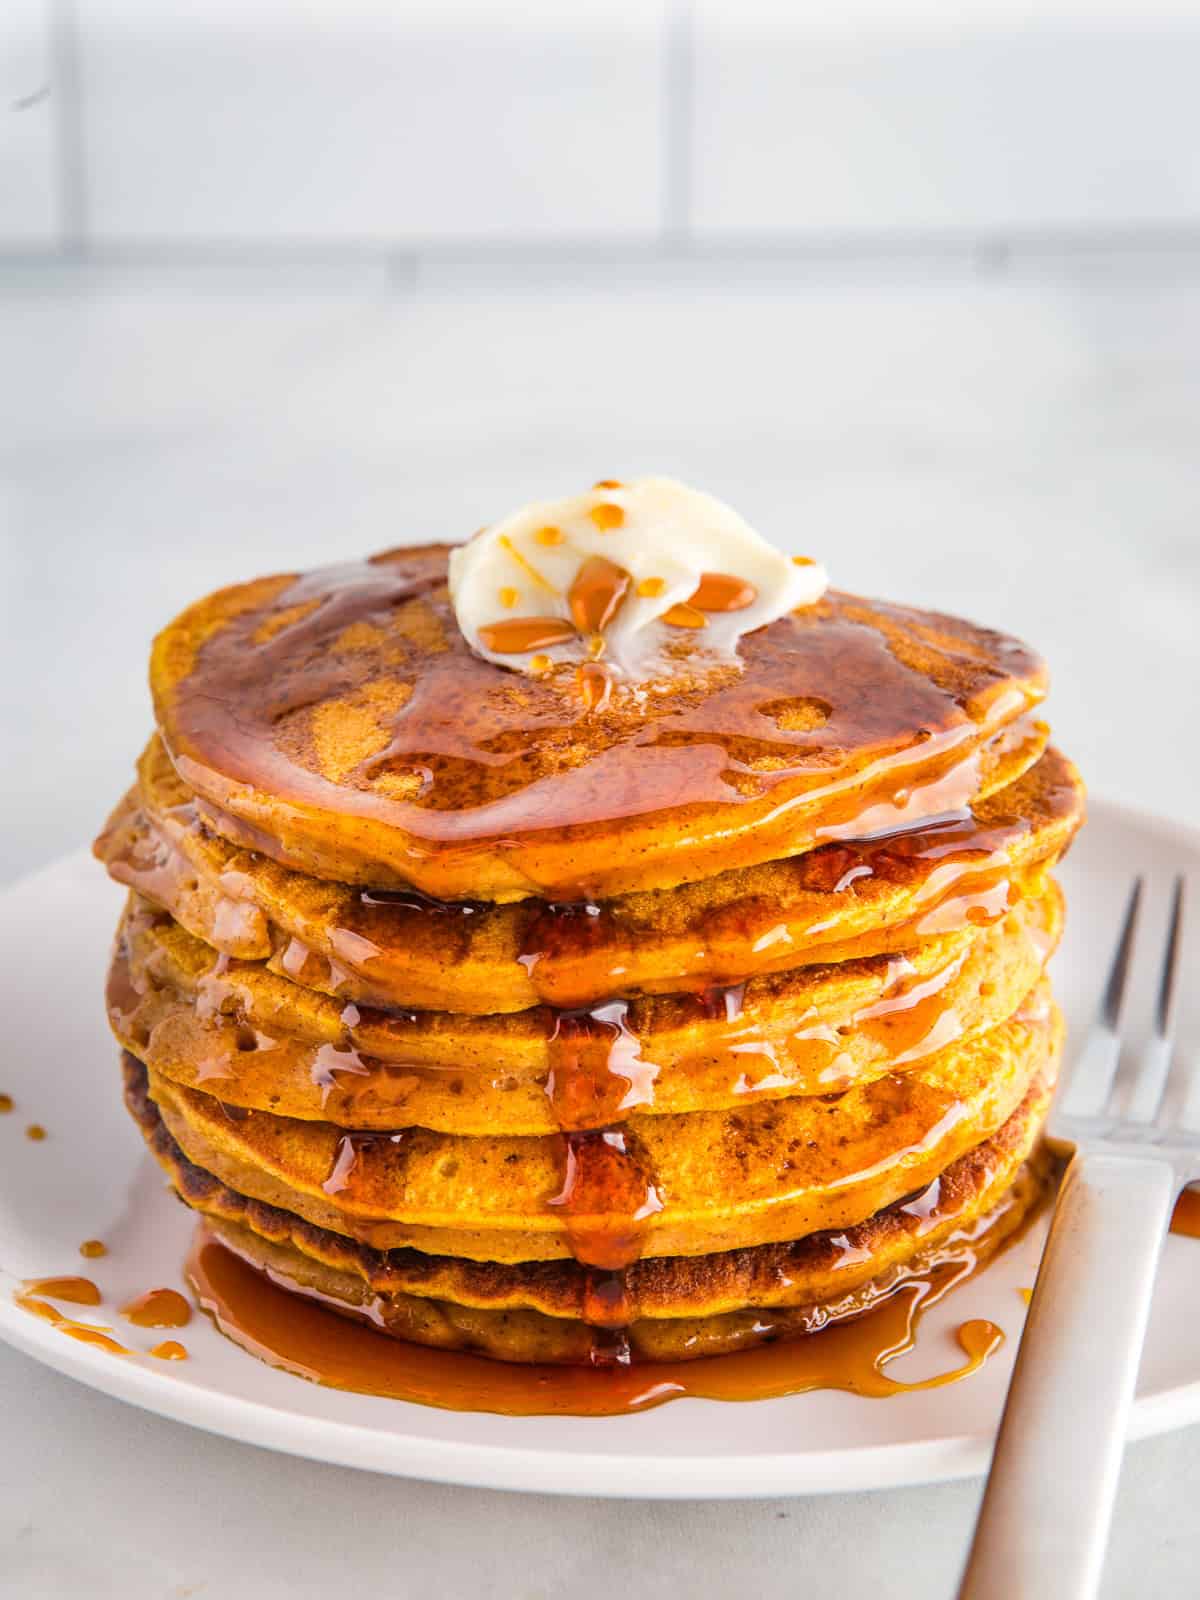
    And speaking of yummy breakfasts, if you love waffles, you probably love pancakes. My recipe makes fluffy gluten-free pancakes.
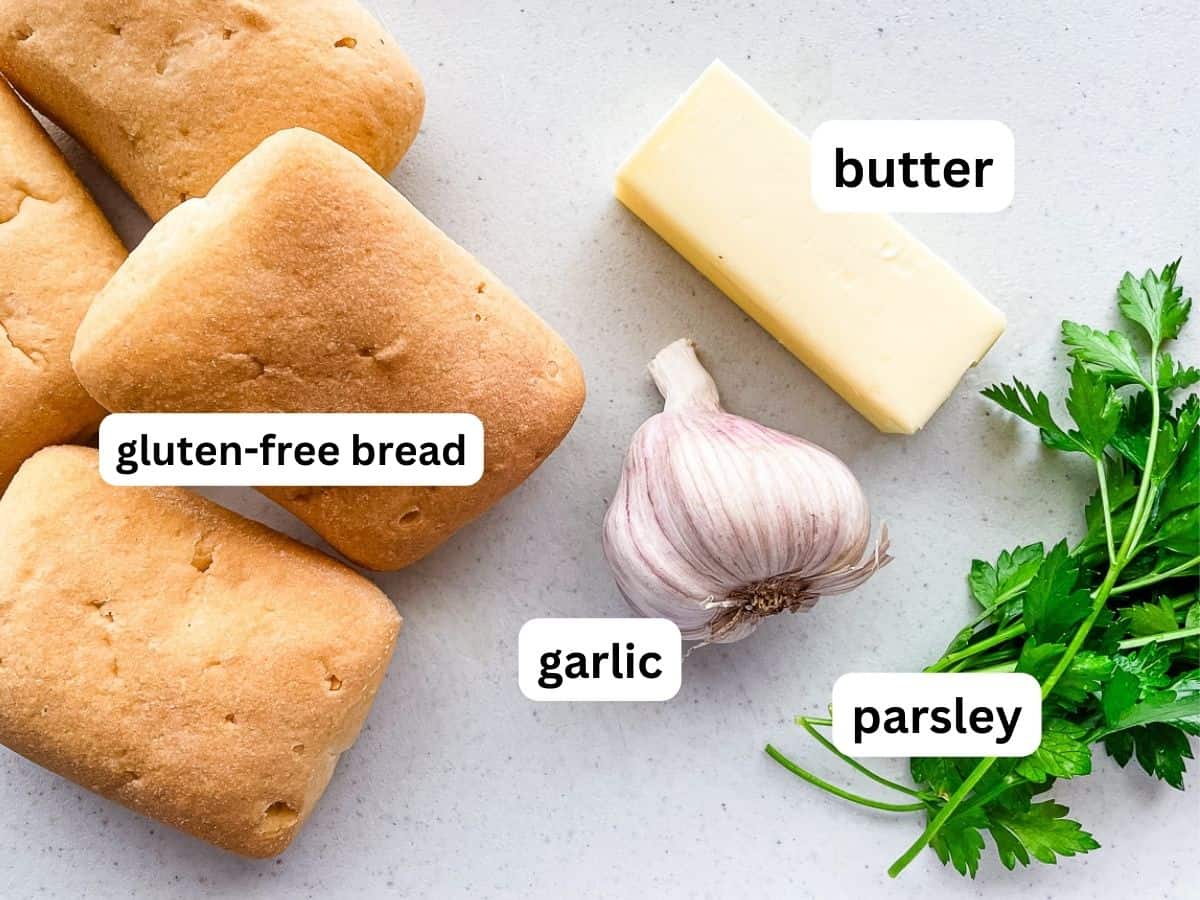
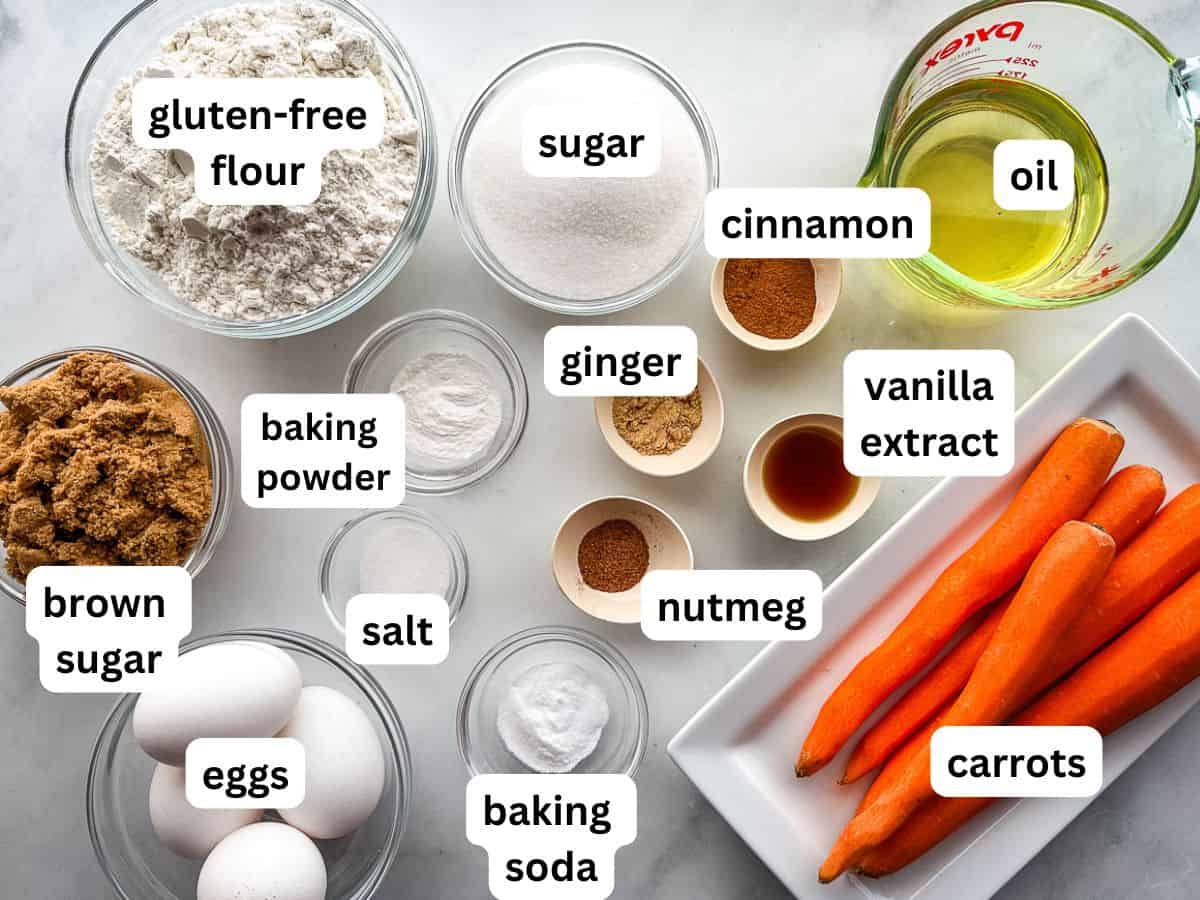
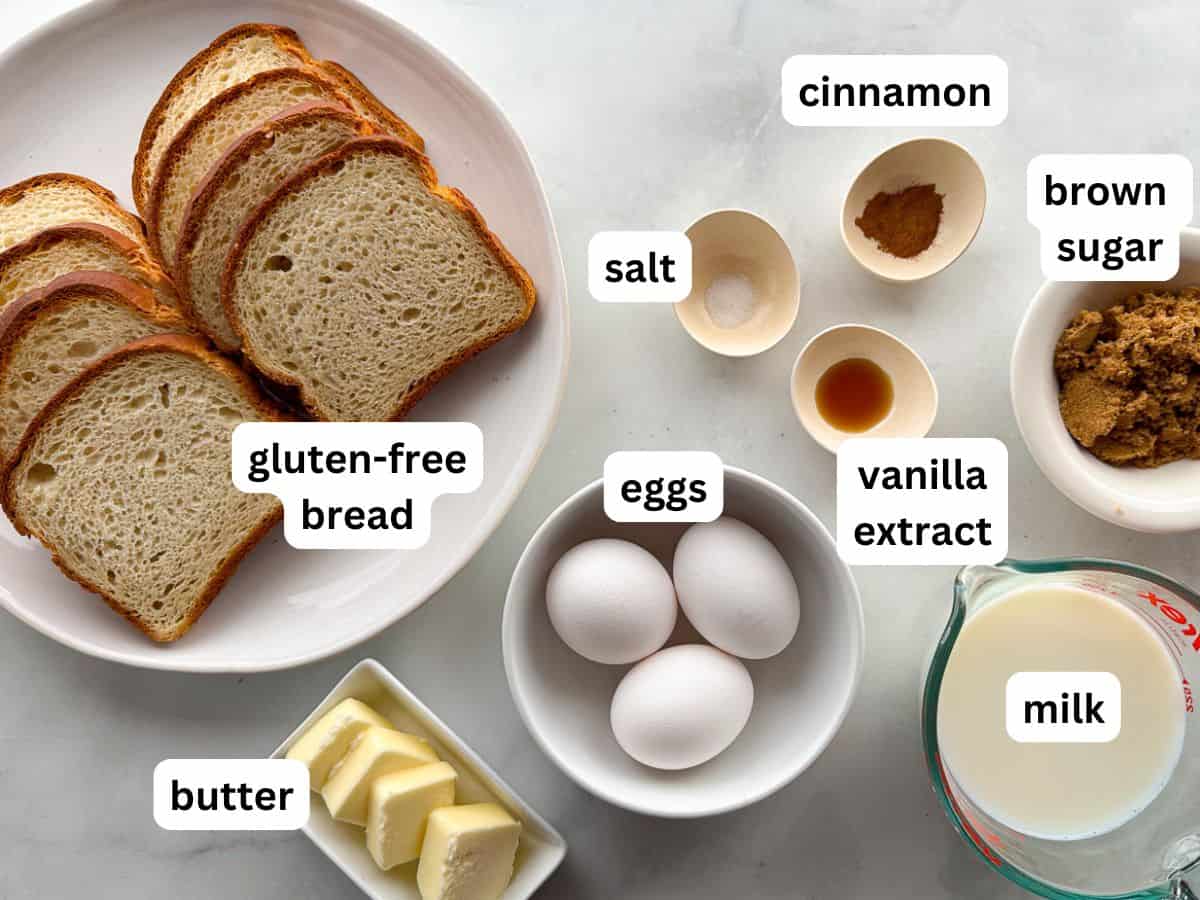
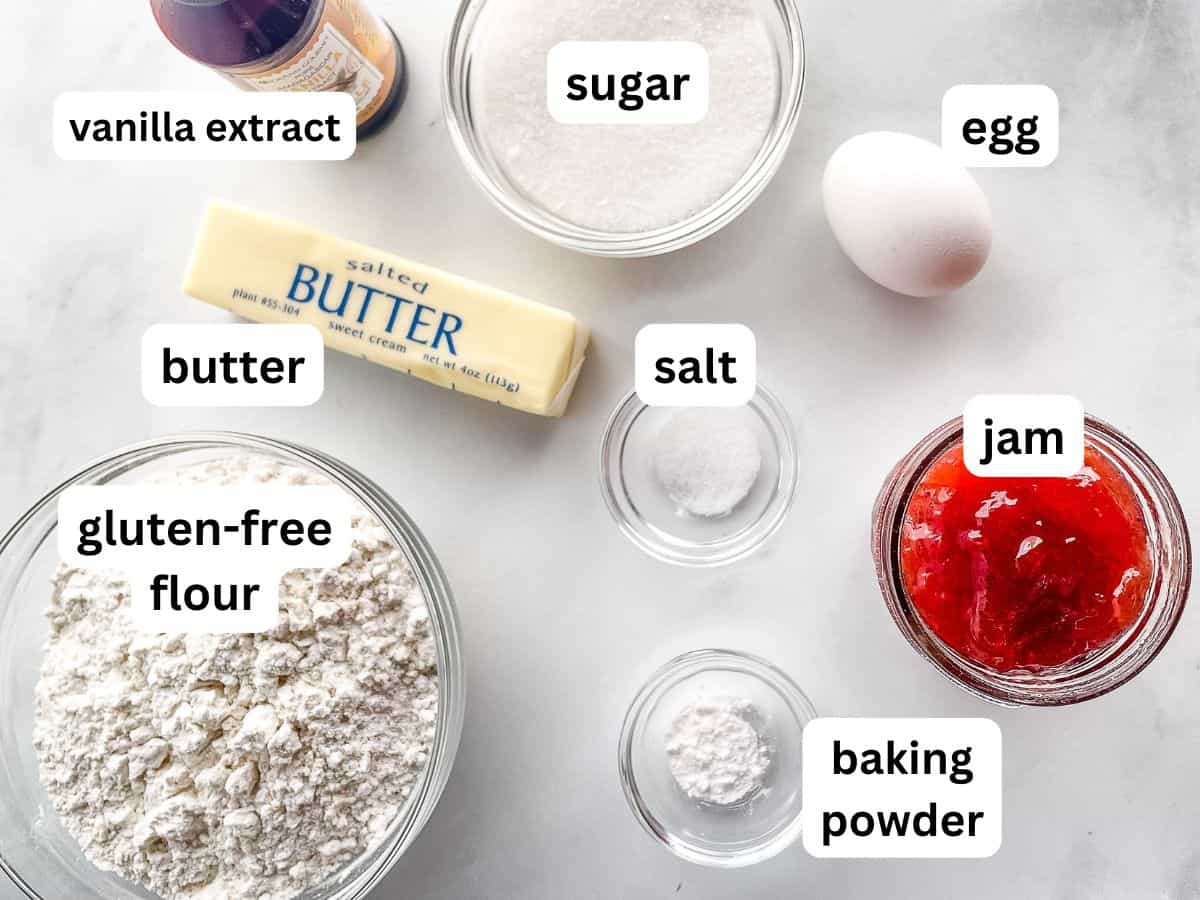
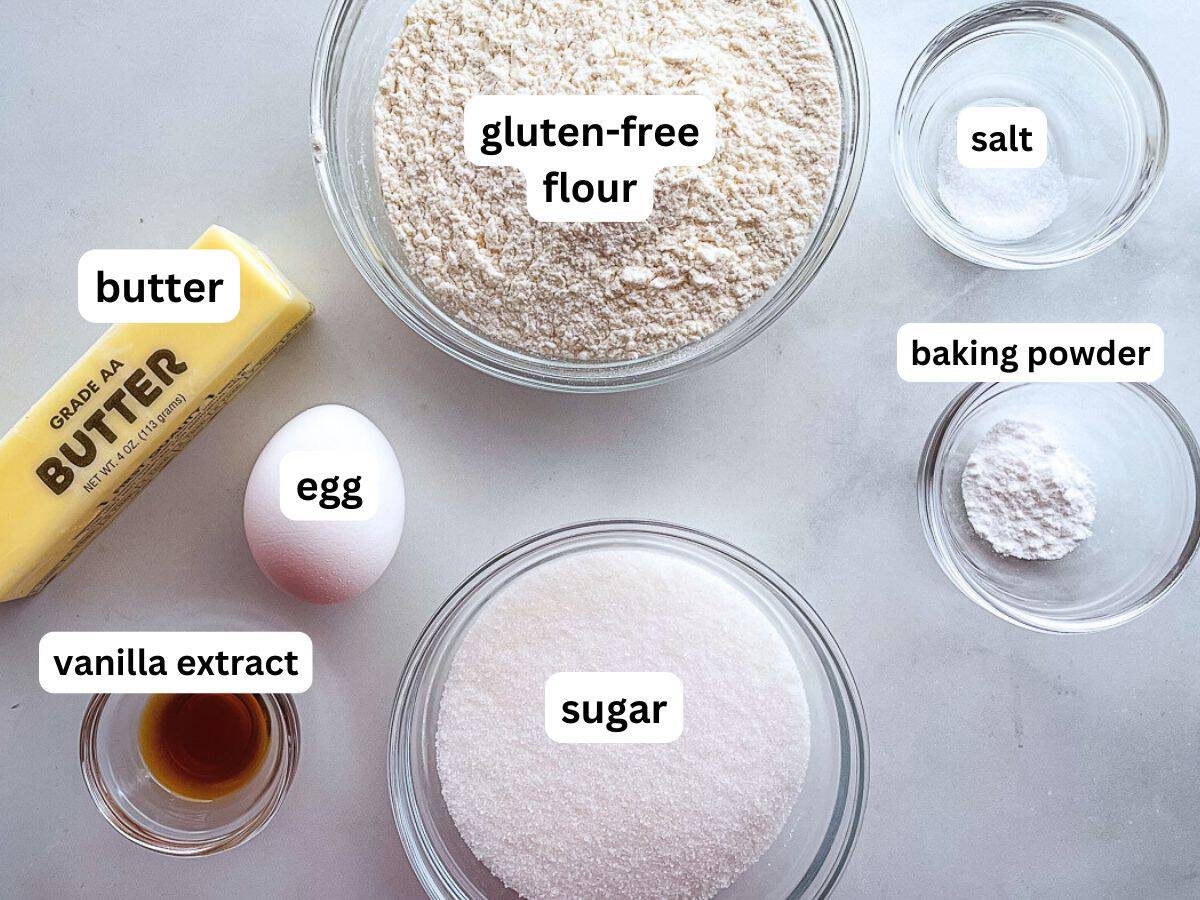
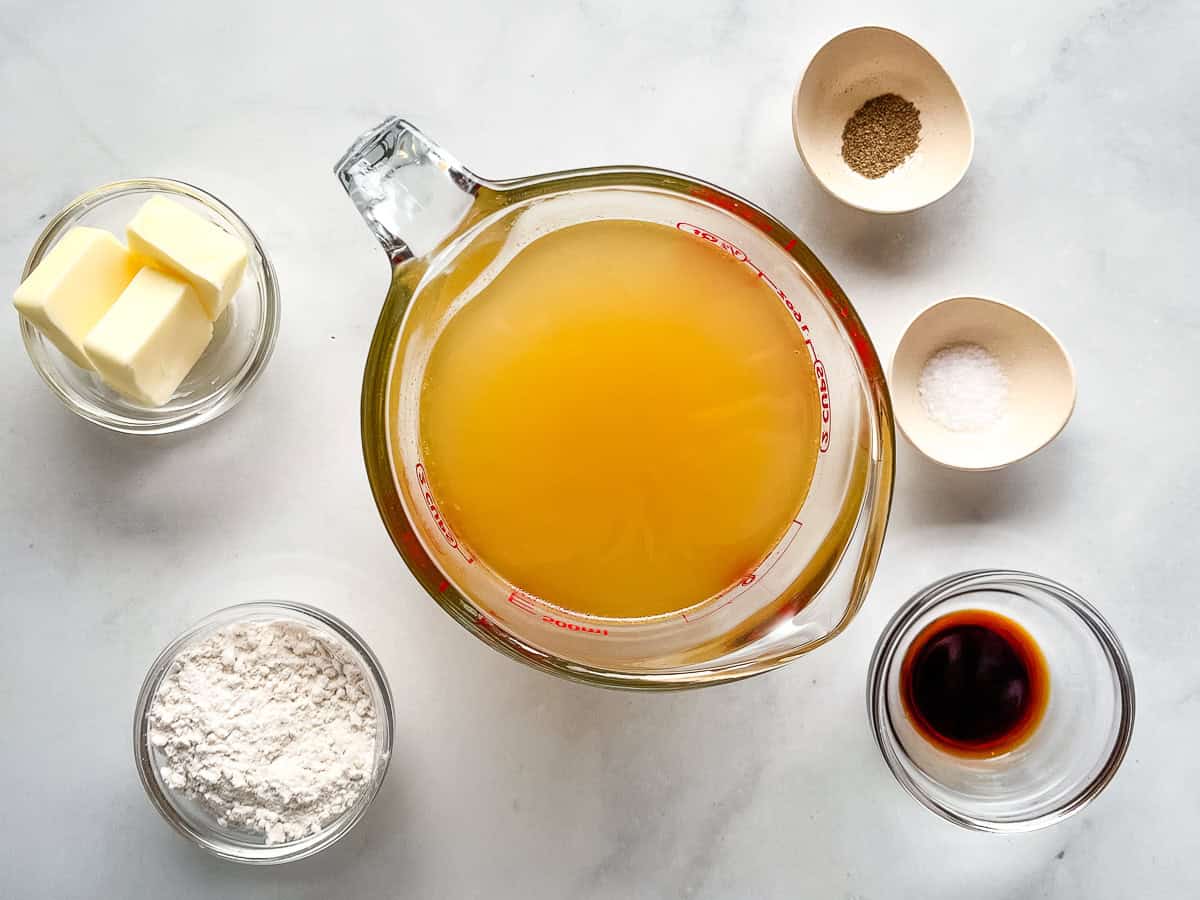
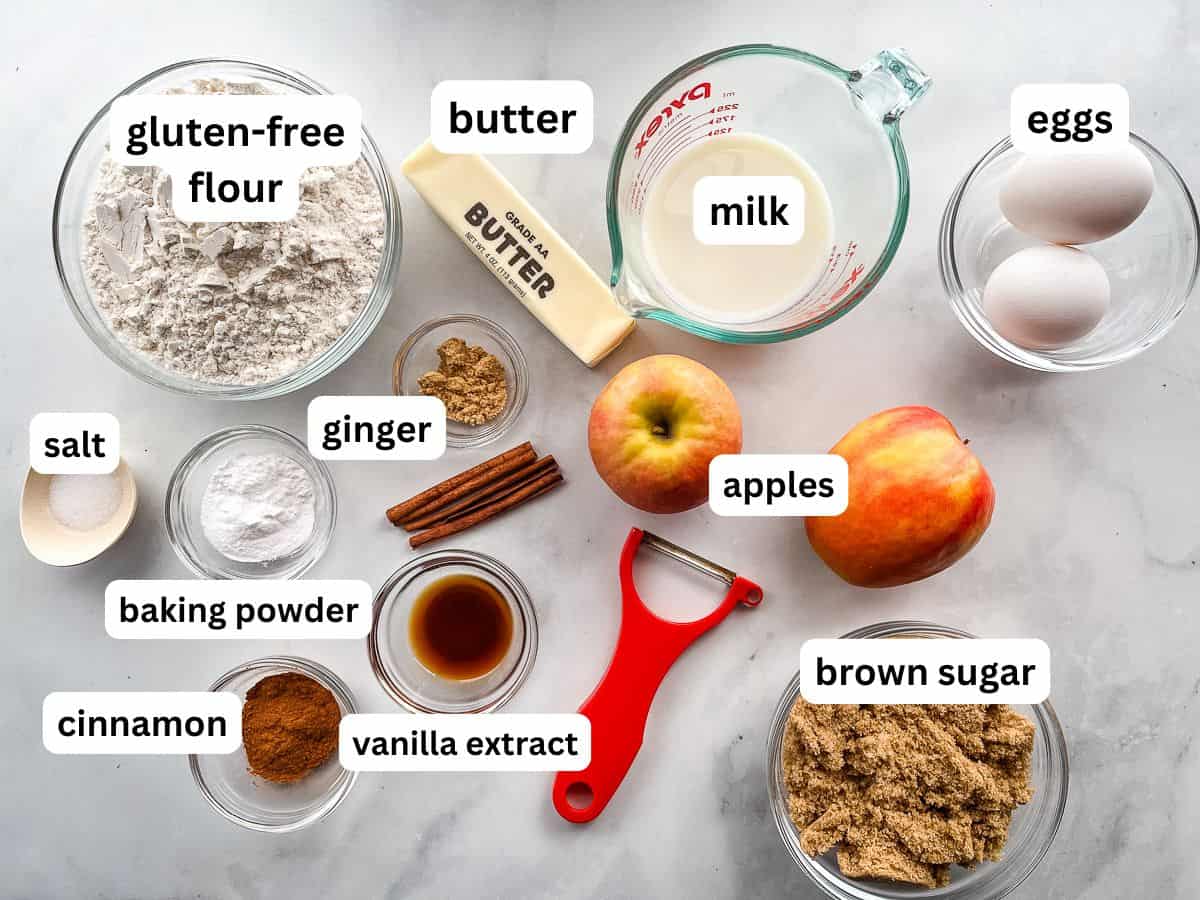
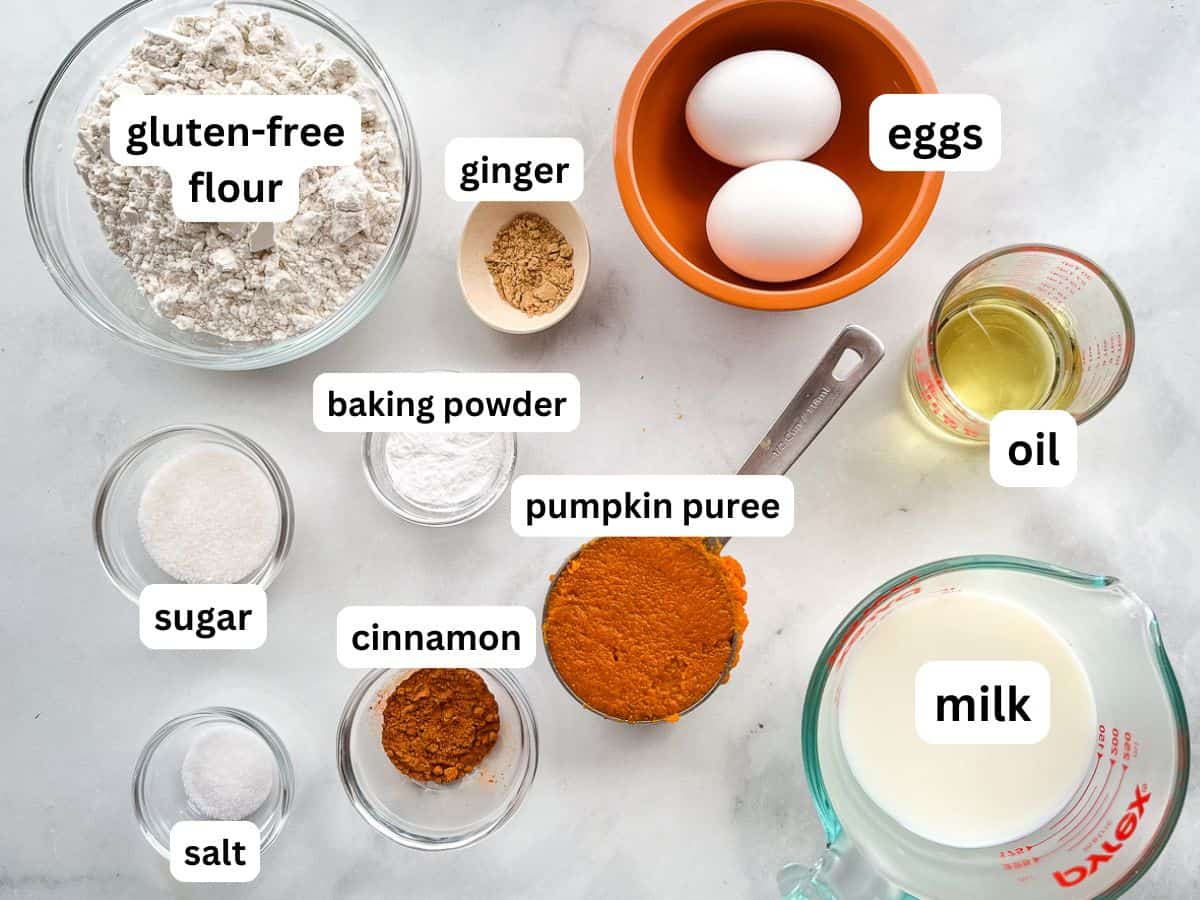
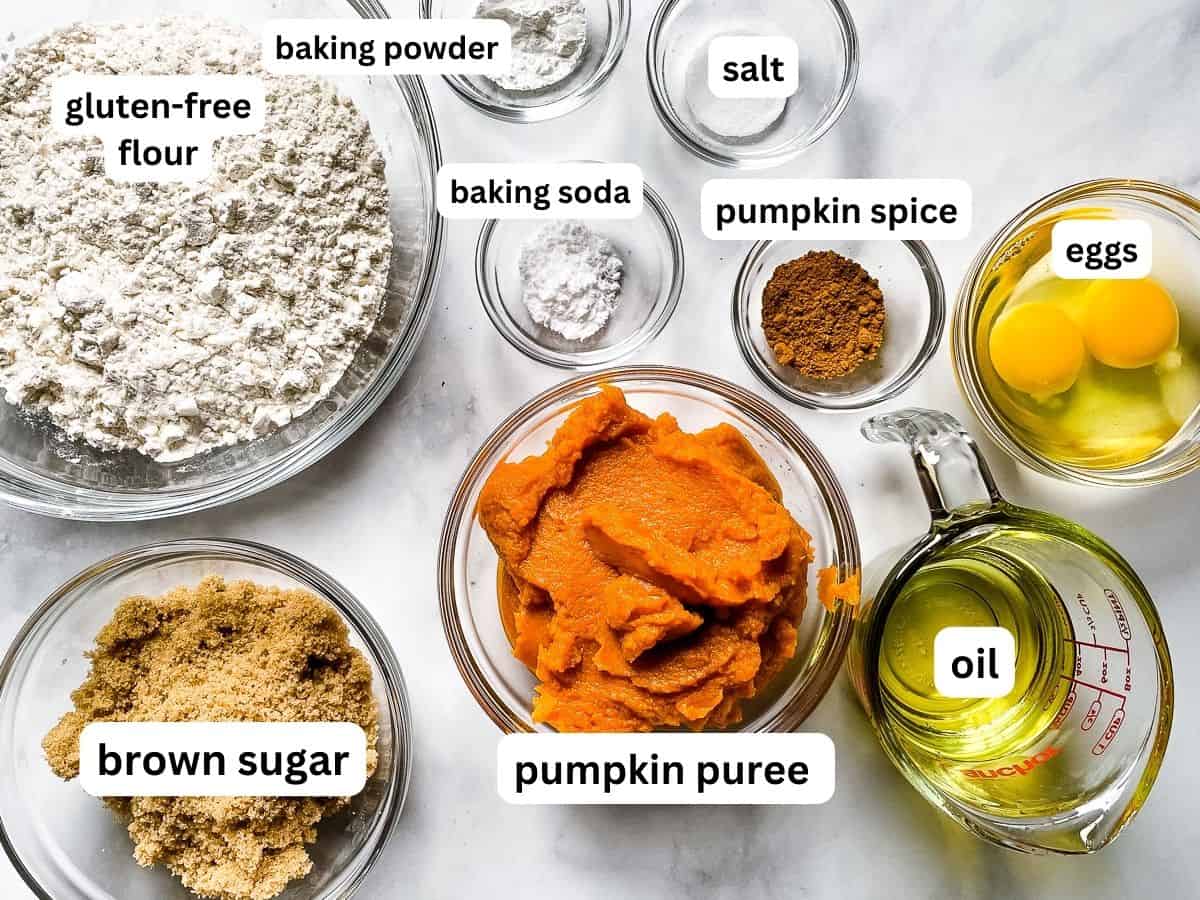
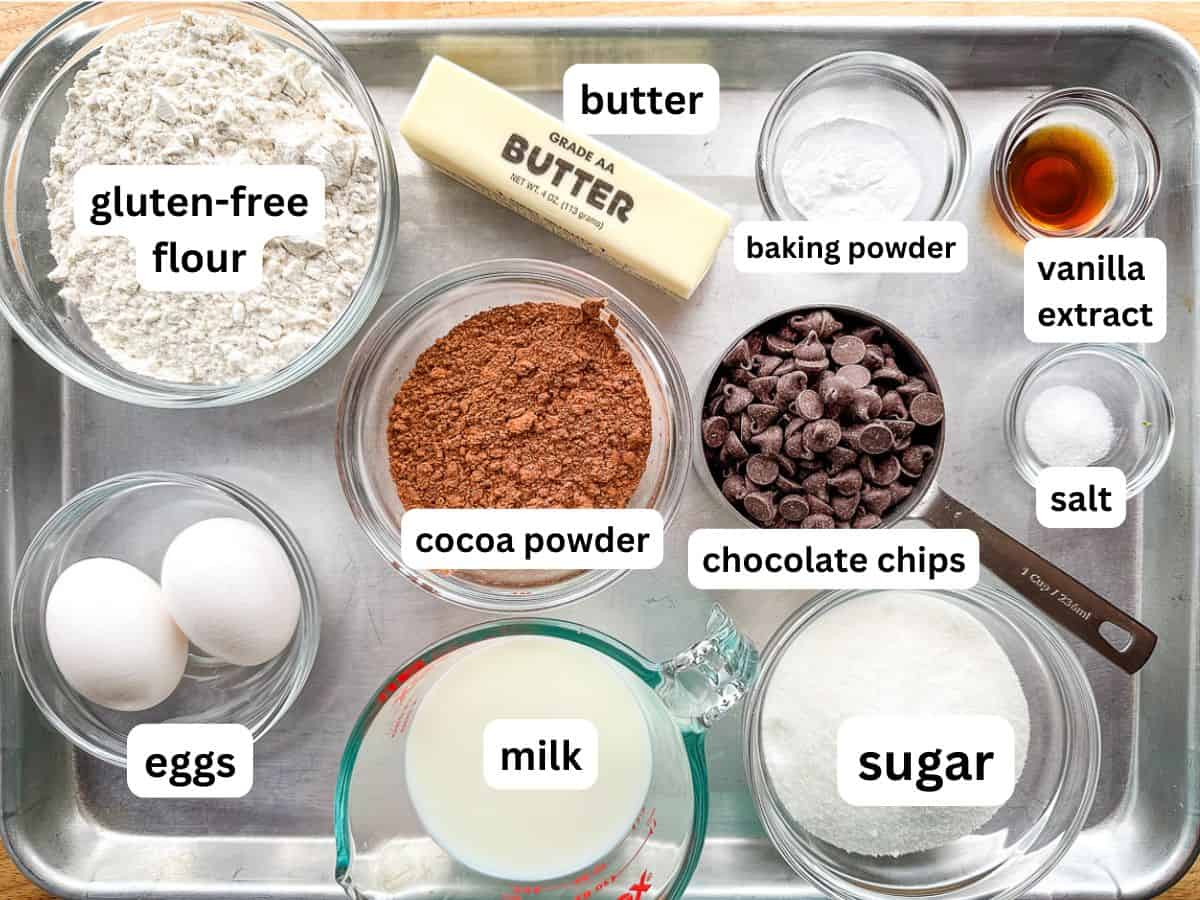
    Ingredients.

    Ingredients for gluten-free waffles on the counter.
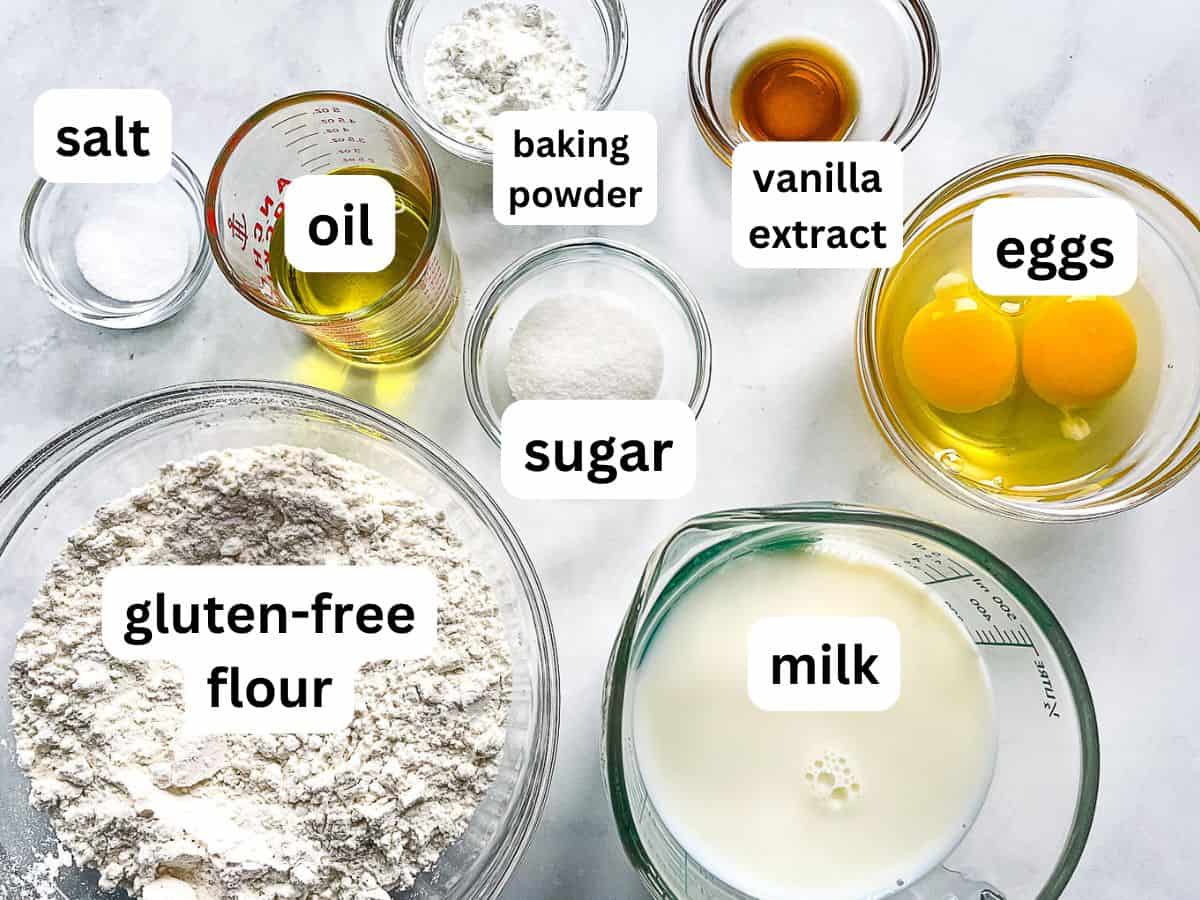
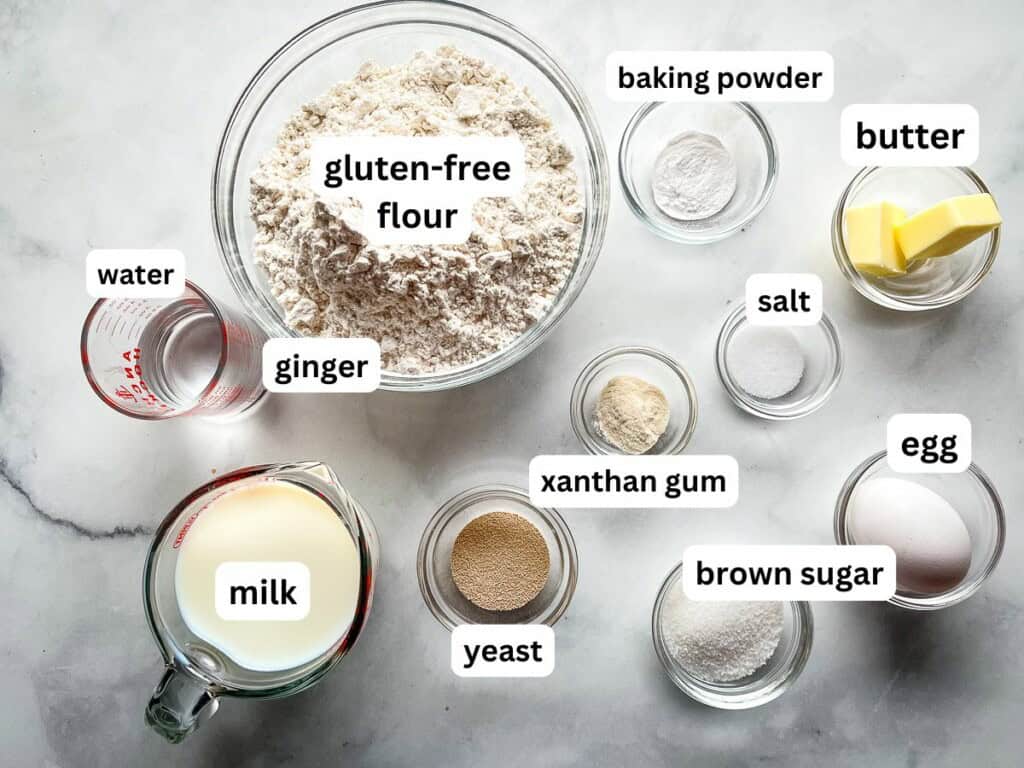
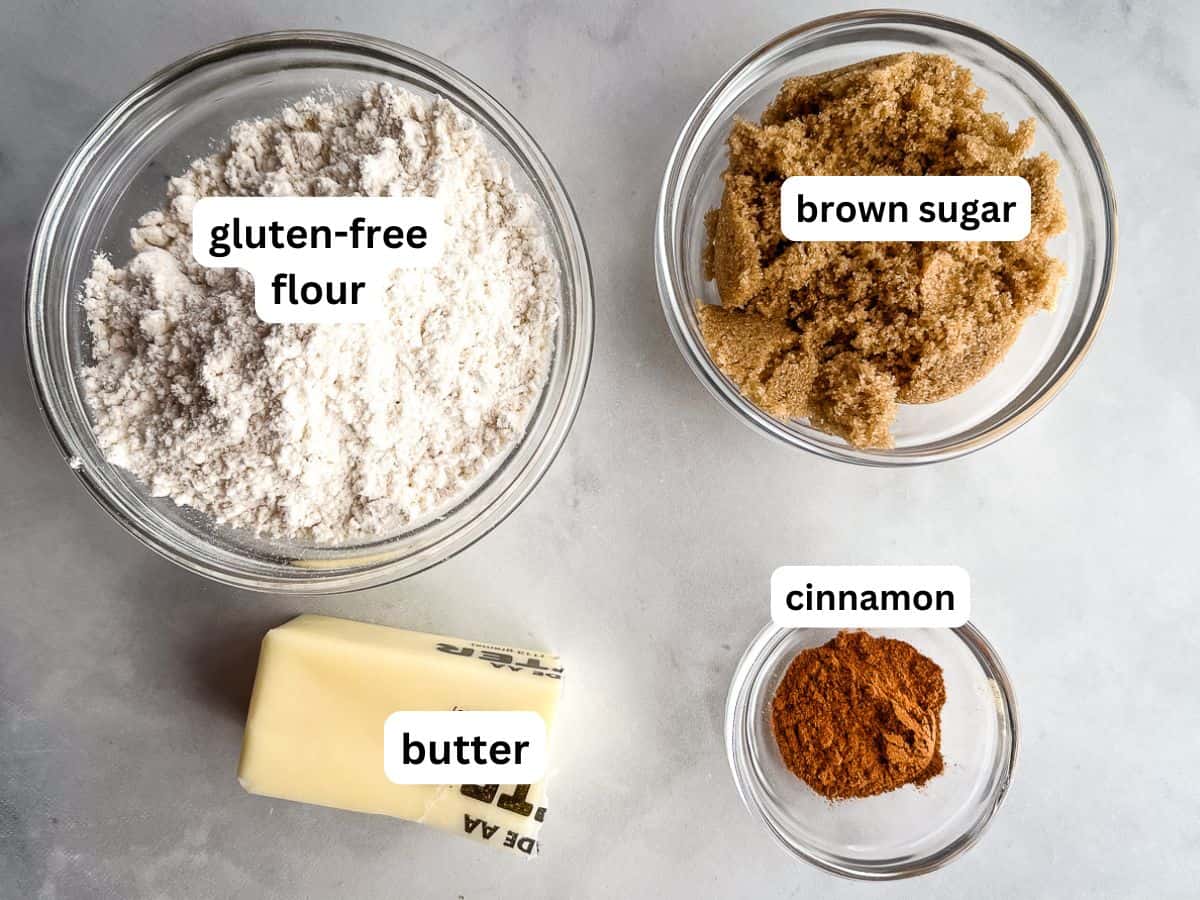
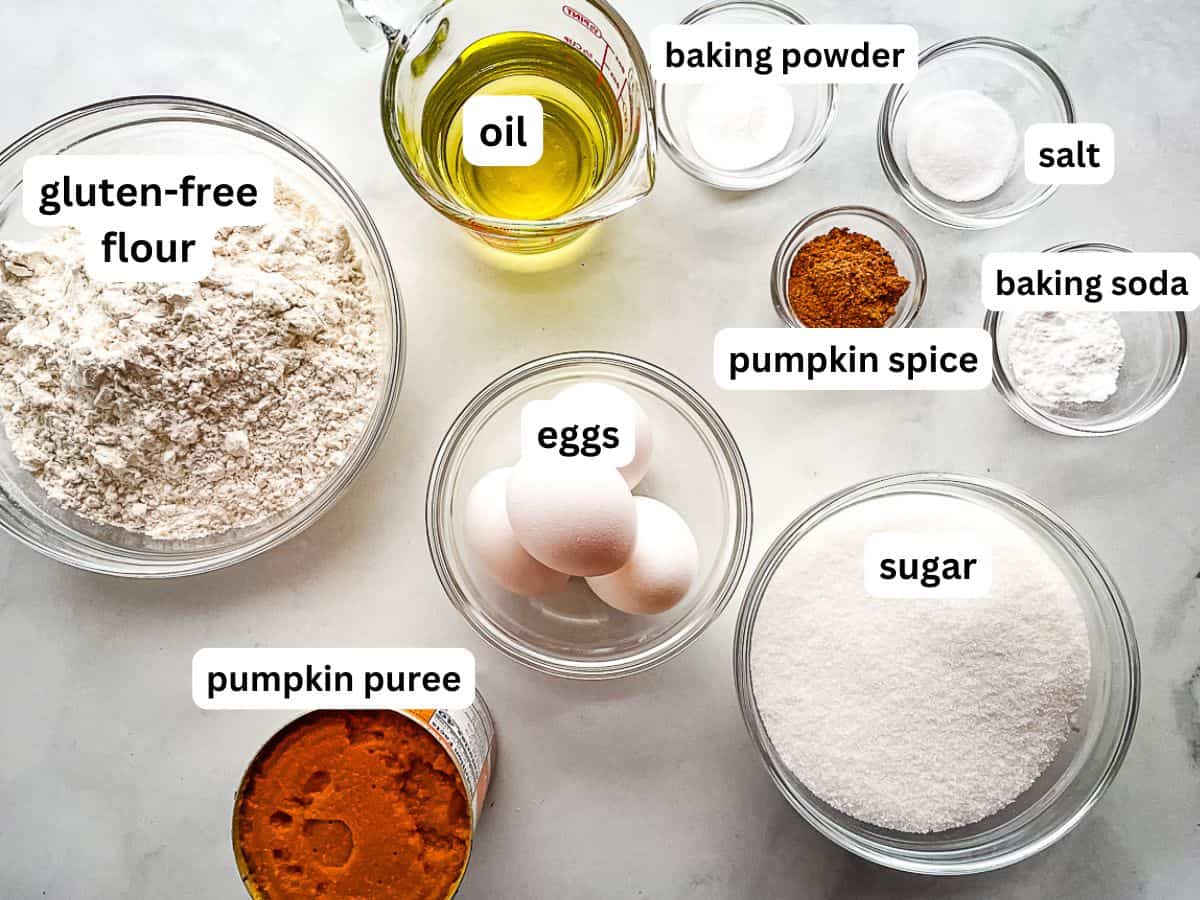
    • Gluten-Free Flour. This recipe starts with a premade gluten-free flour blend. For the best results, use a gluten-free blend that contains either xanthan gum or guar gum. Without it, the waffles can turn out dense and heavy. If your blend doesn’t contain xanthan or guar gum, add a half teaspoon to the flour before using.
    • Milk. Both traditional and dairy-free milk work in this recipe. If you prefer the flavor of buttermilk, use an equal amount to replace the milk.
    • Eggs. Two large eggs add protein (think of this as structure) and give the waffles a nice flavor. To make the waffles egg-free, see the note below. 
    • Melted Butter or Oil. A touch of melted butter or oil adds richness. If you’re using coconut oil, melt it before adding it to the batter.
    • Granulated Sugar. One tablespoon of granulated sugar helps the waffles brown.
    • Baking Powder. Baking powder gives the batter a rise and gives the waffles a nice texture.
    • Salt. Gluten-free waffles made without salt taste bland. This is because salt is a flavor enhancer. A half-teaspoon of salt gives them a nice flavor without tasting salty. Use table salt (fine salt). It mixes evenly throughout the waffle batter. 
    • Vanilla Extract. A little vanilla extract adds a lovely flavor. You can also add a ¼ teaspoon almond extract for a little extra flavor.

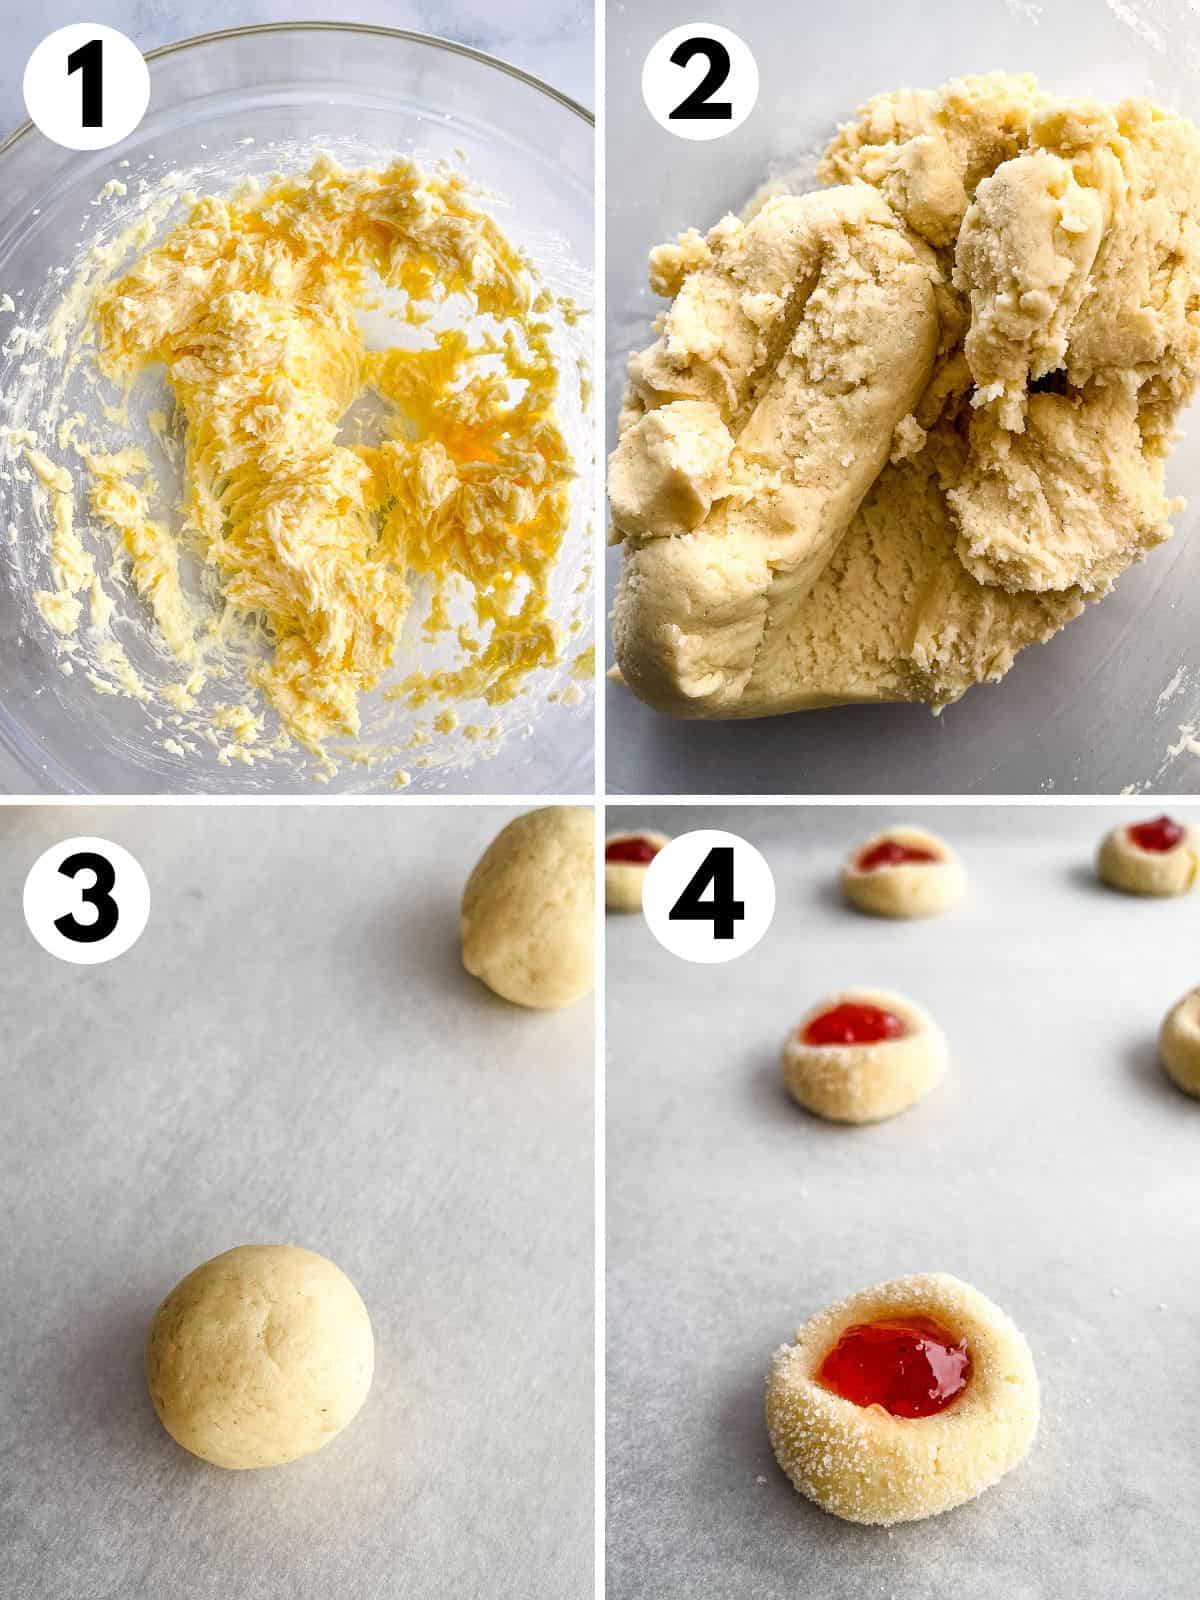
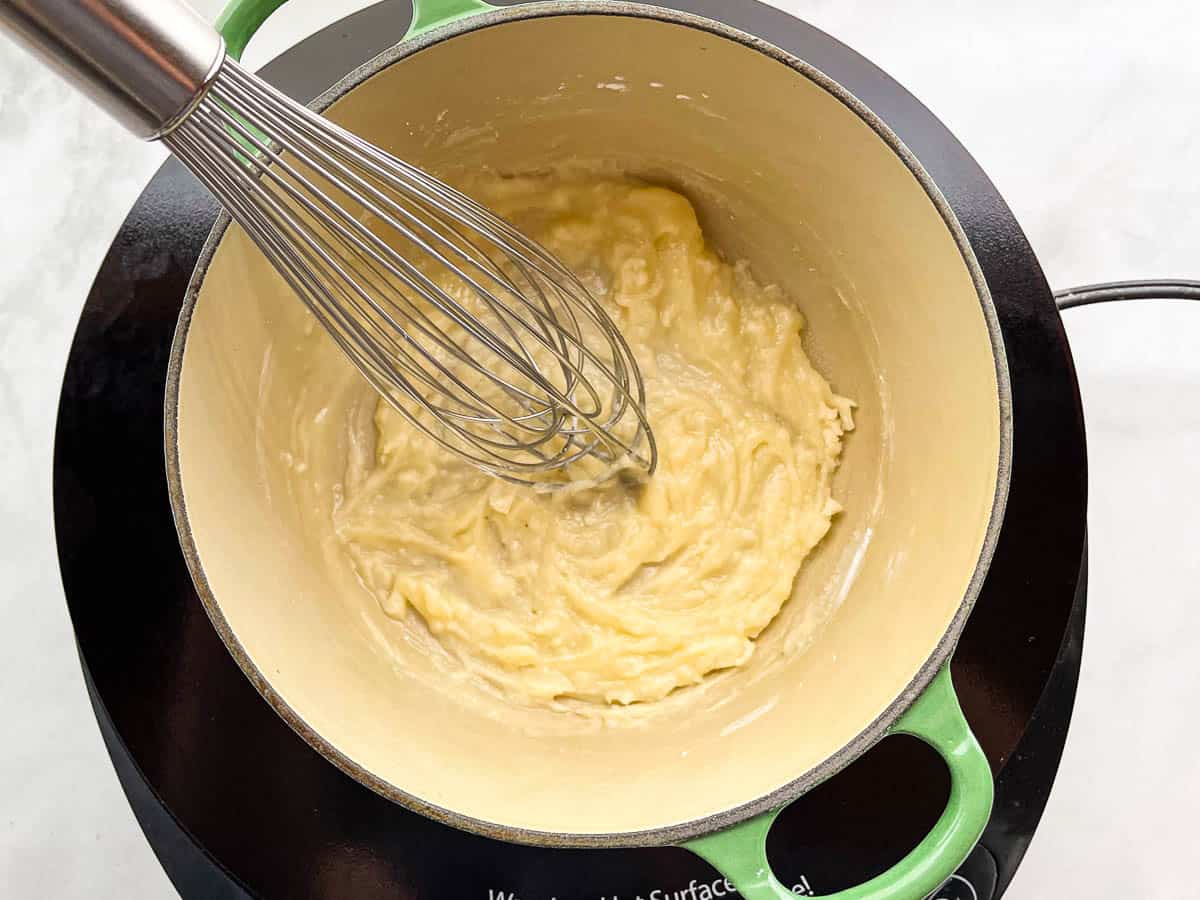
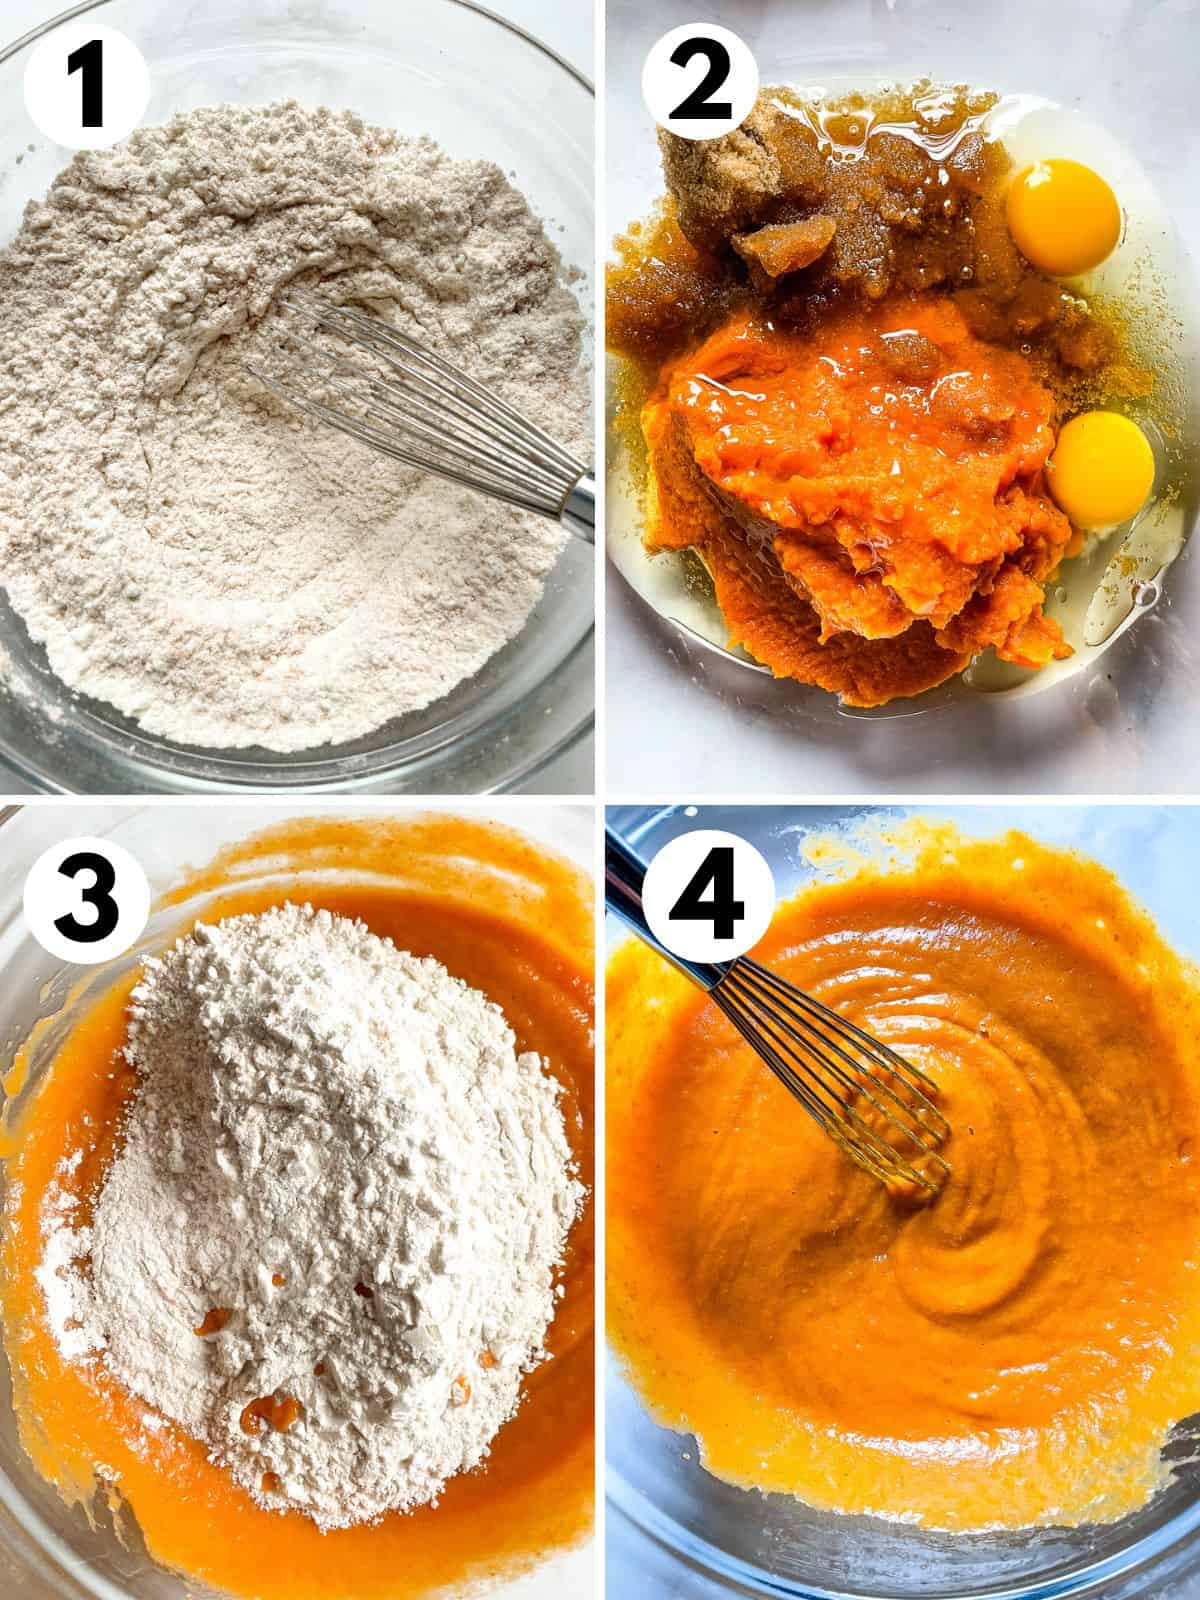
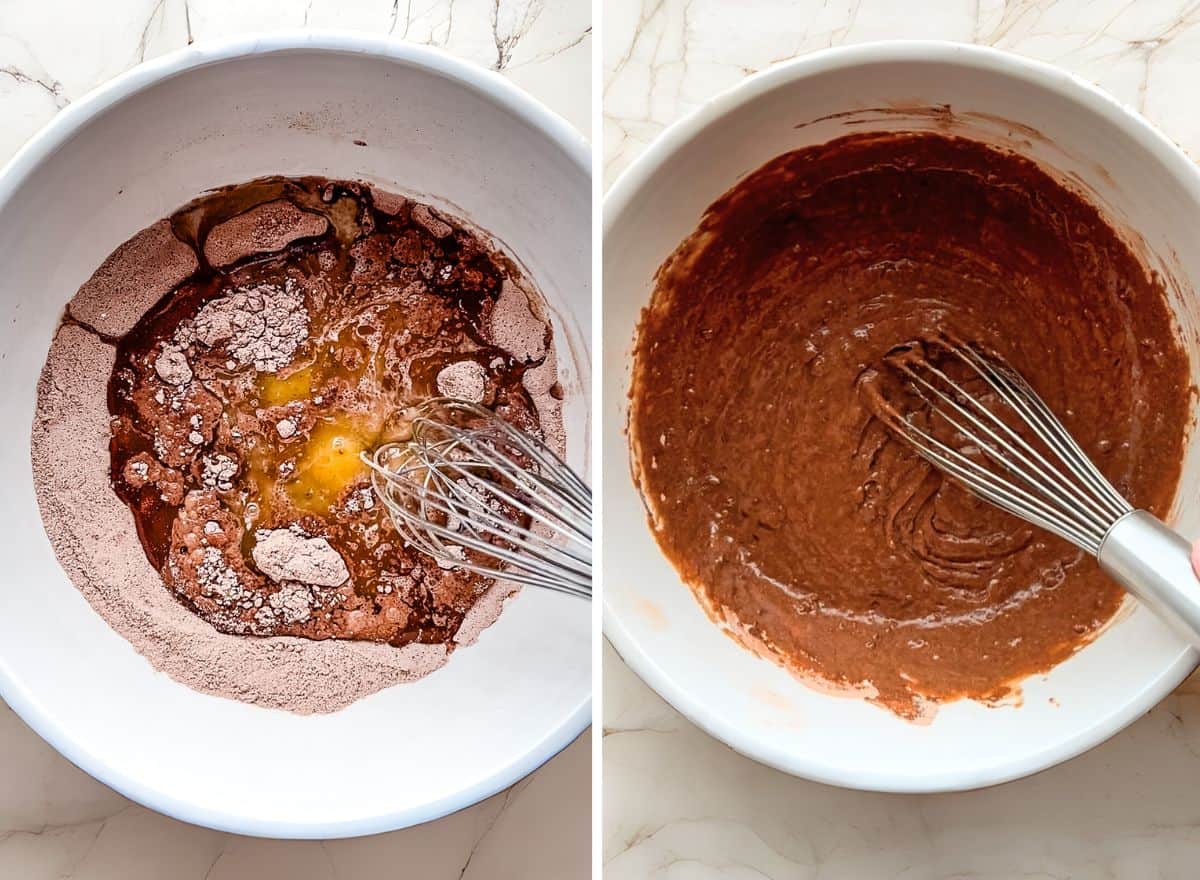
    How to Make Gluten-Free Waffles

    (left) Ingredients for gluten-free waffle batter in a bowl. (right) Gluten-free waffle batter.
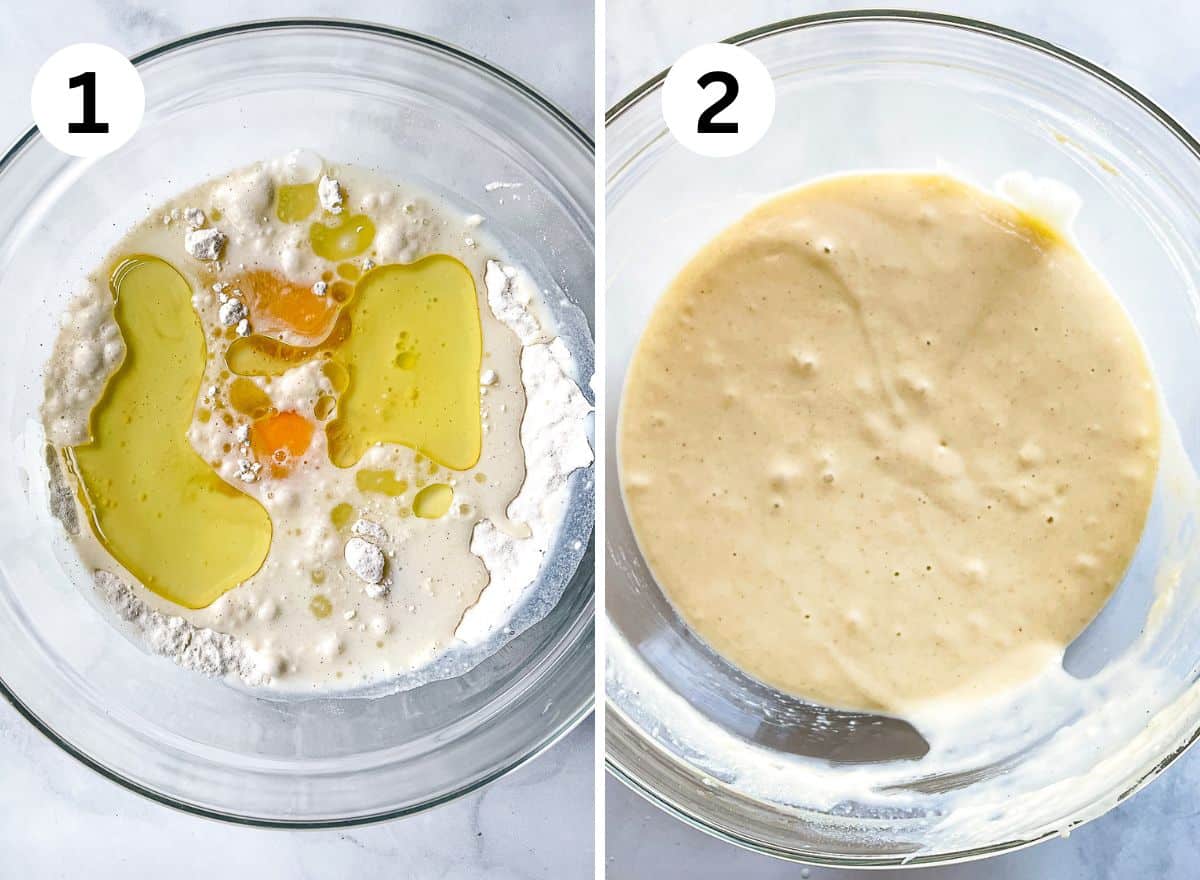
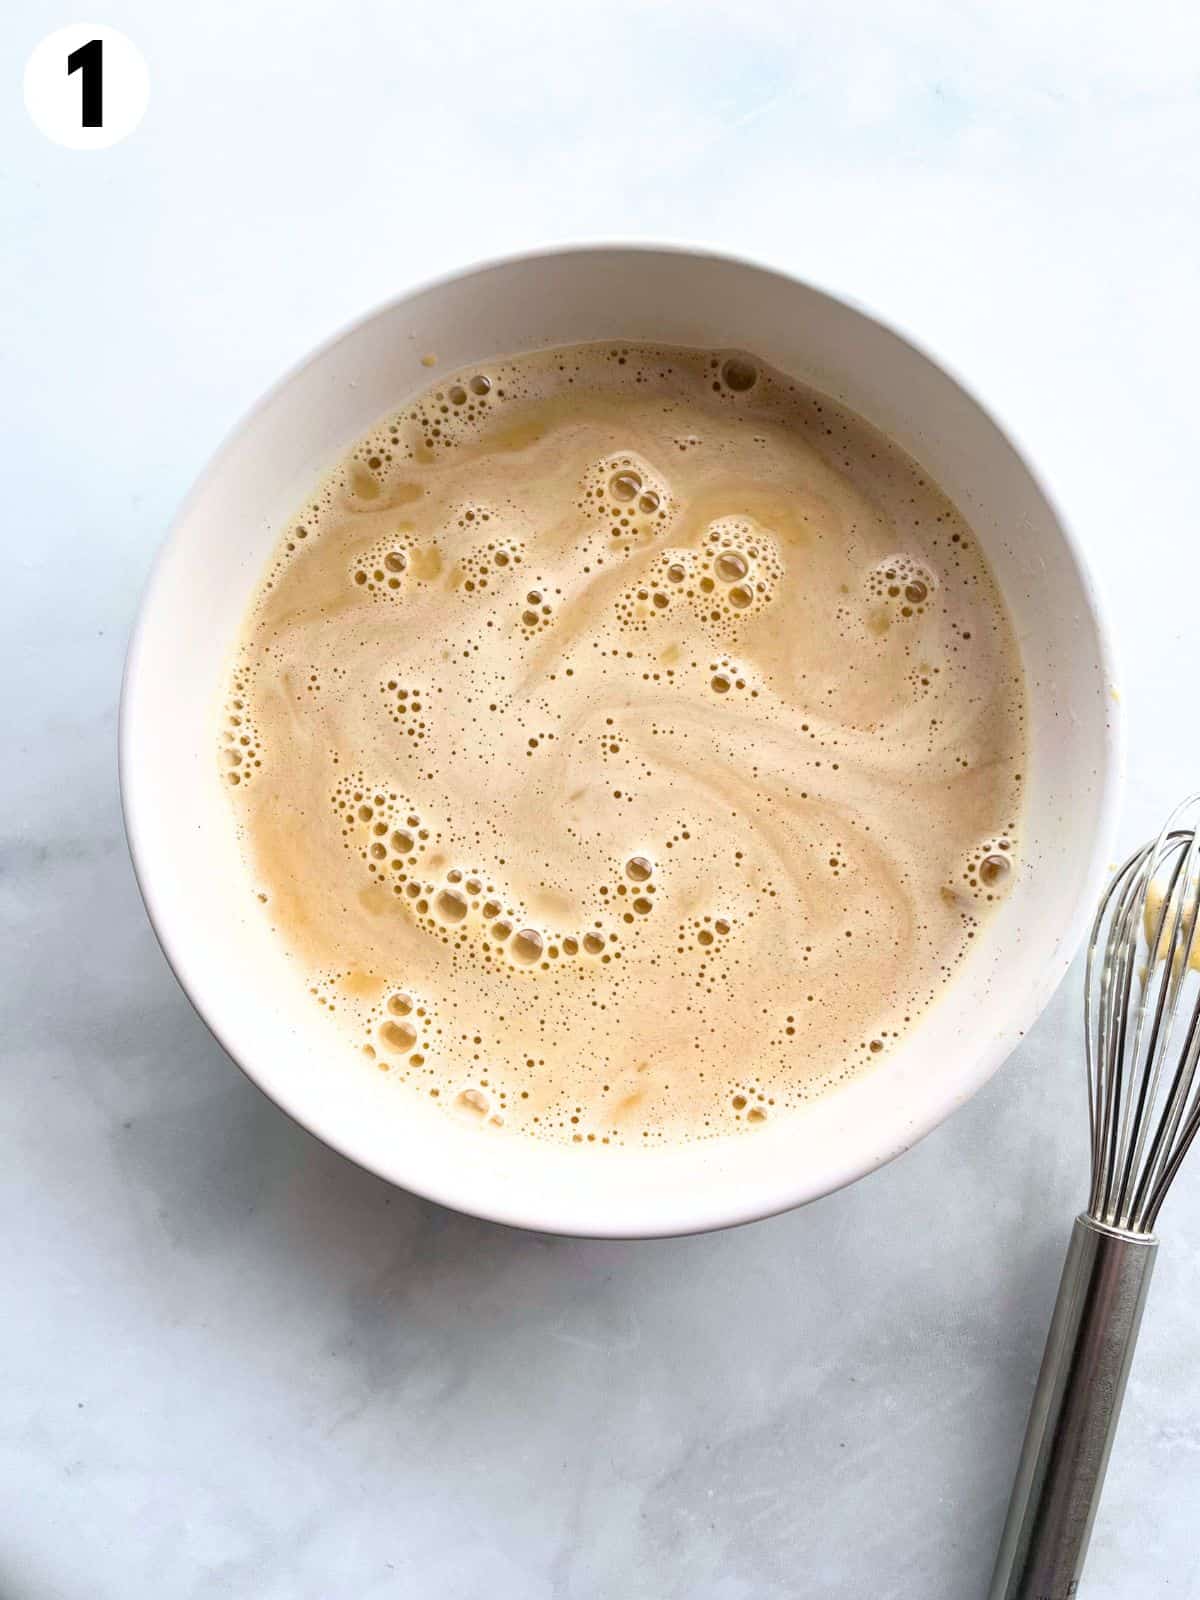
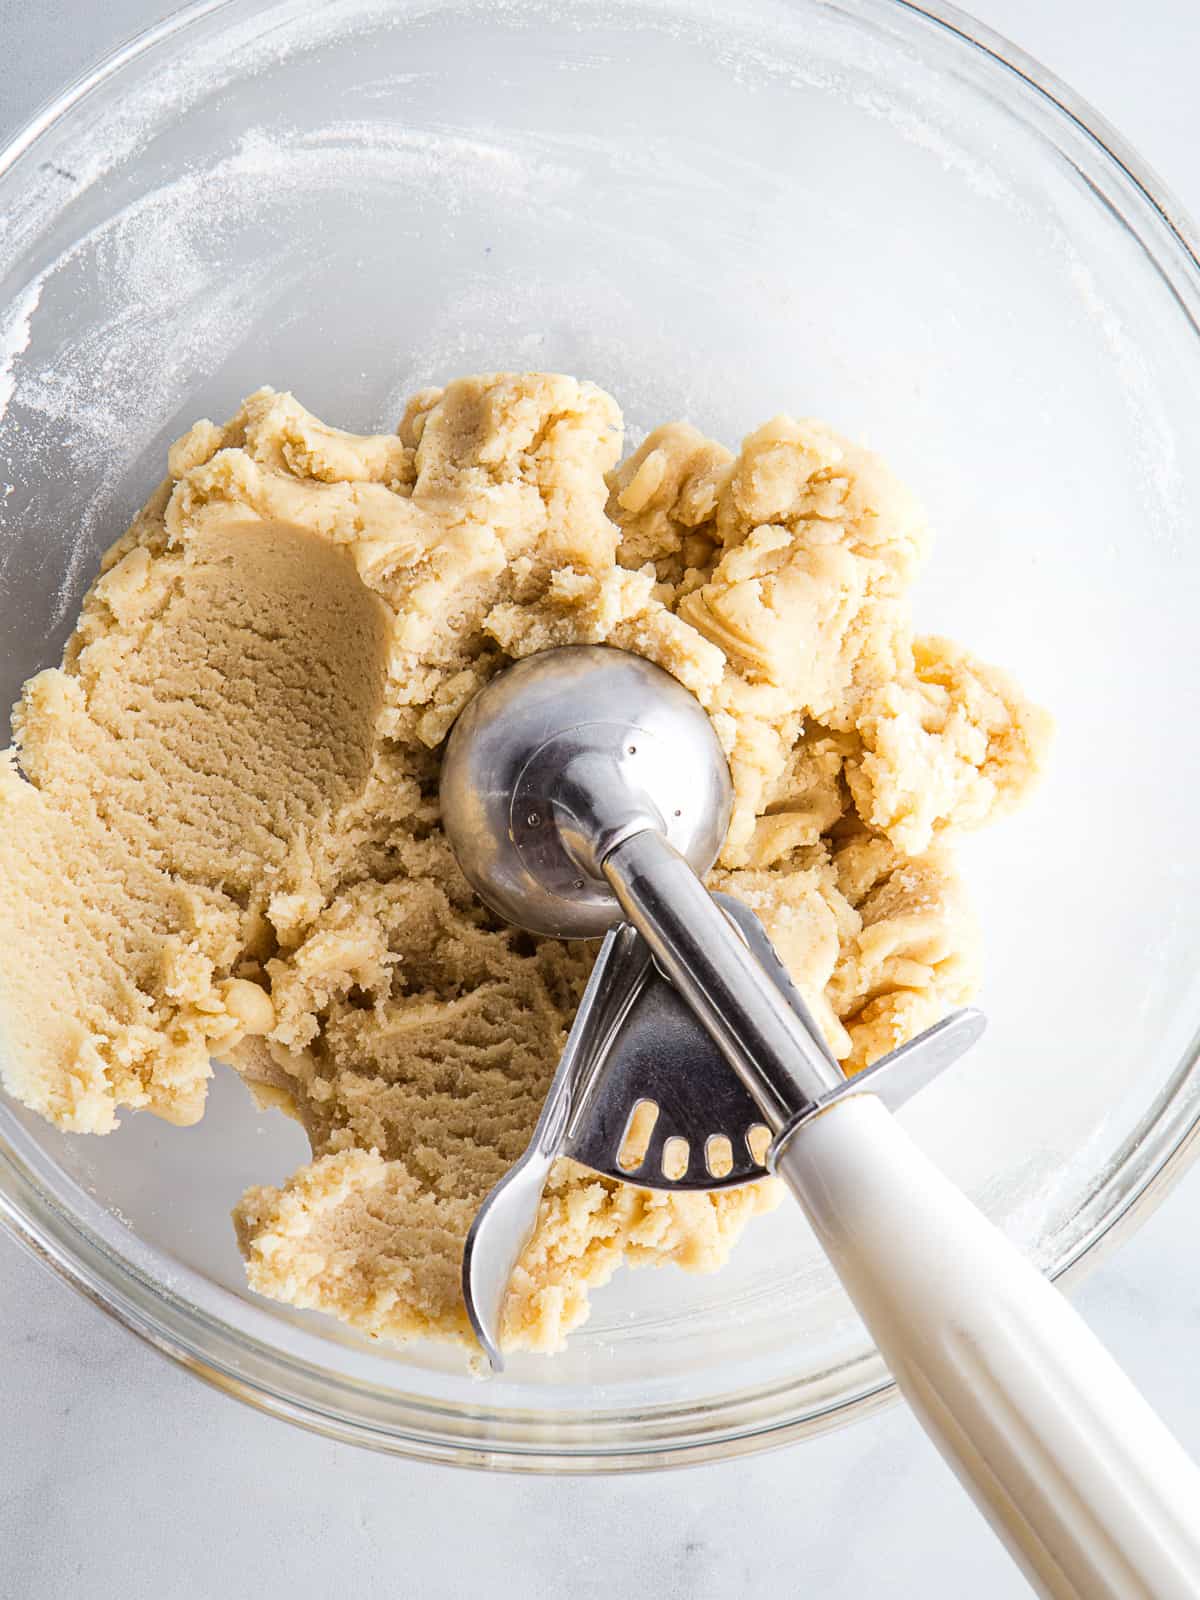
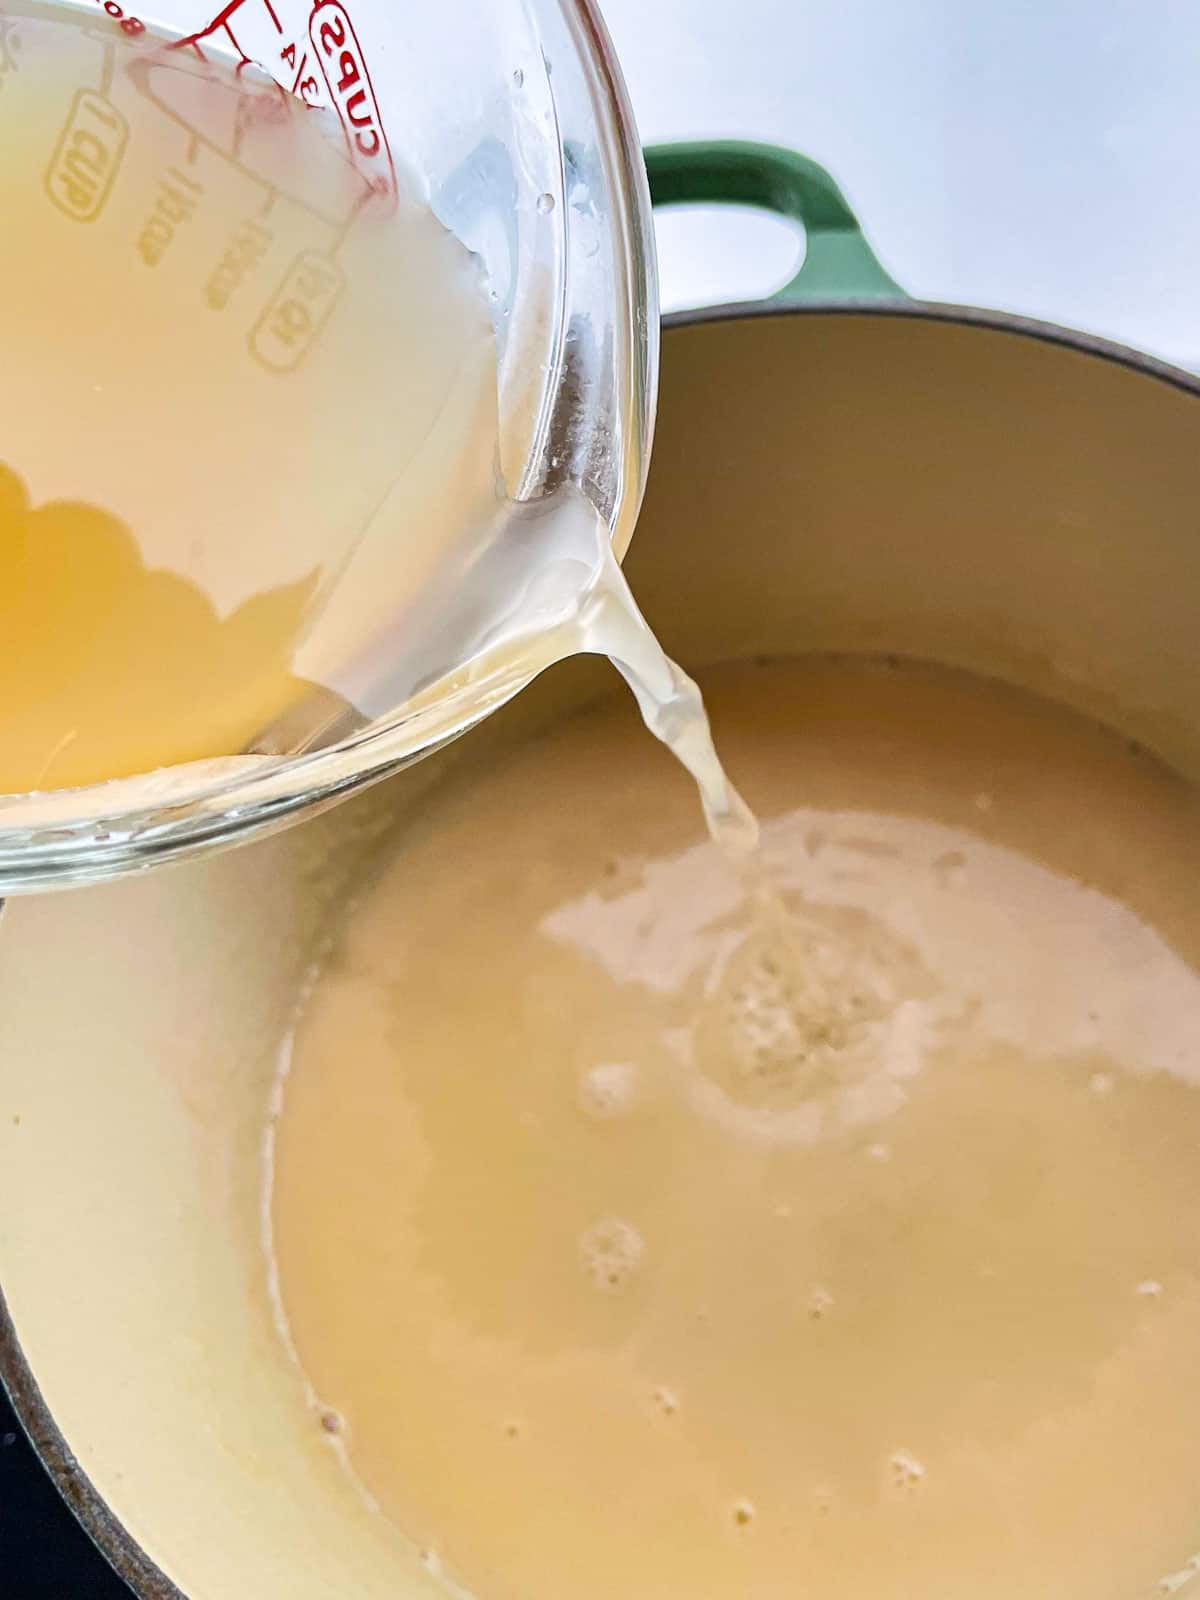
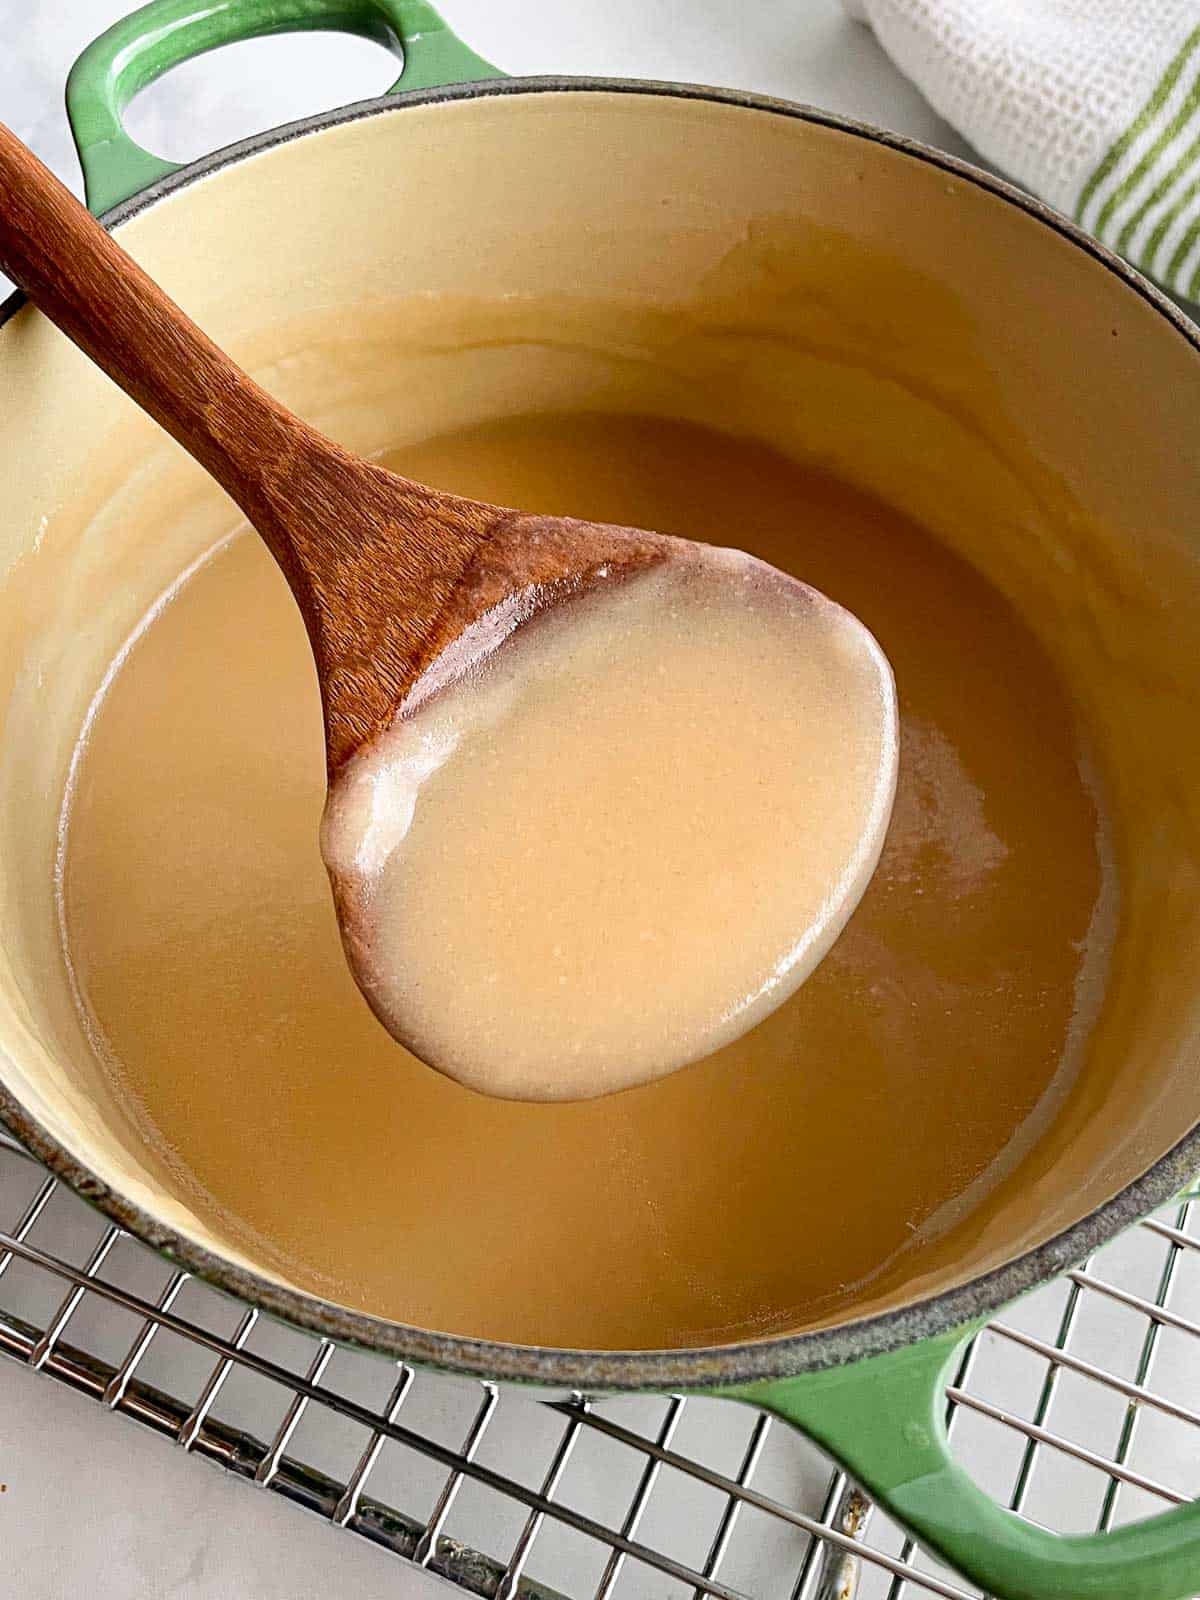
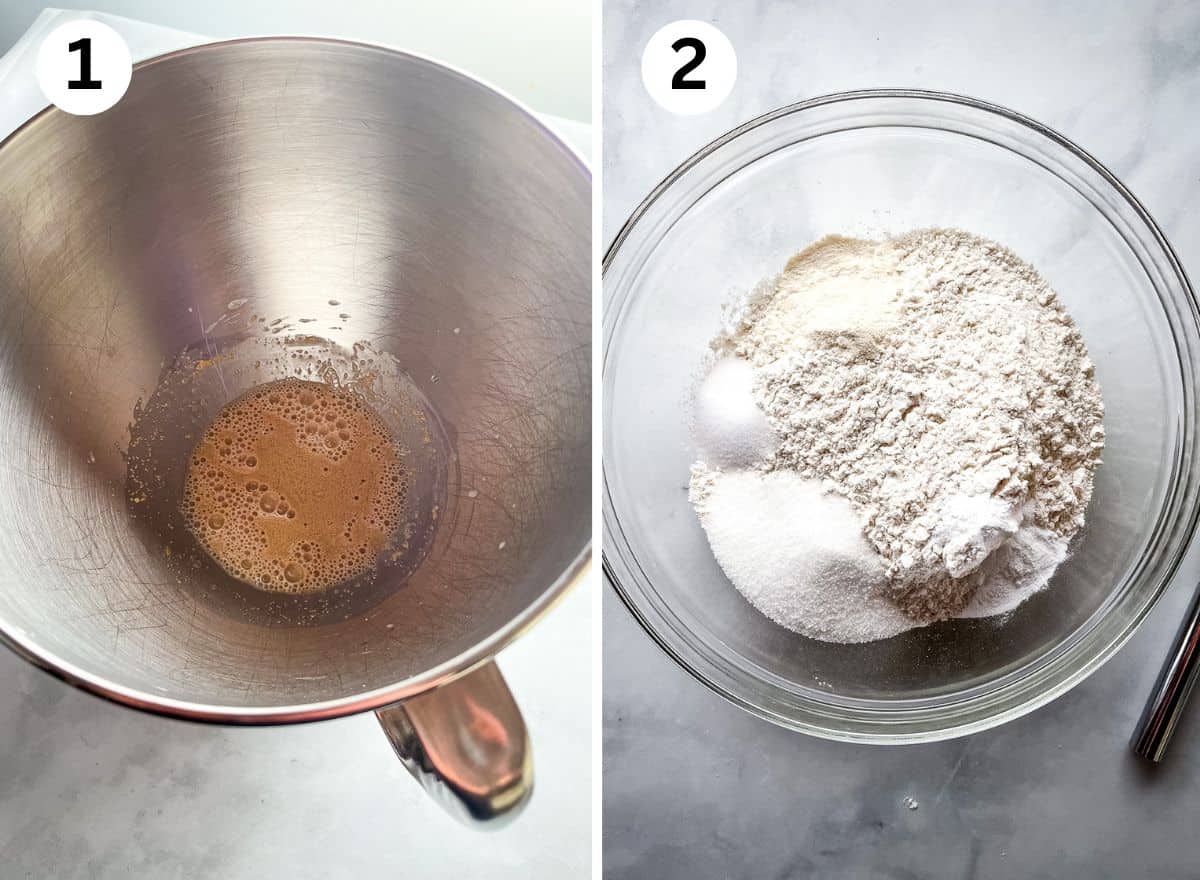
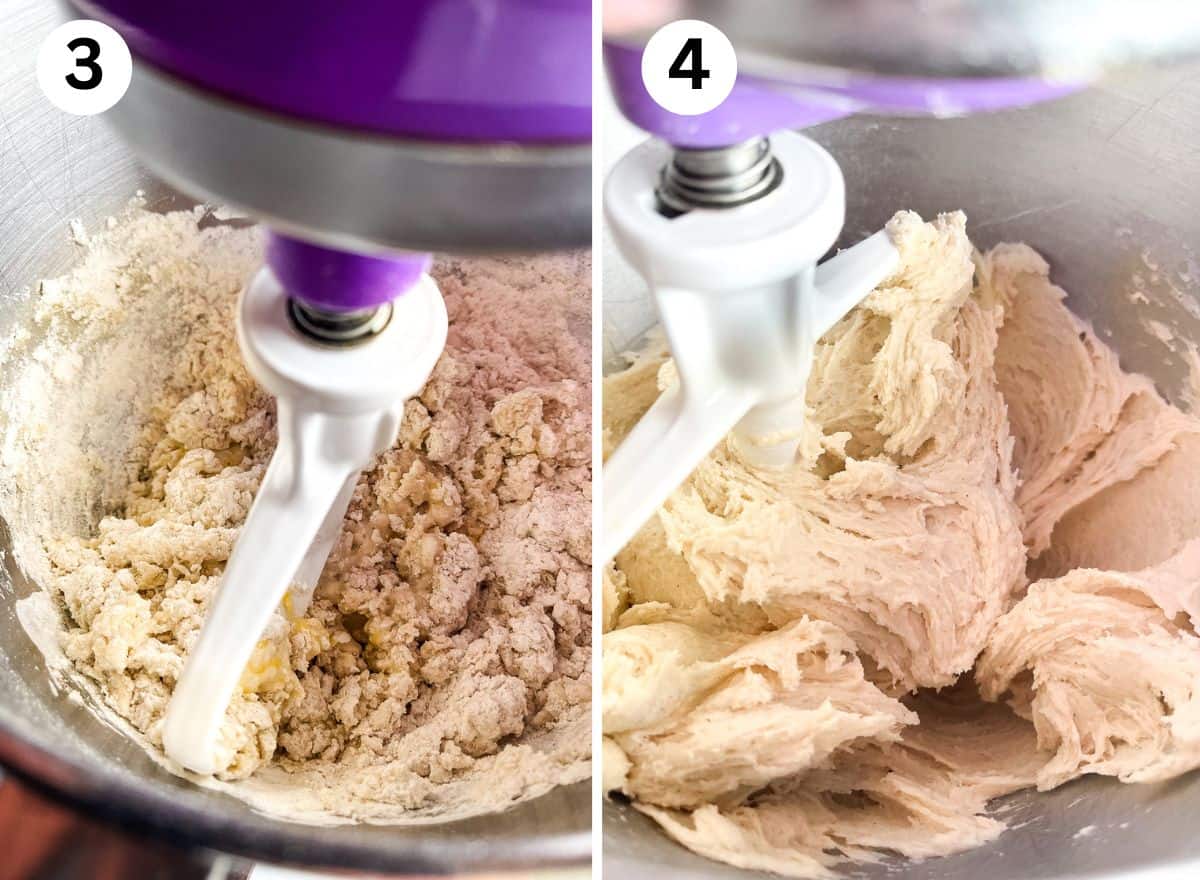
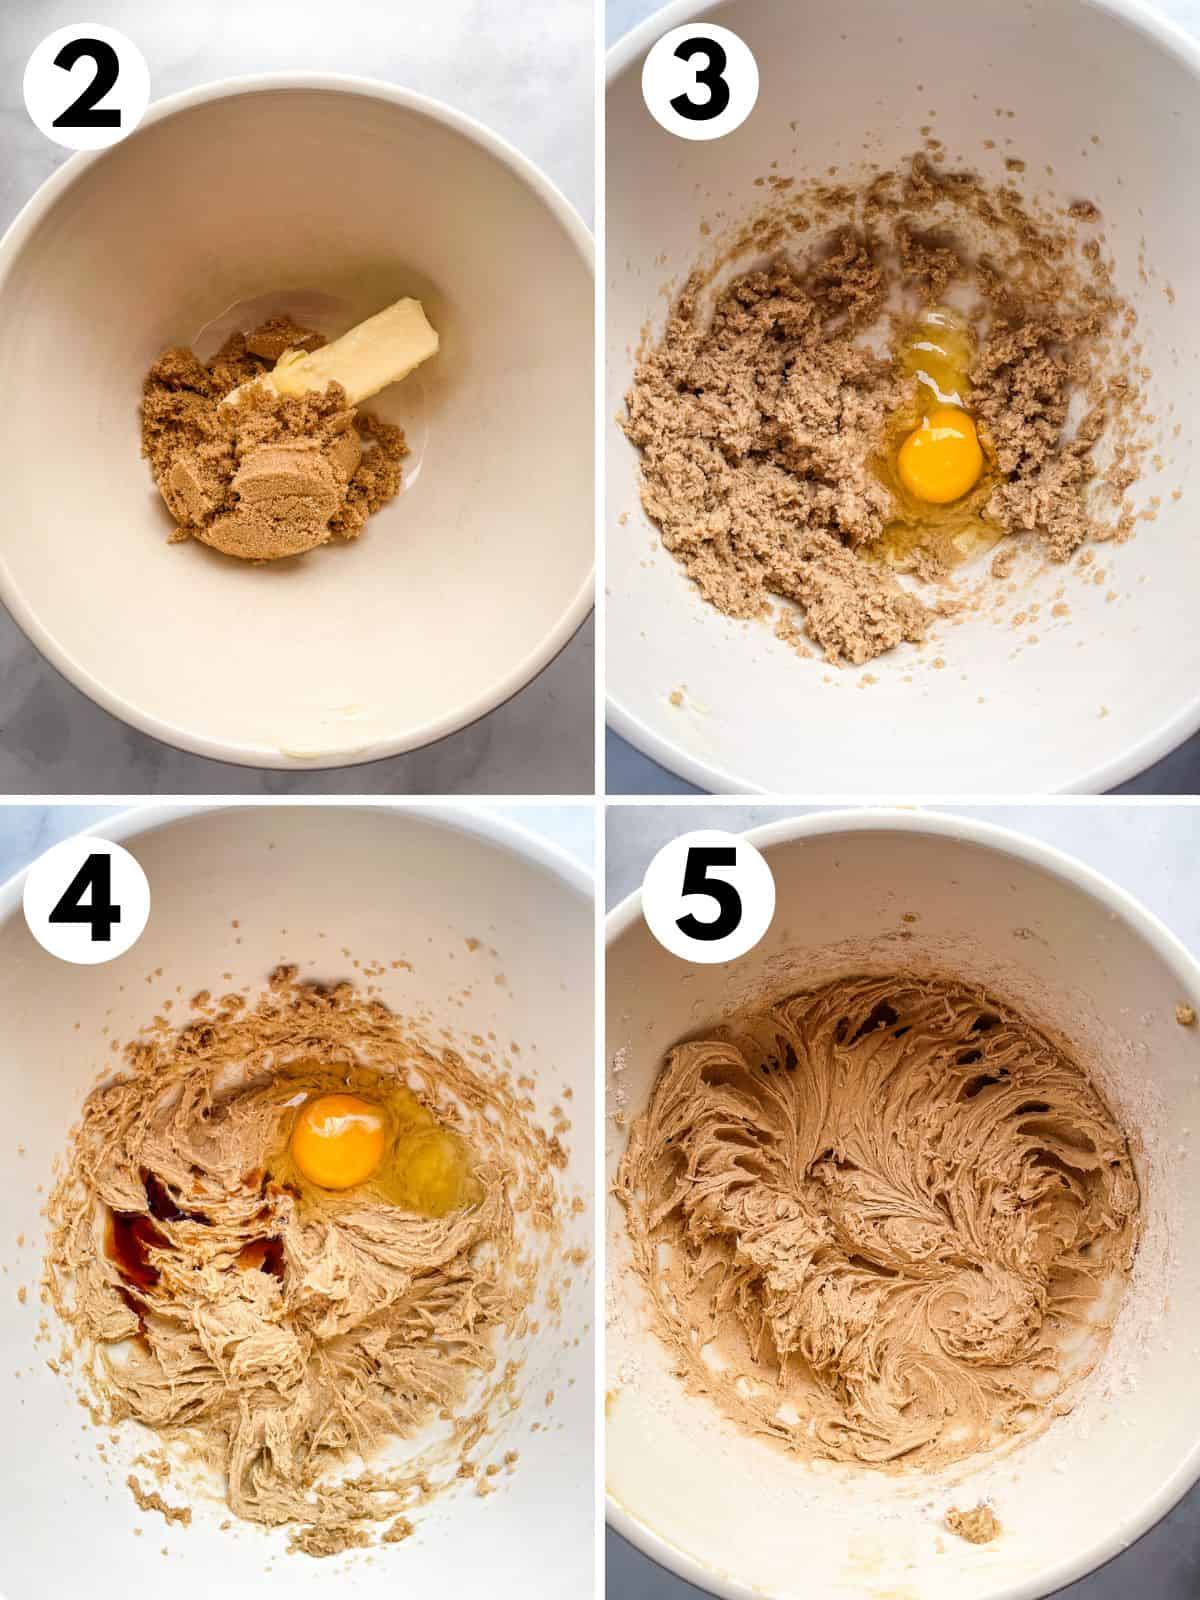
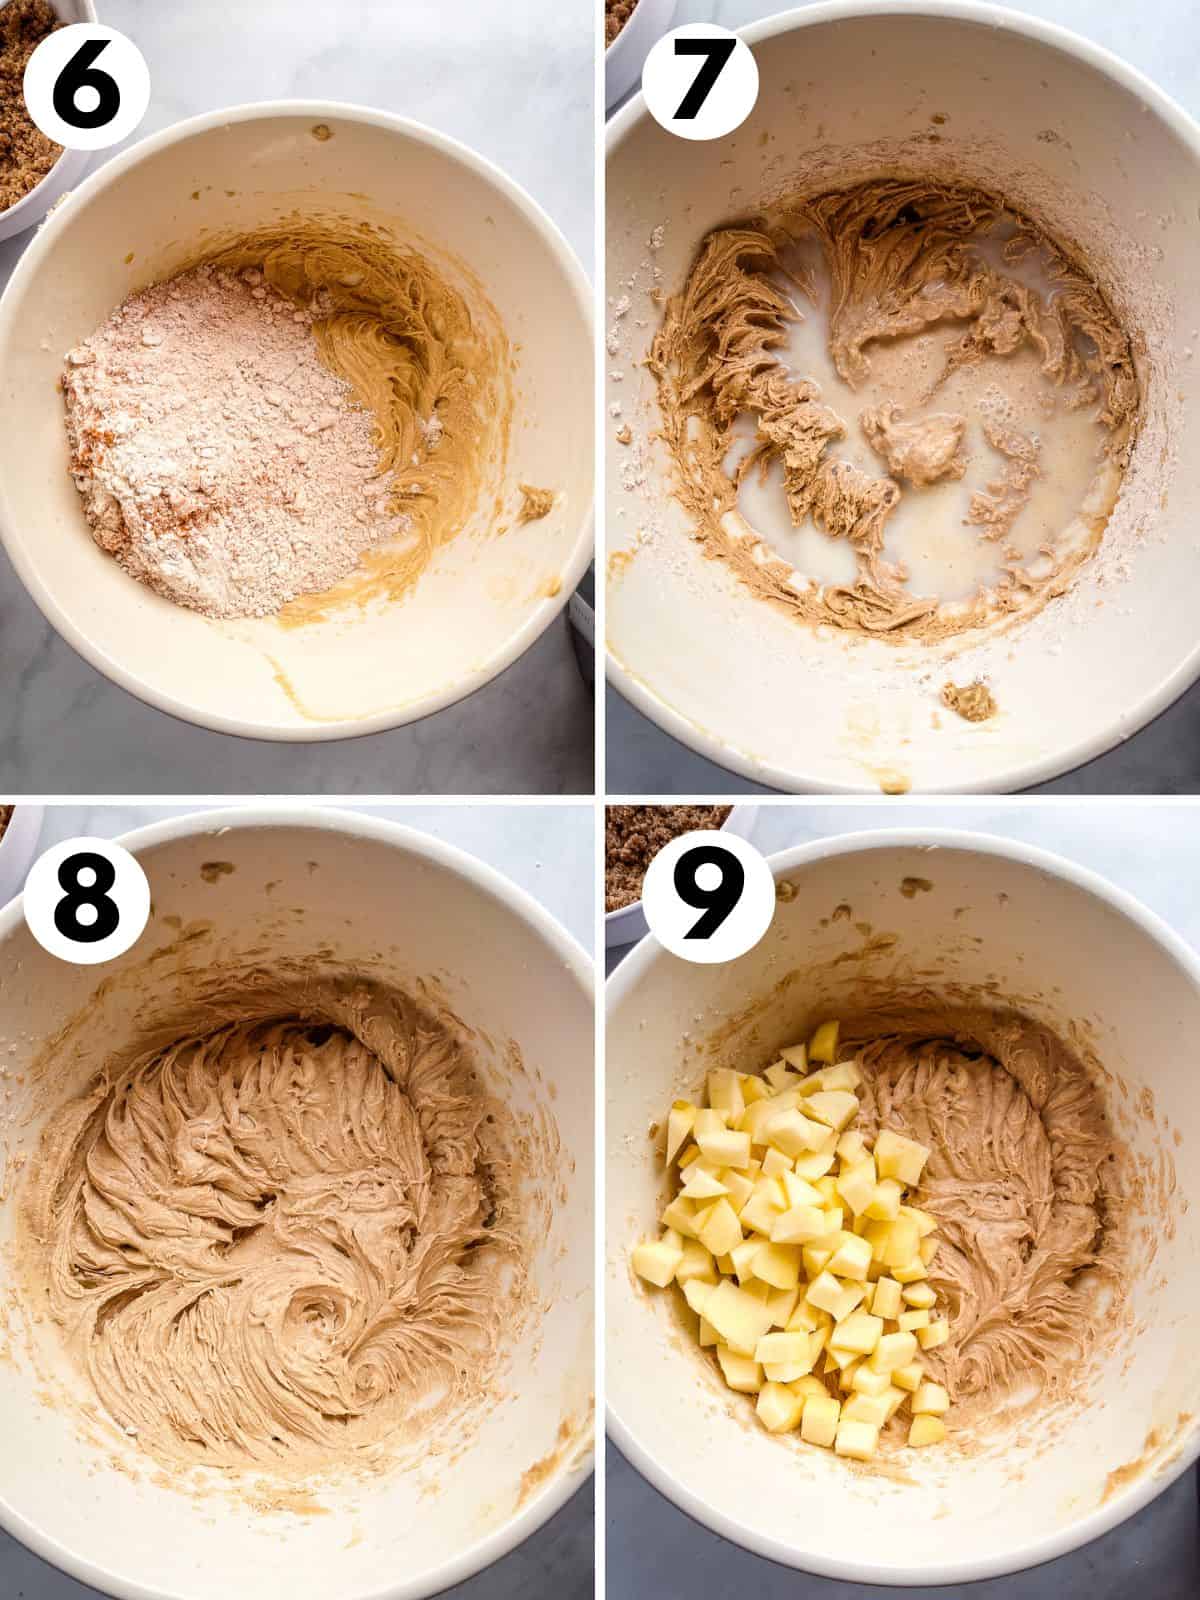
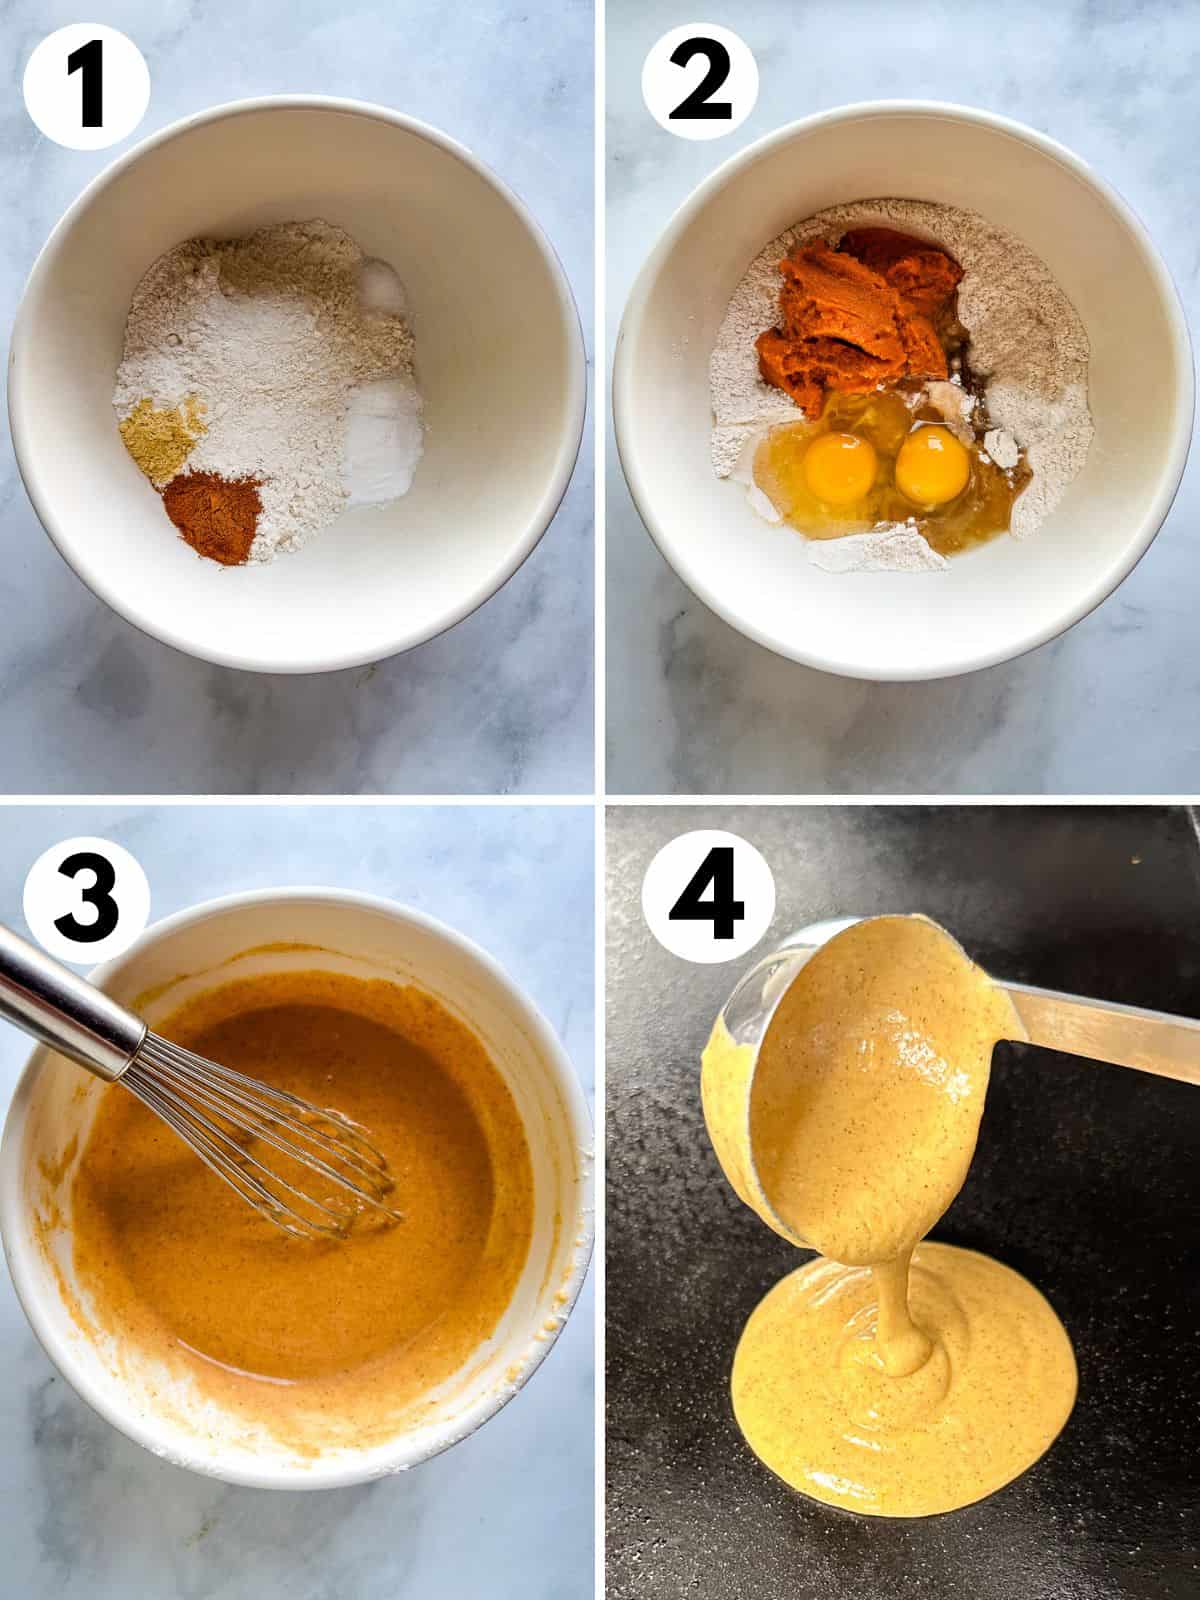
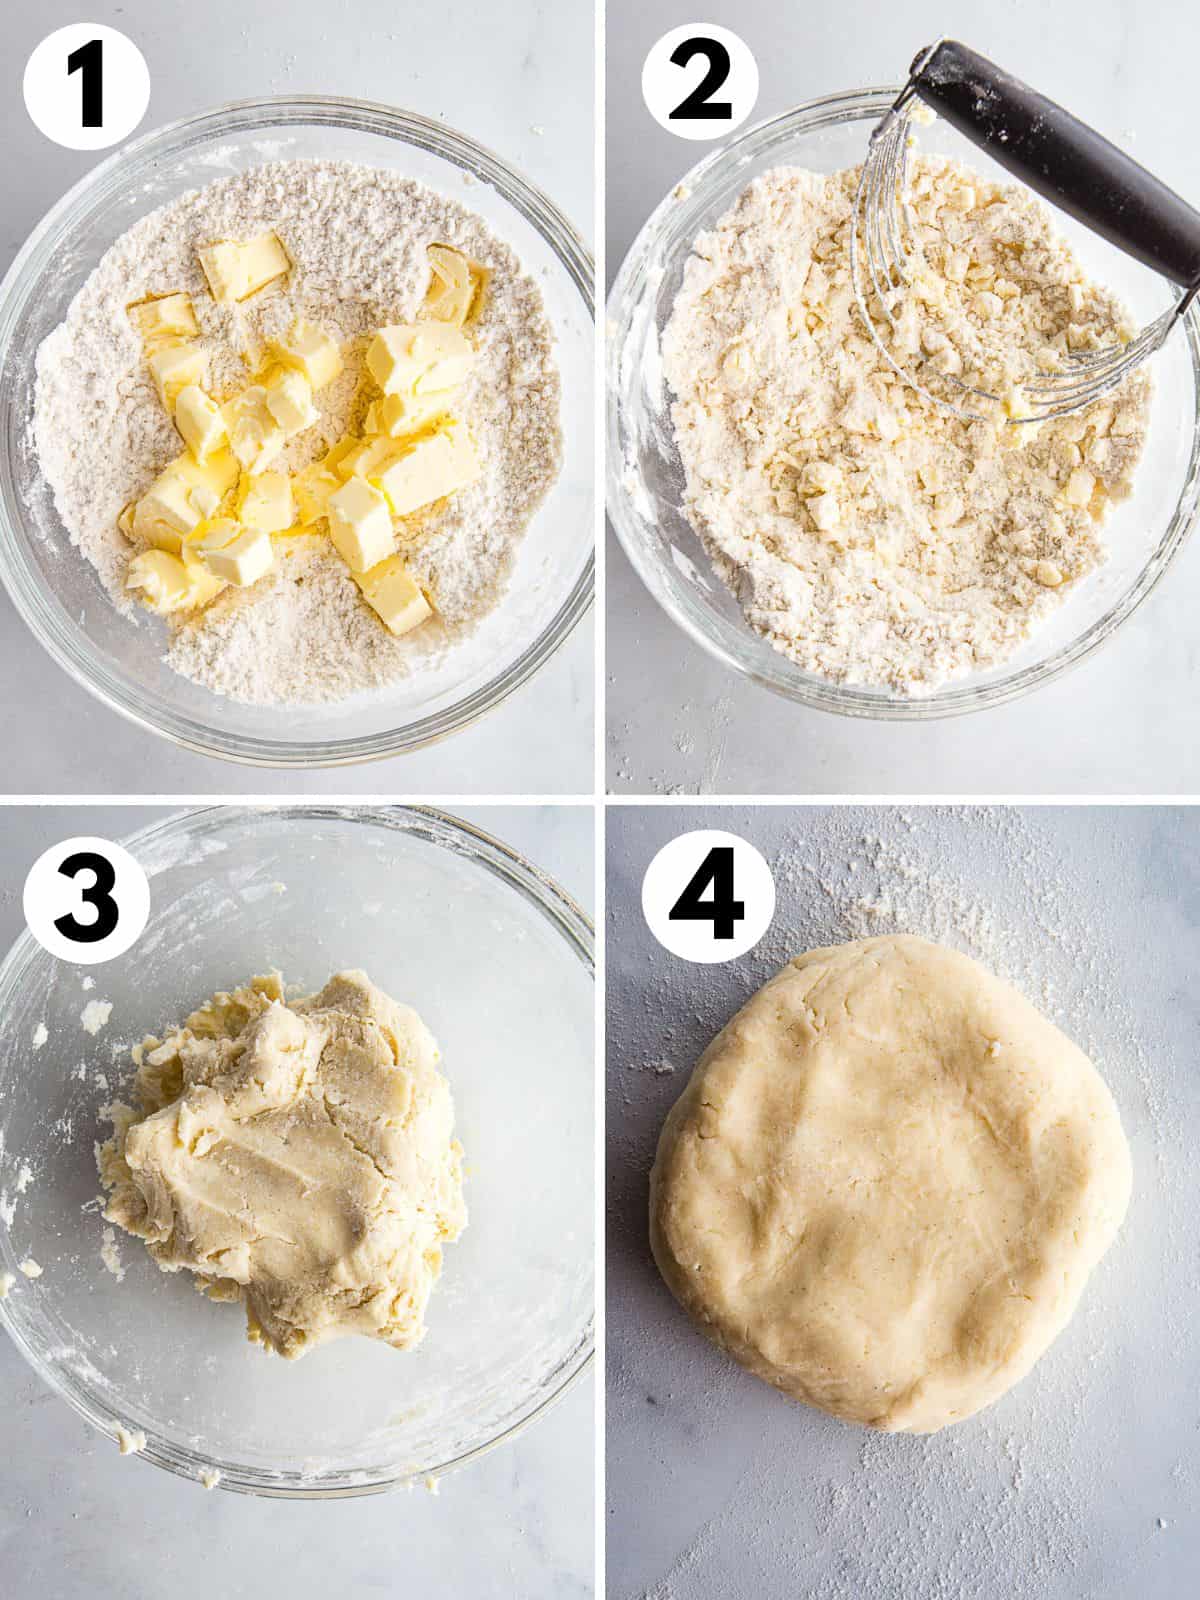
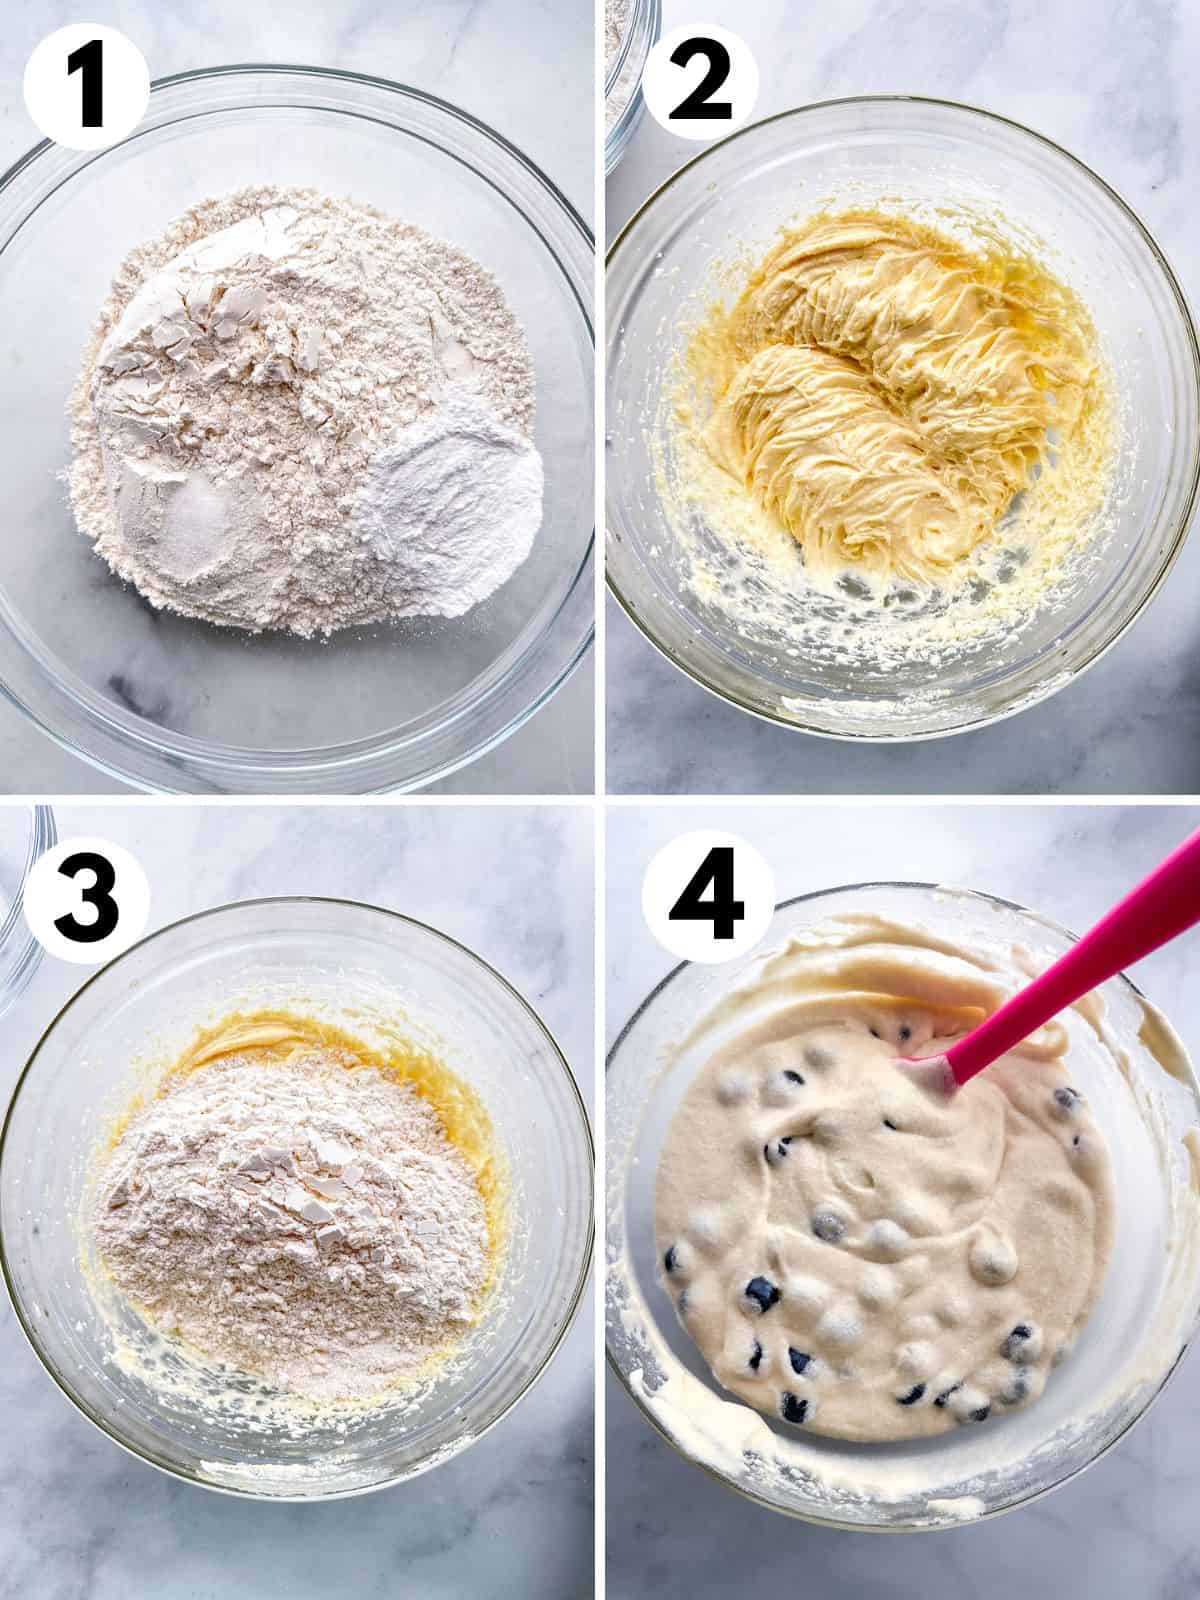
    1. This is a one bowl recipe. Stir until the batter is smooth and thick. I like to run a rubber spatula along the sides and bottom of the bowl. If there’s any flour clinging to the bowl, mix it into the batter.
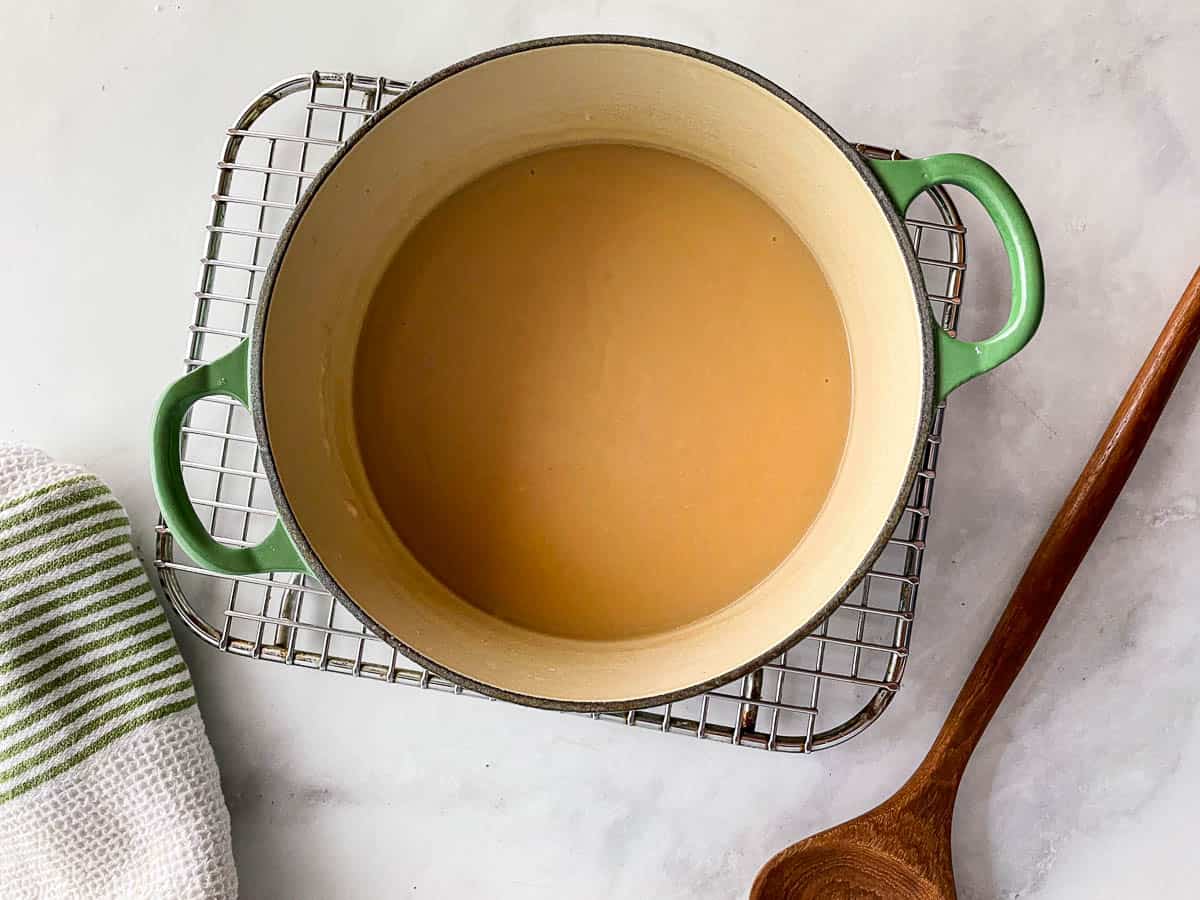
    2. Let the batter rest for 10 minutes. This gives the gluten-free flour time to absorb the liquid, making the waffles less gritty. 
    Gluten-free waffles in a waffle iron.
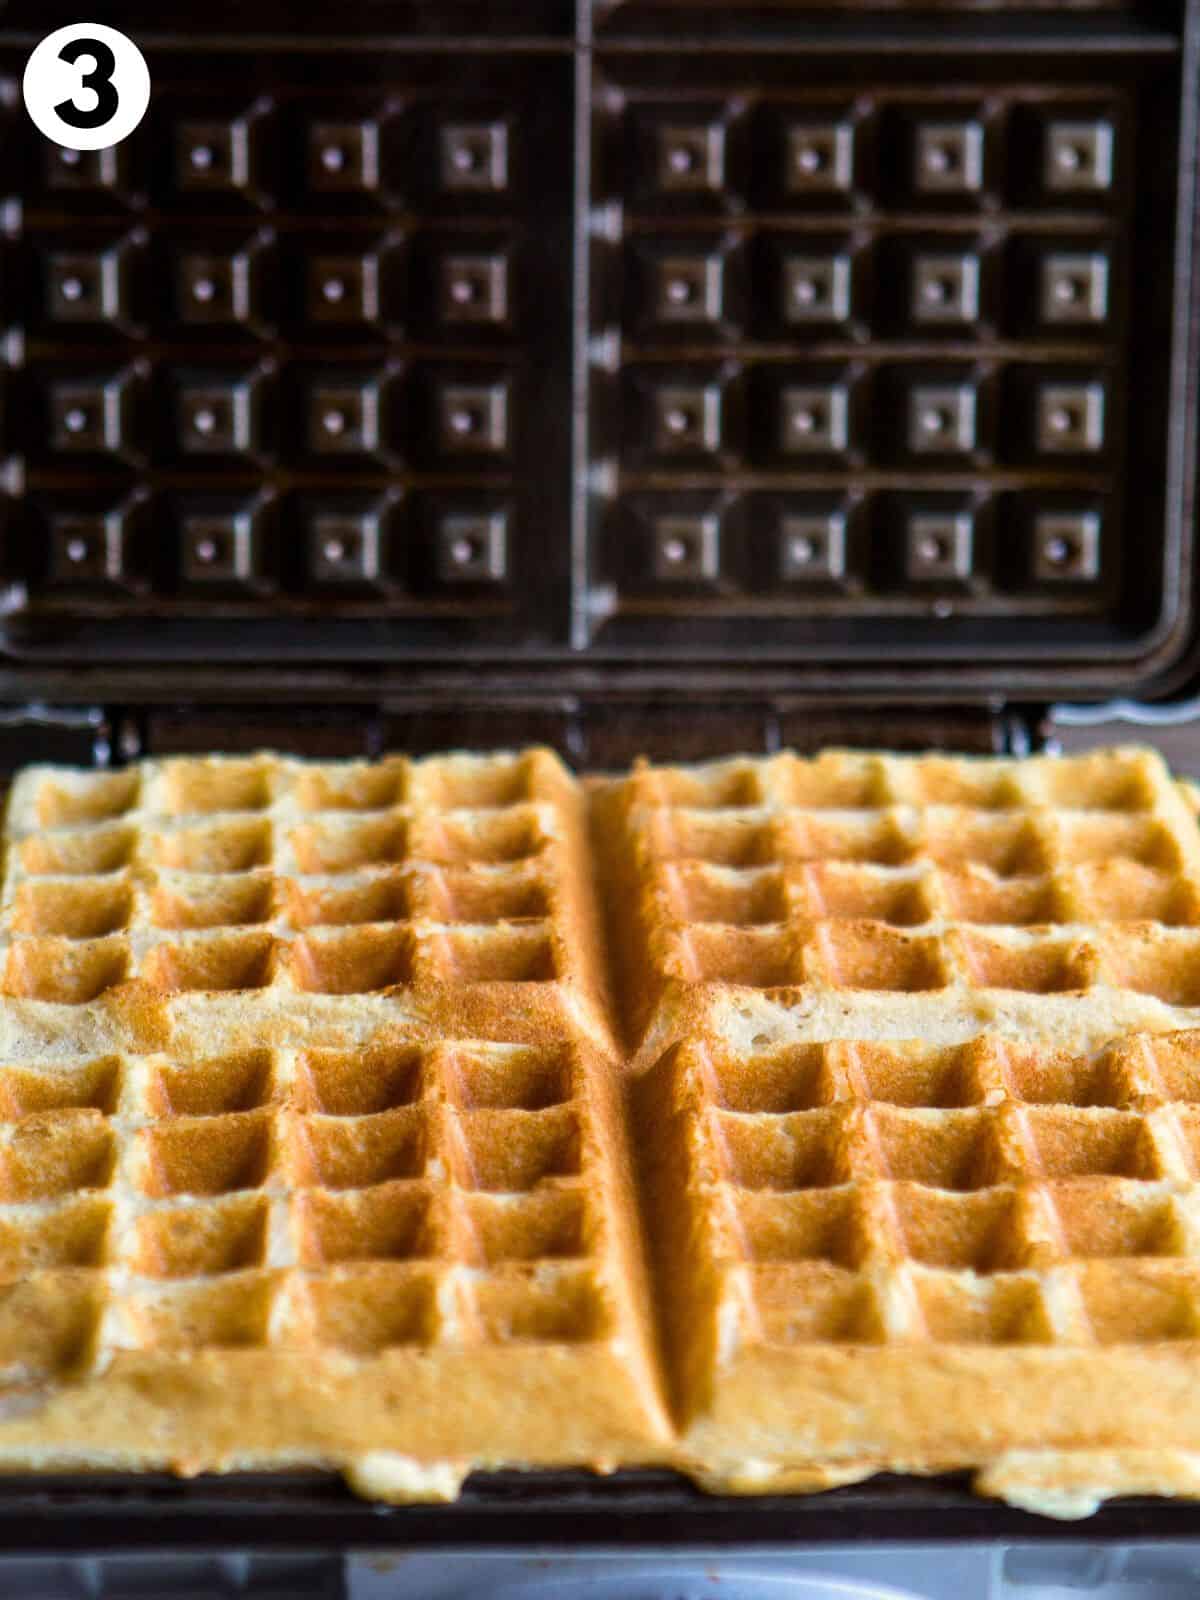
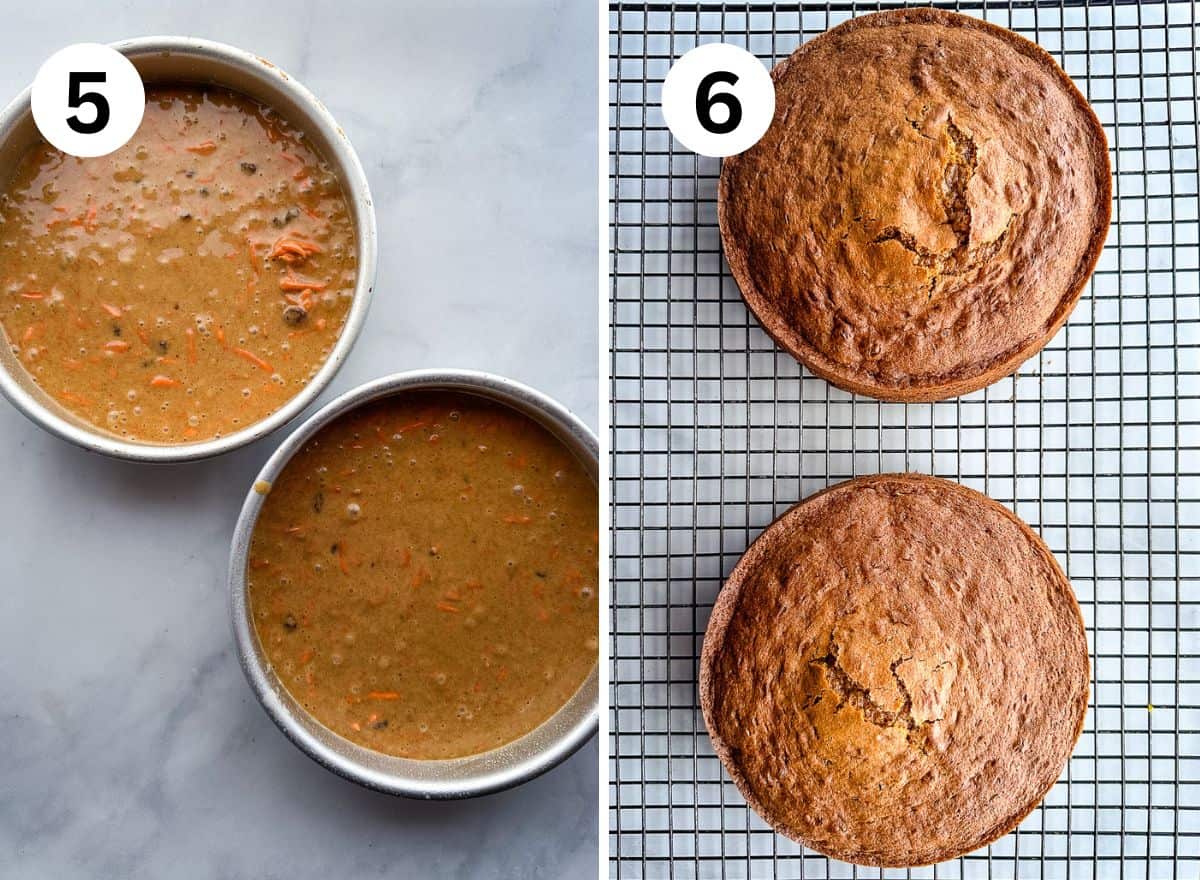
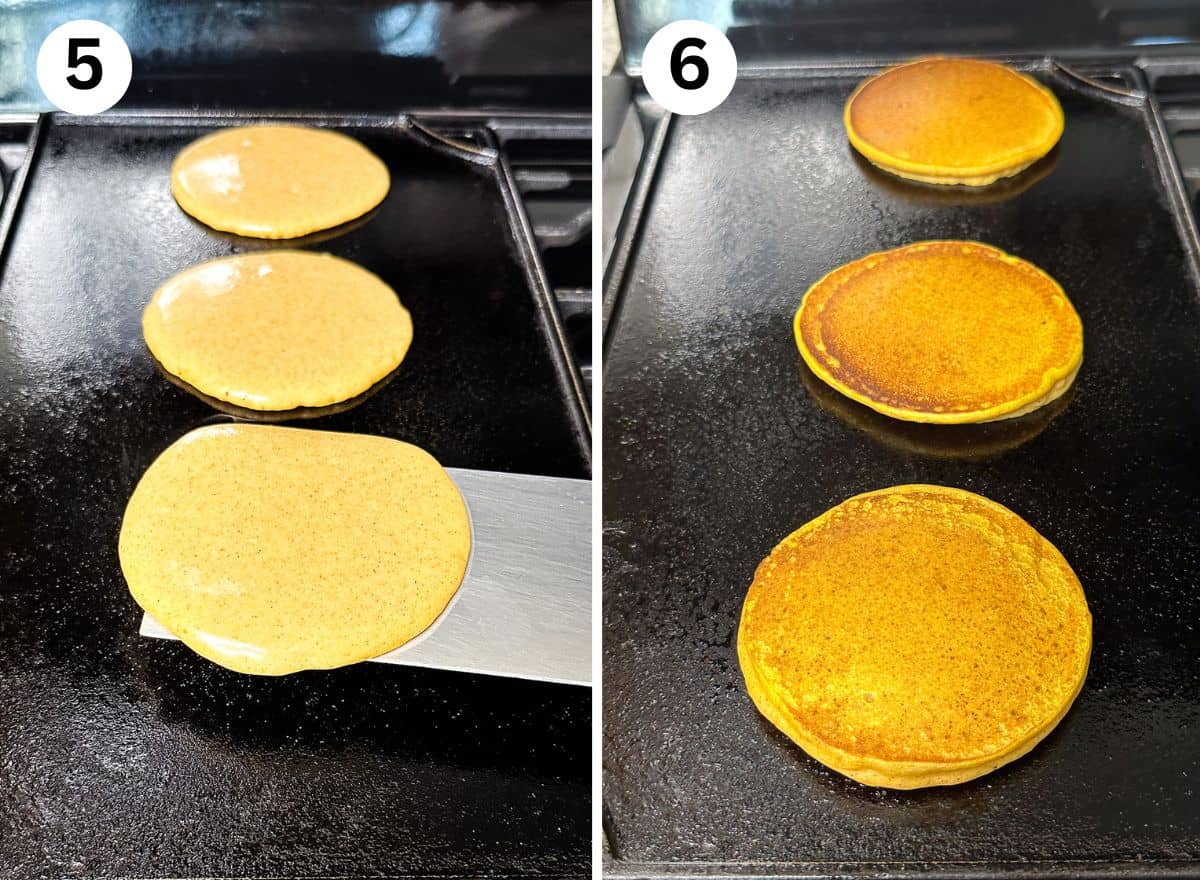
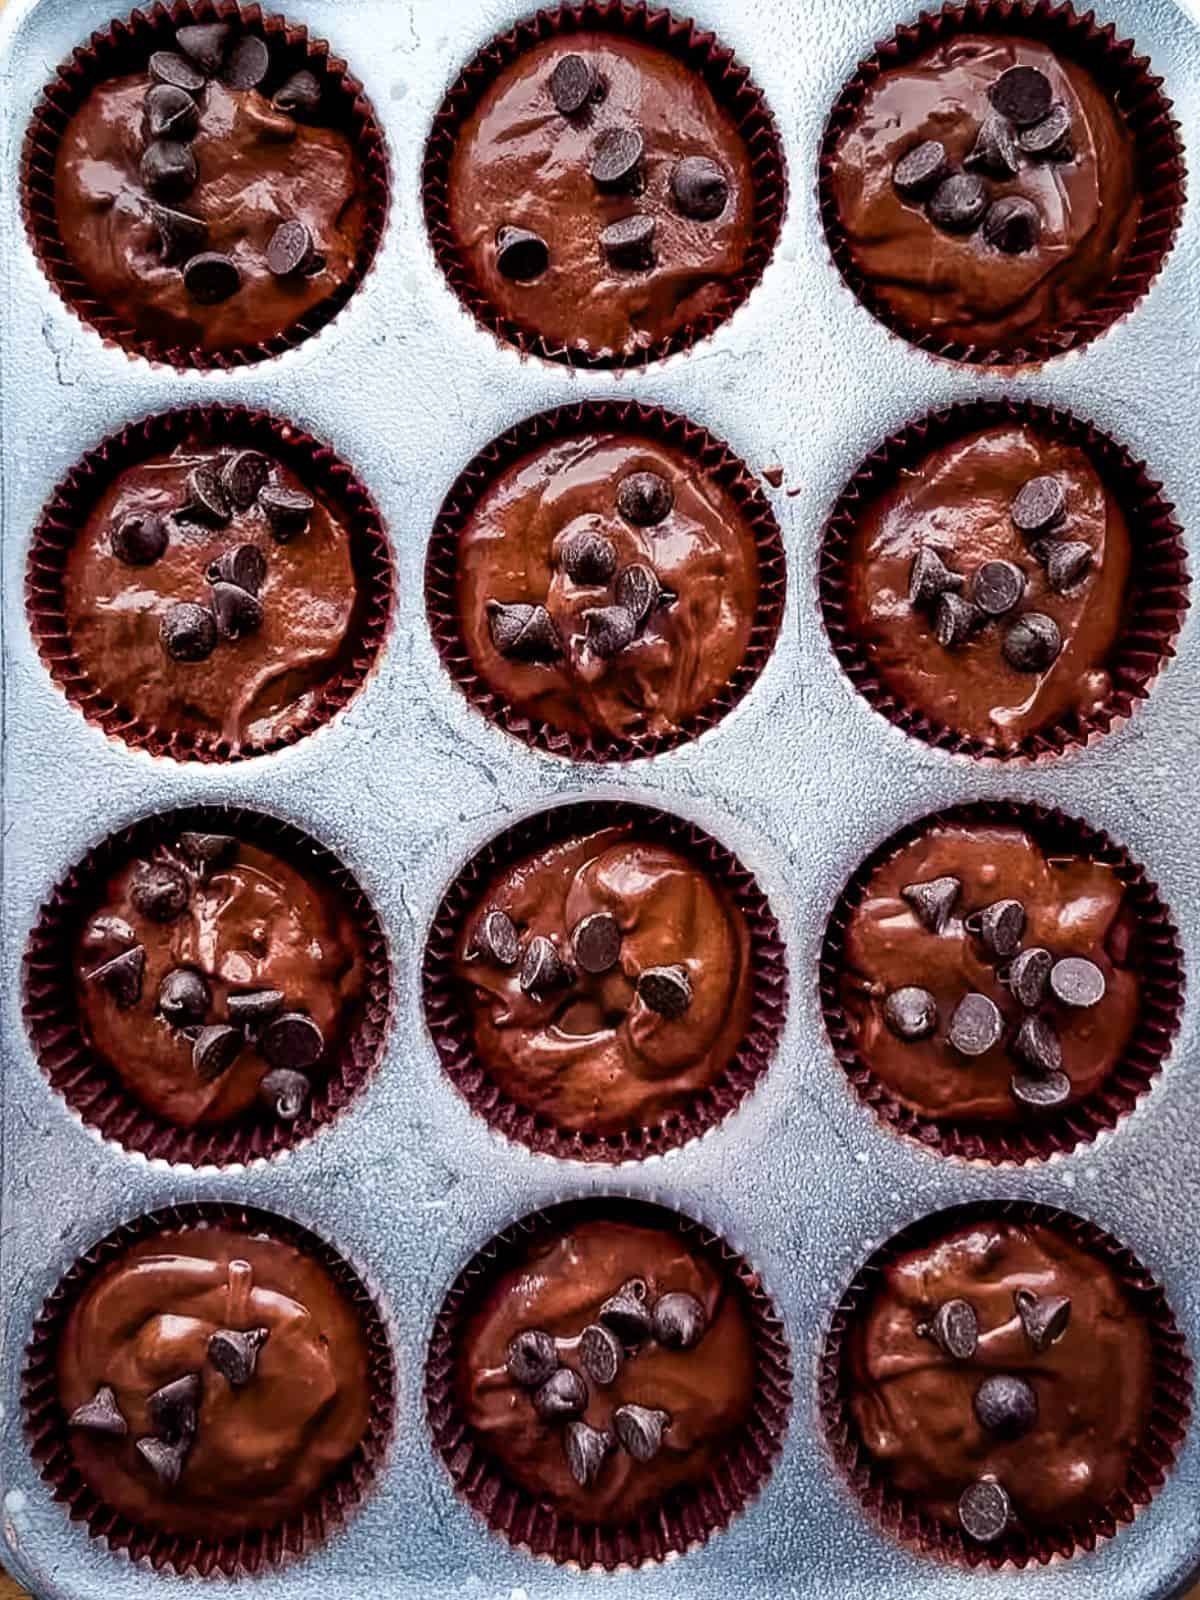
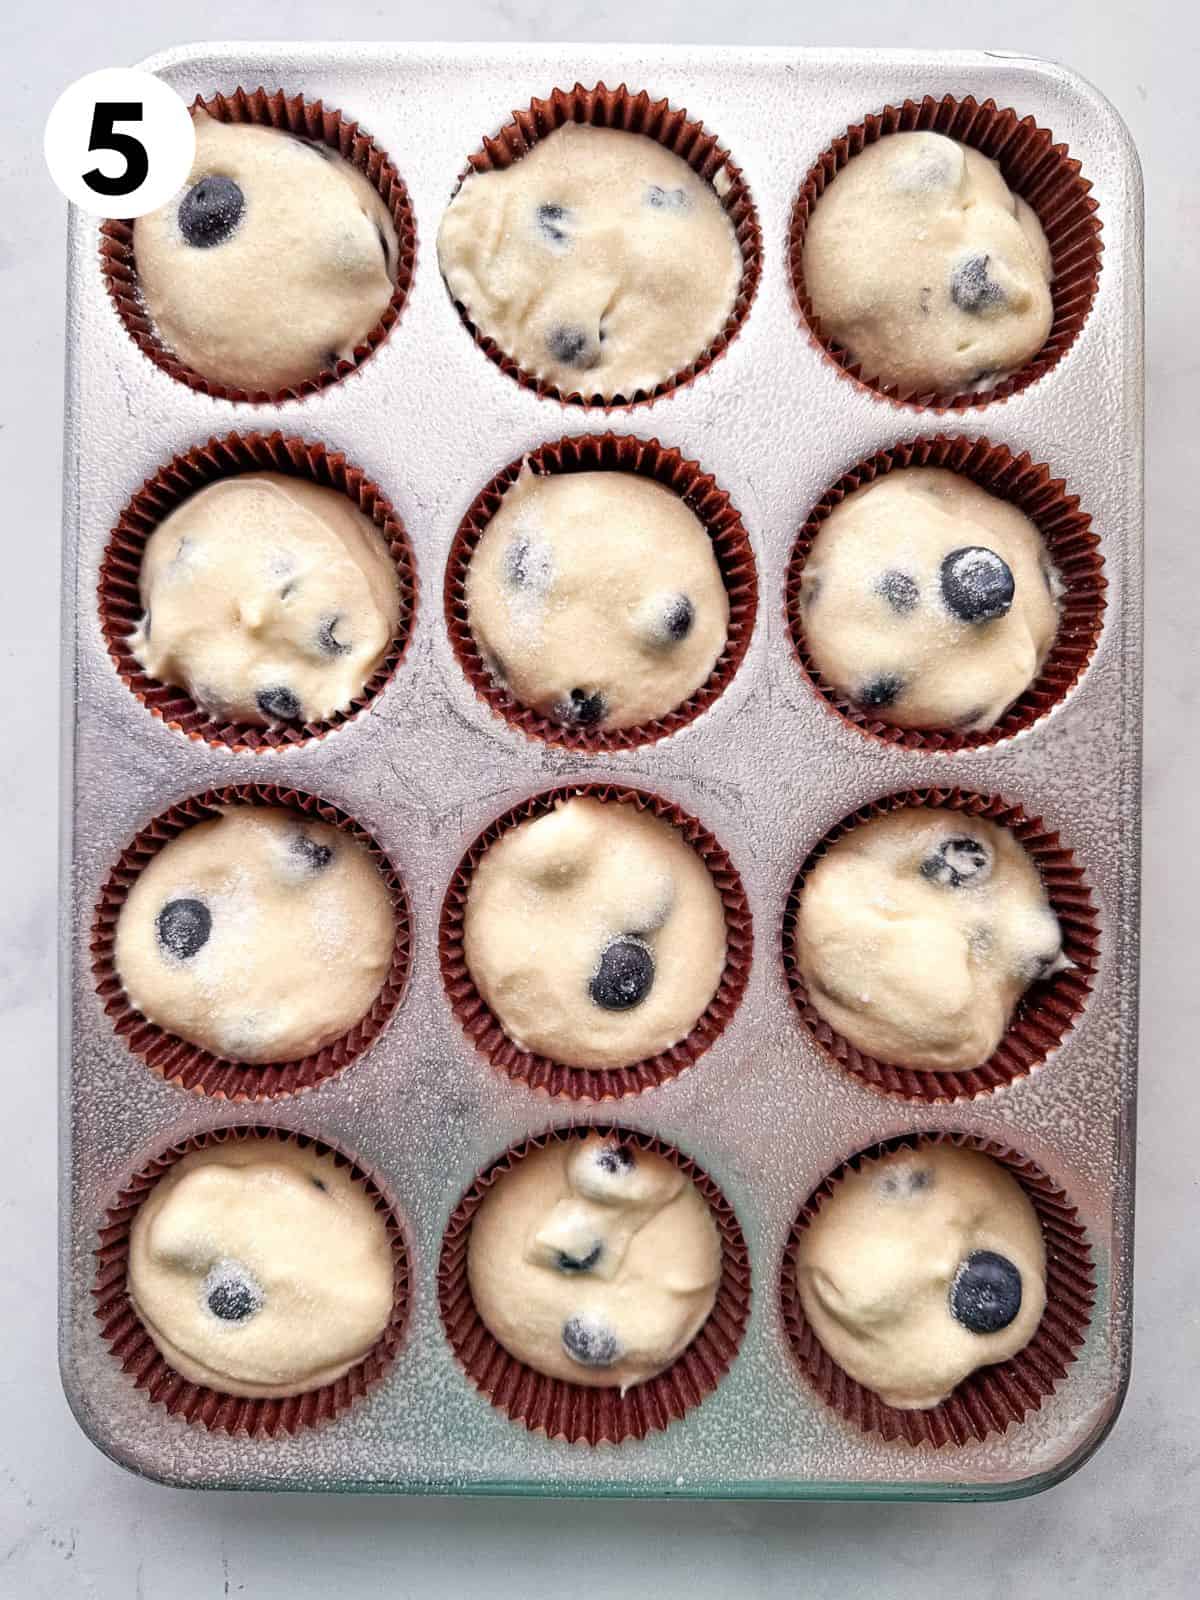
    1. Spoon the batter into your hot and greased waffle iron. Most use about a half cup of batter per waffle. Since they’re all different, it’s best to check the manual to see how much batter to use. When done, the waffles will be brown and crispy. The cook time varies by waffle maker.

    Variations

    Gluten-free waffle on left. Gluten-free, egg-free, dairy-free waffle on right. The gluten-free, dairy-free, egg-free waffle is much lighter in color than the gluten-free waffle.
    On left: Gluten-free waffle. On right: gluten-free, dairy-free, egg-free waffle. The gluten-free waffle made without eggs and dairy is lighter in color.

    Dairy-Free Waffles

    Use your favorite dairy-free milk and butter. Some brands of dairy-free milk don’t brown as nicely as others. So you’re waffles might not brown much.

    Egg-Free Waffles. 

    Gluten-free and egg-free baking is challenging. I’m happy to report this recipe works without eggs. I tested the recipe with Bob’s Red Mill Egg Replacer. When made without eggs, the batter is very thick. Don’t add additional liquid or the waffles will turn out gummy. Gluten-free and egg-free waffles tend to be a little heavier than waffles made with eggs.

    Tips

    • It’s important to cook gluten-free waffles in a hot iron. Preheat it before adding the batter.
    • Remember to grease the iron with nonstick cooking spray or brush with oil–even if it’s a nonstick iron. 
    • If you want to keep waffles warm, put them on a baking pan in a 200℉ oven.

    How to Freeze and Reheat Gluten-Free Waffles. 

    Frozen waffles make a quick gluten-free breakfast. Here’s how to freeze and reheat them. 

    How to Freeze Waffles

    1. Make the waffles as directed. 
    2. Cool on a wire rack. This allows steam to escape. 
    3. Place cooled waffles into a freezer bag or container. 
    4. Freeze for up to three months. 

    How to Reheat Homemade Gluten-Free Frozen Waffles.

    1. Thaw waffles overnight in the refrigerator or on the thaw/defrost setting of the microwave. 
    2. Heat the thawed waffles in a toaster oven, air-fryer, or oven until crispy. 

    Recipe Note.
    This recipe was first posted in 2015. It’s been updated to include new photos and now uses a gluten-free flour blend. Here is the link to the original recipe for classic gluten-free waffles.

    Stack of gluten-free waffles with butter and syrup on a plate.
    5 from 9 votes
    Print

    Gluten-Free Waffles

    These gluten-free waffles are crispy and light with a delicate interior. To make things easy, this one-bowl recipe uses a gluten-free flour blend. (Egg-free and dairy-free variations are included.)

    Prep Time 15 minutes
    Cook Time 5 minutes
    Total Time 20 minutes
    Servings 4 people

    Ingredients

    • 1 ¾ cups gluten-free flour blend (8 ¾ ounces; 248 grams.)
    • 1 tablespoon baking powder
    • 1 tablespoon granulated sugar (½ ounce; 14 grams)
    • ½ teaspoon salt
    • 1 ¼ cups milk (10 ounces; 283 grams)
    • 2 large eggs (about 3 ½ ounces; 100 grams)
    • ¼ cup vegetable oil (1 ¾ ounces; 50 grams)
    • 1 teaspoon vanilla extract

    Instructions

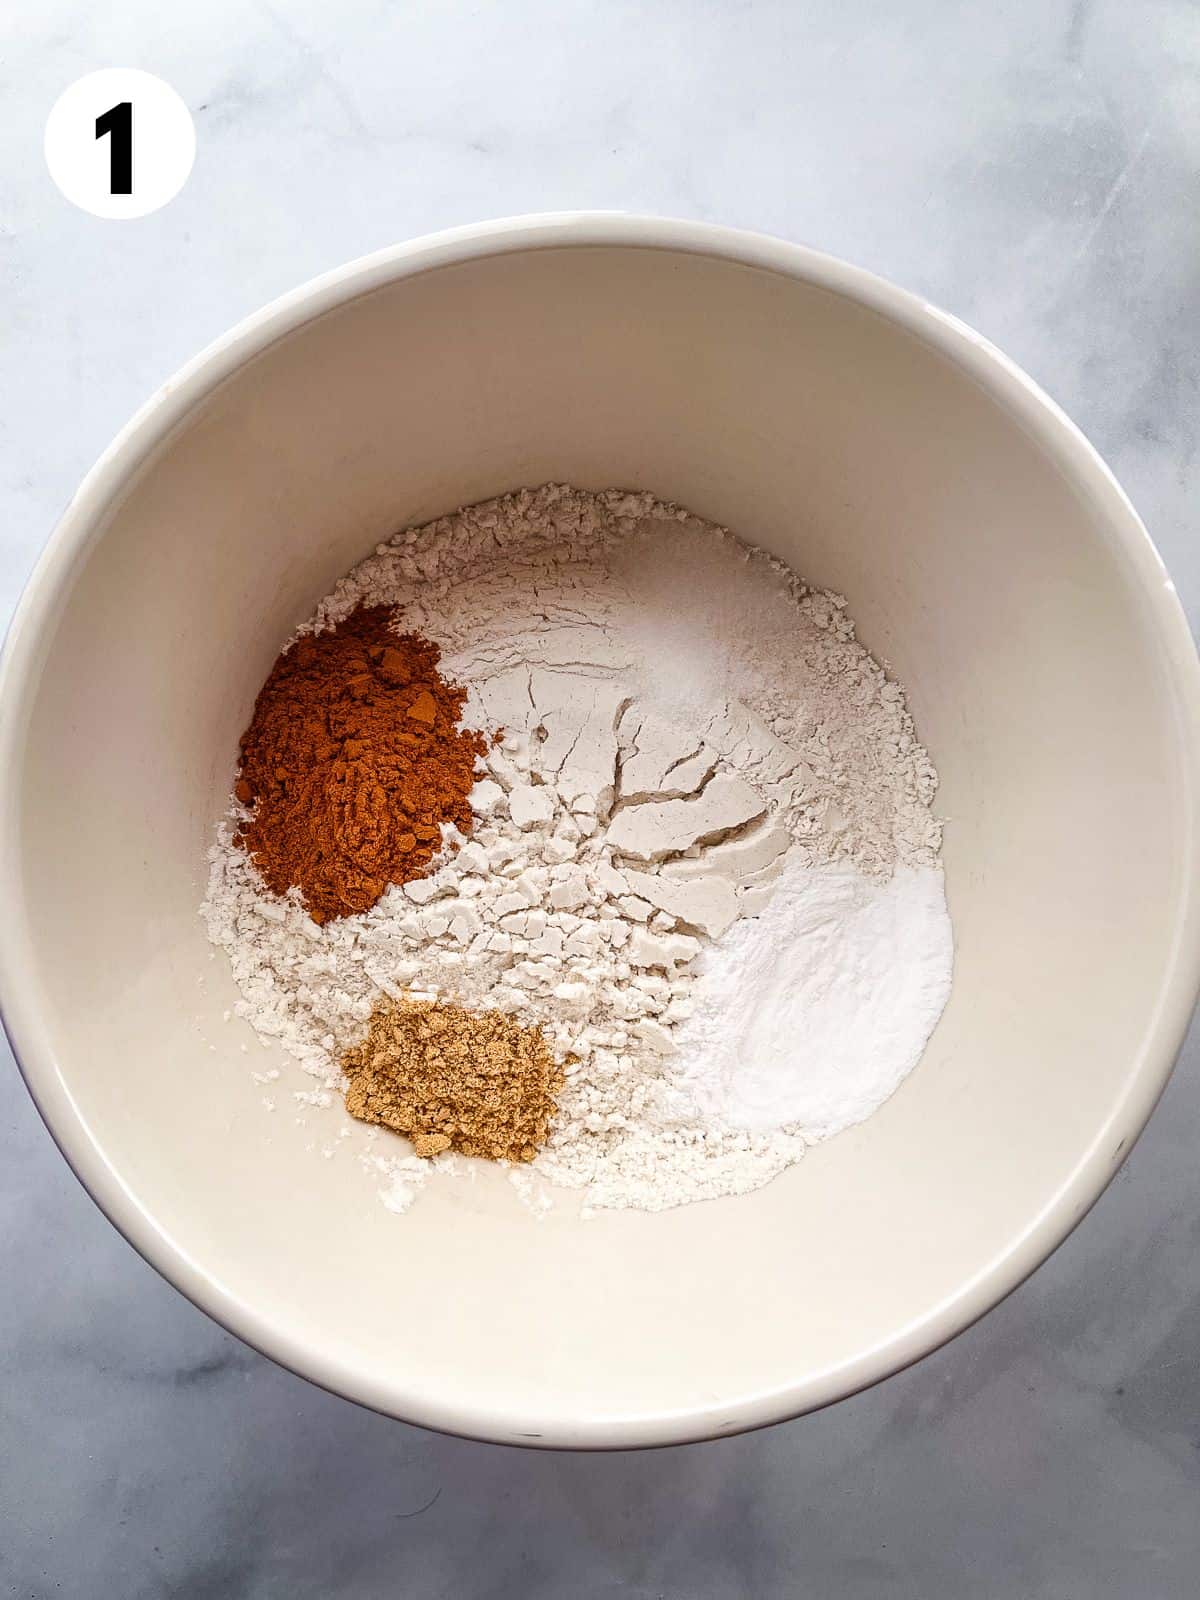
    1. Whisk together the gluten-free flour blend, baking powder, granulated sugar, and salt. Add milk, eggs, oil, and vanilla extract. Mix until the batter is smooth. Let batter rest for 10 minutes.
    2. Heat waffle iron according to manufactuer’s directions. Grease with oil and cook waffles until crispy.
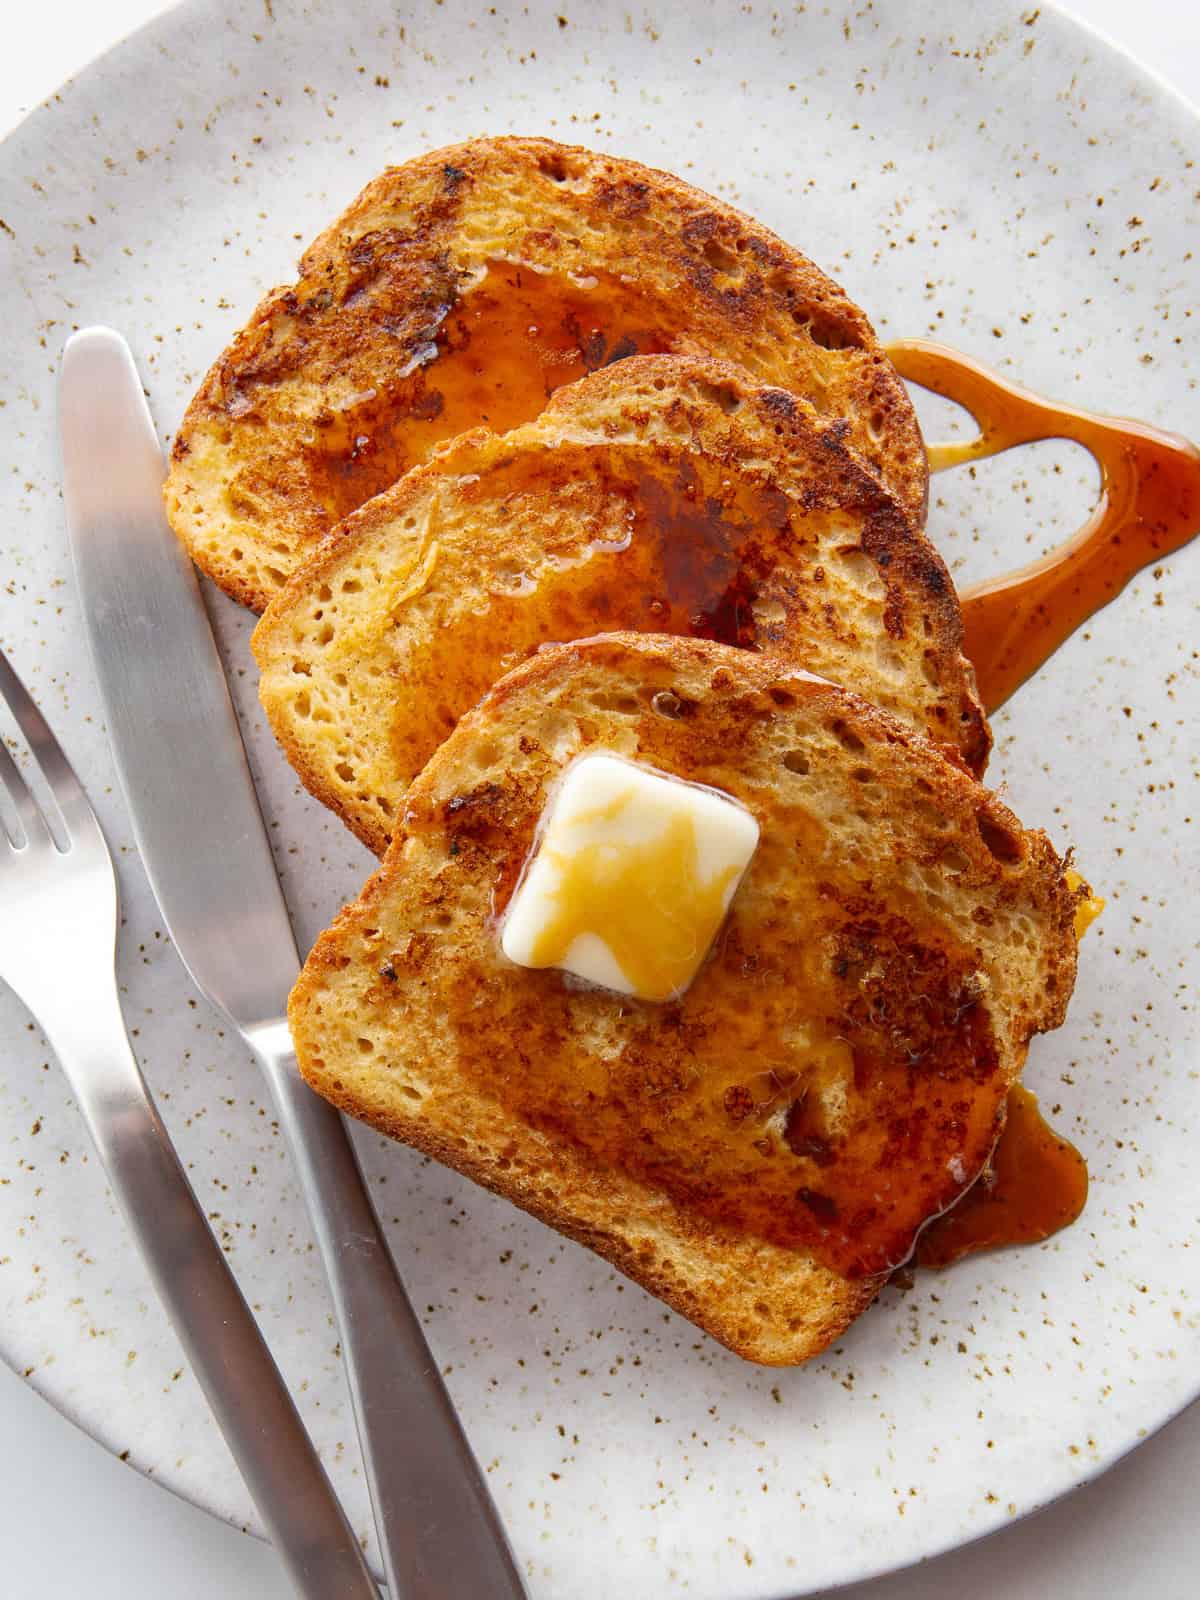
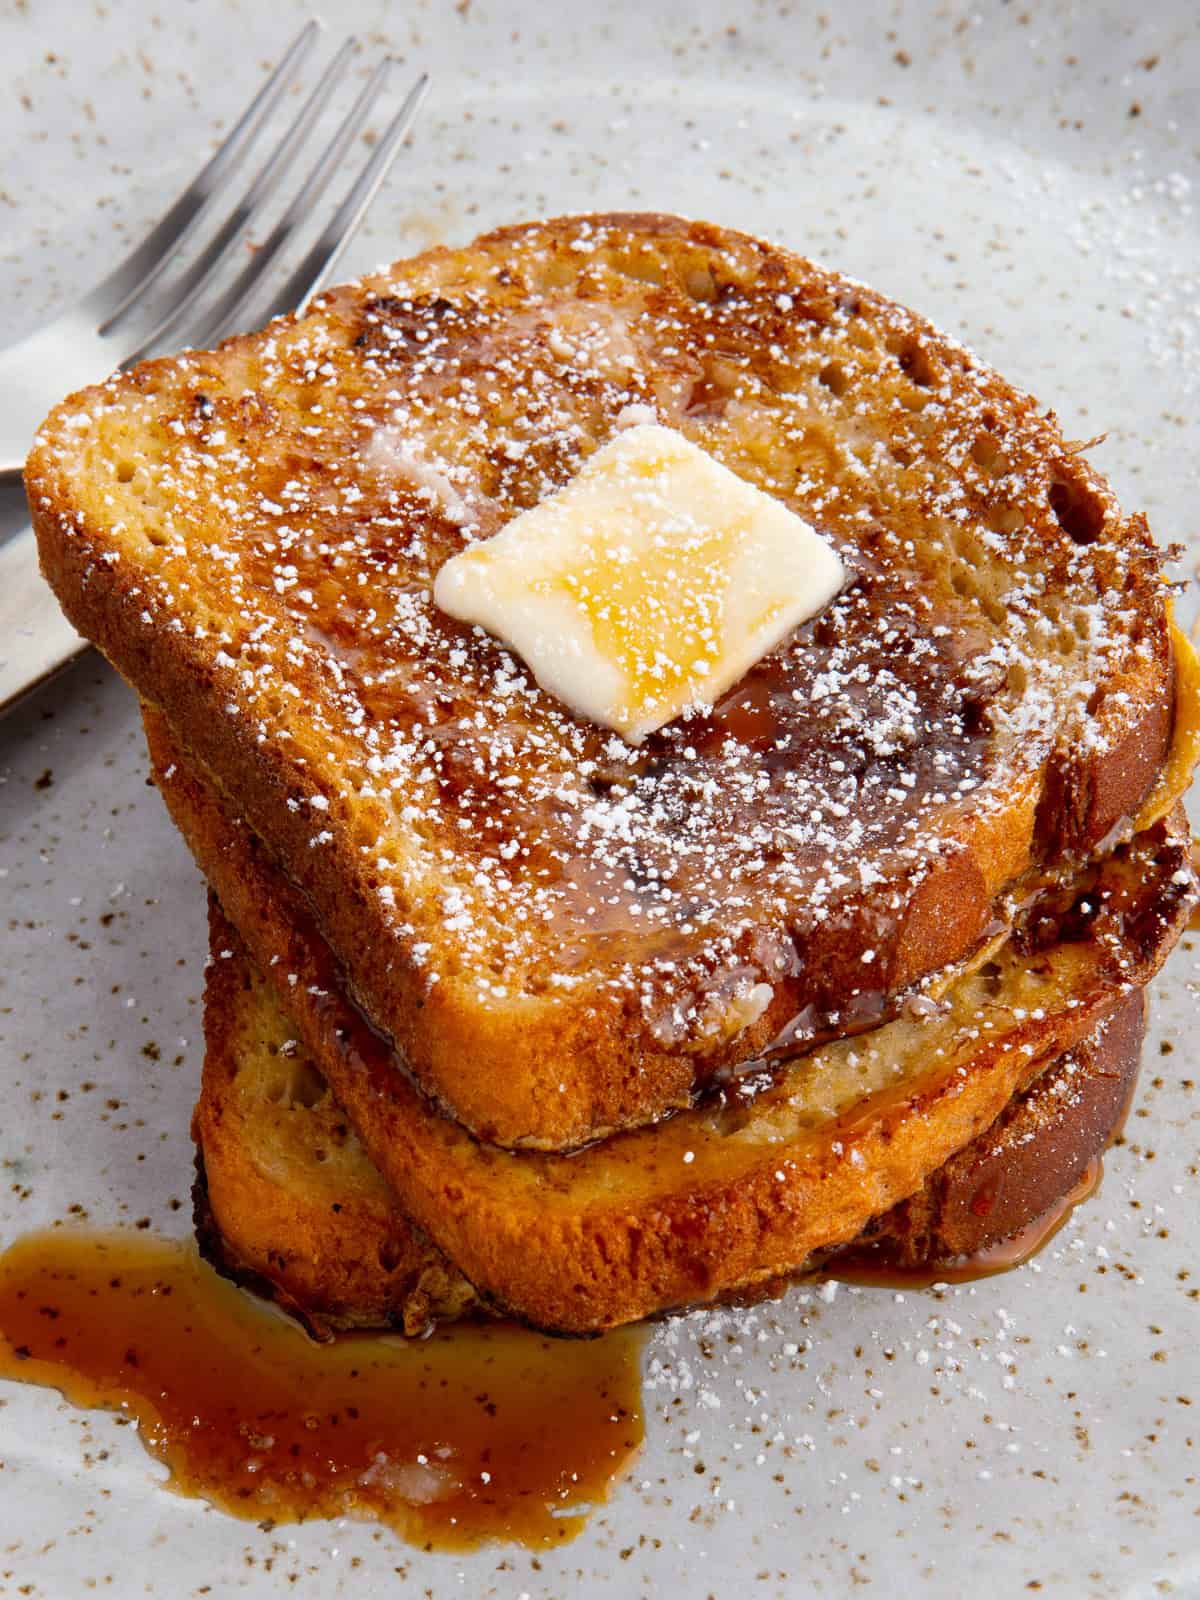
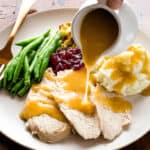
    3. Serve with butter and maple syrup or other toppings of your choice.

    Recipe Notes

    Gluten-Free Flour. This recipe was created with Bob’s Red Mill 1:1 Gluten-Free Flour Blend. Use a gluten-free flour that contains xanthan or guar gum. If it doesn’t, whisk ½ teaspoon xanthan gum into the flour and then make the recipe as directed.

    Variations

    Dairy-free. Replace the milk with an equal amount of dairy-free milk. 

    Egg-Free. Replace the eggs with 2 tablespoons Bob’s Red Mill Egg Replacer and 4 tablespoons warm water. Whisk the mixture together until smooth. Allow to rest until thick, about five minutes. When made without eggs, the batter will be very thick. Don’t add additional liquid or the waffles will turn out gummy and heavy.

    Gluten-Free Game Day Recipes

    Gluten-free game day foods. (clockwise) Garlic bread. Mozzarella sticks. Pigs in a blanket. Brownies. Onion rings.

    The best part of game day is the snacks! From savory snacks to sweet treats, these tasty gluten-free treats keep the party going from start to finish. 

    Gluten-Free Pigs in a Blanket

    Gluten-free pigs in a blanket on a white platter with ketchup and mustard in small bowls off to the side.

    Pigs in a blanket are my game day tradition! We usually dig in at halftime.

    Gluten-Free Pigs in a Blanket Recipe

    Gluten-Free Corn Dogs

    Gluten-Free Corn Dogs in a red basket.

    If your party always moves to the kitchen, even on game day, make some corn dogs. It’s fun to stand around and fry them while you chat!

    Gluten-Free Corn Dogs Recipe

    Gluten-Free Mozzarella Sticks

    Gluten-free mozzarella sticks on a plate with a small bowl of tomato dipping sauce.

    There’s just something special about fried cheese. These cook up crunchy and perfect. Recipe includes an air fryer option.

    Gluten-Free Mozzarella Sticks Recipe

    Gluten-Free Garlic Bread

    Slices of gluten-free garlic bread on a baking sheet.

    For the big game, garlic bread really hits the spot. Make the cheesy variation for something a little extra special.

    Gluten-Free Garlic Bread Recipe

    Gluten-Free Cornbread

    Gluten-free cornbread in a skillet.

    Are you making a pot of chili? Then you need a pan of cornbread to go along with it. 

    Gluten-Free Cornbread Recipe

    Gluten-Free Brownies

    A stack of three gluten-free brownies.

    My mom always made brownies for the Big Game. A pan always hits the spot. 

    Gluten-Free Brownie Recipe

    Gluten-Free Chocolate Chip Cookies

    Gluten-free chocolate chip cookies on the counter. The center cookie is split in half.

    A big plate of chocolate chip cookies makes any day special!

    Gluten-Free Chocolate Chip Cookie Recipe

    How to Make the Best Gluten-Free Garlic Bread

    Slices of gluten-free garlic bread on a baking sheet.

    This homemade gluten-free garlic bread is buttery, flavorful, and easy to make. You can make it in your over, toaster, or air fryer! It’s the perfect side dish for a bowl of gluten-free pasta or served alongside a big salad.

    Gluten-free garlic bread.

    This gluten-free garlic bread is my go-to recipe. The best part? I’ve made it with all types of gluten-free bread and it turns out delicious each time. If you love the ease of frozen garlic bread, make a batch ahead, freeze it, and then heat it when you’re ready to enjoy.

    Ingredients

    Here’s what you need to make this recipe. Think of these toppings as suggestion. Add your favorite herbs and cheese to make a gluten-free garlic bread that you love.

    Ingredients for gluten-free garlic bread on the counter.
    • Gluten-Free Bread. Both homemade and store-bought gluten-free bread work great for this recipe.
    • Butter. This garlic bread is really buttery! If you’re dairy-free, use your favorite dairy-free butter. 
    • Garlic. Minced garlic gives the bread a nice garlicky flavor. If you don’t have any in the house, use a teaspoon of garlic powder. 
    • Parsley. A little chopped fresh parsley adds a subtle freshness. 
    • Parmesan. I like to top my garlic bread with a sprinkle of parmesan cheese. 
    • Mozzarella. If you love a cheesy garlic bread, top the bread with grated mozzarella before baking. 
    • Salt and Pepper. Season the butter with a little salt and pepper. 

    How to Make Gluten-Free Garlic Bread

    From start to finish, this recipe takes about 20 minutes to make. Before making the garlic butter, preheat your oven or toaster. This way it’s hot and ready to use when the bread is prepared.

    Side-by-side gluten-free garlic bread. (on left) Unbaked. (on right) Baked.
    1. Prepare the bread. Slice gluten-free rolls or French bread, in half lengthwise. Or cut a homemade loaf of bread into ½-inch slices. 
    2. Make the garlic butter. Mix together softened butter with the garlic, parsley, and a little salt and pepper. 
    3. Top. Spread the garlic butter evenly over the bread. If you’re making cheesy bread, sprinkle the parmesan or mozzarella over the garlic butter.
    4. Bake until brown. Bake the bread until it’s golden brown. This takes about 10 minutes.

    Air Fryer Option

    (left) Two pieces of gluten-free bread with a garlic-butter topping in the air fryer pan. (right) Cooked gluten-free garlic bread in the air fryer.

    You can make this garlic bread in your air fryer. Here’s what to do.

    1. Preheat your air fryer to 375°F.
    2. Prepare the bread and garlic butter as directed above.
    3. Place the bread in the air fryer with the butter side facing up. If you have an air fryer basket or tray, use it.
    4. Air fry for about 5 minutes. The bread should be light brown and crispy. I’d check it after 3 minutes because all air fryers cook differently.

    How to make this in advance

    If you want to make this ahead of time, it’s best to use rolls or French bread. Make the garlic butter and spread it on the bread. But don’t bake it. Sandwich the bread together, so the buttered pieces are touching.

    Wrap the bread tightly in foil and freeze. You can freeze this for up to one month.

    When you’re ready to enjoy: Heat your oven, unwrap the bread, and bake until brown. There’s no need to thaw it. Garlic bread baked from frozen takes a little longer to brown than fresh bread.

    Storing Leftovers

    Gluten-free garlic bread tastes the best right after it’s made. If you’ve got some left, don’t toss it. Wrap it in foil and store it overnight. When you’re ready to enjoy, reheat in the oven, toaster oven, or air fryer.

    If you have a lot left over, freeze it. Allow the bread to cool, wrap it tightly in foil and freeze. Reheat in the oven. Note: Frozen and reheated garlic bread can dry out slightly. 

    Slices of gluten-free garlic bread on a baking sheet.
    5 from 1 vote
    Print

    Gluten-Free Garlic Bread

    Buttery and garlicky, this gluten-free garlic bread is easy to make. For a dairy-free version, replace the butter with a dairy-free spread.
    Course Appetizer, bread
    Cuisine American
    Keyword garlic bread, gluten-free garlic bread
    Prep Time 5 minutes
    Cook Time 12 minutes
    Total Time 17 minutes
    Servings 6 people

    Ingredients

    • 4 to 6 gluten-free rolls or 6 slices of gluten-free bread, about 8 ounces of bread
    • 6 tablespoons butter, softened (traditional or dairy-free)
    • 3 cloves garlic, minced or 1 teaspoon garlic powder
    • 2 teaspoons chopped fresh parsley or 1 teaspoon dried parsley
    • ½ teaspoon freshly ground black pepper
    • ¼ teaspoon salt, optional optional
    • ½ cup grated parmesan or shredded mozzarella, plus more to taste

    Instructions

    1. Preheat oven to 350°F.

    2. Split gluten-free rolls, lengthwise. Place bread, cut-side up, on a baking sheet.

    3. Combine butter, minced garlic or garlic powder, parsley, black pepper, and salt in a small bowl. Mix until creamy.

    4. Spread the garlic butter on the bread. For cheesy bread: sprinkle the cheese over the bread.

    5. Bake until golden brown, about 8 minutes for slices and 12 minutes for rolls. For extra-crispy garlic bread, broil for one to two minutes.

    6. Remove bread from the oven. Let cool for a few minutes, slice, and enjoy.

    One Bowl Gluten-Free Carrot Cake

    A slice of gluten-free carrot cake on a plate with a fork.

    This easy gluten-free carrot cake recipe makes a moist and delicious cake. Add pineapple for an extra treat. Make the best cupcakes or muffins for the carrot lover in your life.

    A slice of gluten-free carrot cake on a plate with a fork.

    This is one of my favorite gluten-free cakes! It’s loaded with spice, carrots, and the texture! Oh my goodness. No one would guess this cake is gluten-free. It’s moist and so tender–without a hint of gumminess. 

    I always frost the cake with cream cheese frosting because carrot cake, to me, calls for it. There’s something about the combination of the spicy cake with that creamy frosting that’s just perfect. Enjoy this recipe! It’s so good.

    Ingredients for gluten-free carrot cake on the counter. The ingredients are measured into individual bowls.

    Key Ingredients

    • Gluten-Free Flour. I tested the recipe with Bob’s Red Mill 1:1 Gluten-Free Baking Flour. Using a different flour might change the texture of the cake. 
    • Carrots. You need three cups of shredded carrots for this recipe.
    • Sugars. The combination of brown and granulated sugar makes for a nicely sweet and flavorful cake. 
    • Spices. Cinnamon, ginger, and nutmeg add lots of flavor. 
    • Oil. Use your favorite liquid oil (like canola or vegetable oil).
    • Eggs. Four large eggs keep the cake moist and help it rise.

    Optional Ingredients

    Stir in one—or all—of these to make a cake you love.

    • Crushed Pineapple. A can of drained crushed pineapple. Be sure to use crushed. Chunks are too big.
    • Raisins. Make sure your raisins are soft and plump. 
    • Pecans. Chop them before stirring into the batter.

    How to Make a One Bowl Gluten-Free Carrot Cake

    1. Dry ingredients for gluten-free carrot cake in a mixing bowl. 2. Wet ingredients added to the bowl. 3. Shredded carrots added to the batter. 4. Gluten-free carrot cake batter in the mixing bowl.
    1. Combine all the dry ingredients in a bowl. If your brown sugar has lumps, break them up. 
    2. Add the eggs and oil. Mix until the batter is smooth. 
    3. Stir in the grated carrots. If you’re adding pineapple, raisins, or pecans, stir them in now. 
    4. Mix until everything is blended into the batter. Remember to scrape the bottom of the bowl. Gluten-free batter loves to cling to the bottom. Sometimes you’ll find a clump at the bottom of the bowl. Stir that in before putting the batter in pans.
    (left) Gluten-free carrot cake batter in two round cake pans. (right) Two gluten-free carrot cakes cooling on a wire rack.
    1. Divide the batter between two greased round cake pans. 
    2. Bake until the cake is set. Then place the cakes on a wire rack to cool.
    Gluten-free carrot cake on a cake stand.

    Frosting and Storing the Cake

    It’s important to wait for the cake layers to cool completely before you frost. If the cake is warm, the frosting melts and makes a mess. 

    Cover the cake and store it at room temperature for up to four days. If you want to freeze the cake, place it into a freezer container and freezer for up to two months. Let the cake thaw at room temperature when you’re ready to enjoy. And remember, you can freeze a frosted cake!

    FAQs

    Can I use this recipe to make cupcakes? 

    Yes! This recipe makes about 20 cupcakes. Spoon the batter into a paper-lined cupcake holder. Bake for about 20 minutes or until a cake tester inserted in the center comes out clean. 

    How do I shred the carrots?

    There are two ways to shred/grate the carrots for carrot cake.

    1. Use a box grater.
    2. Use the grater attachment on a food processor.

    Is this carrot cake dairy-free?

    Yes! The cake contains no dairy. The frosting does contain dairy. To make it dairy-free use a dairy-free butter and cream cheese.

    Note: This recipe was first posted in January 2020. It was updated in January 2025 with new photos and ingredient information. The recipe remains the same.

    A slice of gluten-free carrot cake on a plate with a fork.
    5 from 16 votes
    Print

    Gluten-Free Carrot Cake

    Easy gluten-free carrot cake recipe makes a moist and delicious cake. Add pineapple for an extra treat. Make the best cupcakes or muffins for the carrot lover in your life.

    Prep Time 15 minutes
    Cook Time 35 minutes
    Total Time 50 minutes
    Servings 10 servings

    Ingredients

    • 2 cups Gluten-Free Baking Flour, see note 1 (9 ½ ounces; 269 grams)
    • ¾ cup granulated sugar (5 ½ ounces; 142 grams)
    • ¾ cup packed dark brown sugar (5 ½ ounces; 142 grams)
    • 1 ½ teaspoons baking powder
    • 1 ½ teaspoons ground cinnamon
    • 1 teaspoon baking soda
    • 1 teaspoon salt
    • 1 teaspoon ground ginger
    • ½ teaspoon ground nutmeg
    • ¾ cup canola or other vegetable oil (5 ¼ ounces; 148 grams)
    • 4 large eggs
    • 1 teaspoon vanilla extract
    • 3 cups grated carrots (about 5 to 6 large carrots) (7 ½ ounces; 212 grams)
    • 1 (8 ounce) can crushed pineapple, drained (optional)
    • 1 cup coarsely chopped pecans (optional)
    • ½ cup raisins (optional)

    Cream Cheese Frosting

    • 1 (8 ounce) package cream cheese, softened, see note 2
    • ½ cup butter, softened (4 ounces; 113 grams)
    • 2 teaspoons vanilla extract
    • 4 cups powdered sugar, sifted (16 ounces; 453 grams)

    Instructions

    1. Preheat oven to 350℉. Grease two 8-inch round cake pans with nonstick cooking spray and set aside.

    2. Whisk together the gluten-free flour, granulated sugar, brown sugar, baking powder, cinnamon, baking soda, salt, ginger and nutmeg. If there are any lumps of brown sugar, break them up.

      Add the oil, eggs and vanilla extract. Mix until the batter is smooth. Stir in the carrots. Add the drained pineapple, pecans, and/or raisins, if using.

    3. Divide the batter evenly between the two prepared pans.
    4. Bake until golden brown. A toothpick inserted into the center of the cake should come out clean, about 35 minutes.
    5. Allow cakes to cool in the pan for 5 minutes before turning out onto a wire rack to cool completely. When cool, frost with cream cheese frosting.

    Cream Cheese Frosting

    1. Combine cream cheese, butter and vanilla extract in a large bowl. Cream until light and smooth. Add powdered sugar. Mix until smooth.

    Recipe Notes

    NOTE 1: Gluten-Free Flour

    This recipe was tested with Bob’s Red Mill 1:1 Gluten-Free Baking Flour. To use your own flour blend, combine:

    1 cup white rice flour
    ½ cup sweet rice flour
    ½ cup tapioca starch
    ½ teaspoon xanthan gum

    Whisk in a small bowl before using. 

    NOTE 2: Cream Cheese

    Use brick-style cream cheese. Whipped cream cheese does not work in this recipe.

    Gluten-Free French Toast

    Gluten-free French toast with syrup and butter on a plate.

    This easy recipe makes gluten-free French toast that’s moist, puffy, and a little crisp on the outside. Use your favorite gluten-free bread!

    Gluten-free French toast with syrup and butter on a plate.

    I make a special breakfast every Sunday morning, rotating between pancakes, waffles, and my favorite, French toast. 

    French toast is by far the easiest to make! You simply soak your favorite gluten-free bread in a basic custard, then cook it on a buttered griddle until the slices are puffy and golden brown. I serve it with maple syrup and a little butter,  but if you have whipped cream or berries on hand, feel free to use them–they make breakfast even more delicious.

    Ingredients

    Ingredients for gluten-free French toast on the counter.
    • Gluten-Free Bread. Slightly dry gluten-free bread works best. It soaks up the milk and egg mixture nicely.
    • Milk. Use any milk you like.  I usually add a splash of half and half for a little extra richness.
    • Eggs. Three large eggs makes a tasty soak for the bread without being too eggy. 
    • Sugar. My French toast soak includes a little sugar. It add a nice sweetness without making it taste like dessert. I use brown sugar but white (granulated) sugar, honey, or maple syrup work great. 
    • Vanilla Extract and Cinnamon. Optional but I like the flavor they add. 
    • Salt. Enhances all the other flavors. 
    • Butter. Cook the French toast on a generously buttered griddle. Dairy-free butter works!

    Ingredient Note: The Key to the Best Gluten-Free French Toast is Dry Bread!

    Dry bread makes the best gluten-free French toast– but you don’t need to wait for a stale loaf!

    Simply slice your bread and place it onto a baking sheet. Dry it in a 250℉ oven for a few minutes, flipping it once. Let it cool before adding it to the custard and then cook as directed.

    How to Make Gluten-Free French Toast

    Simple custard for gluten-free French toast.

    Make the custard in a small bowl. Whisk until it’s smooth. It’s fine if the cinnamon floats to the top.

    (left) Six slices of gluten-free bread soaking in a custard. (right) The slices flipped over in the custard.

    Soak the bread, about a minute per side, in the custard. If the bread feels dry, soak it for a little longer.

    (left) Gluten-free French toast cooking on the griddle. (right) The French toast flipped and light brown.

    Heat a nonstick or cast iron griddle over medium heat. Add about a tablespoon of butter and let it melt. Brush the butter evenly over the griddle.

    Cook the bread until it’s golden brown, about two minutes per side. If the pan is too hot, the outside will burn before the center cooks. Medium heat is the best!

    Keeping French Toast Warm

    Keeping gluten-free French toast warm on a pan. The slices are stacked on top of each other.

    Before you start cooking, heat your oven to 200℉. Place the cooked French toast on a foil or parchment-lined–it’s fine if you stack it! If you like your French toast a little crispy, put it in a single layer on a wire rack. It keeps best for about an hour or so. After that, it starts to dry out.

    Making French Toast in Advance

    Three slices of French toast on a plate. The toast is topped with butter, syrup, and powdered sugar.

    There are a few ways to make gluten-free French toast in advance. 

    1. Make the custard. Mix together all the ingredients and refrigerate it overnight. 
    2. Cook the French toast. Store it in the refrigerator for up to two days. Then heat it in a 325℉ oven until warm.
    3. Freeze cooked and cooled French toast. Thaw it overnight in the refrigerator. Heat it in a 325℉ oven until warm. 
    Three slices of French toast on a plate. The toast is topped with butter, syrup, and powdered sugar.
    Print

    Gluten-Free French Toast Recipe

    This easy recipe makes gluten-free French toast that’s moist, puffy, and a little crisp on the outside. Use your favorite gluten-free bread!
    Prep Time 5 minutes
    Cook Time 10 minutes
    Total Time 15 minutes
    Servings 4 servings

    Ingredients

    • 1 cup milk
    • 3 large eggs
    • 2 tablespoons brown sugar, see note 1
    • ½ teaspoon vanilla extract
    • ¼ teaspoon ground cinnamon
    • ¼ teaspoon salt
    • 8 slices gluten-free bread, see note 2
    • 2-4 tablespoons butter, for the pan

    Instructions

    1. If you want to keep your French toast warm, preheat the oven to 200F.
    2. In a small mixing bowl, whisk together the milk, eggs, brown sugar, vanilla extract, cinnamon, and salt.
    3. Pour the mixture into a large baking sheet. Place the bread slices into the pan and soak for about a minute on each side.

    4. Heat a nonstick griddle or cast iron pan over medium heat. Melt about a tablespoon of butter on the griddle. Brush the butter evenly over the griddle.
    5. Place bread, as many comfortably fit, and cook until golden brown, about 2 to 3 minutes per side.
    6. Serve immediately or place on a baking sheet and place in the preheated oven to keep warm. Repeat, buttering the pan each time, until all the bread is cooked. Serve with maple syrup, whipped cream or fruit.

    Recipe Notes

    Note 1. You can sweeten the custard with brown sugar, granulated sugar, honey, or maple syrup.

    Note 2. Use your favorite gluten-free bread. It’s best if it’s slightly dry. You can do this by placing it into a 250℉ oven for a few minutes.

    Gluten-Free Monster Cookies

    Gluten-free monster cookies.

    Gluten-free monster cookies are filled with good things: peanut butter, oats, butterscotch chips, and M&Ms. Everything comes together to make a cookie that’s chewy and flavorful. And the best part? The recipe is easy-to-make. You mix the dough in a large bowl. Scoop it onto a parchment-lined baking sheet and bake until brown. 

    If you love gluten-free cookies, try these recipes for gluten-free chocolate chip cookies and gluten-free shortbread.

    Gluten-free monster cookies on a wire rack.

    What are Monster Cookies? 

    Gluten-free monster cookies could be called “this and that” cookies because you add a little of this and a little of that.  The recipe starts with a peanut butter and oatmeal cookie base. Then you add butterscotch chips, peanuts, and M&Ms. But think of those as suggestions. Stir in your favorite nuts and candies to make monster cookies that suit your tastes.

    Key Ingredients

    Gluten-free monster cookie ingredients on the counter.
    • Gluten-Free Oats. Look for oats that are labeled gluten-free. Quick-cook (instant) and traditional oats work in this recipe. Traditional oats give you a chewier texture than quick-cook oats but both have good flavor. Don’t use steel cut oats.
    • Gluten-Free Flour. Use a gluten-free flour blend that contains xanthan gum. It helps the cookies hold their shape. The recipe was tested with Bob’s Red Mill’s 1:1 Gluten-Free Baking Flour. Different gluten-free flours affect the texture of the cookies. 
    • Peanut Butter. Creamy peanut butter works best. 
    • Butterscotch Chips. If you don’t like butterscotch chips, replace them with white chocolate chips, peanut butter chips, or chocolate chips. Note: For a long time, some brands of butterscotch chips contained barley. Read the label to ensure the butterscotch chips are gluten-free.
    • Peanuts. Use any type of peanut you love. Honey-roasted peanuts are especially nice. 
    • M&Ms. M&Ms or other chocolates are a nice addition.

    Suggest Stir-In Variations

    Mix it up by using different stir-ins. Here a few of my favorites.

    • Gluten-Free Pretzels. I like to break them up. Or you can press a mini-pretzel into the top of the cookie.
    • Potato Chips.
    • Toffee Chips

    How to Make Gluten-Free Monster Cookies

    Steps for mixing gluten-free monster cookie dough. 1. Melted butter, brown sugar, and peanut butter mixed in a bowl. 2. Adding gluten-free flour, baking soda, and salt. 3. Gluten-free oats sitting on top of the dough. 4. Adding butterscotch chips, peanuts, and M&Ms.
    1. Mix the melted butter, brown sugar, and peanut butter. Then add the eggs and vanilla extract. I like to use a large bowl for this.
    2. Stir in the gluten-free flour, baking soda, and salt. 
    3. Add the gluten-free oats.
    4. Stir in the butterscotch chips, peanuts, and candy pieces. 
    Gluten-free monster cookies on a sheet pan. (left) Dough close up. (right) 12 cookies on a pan.
    1. Scoop dough into balls and place on a parchment-lined baking sheet. Bake until the edges are golden brown.
    Stack of three gluten-free monster cookies. The top cookie is broken in half.

    How to Store Leftovers

    These cookies keep really well for about 5 days. Store the cooled cookies in an airtight container with a lid. 

    If you want to keep them longer, place the cooled cookies into a freezer bag or container. Freeze for up to three months.

    Gluten-free monster cookies on a wire rack.
    Print

    Gluten-Free Monster Cookies

    Gluten-free monster cookies are loaded with good things! Gluten-free oats, peanut butter, butterscotch chips, and more. They bake up chewy and flavorful.

    Prep Time 10 minutes
    Cook Time 15 minutes
    Total Time 25 minutes
    Servings 24 cookies

    Ingredients

    • ½ cup butter, melted and cooled slightly (4 ounces; 113 grams)
    • ¾ cup light brown sugar (6 ounces; 170 grams)
    • ¾ cup creamy peanut butter, see note 1 (7 ounces; 198 grams)
    • 2 large eggs
    • 1 teaspoon vanilla extract
    • ¾ cup gluten-free flour, see note 2 (3 ¾ ounces; 106 grams)
    • ½ teaspoon baking soda
    • ½ teaspoon salt
    • 1 ¼ cups gluten-free oats, quick cook or rolled, uncooked, see note 3 (5 ¼ ounces; 148 grams)
    • 1 cup gluten-free butterscotch chips or chocolate chips (about 6 ounces; 170 grams)
    • 1 cup dry roasted peanuts ( 5 ounces; 142 grams)
    • 1 cup M&Ms candy (about 4 ounces; 113 grams)

    Instructions

    1. Preheat oven to 350°F. Line a baking sheet with parchment paper.

    2. In a large bowl, whisk together melted butter, brown sugar, and peanut butter until smooth. Add eggs and vanilla extract. Mix until eggs are combined and the mixture is smooth. Switch to a rubber spatula or wooden spoon.

    3. Add the gluten-free flour, baking soda, and salt. Mix until flour is combined. Add the oats. Stir until combined. The dough will be thick

      Stir in butterscotch chips, peanuts, and candy pieces.

    4. Scoop dough, about two tablespoons each, onto the prepared baking sheet. Space the cookies about one-inch apart. If desired, flatten each cookie with the bottom of a glass or measuring cup. Dip the bottom of the measuring cup in cold water to keep it from sticking to the dough.

    5. Bake until the edges are golden brown and set, about 12 minutes. Allow cookies to cool on the pan for about three minutes and then transfer cookies to a wire rack. Repeat with remaining dough.

    6. Place cookies in an airtight container and store on the counter for up to four days or freeze in a freezer container, for up to three months. Allow cookies to thaw on the counter.

    Recipe Notes

    Note 1: Creamy Peanut Butter: Traditional creamy peanut butter works best.

    Note 2: Gluten-Free Flour: This recipe was tested with Bob’s Red Mill 1:1 Gluten-Free Flour Blend and is recommended for the best texture. 

    Note 3: Oats: Use gluten-free oats. Quick cook (instant) oats or old fashioned oats may be used. Do not use steel cut oats in this recipe.


    Gluten-Free Thumbprint Cookies

    Plate of gluten-free thumbprint cookies.

    These jam thumbprint cookies are irresistible. They’re light and buttery with an almost melt-in-your-mouth texture. Before baking, press a small indentation into the center of each dough ball and fill it with your favorite jam. Bake the cookies until the edges are light brown and the jam is shiny. Remember to let these cool before eating. The jam is really hot right out of the oven!

    Gluten-free jam thumbprint cookies on a plate.

    Jam thumbprints are one of my favorite cookies. There’s just something about the combination of the buttery cookie and the jam topping. Not only are they tasty, they’re so fun to make. I usually fill them with strawberry or raspberry jam but any jam works. Use whatever you love.

    If you love buttery cookies, consider making a batch of gluten-free shortbread to go along with these. They make a nice pair if you make cookie tins to give as gifts.

    Ingredients for gluten-free jam thumbprints measured on the counter.

    Simple Ingredients. Tasty Cookies.

    • Gluten-Free Flour. Use a gluten-free flour blend that contains xanthan gum. It helps the cookies hold their shape. If your blend doesn’t contain xanthan, whisk a ¼ teaspoon into it before making the dough. 
    • Butter. Softened butter is critical to making the dough. Both salted and unsalted butter work in this recipe. I prefer salted butter because I think it gives the cookies a richer flavor. If you’re using a dairy-free butter replacement, make sure it’s suitable for baking. Avoid using oil. It makes for greasy cookies. 
    • Granulated Sugar. Adds sweetness. 
    • Salt. Enhances the other flavors. 
    • Baking Powder. A tiny amount of baking powder gives the cookies a delicate texture.
    • Egg. One large egg brings the dough together. 
    • Jam. You can use your favorite jelly, jam, or preserves. They all work and they’re all tasty. 
    • Vanilla or Almond Extract. Adds flavor. You can use either vanilla or almond extract. If you have both on hand, use them. The blend adds a really nice flavor.

    How to Make Gluten-Free Jam Thumbprint Cookies

    There are four simple steps to making these cookies: prepare the dough, roll them into balls, fill them with jam, and bake.

    1. Creamed butter, sugar, and egg in a large bowl. 2. Gluten-free jam thumbprint dough. 3. Dough rolled into balls. 4. Dough with jam in center.
    1. Cream together the butter and sugar in a large bowl. Add the egg and vanilla. Mix until creamy and thick.
    2. Add the whisked gluten-free ingredients. Mix until a dough forms. 
    3. Roll the dough into balls. I like to roll these in powdered or granulated sugar. It’s totally optional but adds a nice flavor and appearance. 
    4. Press a small indentation into each cookie. Spoon in your favorite jam.
    5. Bake. A pan of these cookies takes 12 to 15 minutes to bake. You want the edges to have a light pale golden color.

    Note: Wait before enjoying these cookies! The jam is very hot right out of the oven.

    Two Baking Tips for Making the Perfect Jam Thumbprints

    Gluten-free jam thumbprint dough rolled in powdered sugar and topped with jam on a baking sheet.
    • Chill the Dough. Pop the dough into the fridge for about 10 minutes before rolling it into balls. This gives the dough time to firm up a bit. If your kitchen is very warm, chill the dough for longer.
    • Don’t use too much jam. If you use too much, the jam runs all over the cookies as they bake. Use about a ¼ teaspoon per cookie. That’s it. 

    Storage Tips

    These cookies keep at room temperature for up to five days when stored in an airtight container. Don’t place warm cookies into a container or they’ll steam and fall apart. 

    To freeze: These cookies freeze beautifully. Once they’re fully cooled, place them into a freezer container. I like to layer them with a piece of parchment between each layer. They keep for up to two months in the freezer.

    Gluten-free jam thumbprint cookies on a plate.
    4.5 from 2 votes
    Print

    Gluten-Free Thumbprint Cookies

    Classic thumbprint cookies made gluten-free. The buttery cookie is topped with a little jam. Recipe includes a dairy-free variation.
    Prep Time 15 minutes
    Cook Time 12 minutes
    Total Time 27 minutes
    Servings 32 cookies

    Ingredients

    • 1 ¾ cups gluten-free flour, see note (8 ounces; 226 grams)
    • ½ teaspoon salt
    • ¼ teaspoon baking powder
    • ½ cup butter, softened (4 ounces; 113 grams)
    • ½ cup granulated sugar (3 ½ ounces; 100 grams)
    • 1 large egg (about 2 ounces; 56 grams out of shell)
    • ½ teaspoon vanilla or almond extract, see note
    • ¼ cup jam, any flavor (3 ounces; 85 grams)

    Instructions

    1. Preheat oven to 350℉. Line a baking sheet with parchment paper and set aside.

    2. Whisk together gluten-free flour, salt, and baking powder in a small bowl.
    3. In a large bowl, mix butter and granulated sugar together until thick and creamy. Stop the mixer and scrape the sides and bottom of the bowl.

    4. Add the egg and vanilla extract. Mix until light. Stop the mixer and scrape down the sides and bottom of the bowl. Run mixer for about 10 seconds to incorporate wherever you’ve scraped from the sides.

    5. Add the dry ingredients. Mix until a dough forms. Chill the dough for ten minutes.

    6. Scoop the dough, about one tablespoon each, and roll into balls. Place cookies, about two inches apart, on the prepared baking pan.

    7. Using your finger or the back of a half (½) teaspoon measuring spoon, press an indentation into each cookie. If the cookie dough cracks, gently press it back together.

    8. Spoon about ¼ teaspoon of jam into each indentation.

    9. Bake cookies for 12-15 minutes or until cookies are firm and the edges are light golden brown.

    10. Let the cookies cool on the pan for three minutes. Then transfer cookies to a wire rack to cool completely. Repeat with remaining dough.

    11. Store cookies in an airtight container for up to five days or freeze once cooled for up to two months.

    Recipe Notes

    Gluten-Free Flour: This recipe was developed with Bob’s Red Mill 1:1 Gluten-Free Baking Flour. For the best results, use a gluten-free flour blend that contains xanthan or guar gum. If yours doesn’t, whisk ¼ teaspoon into the flour before using. This recipe has not been tested with nut or grain-free flour. 

    Dairy-Free Variation: Replace the butter with a dairy-free butter that’s labeled for baking. Coconut oil is not recommended as it can make the cookies heavy and greasy. 

    Vanilla and Almond Extract. If you have almond extract in the house, use a blend of vanilla and almond extract. It makes for extra tasty cookies. Use 1 ½ teaspoons vanilla extract and ½ teaspoon almond extract.


    Easy Gluten-Free Sugar Cookies (Drop Style)

    Gluten-free sugar cookies in a stack.

    These gluten-free sugar cookies are light and crisp on the edges and soft in the center. They’re sweet and buttery and don’t require a cookie cutter. Just make the dough, drop it onto a parchment-lined pan and bake. Rolling the dough in sugar before baking is optional but adds a lovely crunch and sweetness.

    Gluten-free sugar cookies in a stack.

    If you love sugar cookies, you know there are two types: cut-out cookies and drop cookies. This recipe is the second type. It’s perfect for when you’re in the mood for sugar cookies but don’t have a lot of time.

     And if you want the cut-out style too, we’ve got a gluten-free sugar cookie recipe that you roll and cut into shapes.

    Ingredients

    Ingredients for gluten-free sugar cookies measured and placed on the counter.

    Here’s what you need to make a batch of these cookies.

    • Gluten-Free Flour. I tested the recipe with Bob’s Red Mill’s 1:1 Gluten-Free Flour. If you use a blend that doesn’t contain xanthan or guar gum, whisk a half teaspoon into the flour before using.
    • Butter. Use softened butter. For a dairy-free cookie, use your favorite dairy-free butter.
    • Sugar. Granulated sugar or organic cane sugar works best.
    • Baking Powder. Gives the cookies a light, tender texture.  
    • Salt. Use table salt, not flaky (kosher) salt. It blends easily into the flour and enhances all the other flavors. 
    • Egg. One egg adds flavor and moisture. 
    • Vanilla Extract. If you like a little lemon flavor in your sugar cookies, use lemon oil or extract. 
    • Sanding or Coarse Sugar. To give these cookies some sparkle, roll them in colored sugar before baking. Coarse sugar adds a nice crunch since the sugar crystals are bigger.

    How to Make Easy Gluten-Free Sugar Cookies

    Gluten-free sugar cookie dough in a glass mixing bowl.
    1. Make the Dough. You need two mixing bowls for this dough. I like to mix it with an electric mixer since the dough is stiff.
    Gluten-free sugar cookie dough in a bowl with a cookie scoop.
    1. Scoop the dough. You want to use about 1 tablespoon of dough for each cookie. I like to use a cookie scoop for this step. It makes it quick to scoop the dough and all the cookies turn out the same size.
    Gluten-free peanut butter dough being rolled in granulated sugar.
    1. Roll the dough into sugar. Fill a small bowl with about ½ cup of sugar for rolling. You can roll the entire ball or just the top. It’s up to you!
    Gluten-free sugar cookie dough on a baking sheet.
    1. Place the cookies on a parchment-lined baking sheet. Flatten the dough by pressing down on it with your hand or the bottom of a drinking glass. These cookies spread during baking. But if you don’t press them down before baking, they turn out thick in the middle. 
    Baked gluten-free sugar cookies on a baking sheet.

    4. Bake until the cookies are a very light golden brown on the edges. A pan of these cookies takes about 12 minutes to bake. As always, it’s better to go by how they look than the clock.

    Baking Tips

    • Turn your oven on and measure out all the ingredients before you make the dough. This way you know you’ve got everything on hand to make the cookies before you’re halfway through mixing.
    • Use a few different colored sugars. It’s an easy way to make a batch look fun!
    • Let the cookies cool on the pan for about three minutes. If you move them before that, they can break because they’re so hot and delicate from the oven. Once they’ve cooled for a few minutes, transfer them to a wire rack to cool completely. 

    Storage and Freezing Tips

    Gluten-free sugar cookies on the counter.

    Once the cookies are completely cool, store them in an airtight container at room temperature for up to five days. 

    How to Freeze Baked Cookies. 

    These cookies freeze nicely. Let them cool completely and then place into a freezer container. To keep the cookies from sticking to each other, place a piece of waxed or parchment paper between each layer. Freeze the cookies for up to three months. When you’re ready to enjoy, let them thaw on the counter. 

    How to Freeze Cookie Dough. 

    If you want to make the dough in advance and bake it later, here’s what to do. Prepare the dough as directed. Roll the cookies into balls and roll into sugar. Place the cookie dough balls onto a parchment-lined baking sheet. Freeze on the pan for about an hour. Then transfer the dough to a freezer bag. The dough keeps in the freezer for up to two months. 

    When ready to bake, here’s what to do.

    • Place the frozen dough on a parchment-lined baking sheet. Let it thaw for about 20 minutes. 
    • Preheat your oven and bake the cookies as directed. Thawed dough sometimes takes an extra minute or so to bake. Check them after 12 minutes and adjust the baking time as needed.
    Gluten-free sugar cookies in a stack.
    5 from 10 votes
    Print

    Easy Gluten-Free Sugar Cookies (Drop Style)

    These gluten-free sugar cookies are light and crisp on the edges and soft in the center. They’re sweet and buttery. (Perfect recipe for beginners.

    Prep Time 10 minutes
    Cook Time 12 minutes
    Total Time 22 minutes
    Servings 24 cookies

    Ingredients

    • 1 ⅓ cups gluten-free flour, see note (7 ounces; 198 grams)
    • ½ teaspoon baking powder
    • ¼ teaspoon salt
    • ¾ cup granulated sugar (5 ¾ ounces; 165 grams)
    • ½ cup softened butter (1 stick; 4 ounces; 113 grams)
    • 1 large egg (out of shell: 2 ounces; 56 grams)
    • 1 teaspoon vanilla extract
    • ½ cup sanding or coarse sugar (about 4 ounces; 113 grams)

    Instructions

    1. Preheat oven to 350℉. Line baking sheets with parchment paper.

    2. Whisk together the gluten-free flour, baking powder, and salt in a small bowl.

    3. Mix together the sugar, softened butter, and vanilla in a large mixing bowl until a thick paste forms, about 1 minute. Add the egg and mix until well combined. Reduce speed to low and add the dry ingredients. Scrape down the sides and bottom of the bowl. Mix until a dough forms.

    4. If the dough is soft and sticky, chill for 10-15 minutes. If not, skip to the next step.

    5. Roll the dough, about 1 tablespoon each, into a balls or use a cookie scoop.

      Roll the dough into sanding sugar.

      Place dough onto the prepared baking sheet. Space cookies about 2 inches apart. Flatten cookies to ¾-inch thickness with the bottom of a glass or measuring cup.

    6. Bake cookies, one sheet at a time, until set and lightly golden brown on the edges, about 12 minutes.

    7. Cool cookies for 5 minutes on the baking sheet. Transfer cookies to a wire rack to cool. Store cookies in an airtight container for up to five days.

    Recipe Notes

    Gluten-Free Flour. Bob’s Red Mill 1:1 Gluten-Free Baking Flour recommended. If you use a flour blend that doesn’t contain xanthan or guar gum, whisk a half teaspoon into the flour before using.

    To Make Ahead. The cookie dough can be made ahead.  Wrap the dough with plastic wrap and refrigerate for up to two days. Let dough soften at room temperature and then roll and bake as directed.

    To Freeze the Dough. Make the dough as directed. Shape and roll into sugar. Place them on a baking sheet. Freeze until solid, then transfer to a freezer container or bag. Freeze for up to 2 months.

    To Bake from Frozen. Place frozen dough on a parchment-lined baking sheet and bake as directed. Increase baking time to about 15 minutes.

    How to Make the BEST Gluten-Free Gravy

    Pouring homemade gluten-free gravy on turkey. There are mashed potatoes, cranberry sauce, green beans, and stuffing on the plate.

    Gluten-free gravy is a must-have part of many holiday meals. This easy recipe makes a flour-thickened gravy that’s deeply flavorful and a snap to make. You only need three ingredients and about 10 minutes to make a batch. 

    Pouring homemade gluten-free gravy on turkey. There are mashed potatoes, cranberry sauce, green beans, and stuffing on the plate.

    Gravy is one of the best parts of Thanksgiving. The rich, savory flavor enhances everything it touches—from turkey to mashed potatoes to gluten-free stuffing.

    And making a gluten-free gravy is surprisingly easy. Here’s everything you need to know to make perfect gravy every time.

    Ingredients.

    Ingredients for gluten-free gravy measured and in bowls on the counter.

    Essential Ingredients

    You only need a few ingredients to make this gluten-free gravy. 

    • Broth. Turkey, chicken, beef, or vegetable broth (or stock) is the base of the gravy. I prefer to use a low sodium options so the finished gravy isn’t too salty.
    • Fat. Butter, olive oil, or chicken/turkey fat all make tasty gravy. Use whichever one you prefer.
    • Gluten-free flour. This is a flour-thickened gluten-free gravy. You start the recipe by making a roux-a mixture of fat and flour. My favorite flour to use for gravy is sweet rice flour. It makes a creamy gravy. 
    • Seasonings. Always season your gravy to taste after you make it. Start with salt and pepper.  You can also add garlic powder, onion powder, dried thyme, or sage for added flavor.

    Optional Ingredients

    • Pan drippings. If you’re lucky and have some pan drippings from a roast turkey or chicken, use them. First, strain them to remove excess fat and then stir them into the gravy after it thicken.
    • Gluten-free soy sauce or Worcestershire sauce. A little soy sauce or Worcestershire adds depth and umami.

    How to Make Gluten-Free Gravy.

    Let’s take a look at the steps needed to make gluten-free gravy. By the way, for this recipe, you’ll need a medium saucepan and a whisk.

    Step One: Make the Roux.

    Cooked roux for gluten-free gravy.

    In a saucepan, melt the  butter or heat the olive oil over medium heat. Add the gluten-free flour. Whisk constantly to form a smooth paste. At first, the mixture will look thick and almost dry. As it cooks, it loosens a bit and looks like a thick paste. Cook until the roux is light golden brown. This takes about three minutes.

    Step Two: Add the Broth.

    Adding broth to gluten-free gravy.

    Slowly whisk in the warm broth. If you add it too fast, the roux can clump, making for a lumpy gravy. 

    Bring the gravy to a boil and then reduce the heat to low. Keep whisking until the gravy thickens. If it becomes too thick, add a bit more broth.

    Step Three: Season to Taste.

    Homemade gluten-free gravy in a pan. A wooden spoon holds a spoonful of gravy above the pan.

    Season the gravy with salt and pepper after its simmered. Add any other seasonings, like soy sauce, garlic powder, or herbs now.

    As gravy simmers, it concentrates a bit. It’s fine to use less salt than you think it needs and then salt to taste right before serving.

    How to Make Gluten-Free Gravy in Advance.

    Gluten-free homemade gravy in a pot.

    There’s no need to wait until Thanksgiving day to make it. You can make gravy up to four days in advance.

    Prepare the gravy as directed. Cool and store it in a covered container in the refrigerator. Right before serving, warm the gravy and add, if you’d like, add pan drippings.

    Tips for Storing and Reheating.

    Store leftover gravy in an airtight container. Refrigerate for up to four days.

    To reheat: place the gravy in a small saucepan and heat over low heat. Stir occasionally as it heats. 

    Pouring gluten-free gravy on turkey on a Thanksgiving plate.
    4.93 from 14 votes
    Print

    How to Make Gluten-Free Gravy

    Gluten-Free Gravy is easy to make. This recipe only requires three simple ingredients. The gravy is perfect for Thanksgiving or any meal! 

    Prep Time 5 minutes
    Cook Time 8 minutes
    Total Time 13 minutes
    Servings 6 servings
    Calories 65 kcal
    Author GlutenFreeBaking.com

    Ingredients

    • 3 tablespoons unsalted butter or olive oil (1½ ounces; 42 grams)
    • 3 tablespoons sweet rice flour or white rice flour (¾ ounce; 21 grams)
    • 2 cups warm turkey, chicken, beef, or vegetable broth see note (16 ounces; 453 grams)
    • salt and freshly ground black pepper

    Optional Ingredients

    • 1 teaspoon gluten-free soy sauce
    • ½ teaspoon garlic powder
    • ½ teaspoon onion power
    • ½ teaspoon dried thyme

    Instructions

    1. In a small pot, melt the butter over medium-high heat. Or heat the oil until it shimmers but doesn't smoke.

    2. Add the sweet rice flour and whisk until a paste forms. Continue whisking until paste turns light beige, about 3 minutes.

    3. In a slow and steady stream, whisk in warm stock. Cook, whisking constantly, until gravy thickens and begins to bubble. Reduce heat. Simmer for 10 minutes.

      Add optional seasonings if using. Season with salt and pepper to taste.

    4. Serve warm. Store leftover gravy in the refrigerator for up to four days.

    Recipe Notes

    Broth Note

    Low-sodium gluten-free turkey, chicken, or beef stock is recommended. 

    Pan Drippings

    If you have pan drippings, you can add them to the gravy after it’s thickened. Strain the pan drippings to remove excess fat from roasting. Then whisk the drippings into the gravy for added flavor. Don’t use pan drippings if they’re burnt.

    Gluten-Free Soft Dinner Rolls Recipe

    Brushing butter on gluten-free soft dinner rolls.

    Soft Gluten-Free Dinner Rolls are easy to make! The rolls bake up soft and tender. Perfect recipe for a first-time bread baker.

    Brushing butter on gluten-free soft dinner rolls.

    I first shared this recipe for gluten-free soft rolls in 2019, and I’m so glad so many of you have used it for your holiday meals! Some of you mentioned that the rolls could be a bit easier to make, especially since scooping sticky, gluten-free dough can be quite messy.

    So, I decided to tweak the recipe. The result is the same soft, tender rolls you love—now a little easier to make.

    Instead of scooping the dough, you’ll simply cut it into nine pieces and roll them into balls. I’ve also switched to baking them in an 8×8-inch pan instead of a 9×13-inch pan. This helps the dough touch as it rises, giving the rolls more support and making them taller.

    I hope you loved the recipe before, and I’m sure you’ll love it even more now!

    Happy Baking,
    Elizabeth

    Gluten-free soft roll ingredients measured on the counter.

    Ingredients Explained.

    • Gluten-Free Flour. This recipe uses Bob’s Red Mill 1:1 Gluten-Free Flour Blend. If you prefer to mix your own flour, replace the flour with a mix of brown rice flour or millet and tapioca starch. The individual measurements are included with the recipe.
      Ingredient note: Since all commercial flour blends vary, I can’t say if this recipe works with a different blend. 
    • Egg. One egg brings the dough together. Without the egg, the rolls turn out dense and heavy.
    • Milk and Butter. Whole milk and melted butter add richness and flavor
    • Yeast. Instant dried yeast is my preferred yeast. Be sure to use a yeast that’s gluten-free.
    • Baking Powder. Helps with rise.
    • Xanthan Gum. A teaspoon of xanthan gum is needed for the best texture. (Use the xanthan gum even though the gluten-free flour already includes it.)
    • Sugar. A little sugar helps with browning and flavor.
    • Salt. Adds flavor and controls the yeast activity.

    Dairy-Free Note: For a dairy-free version, use dairy-free milk and butter.
    Rolls made without dairy tend not to brown as well as those made with dairy. They also stale a little faster without the fat from the whole milk and butter. To prevent the gluten-free/dairy-free rolls from stalling quickly, freeze the leftovers. (See directions below on how to best freeze gluten-free buns.)

    How to Make Gluten-Free Soft Dinner Rolls: Step by Step.

    There’s three parts to making this recipe: mixing the dough, letting it rise, and baking. Let’s take a look at each step.

    1. Yeast dissolved in water in a mixing bowl. 2. Dry ingredients in a separate mixing bowl.
    1. Dissolve the yeast in a little warm water. I do this right in my mixing bowl. 
    2. Whisk the dry ingredients together in a separate bowl. This helps the sugar, xanthan gum, baking powder, and salt mix evenly throughout the gluten-free flour. 
    3. Soft roll dough starting to mix. It's crumbly. 4. Soft roll dough fully mixed. It's thick and smooth.
    1. Once the yeast is dissolved, add the remaining ingredients to the yeast mixture. Mix the dough on low speed. At first, the dough looks dry and crumbly. This is normal.
    2. Mix until a thick dough forms. This recipe makes a thick, sticky dough. For the best results, mix it together in a stand mixer with the flat paddle attachment. Note for new bakers: the dough won’t form a tight dough ball.
    5. Gluten-free soft roll dough patted into a rectangle on the counter. 6. Dough cut into 6 pieces.
    1. Put a generous amount of gluten-free flour on your counter. Transfer the dough to the counter. Dust the top with additional gluten-free flour. Pat the dough into a rectangle. 
    2. Cut into 9 pieces. Use a sharp knife for this. 
    7. Rolls in a parchment-lined pan. 8. Risen rolls in the pan.
    1. Lightly dust each piece of dough with gluten-free flour. Then roll into balls between your palms. 
    2. Place the dough balls into a parchment-lined and greased 8-inch square pan. Cover with plastic wrap-this keeps the dough from drying out. Let the rolls rise in a warm place for about an hour. You want the rolls to almost double in size and look puffy when they’re ready.
    9. Brushing egg wash onto rolls with a red pastry brush. 10. Egg-washed rolls.
    1. Brush with egg. Once the rolls have risen, brush them with a whisked egg right before baking. This helps them to brown nicely as they bake.
    2. Gently coat each roll with egg to cover the entire top. I usually go back and coat them twice.
    11. Brushing butter onto baked gluten-free soft rolls with a red pastry brush.
    1. A pan takes about 35 minutes to bake in a preheated 375℉ oven. To ensure the rolls are fully baked, I like to take the temperature. The center of the roll should reach 205℉.

      Right after baking, I brush the rolls with a little melted butter. Not only does this add a nice shine, it also helps keeps them soft and tender. 

    Baker’s Tip: For a lightly sweet finish, mix equal parts melted butter with honey and brush it over each baked roll. 

    A gluten-free soft roll cut in half and spread with butter. The butter is melting on the warm roll.

    How to Store Leftovers

    Gluten-free bread tastes best the day it’s baked. Wrap the leftover rolls in plastic wrap and store them at room temperature. Reheat the rolls lightly before serving for the best flavor and texture.

    To freeze, let them cool completely, wrap in plastic wrap or place in a freeze container. Freeze for up to three months. 

    Just baked gluten-free soft dinner rolls in a pan. The rolls have just been brushed with melted butter.
    4.8 from 35 votes
    Print

    Gluten-Free Soft Dinner Rolls

    These gluten-free dinner rolls are soft and tender. They’re the perfect addition to the holiday bread basket- or whenever the bread craving hits.

    Prep Time 15 minutes
    Cook Time 35 minutes
    Rising Time 1 hour
    Total Time 1 hour 50 minutes
    Servings 9 Rolls

    Ingredients

    For the Dough

    • ⅓ cup warm water, about 110℉ (2 ¾ ounces; 75 grams)
    • 2 ¼ teaspoons instant dry yeast (1 packet; 7 grams)
    • 3 cups Bob's Red Mill 1:1 Gluten-Free Baking Flour, plus extra for dusting counter (15 ounces; 425 grams)
    • 2 tablespoons granulated sugar (1 ounce; 28 grams)
    • 1 teaspoon baking powder
    • 1 teaspoon xanthan gum
    • 1 teaspoon salt
    • 1 cup warm whole milk, about 110℉ (8 ounces; 226 grams)
    • 1 large egg
    • 2 tablespoons butter, melted (1 ounce; 28 grams)

    For Brushing on the Dough

    • 1 large egg
    • 1 teaspoon water

    For Finishing

    • 2 tablespoons butter, melted (1 ounce; 28 grams)

    Instructions

    1. Combine warm water and yeast in the bowl of a stand mixer. Stir to combine. Allow to sit for five minutes.
    2. While the yeast dissolves, whisk together the gluten-free flour, granulated sugar, baking powder, xanthan gum, and salt in a small bowl.
    3. Add the gluten-free flour mixture, milk, egg, and melted butter to the yeast mixture. Mix on medium speed until thick and smooth, about three minutes. The dough will be very thick.
    4. Dust counter with a generous amount of gluten-free flour. Transfer the dough from the mixing bowl to the counter. Dust the top with gluten-free flour. Gently pat the dough into a rectangle, about 8×8 inches.
    5. Cut the dough into 9 equal pieces. (Three rows of three)
    6. Roll the dough into rounds. If the dough sticks to your hands, coat it lightly with gluten-free flour before rolling.
    7. Line an 8-inch square pan with parchment paper and lightly grease with gluten-free cooking spray.
    8. Place the rolls into the pan in three rows. Cover with plastic wrap. This keeps the dough from drying out.

    9. When rolls have almost doubled in size, preheat the oven to 375℉ (190℃)

    10. Whisk together the egg and teaspoon of water together in a small bowl. Brush the egg wash gently on top of each roll.
    11. Bake rolls until golden brown, 30 to 35 minutes. The middle of the rolls should reach 205℉ (96℃)

    12. Remove the pan from oven. Let them cool for about 5 minutes and then brush the warm rolls with melted butter.
    13. Cool for about 15 minutes before serving.

    14. Rolls are best enjoyed the day they are made. Store leftover rolls wrapped on the counter or place cooled rolls in a freezer bag and freeze for up to two months. Thaw rolls at room temperature overnight.

    Recipe Notes

    Gluten-Free Flour Variation
    Flour may be replaced with 2 cups brown rice flour or millet flour, ¾ cup tapioca starch, and 1 teaspoon xanthan gum. (If using this blend, the recipe will include a total of 2 teaspoons xanthan gum.)

    Dairy-Free Variation
    Replace the milk with an equal amount of dairy-free milk.
    Replace the butter in the dough with an equal amount of dairy-free butter or canola oil.
    Brush the baked rolls with melted dairy-free butter or olive oil. 

    Gluten-Free Apple Muffins

    Gluten-free apple muffins on a cooling rack.

    These gluten-free apple muffins taste like autumn. They’re sweet and spicy and each bite is filled with apple pieces. The recipe is easy to make-just like my gluten-free blueberry muffins. And that crumb topping? It’s optional but adds a lovely crunchy sweetness.

    Gluten-free apple muffins on a cooling rack.

    When I created this recipe, I wanted to make muffins that were filled with apples and spice. Some apple muffin recipes call for grated apples, which can be nice, but I find that the muffins often lack substance. It’s almost as if the shredded apples disappear into the batter. Chopped apples, on the other hand, add both flavor and a delightful crunch.

    For the spice, I chose to use ground cinnamon and ginger instead of a spice blend because I wanted those two flavors to stand out. The result is a muffin with just the right amount of spice. Of course, if you prefer a spice blend, go for it. (And if you want a muffin that highlights all the spices of fall, make a batch of gluten-free pumpkin muffins.)

    From start to finish, I love this recipe. The house smells amazing while they bake, and the muffins are perfect for breakfast or anytime you crave something a little sweet.

    Ingredients

    There are two parts to this recipe: The batter and the crumb topping. Let’s look at what you need to make each of them.

    What you need for the batter.

    Ingredients for gluten-free apple muffins on the counter.
    • Gluten-Free Baking Flour. I tested this recipe with Bob’s Red Mill 1:1 Gluten-Free Baking Flour. Using another flour might change the texture of the muffins. (Almond flour and coconut flour don’t work in this recipe.) 
    • Apples. A firmer apple, like Pink Lady or Honeycrisp, work great in these muffins. 
    • Cinnamon, ginger and vanilla extract. Brings lots of flavor. If you don’t have ground cinnamon or ginger on hand, use your favorite spice blend–like pumpkin spice or apple pie spice. 
    • Light brown sugar. Gives the muffins sweetness. Granulated (table) sugar can be used. Honey and maple syrup don’t work in this recipe. They add too much moisture and make the muffins heavy and damp.
    • Butter.  Be sure to soften your butter before mixing it with the sugar. 
    • Milk. Any type of milk works. I like to use 2% or whole milk. The richness of these milks help to keep the muffins fresh.
    • Eggs. Two eggs help with the muffins’ structure and flavor. 
    • Baking powder. Gives the muffins lift
    • Salt. Enhances all the other flavors.

    Ingredient Note: Cutting the Apples

    Diced apples for gluten-free apple muffins.

    The apples are the most important part of apple muffins! For this recipe, cut the apples into small pieces. If you cut them somewhere between ¼-inch and a ½- inch, they’ll work great.

    What you need for the crumb topping.

    Ingredients for gluten-free crumb topping on the counter.
    • Gluten-free flour. Use the same flour you use for the batter. It holds the crumb topping together.
    • Light brown sugar. Adds sweetness.
    • Cinnamon. Makes for a flavorful topping
    • Butter. The melted butter holds everything together.

    How to Make Gluten-Free Apple Muffins: Step-by-Step.

    Start this recipe by making the batter. You’ll need two mixing bowls for this step.

    1. Gluten-free flour, baking powder, cinnamon, ginger, and salt in a mixing bowl.
    1. Mix the dry ingredients together in a medium bowl. When you’re done, set this aside and grab another bowl.
    2. Softened butter and brown sugar in a mixing bowl. 3. Creamed butter with one egg on top. 4. Creamed butter with second egg and vanilla extract. 5. Fluffy creamed butter, sugar, and eggs.
    1. Mix the softened butter and brown sugar together until its thick.
    2. Add one egg. Mix until fluffy.
    3. Stop the mixer. Add the second egg and the vanilla extract.
    4. Blend until the mixture looks like a light frosting.
    6. Creamed butter, sugar, and eggs with dry ingredients added. 7. Milk added to the thick batter. 8. Apple muffin batter. 9. Diced apples about to be stirred into the batter.
    1. Add the gluten-free flour mixture. Mix until thick and creamy.
    2. Stir in the milk. Blend for about 30 seconds.
    3. The batter batter will look very thick.
    4. Add the apples. Stir to combine. I like to use a rubber spatula for this step.
    Gluten-free apple muffin batter in the pan.
    1. Spoon the batter into paper lined muffin cups. The batter should fill the cups about ¾ full. Set this aside while you make the crumb topping.

    Muffin Pan Note

    This recipe makes between 12 and 15 muffins because the size of muffin pans vary. If you have leftover batter after filling 12 cavities, use a second pan.

    Prepare the Crumb Topping

    (left) Gluten-free flour, brown sugar, and cinnamon for crumb topping in a bowl. (right) Melted butter poured over the mixture.
    1. Place the gluten-free flour, brown sugar, and cinnamon in a small bowl. Stir together. It’s fine if there are some lumps of brown sugar in the flour.
    2. Add the melted butter.
    Gluten-free crumb topping in a bowl.
    1. Stir until all the butter is mixed into the flour. The mixture will look crumbly.

    Top and Bake the Muffins

    Gluten-free apple muffin batter in pan topped with crumb topping.
    1. Top the muffins with the crumb topping. Depending on the size of your muffin pan and how much topping you use, you might have a little crump topping leftover.
    2. Bake the muffins until a toothpick inserted into the center comes out clean. A pan takes about 25 minutes to bake.
    Gluten-free apple muffins cooling in the pan.
    1. Cool the muffins in the pan for about 10 minutes. Then transfer them to a wire rack.

    Storing and Freezing

    Gluten-free apple muffin split in half.

    These muffins keep for about three days when stored on the counter. After baking, let the muffins cool completely. Then cover them and store at room temperature.

    If you want to freeze the muffins, place the cooled muffins in a freezer bag or container. Freeze for up to three months.

    Gluten-free apple muffins on a cooling rack.
    Print

    Gluten-Free Apple Muffins

    These gluten-free apple muffins taste like autumn. They’re sweet and spicy and each bite is filled with apple pieces.
    Prep Time 15 minutes
    Cook Time 25 minutes
    Total Time 40 minutes

    Ingredients

    For the Batter

    • 2 cups Bob’s Red Mill 1:1 Gluten-Free Baking Flour (9 ¾ ounces; 275 grams)
    • 2 teaspoons baking powder
    • 2 teaspoons ground cinnamon
    • ½ teaspoon ground ginger
    • ½ teaspoon salt
    • ½ cup butter, softened (4 ounces; 113 grams)
    • ¾ cup packed light or dark brown sugar (5 ½ ounces; 155 grams)
    • 2 large eggs
    • 1 teaspoons vanilla extract
    • ½ cup milk (4 ounces; 150 grams)
    • 1 ½ cups peeled & chopped apples, about 2 medium apples

    For the Crumb Topping

    • ½ cup gluten-free flour (2 ½ ounces; 70 grams)
    • ¼ cup packed light or dark brown sugar 2 ounces; 55 grams
    • 1 teaspoon ground cinnamon
    • 3 tablespoons butter, melted (1 ½ ounces; 42 grams)

    Instructions

    1. Preheat oven to 375°F. Grease a 12-count muffin pan with nonstick spray and line with paper cupcake liners. (see note 1)
    2. Make the batter: Whisk the gluten-free flour, baking powder, cinnamon, ginger, and salt together in a medium bowl. Set aside.

    3. Mix the softened butter and brown sugar in a large bowl. Use on high speed on a handheld or stand mixer. Blend until thick and creamy, about one minute.
    4. Stop the mixer. Add one egg. Mix until combined. Scrape the bottom and sides of the bowl. Add the remaining egg and vanilla extract.
    5. Blend on high speed until light and fluffy.
    6. Stop the mixer. Add the flour. Mix on medium speed until blended. The batter will be very thick. Add the milk. Mix on medium speed until the batter is thick and creamy.
    7. Again, stop the mixer. Stir in the apples. Set the batter aside while you make the crumb topping.
    8. Make the crumb topping: Mix the gluten-free flour, brown sugar, and cinnamon together in a small bowl. Stir in the melted butter until the mixture is crumbly.

    9. Fill each muffin cup with batter, about 3/4 full. Sprinkle the crumb topping on each muffin. If you need to, press it down gently so it sticks.
    10. Bake until a toothpick inserted in the center comes out clean. A pan takes about 25 minutes to bake.
    11. Allow the muffins to cool for 10 minutes in the pan. Then transfer to a wire rack to cool completely.

    Recipe Notes

    Note 1: Muffin pan sizes vary. This recipe makes between 12 and 15 muffins.

    Gluten-Free Pumpkin Pancakes

    Stack of gluten-free pumpkin pancakes on a plate with butter and syrup.

    This gluten-free pumpkin pancake recipe makes light and flavorful pancakes. They’re made with a gluten-free flour blend, pumpkin puree and the perfect blend of spices. Easy to make and even easier to eat!

    Stack of gluten-free pumpkin pancakes on a plate with butter and syrup.

    At our house, Sunday morning means either pancakes or waffles. And when October rolls around, one of my favorite varieties of pancakes enters the rotation: pumpkin pancakes. These pancakes have the flavors of a slice of pumpkin pie. It’s almost as good as eating pie for breakfast!  

    And, if like me, you love pancakes, give my recipe fluffy gluten-free pancakes a try.

    Ingredients

    The ingredients for these pancakes are pretty simple. Let’s take a look at them.

    Ingredients for gluten-free pumpkin pancakes in bowls.
    • Gluten-Free Flour. I tested this recipe with Bob’s Red Mill 1:1 Gluten-Free Baking Flour. Other flours will give you a different texture. 
    • Pumpkin Puree. Use pumpkin puree and not pumpkin pie filling. The cans of filling include other ingredients that you don’t need. Pumpkin puree is just pumpkin.
    • Spices. I like to use individual spices but you can easily replace them with pie spice. 
    • Sugar. Adds a touch of sweetness. Granulated (white) sugar is the best to use. I don’t recommend using brown sugar, honey, or maple syrup. Since they all contain moisture, those sweeteners make the pancakes almost gummy.
    • Oil. You can use oil or melted butter for a bit of richness. 
    • Milk. Dairy or dairy-free milk works. 
    • Eggs. Two eggs add flavor and help with rise.
    • Baking Powder. Make sure your baking powder is fresh.
    • Salt. Enhances all the other flavors.

    How to Make Gluten-Free Pumpkin Pancakes.

    1. Dry ingredients for gluten-free pumpkin pancakes in a bowl. 2. Wet ingredients added to the bowl. 3. Gluten-free pumpkin pancake batter. 4. Spooning batter onto a griddle.
    1. Mix all the dry ingredients together in a medium bowl.
    2. Add the wet ingredients. 
    3. Stir until the batter is smooth. 
    4. Cook pancakes on a hot, greased griddle.
    (left) Three gluten-free pumpkin pancakes on a griddle. The first one is about to be flipped. (right) Three flipped gluten-free pumpkin pancakes on a griddle.
    1. Flip the pancakes when the edges are set and a few bubbles appear in the center. 
    2. Cook until both sides are golden brown.

    Storing Leftovers

    If you’ve got some leftover pancakes, don’t throw them away. Let them cool. Then wrap them-you can put the stack in foil or place them into a container. Store the leftover pancakes in the fridge. If you put warm gluten-free pancakes in the refrigerator, they will turn soggy because of the steam that’s still being released.  

    They keep for about three days. Reheat them in the microwave or toaster on low heat.

    Making Pancakes in Advance 

    It’s fun to make pancakes on a slow weekend morning but what if you want them as a quick breakfast? The answer: make them in advance.

    Gluten-free pumpkin pancakes cooling on a rack.
    1. Make the pancakes as directed. You want them fully cooked.
    2. Place them on a wire rack to cook completely. 
    3. When they’re cool, stack them in a freezer bag or container with a piece of parchment or waxed paper between them. The paper keeps them from sticking. 

    When you’re ready for pancakes, heat them right from frozen. 

    • In the microwave: Heat them for about one minute. 
    • In the toaster. Use a low heat setting and toast until warm. Don’t use a high heat or they will dry out.
    Stack of gluten-free pumpkin pancakes on a plate with butter and syrup.
    Print

    Gluten-Free Pumpkin Pancakes

    This recipe makes light and fluffy gluten-free pancakes that are loaded with flavor. If you want to use pumpkin pie spice instead of the individual spices, see the note below.
    Prep Time 5 minutes
    Cook Time 5 minutes
    Total Time 10 minutes
    Servings 12 pancakes

    Ingredients

    • 1 ½ cups gluten-free flour, Bob's Red Mill 1:1 Gluten-Free Baking Flour recommended (7 ½ ounces; 212 grams)
    • ¼ cup granulated sugar (1 ¾ ounces; 50 grams)
    • 2 ½ teaspoons baking powder
    • 1 ½ teaspoons ground cinnamon
    • ½ teaspoon ground ginger
    • ½ teaspoon salt
    • ⅔ cup milk, more as needed (5 ⅓ ounces; 150 grams)
    • ½ cup pumpkin puree (4 ¼ ounces; 120 grams)
    • 2 large eggs
    • ¼ cup oil (1 ¾ ounces; 50 grams)
    • Oil for griddle

    Instructions

    1. Whisk gluten-free flour, sugar, baking powder, cinnamon, ginger, and salt in a large bowl. Add milk, pumpkin puree, eggs and oil.
    2. Stir until the batter is smooth. If the batter is thick, add an additional tablespoon of milk.
    3. Heat a nonstick griddle or skillet over medium-high heat. Lightly grease the griddle with oil or butter.
    4. Spoon about ¼ cup of batter onto the skillet. Cook until the edges look set and bubbles appear all over the surface of the pancake, about two minutes. To check for doneness, lift the edge of the pancake with a spatula. It should be golden brown.
    5. Flip the pancake and cook until golden brown, about two additional minutes.
    6. Repeat with the remaining batter. Serve with butter and syrup.

    Recipe Notes

    Spice Note: You can replace the cinnamon and ginger with 2 ½ teaspoons pumpkin spice blend.

    Leftovers: Let leftovers cool completely. Then wrap in either foil or place into a container. Refrigerate for up to four days. Reheat on low in the microwave or toaster until warm.

    Easy Gluten-Free Pumpkin Bread

    Slices of gluten-free pumpkin bread in a stack.

    It’s easy to make homemade gluten-free pumpkin bread. Simply mix the batter, spread it into two pans, and bake. Since the recipe makes two loaves, you can enjoy them both right away or freeze one for later.

    Sliced gluten-free pumpkin bread.

    When fall arrives, and sometimes a little sooner, I pull out this gluten-free pumpkin bread recipe. It’s a one-bowl recipe and comes together in just minutes. To keep things simple, I use a gluten-free flour blend. It makes a tender loaf with a soft delicate crumb. And since this recipe makes two loaves, we eat one right away and I pop the other in the freezer to enjoy later.

    Ingredients for gluten-free pumpkin bread on the counter with labels.

    Ingredients Explained

    Here’s what you’ll need to make this recipe.

    • Gluten-Free All-Purpose Flour. I tested the recipe with Bob’s Red Mill 1:1 Gluten-Free Flour. Using a different flour will change the texture of the bread.
    • Pumpkin Puree. Be sure to use pumpkin puree, not pumpkin pie filling. Canned pumpkin pie filling contains other ingredients and doesn’t work in this recipe.
    • Pumpkin Pie Spice. The flavor comes from a full tablespoon of pumpkin pie spice. It’s a premixed blend of spices and usually contains cinnamon, ginger, nutmeg, and allspice. If you want to use your own spices, individual amounts are listed in the recipe. 
    • Sugar. If you like a subtle molasses flavor, use light or dark brown sugar instead of granulated sugar.
    • Eggs. Two eggs give the bread a lovely cake-like texture. 
    • Oil. A lot of pumpkin bread recipes call for butter. In side-by-side testing, I found that oil gave the loaves a softer texture and crumb. The butter-based pumpkin bread tasted a little dry. Oil has the added bonus of making the recipe dairy-free.
    • Baking Powder and Soda. The combination of baking powder and soda helps the loaf to rise and gives it a nice brown color.
    • Salt. Just a touch brings out the flavor of the bread. Use table salt (not kosher salt) for the best results.

    How to Make Gluten-Free Pumpkin Bread

    This is a simple recipe! Here are the steps explained and a few pointers so you make perfect pumpkin bread every time.

    1. Dry ingredients for gluten-free pumpkin bread in a bowl. 2. Adding wet ingredients. 3. The whisked batter. 4. Two pans filled with the batter.
    1. Grab a large bowl and whisk the dry ingredients together. You can use a handheld whisk or an electric mixer for this recipe. 
    2. Add the wet ingredients. This is why you want a large bowl! By the time you add the wet ingredients, it takes a lot of room.
    3. Mix until the batter is smooth and creamy. If you’re adding chocolate chips or nuts, stir them in after you mix the batter.
    4. Divide the batter evenly between two greased pans. I like to line my pans with parchment paper after greasing but that’s optional.
    Gluten-free pumpkin bread cooling on a rack.
    1. This bread takes about an hour to bake. To test for doneness, insert a cake tester or toothpick into the center of the bread. You want it to come out dry or with one or two crumbs clinging to it. If there’s wet crumbs or batter, bake the loaves for 5 more minutes and test again. The bread should be golden brown.
    2. Cool the loaves in the pan for about 15 minutes. Gluten-free pumpkin bread is really delicate when it first comes out of the oven. After 15 minutes, remove the bread from the pan and place it on a wire rack to finish cooling.

    Storage and Freezing Instructions

    Slices of gluten-free pumpkin bread in a stack.

    To keep the bread fresh, wrap it tightly. It stays fresh for about four days.

    When ready to enjoy, remove the loaf from the freezer and allow it to thaw at room temperature.

    Sliced gluten-free pumpkin bread.
    4.17 from 6 votes
    Print

    Easy Gluten-Free Pumpkin Bread

    Moist and tender gluten-free pumpkin bread recipe. Easy to make and loaded with pumpkin spice flavor.  The recipe makes two loaves. Enjoy one now and freeze one for later.

    Prep Time 15 minutes
    Cook Time 1 hour
    Total Time 1 hour 15 minutes
    Servings 2 loaves

    Ingredients

    • 3 ½ cups gluten-free all-purpose flour, see note (17 ½ ounces; 500 grams)
    • 1 tablespoon pumpkin pie spice, see note
    • 1 teaspoon baking powder
    • 1 teaspoon baking soda
    • 1 teaspoon salt
    • 1 (15 ounce) can 100% pure pumpkin
    • 1 ½ cups granulated sugar (11 ½ ounces; 326 grams)
    • 4 large eggs
    • ¾ cup vegetable oil, such as canola oil (5 ¼ ounces; 148 grams)

    Instructions

    1. Adjust oven rack to the middle position and preheat to 350℉. Grease two 9-by 5-inch loaf pans with nonstick cooking spray or line with parchment paper and grease lightly.

    2. Whisk together the gluten-free flour, pumpkin spice, baking powder, baking soda, and salt in a large bowl.

    3. Add the pumpkin puree, sugar, eggs, and vegetable oil. Mix until smooth. The batter will be thick. If adding chocolate chips, nuts, or dried cranberries, stir them in now.

    4. Divide batter evenly between prepared pans. Smooth batter into pans with a small spatula or the back of a spoon.

    5. Bake for about 50 minutes or until a cake tester inserted into the center of the loaves comes out clean.

      Place the pans on a wire rack to cool for 15 minutes and then turn the loaves out onto a wire rack to cool completely.

    6. Store bread wrapped on the counter for up to 4 days. To freeze, wrap the cooled loaf in plastic wrap and foil and freeze for up to three months.

    Recipe Notes

    The Gluten-Free Flour.

    This recipe was tested with Bob’s Red Mill 1:1 Gluten-Free Baking Flour. Using a different flour or blend will affect the bread. 

    Sugar. 

    For a subtle molasses flavor, use 1 ½ cups light or dark brown sugar.

    Pumpkin Pie Spice.

    Pumpkin pie spice can be replaced with individual spices: 1 ½ teaspoons ground cinnamon. 1 teaspoon ground ginger. ¼ teaspoon ground nutmeg, ¼ teaspoon ground allspice. 

    Optional Ingredients: Chocolate Chips, Nuts, or Dried Cranberries. 

    Stir in 2 cups total either chocolate chips, chopped nuts, or dried cranberries. A mix of two or all three can be used. Just don’t exceed two cups total.

    The Ultimate Guide to Making Gluten-Free Pie Crust  

    Empty baked gluten-free pie crust cooling in a pan.

    A great pie needs a great crust. This recipe makes a gluten-free crust that’s delicate, flaky, and perfect for any pie from pumpkin to apple—and everything in between.  In the guide, we cover ingredient selection and how to make a pie crust by hand or in a food processor.

    Unbaked gluten-free pie crust in a pan.

    This easy recipe for a homemade gluten-free pie crust is one of my favorite recipes. It’s flaky. It’s buttery. (It can easily be made dairy-free.) And, if you have a food processor, you can make a batch in less than 10 minutes.

    Gluten-Free Pie Crust Ingredients.

    Here’s what you’ll need to make this recipe. And we get into the butter vs. shortening debate.

    Ingredients for gluten-free pie dough measured on the counter.
    • Gluten-Free Flour. I tested the recipe with Bob’s 1:1 Gluten-Free Baking Flour.  If you use a different blend, check to see if it contains xathan gum. If it doesn’t whisk ½ teaspoon into your flour before using.
    • Butter or Shortening. Butter versus shortening is a hot topic among pie bakers. Since pie crust relies on a generous amount of fat for both flavor and texture, it’s the most important ingredient.
    • Sugar. A tablespoon of sugar helps the gluten-free crust to brown. It doesn’t add a noticeable sweetness. 
    • Water. Cold water is a must for pie dough. To ensure that your water is cold enough, place a few ice cubes into a glass of water. Let it sit for about five minutes and then measure your water from the glass of ice water. 
    • Salt. Salt enhances the flavor of the crust. Use table salt or very fine sea salt. 

    Butter or Shortening? Which is best for a gluten-free pie crust?

    Shortening in a measuring cup. Cubbed butter on a wrapper.

    Butter or shortening work equally well but it’s important to understand the differences between the two.

    • Butter.  Very flavorful. Makes for a tender pie crust. 
    • Shortening. Very flaky. Easy to work with. Almost flavorless. Perfect if you need a gluten-free and dairy-free pie dough. 

    Baker’s Note: Want the best of both worlds? Use a 50/50 blend of butter and shortening for a crust that’s flavorful and flaky. 

    A note about lard and coconut oil. 

    • Lard is a classic pie crust ingredient. Made from pig fat, lard is dairy-free and makes a flavorful and flaky crust. 
    • Coconut Oil. I hesitate to recommend coconut oil for pie crust. It’s low melting temperature makes it finicky to work with. It can easily turn to liquid in the bowl, leaving you with a dense oily crust.

      If you want to use coconut oil, be sure it’s cold and solid. 

    How to Make a Gluten-Free Pie Dough

    Gluten-free pie dough on the counter.

    There are two methods for making a pie crust. You can make it “by hand” or use a food processor.  If you’re wondering which method is best, the answer is: it depends.

    Mixing the pie dough by hand allows you to feel the dough each step of the way. It also lets you adjust how the butter is cut into the flour and how much water is added to the dough. 

    But there are drawbacks to this method. Some folks don’t like the sensation of floury hands. Others have warm hands—and warm hands don’t make for a good pie crust. 

    Happily there’s another way: the food processor. 

    A food processor cuts the butter very quickly in the flour. It’s a great tool to use if you’ve got warm hands, don’t like touching dough, or are pressed for time. 

    So which method should you pick? Whichever one you prefer. Both make excellent gluten-free pie crusts.

    How to Make Gluten-Free Pie Crust By Hand

    Mixing pie dough “by hand” means mixing without a food processor. You can use your hands or a pastry cutter.

    Four images. 1. Cubes of butter on top of gluten-free flour. 2. Butter cut into gluten-free flour. 3. Gluten-free pie dough in a bowl. 4. Gluten-free pie dough pressed into a round.
    1. Whisk the gluten-free flour, sugar, and salt together in a large bowl. Add the cubes of butter. Stir gently to coat them with flour. This keeps the pieces from sticking together. You aren’t trying to work the butter into the flour yet.
    2. Work the butter into the gluten-free flour with either your hands or a pastry cutter. You want the butter in pieces somewhere between the size of a pea and an almond.
    3. Finally, add the water. Start by adding ½ cup ice water. Stir. Then add more water and stir until the dough holds together. If it doesn’t or if it looks floury, add more water, one tablespoon at a time.
    4. Next, turn the dough out onto a lightly floured counter. Knead it once or twice to bring it together. Cut it in half with a sharp knife. Press each half into a flat disk and wrap it tightly with plastic wrap.

    How to Make Gluten-Free Pie Dough in a Food Processor

    Food processors make it easy to whip up a gluten-free pie crust in minutes. They’re also great for bakers who have warm hands.

    Four images showing the steps for making gluten-free pie dough. 1. Gluten-free flour and butter in the food processor. 2. Butter cut into the flour. 3. Dough looks crumbly. 4. A handful of dough is squeezed together.

    Note: Use a food processor with at least a 6-cup capacity.

    1. Place the gluten-free flour in the bowl of the food processor and hit the “pulse” button a few times to combine.  Add the cubes of butter or shortening.
    2. Pulse the processor a few times until the butter is somewhere between the size of peas and almonds. 
    3. Stop the processor and add the water, all at once. Don’t drizzle it in through the pour spout. Pulse the food processor until the water is absorbed. Most likely it will not form a dough. Rather, the mixture might resemble tiny pebbles.
    4. Transfer the mixture to a large mixing bowl. Squeeze a handful. It should hold together. If it does, stir or knead it together until it forms a dough. If the handful doesn’t hold together, stir in a tablespoon of additional water.
    5. Once a dough forms, turn it out onto a floured counter. Knead it once or twice to bring it together. Cut the dough in half with a sharp knife. Press each half into a flat disk and wrap it tightly with plastic wrap.

    Chill the Dough.

    This is one step you don’t want to skip! Be sure to chill your dough whether you mix it by hand or in a food processor.

    Wrap the dough tightly in plastic wrap and chill it for at least one hour. Chilling gluten-free pie dough gives the fat a chance to firm up, so it won’t overmix into the flour. The flour also absorbs the liquid in the dough during this time which gives the crust a great texture. 

    How to Roll Out a Gluten-Free Pie Crust

    Four images showing how to roll out gluten-free pie dough. 1. The dough on the counter. 2. Sizing the dough with a pie pan inverted onto it. 3. Moving the dough into the pan with a rolling pin. 4. Placing the dough into the pan.
    1. Lightly dust your counter with gluten-free flour. Place the dough on the counter and sprinkle a little additional flour on top of the dough. Coat your rolling pin with flour.

      Roll the dough from the center outward until it’s between 1/8-and 1/4-inch thick. Apply a gentle pressure to the dough as you roll. Working from the center out, instead of a back and forth motion keeps the dough even.

      Move the dough, adding more flour under it as needed to prevent it from sticking to the counter.

      If the dough cracks as you roll it, gently press it back together. If it’s cracking a lot, the dough might be too cold. Cover it and let it sit for five minutes before trying to roll again.
    2. After you’ve rolled out the dough to the desired thickness, check the size of the dough. To do this,  center your pan over the dough. You want it about one-inch larger than the plate. 

      After you’ve rolled out the dough to the desired thickness, check the size of the dough. To do this,  center your pan over the dough. You want it about one-inch larger than the plate. 
    3. If it’s the correct size, remove the pie pan and gently roll the dough around your rolling pin.

      Position the pin along the far end of the plate. Slowly unfurl the dough off the rolling pin. 
    4. Gently press the dough into the bottom and sides of the pan.
    Gluten free pie dough in pan with crimped edges.
    1. Trim excess dough from the edge. You want to leave about ½-inch of dough overhanging the pan.Tuck the dough under the edge of the pan. Crimp it with your fingers or a fork.

    Selecting the Perfect Pie Plate for Gluten-Free Crust. 

    Four empty pie plates on the counter. Top row: a metal pan and a glass pan. Bottom row: ceramic pan and a disposal pan.

    Let’s get right to it: you can bake a gluten-free pie in any type of pie plate. Metal. Glass. Ceramic. Disposable. They all work. But there are some differences between them. Let’s look at the options.

    • Metal. This is my favorite material for a pie plate. The crust doesn’t stick. They conduct and distribute heat well, which gives us a nice brown crust. Plus metal pans tend to be easy to find and affordable. 
    • Ceramic. These pans are so pretty. Like a metal pie plate, they conduct heat well. However, some of the finishes cause the pie dough to stick. If you find this is happening with your favorite pan, try lightly greasing the pan before placing the crust. This usually solves the problem. 
    • Glass. A see-through pan. What’s not to love? One thing: they don’t conduct heat as well as metal or ceramic pans. If you use one, check the crust for doneness before removing it from the oven. It might need an extra few minutes of baking. 
    • Disposable. These pie plates are great if you’re gifting a pie. They tend to be very thin and a little smaller than regular pie plates. Take care when lifting them. Disposable plates can buckle under the weight of a filled pie. I always place them on a baking sheet to avoid an accident.

    Deep Dish versus Regular Pie Plates. 

    We’ve all seen a “deep dish” pie on the menu at restaurants. But what is a deep dish pie? It’s a pie baked in a pan that’s between 1 ¾ and 2 ½ inches deep. A standard pan, for comparison, is between 1 ¼ to 1 ½ inches. 

    Deep dish pies require more crust and filling than standard pies. Unless a recipe clearly states “deep dish”, it’s safe to assume it’s a standard pie. 

    This recipe makes enough dough to fit a deep dish pan. You won’t have much leftover for trimming or decor. If you like a little extra dough to work with, increase the recipe by 50%.

    Parbaking and Pre-baking Gluten-Free Crusts.

    • Parbaking a crust means baking it partially before filling. Do this when your filling will cook quickly, before the crust has time to bake. This is usually done when your filling will bake before the crust fully cooks. 
    • Pre-baking (also called Blind-Baking) means fully baking the crust before filling. Do this when you’re filing the crust with a fully cooked filling, like pudding. 
    Blind baked gluten-free crust with pinto beans

    If your pie recipe calls for parbaking or pre-baking the crust, here’s what to do. 

    1. Preheat your oven to 425℉. 
    2. Roll and place the dough in the pan as directed above.
    3. Prick the crust all over with the tines of a fork. This keeps the crust from puffing up as it bakes. Place a piece of foil or parchment in the pan. Fill the pan with dried beans or pie weights. 
    4. Bake until the edges just begin to brown. This takes about 15 minutes.
    5. Carefully remove the pan from the oven. Carefully remove the foil and weights from the pan. 

      For Parbaking: Return the pie to the oven and bake for another three or four minutes. Just until the crust loses its raw, shiny appearance. Remember, you don’t want to fully bake a parbaked crust.

      For Pre-Baking: Return the pie to the oven and fully bake. The crust should be golden brown. This takes about 12 minutes.
    1. Place the pan on a cooling rack and allow the crust to cool slightly before filling. 
    2. Fill and bake the pie as directed.
    Empty baked gluten-free pie crust cooling in a pan.

    Helpful Tips for Making Gluten-Free Pie Crust

    • If it’s warm when you want to make a pie crust, chill everything. Place the ingredients and mixing bowl in the fridge for at least 30 minutes before you make the dough. 
    • Drizzle the water all over the flour. Instead of pouring the water in one spot, drizzle it evenly over the flour. Do this if you’re mixing by hand or in a food processor. This keeps the flour from clumping in one spot.
    • If the dough cracks as you roll it, don’t panic. First press it back together. Next, let it warm up slightly. Cold, butter-based pie dough tends to crack. Let it sit on the counter for five to ten minutes. If this doesn’t solve the problem, it might be too dry. Transfer the dough to a mixing bowl and add a tablespoon of additional water.
    Trimmed gluten-free pie dough around an inverted pie plate.
    • Roll your dough between ⅛-inch and ¼-inch. This way it’s not too fragile.
    • Make sure you roll your dough circle out large enough. To check the size, invert your pie plate over the dough. If it’s about one-inch larger than the plate, you’re all set. It’s better to focus on thickness rather than diameter when rolling out pie dough. 

    Make-Ahead Tips.

    Gluten-free pie dough can be made in advance. Simply store it in the refrigerator or freezer. When you want to make a pie, it’s ready-to-use.

    To Refrigerate the dough. 

    • Keeps up to three days.
    • Prepare as directed. 
    • Shape into a disk. 
    • Wrap tightly with plastic wrap. 
    • Use within three days.

    To Freeze the dough.

    • Keeps up to three months. 
    • Prepare as directed. 
    • Shape into a disk.
    • Wrap tightly with plastic wrap. Then wrap tightly in foil. 
    • Label and date the dough. 
    • Freeze up to three months. 
    Empty baked gluten-free pie crust cooling in a pan.
    Print

    Easy Gluten-Free Pie Crust Recipe

    This recipe makes enough dough for one 9-inch double crust pie or two 9-inch single crust pies.
    Prep Time 15 minutes
    Chill time 30 minutes
    Total Time 45 minutes
    Servings 2 single crusts

    Ingredients

    • 3 cups gluten-free flour (10 ½ ounces; 300 grams)
    • 1 tablespoon granulated sugar, optional
    • 1 teaspoon salt
    • 2 sticks cold butter or 1 cup cold shortening, cut into small pieces (8 ounces; 226 grams)
    • ½ cup cold water, plus more as needed (4 ounces; 113 grams)

    Instructions

    1. If this is your first time making a gluten-free pie crust, read the post included with this recipe. It contains in-depth information and tips to help you succeed.

    By Hand Directions

    1. Whisk the gluten-free flour, sugar, and salt together in a large mixing bowl. Make sure the bowl is large enough that you can place your hands or a pastry cutter into it as you make the dough.

    2. Add the butter or shortening. Stir it gently to coat it with gluten-free flour. Don’t mix it into the flour yet. Just coat each piece.
    3. Work the butter into the flour. To do this, use your fingertips or a pastry cutter, Mix until the pieces of butter are somewhere between a pea and an almond.

    4. Drizzle ½ cup cold water over the mixture. Mix, either with your hands or a wooden spoon, until the dough comes together. Test the dough by giving it a squeeze. If it holds together, move to the next step. If not, add additional cold water, one tablespoon at a time, until it holds together.

    5. Turn the dough onto a floured surface. Knead it once or twice to bring it together. Cut the dough in half. Pat each half into a flat disk. Chill for at least one hour.

    Food Processor Directions

    1. Combine the gluten-free flour and salt in the bowl of a food processor. Pulse three or four times to combine.

    2. Add the butter or shortening. Pulse the food processor in 3-second bursts until the pieces of butter are between the size of peas and almonds. This takes about 10 to 15 pulses.

    3. Remove the lid and drizzle the water over the flour-butter mixture. Pulse the processor in about four or five short, three second bursts. The mixture will look crumbly. Do not mix until a dough comes together.
    4. Transfer the mixture to a mixing bowl. Squeeze a handful. If it holds together, mix with a wooden spoon until a dough forms. If the handful falls apart, stir in an additional tablespoon of water until the dough forms.

    5. Turn the dough onto a floured surface. Knead it once or twice to bring it together. Cut the dough in half. Pat each half into a flat disk. Chill for at least one hour.
    6. Use and bake the dough as directed in your favorite pie recipe.

    Recipe Notes

    Notes
    For detailed information on each step, see the full blog post that accompanies this recipe.

    The recipe was tested with Bob’s Red Mill and Cup4Cup Flour. Other gluten-free flour blends might not work as well.

    Use a blend of half butter and half shortening for a flavorful and flaky gluten-free crust.

    Be sure to use very cold water.

    Gluten-Free Pumpkin Muffins

    Two gluten-free pumpkin muffins stacked on each other.

    This gluten-free pumpkin muffin recipe is easy to make! Just mix the batter, spoon it into a muffin tin, and bake. The brown sugar and pumpkin spice combination makes sweet and perfectly spiced muffins. They come out moist and tender every time.

    Two gluten-free pumpkin muffins stacked on top of each other.

    For a long time, I didn’t think I needed a recipe for gluten-free pumpkin muffins. After all, I’ve got a great recipe for gluten-free pumpkin bread. But just like gluten-free banana bread is different than gluten-free banana muffins, pumpkin bread and pumpkin muffins are two separate treats. They aren’t as sweet or as rich. And like most gluten-free muffins, they’re really easy to make.

    Ingredients.

    Here’s what you’ll need to make a batch of these muffins!

    Ingredients for gluten-free pumpkin muffins in individual bowls on the counter.
    • Gluten-Free Flour. The recipe was developed with Bob’s Red Mill’s 1:1 Gluten-Free Baking Flour. Using a different flour will change the results.
    • Pumpkin Puree. Canned pumpkin (also called pumpkin puree) brings moisture and flavor. Be sure to use pure pumpkin, not pumpkin pie filling.
    • Pumpkin Spice. For the classic “pumpkin” flavor, use pumpkin pie spice. This blend of spices usually contains cinnamon, ginger, nutmeg, and allspice. If you don’t keep pumpkin spice in the house, I’ve included a recipe for it below.
    • Brown Sugar. Adds sweetness and flavor. You can use either light or dark brown sugar. Both work great! If you use dark brown sugar, the muffins bake a little darker and have a slightly stronger molasses flavor.
    • Oil or Melted Butter. Oil or melted butter makes these muffins rich and tender. Butter adds a classic buttery flavor. 
    • Eggs. Two eggs help give the muffins a nice cakey texture.
    • Baking Powder and Baking Soda. Using both baking powder and baking soda helps the muffins to rise and brown beautifully.
    • Salt. A little bit of salt enhances the flavors. Muffins made without salt tend to taste flat. Table salt is best for baking because the texture is fine and it easily mixes into the batter.

    How to Make Gluten-Free Pumpkin Muffins.

    This batter is as simple as whisk, mix, and stir!

    Whisking gluten-free flour and dry ingredients. 2. Wet ingredients and brown sugar in a bowl. 3. Adding gluten-free flour mixture to the wet ingredients. 4. Gluten-free pumpkin muffin batter.
    1. Whisk the dry ingredients together. This helps evenly distribute the baking powder, baking soda, and salt throughout the gluten-free flour. 
    2. In another bowl, mix together the remaining ingredients. 
    3. Add the gluten-free flour. Stir until the batter is smooth. 
    4. After mixing, scrape the bottom of the bowl with a rubber spatula to clear any flour that might be clinging to the bowl.
    (left) Gluten-free pumpkin muffin in a pan. (right) Baked gluten-free pumpkin muffins.
    1. Line your muffin pan with paper liners or spray it with nonstick cooking spray. Fill each muffin cup about ⅔ full. If the cups are too full, they can overflow as they bake and stick to the pan.
    2. Bake until the muffins are golden brown. A pan takes about 20 minutes to bake. Let the muffins cool for about five minutes in the pan. Then remove and place on a wire rack to cool completely. A rack allows steam to escape quickly from the muffins. When the steam gets caught between the muffin and pan, the bottom of the muffin can get soggy.
    Gluten-free pumpkin muffin split in half.

    Tips and Tricks

    • Preheat your oven. Muffins placed in a cold oven can turn out dense and heavy. Full-size ovens take about 15 minutes to preheat. I usually turn mine on and then measure my ingredients. This way, the oven is at the right temperature after I’ve made the batter.
    • Add your favorites. Stir chocolate cups, nuts, or dried fruit into the batter before baking.
    • Let the batter rest. After mixing, cover the bowl and chill for 30 minutes. This gives the gluten-free flour time to absorb the liquid ingredients. Making the muffins tall and tender.
    • Sprinkle on some sugar. Top the muffins with a little coarse sugar before baking. This not only makes them pretty, it adds a little sweetness and crunch. 
    • Check for doneness. To test if they’re baked, insert a cake tester into the center of one of the muffins or gently press down on the top of the muffin. Look for it to spring back to the touch. If it feels damp or squishy, it’s not done.

    How to Store and Freeze Leftovers

    These muffins are very moist and remain fresh for about three to four days when stored covered on the counter.

    If you need to store the muffins longer than that, it’s best to freeze them. After the muffins are completely cool, place them into a freezer bag or container. They keep well in the freezer for up to three months.

    Two gluten-free pumpkin muffins stacked on each other.
    4.86 from 7 votes
    Print

    Gluten-Free Pumpkin Muffins

    These gluten-free pumpkin muffins are soft, sweet, and nicely spiced. This one-bowl recipe is so easy to make. (Gluten-free/dairy-free.)

    Prep Time 10 minutes
    Cook Time 20 minutes
    Total Time 30 minutes
    Servings 12 muffins
    Calories 140 kcal

    Ingredients

    • 2 cups gluten-free baking flour, see note 1 (9 ounces; 260 grams)
    • 2 teaspoons pumpkin spice, see note 2
    • 1 teaspoon baking powder
    • 1 teaspoon baking soda
    • ½ teaspoon salt
    • 1 (15 ounce) can pure pumpkin puree
    • ¾ cup lightly packed dark brown sugar (5 ½ ounces; 155 grams)
    • 2 large eggs (about 4 ounces; 113 grams)
    • ½ cup oil or 1 stick butter, melted and slightly cooled (4 ounces; 113 grams)

    Instructions

    1. Preheat oven to 350°F. Line 12 muffin cups with paper liners or spray with nonstick cooking spray.

    2. Whisk together the gluten-free flour, pumpkin spice, baking powder, baking soda, and salt in a medium bowl.

    3. Mix together pumpkin puree, brown sugar, eggs, and oil in a large bowl. Add the gluten-free flour mixture. Stir until a batter forms. Scrape the bottom of the bowl with a rubber spatula. Mix any flour that’s clinging to the bottom of the bowl into the batter.

      Optional: cover the bowl and chill the batter for 30 minutes. This gives the gluten-free flour a chance to absorb the liquid ingredients.

    4. Fill prepared muffin cups about ⅔ full.

    5. Bake 20-25 minutes or until a toothpick inserted in the center comes out clean. Cool in the pan for 5 minutes. Remove from pan and place on a wire rack to cool completely.

    6. Store, wrapped, on the counter for up to three days or freeze for up to three months.

    Recipe Notes

    Note 1: Gluten-Free Flour.

    This recipe was developed with Bob’s Red Mill 1:1 Gluten-Free Baking Flour. Use a gluten-free flour that contains xanthan or guar gum. If your blend does not contain xanthan or guar gum, whisk ½ teaspoon of xanthan gum into the flour before using. 

    Note 2: Homemade Pumpkin Spice.

    To make your own pumpkin pie spice, whisk together

    1 ½ teaspoons ground cinnamon.
    1 teaspoon ground ginger.
    ¼ teaspoon ground nutmeg
    ¼ teaspoon ground allspice. 

    Gluten-Free Chocolate Muffins

    Gluten-free chocolate muffins, topped with chocolate chips, sit on a plate.

    These gluten-free chocolate muffins have just the right amount of sweetness and chocolate. They’re dense without being heavy. And the best part? The simple recipe only takes a few minutes to make. For an added chocolate boost, I stir in some dark chocolate chips right before baking.

    Gluten-free chocolate muffins, topped with chocolate chips, sit on a plate.

    In my opinion, a good muffin must set itself apart from a cupcake. It can’t be too sweet or cakey. I want a muffin that’s equally at home at breakfast or after dinner when I’m craving “something a little sweet.” 

    These gluten-free chocolate muffins meet all those requirements and more. Thanks to their rich flavor, they’re irresistible and always taste like an extra special treat.

    Ingredients

    Gluten-free chocolate muffin ingredients measured and placed on a sheet pan.

    Here’s what you need to make a batch of these muffins. If you want to make them dairy-free, follow the substitutions listed.

    • Gluten-Free Flour. I tested the recipe with Bob’s Red Mill 1:1 Gluten-Free Baking Flour. Other gluten-free flour blends might change the texture. Coconut or almond flour won’t work in this recipe. 
    • Sugar. Granulated sugar adds the perfect sweetness.
    • Cocoa Powder. You can use either natural or Dutch process cocoa in this recipe. 
    • Butter. For a dairy-free version, use either dairy-free butter or oil.
    • Eggs. Two eggs give the muffins flavor, structure, and keep the muffins moist. 
    • Milk. Brings the batter together. Use traditional or dairy-free. Full fat coconut milk won’t work because it’s so rich.
    • Chocolate Chips. A cup of chocolate chips are optional but I never skip them! 
    • Vanilla extract. Adds flavor. 
    • Baking Powder. Makes the muffins rise. 
    • Salt. Enhances all the flavors.

    How to Make Gluten-Free Chocolate Muffins

    (Left) Ingredients for gluten-free chocolate muffin recipe in a large bowl. (right) Gluten-free chocolate muffin batter with a whisk.

    Mix together the dry ingredients in a large bowl. Then add the melted butter, eggs, milk, and vanilla extract. Stir until a thick batter forms. If you’re adding chocolate chips, stir them in after you’ve mixed the batter.

    Gluten-free chocolate muffin batter in a muffin pan.

    Lightly grease a muffin pan with gluten-free cooking spray. Line it with paper liners. Spoon the batter into the pan. You want to fill each up about ⅔ full. I like to sprinkle some extra chocolate chips on top of the batter. This is batter but adds a nice extra chocolate flavor?

    Baker’s Tip: Let the Batter Rest Before Baking

    If you’ve got time, chill the batter for about 30 minutes. This helps the gluten-free flour absorb liquids and makes for a tender crumb with a nice rise.

    Whether you chill the batter or not, you want to bake the cupcakes until a toothpick inserted into the center comes out clean. That’s how you’ll know they’re done.

    It’s fine if a few moist crumbs stick to the toothpick. You don’t want to see any wet batter. If there’s batter when you test them, bake for a few more minutes.

    Gluten-free chocolate muffins, topped with chocolate chips, sit on a plate.
    4.67 from 3 votes
    Print

    Gluten-Free Chocolate Muffins

    These gluten-free chocolate muffins are dense, rich, and filled with chocolate flavor. It’s a one-bowl recipe! Simply mix the dry ingredients, add the wet ingredients and stir until a batter forms. If you’ve got time, chill the batter for 30 minutes. It gives the muffins an extra-tender texture.
    Prep Time 10 minutes
    Cook Time 22 minutes
    Total Time 32 minutes
    Servings 12 muffins

    Ingredients

    • 1 ½ cups gluten-free flour, see note (6 ¾ ounces; 195 grams)
    • ¾ cup granulated sugar (5 ¼ ounces; 150 grams)
    • ½ cup cocoa powder (1 ½ ounces; 50 grams)
    • 1 ½ teaspoons baking powder
    • ½ teaspoon salt
    • 2 large eggs
    • ¾ cup milk, traditional or dairy-free (6 ounces; 170 grams)
    • ½ cup melted butter or oil (4 ounces; 113 grams)
    • 1 cup chocolate chips, traditional or dairy-free (6 ounces; 170 grams)

    Instructions

    1. Preheat the oven to 350℉. Line 12 standard muffin cups with paper liners. Lightly grease the top of the pan to keep the muffins from sticking.
    2. In a large bowl, whisk together the gluten-free flour, sugar, cocoa powder, baking powder, and salt. Add the eggs, milk, and melted butter. Mix until a thick batter forms. Stir in chocolate chips.

    3. Optional: Chill the batter for 30 minutes. This gives the muffin a more tender texture.

    4. Fill muffin cups ⅔ full. Sprinkle chocolate chips on top of each muffin.
    5. Bake until muffins are set and a cake tester inserted into the center comes out clean, about 25 minutes.
    6. Cool the muffins in the pan for about 10 minutes. Then remove and let them cool completely.
    7. Store muffins covered on the counter for up to three days or freeze cooled muffins for up to three months.

    Recipe Notes

    Gluten-free Flour: This recipe was tested with Bob’s Red Mill 1:1 Gluten-Free Baking Flour. Using a different flour might change the texture. 

    Gluten-Free Peanut Butter Cookies

    Stack of gluten-free peanut butter cookies.

    Gluten-free peanut butter cookies are such a treat! This recipe makes cookies that are crisp on the edges, soft in the center, and loaded with peanut butter flavor. A gluten-free flour blend makes these cookies so easy to make.

    Stack of gluten-free peanut butter cookies.

    In my list of “favorite cookies”, peanut butter cookies are right up there with gluten-free chocolate chip cookies and gluten-free sugar cookies. What can I say? I love classic cookies!

    Gluten-free peanut butter cookie ingredients in individual bowls with labels.

    Ingredients You Need to Make Gluten-Free Peanut Butter Cookies

    • Peanut Butter. Regular creamy peanut butter works best. The type where the oil doesn’t separate.  Natural peanut butter causes the cookies to spread when baking. 
    • Gluten-Free Flour. I tested the recipe with Bob’s Red Mill 1:1 gluten-free flour. It makes cookies that are crisp on the edge and soft in the center.
    • Brown sugar and granulated sugar. The combination of brown sugar and granulated sugar gives the cookies a nice sweetness. The brown sugar keeps the cookies soft, while the granulated sugar helps the cookies hold a nice shape.
    • Butter. Use softened (room temperature) butter. Dairy-free butter works great in this recipe. 
    • Egg. One large egg helps the dough come together. 
    • Baking Soda and Baking Powder. Using both baking soda and baking powder makes the cookies light and thick 

    How to Make Gluten-Free Peanut Butter Cookies.

    This is a one-bowl cookie recipe. Remember to use a large bowl, so you have plenty of room to mix the dough.

    Steps one through four for making gluten-free peanut butter cookies. 1. Butter, sugars, peanut butter, and egg in a bowl. 2. Ingredients mixed. 3. Adding dry ingredients to the peanut butter mixture. 4. Gluten-free peanut butter dough.
    1. Place the peanut butter, softened butter, sugar and eggs in a large bowl. 
    2. Mix until it’s smooth and fluffy. 
    3. Add the gluten-free flour, baking powder, baking soda, and salt.
    4. Blend until a dough forms. After mixing, cover the bowl and chill the dough for at least 30 minutes. This dough can be kept in the fridge for up to three days before baking.
    Steps five and six for making gluten-free peanut butter dough. 5. Rolling the dough into granulated sugar. 6. Pressing a crisscross pattern into the top of the dough.
    1. Roll the dough into balls. Then roll the dough in sugar. Regular granulated sugar works great. You can also use coarse sugar for crunch or colored sugar to make them sparkle.
    2. Add a Crisscross Pattern  Dip your fork into granulated sugar and then press it into the top of the dough twice, creating a crisscross pattern. The sugar on the fork keeps it from sticking to the dough.
    Gluten-free peanut butter cookie dough on a baking sheet.
    1. Place the cookies onto a parchment-lined baking sheet and bake until the edges are golden brown and set.
    2. Allow the cookies to cool on the pan for about five minutes before moving them to a wire cooling rack. If you move them to fast, they can break.

    3 Tips for Making the Best Gluten-Free Peanut Butter Cookies.

    • Use a cookie scoop. Cookie scoops make it easy to round cookies into a ball. And they ensure all your cookies are the same size. Why does this matter? When cookies are a uniform size, they bake evenly. So you won’t have underbaked and overbaked cookies on the same pan.
    • Line your baking sheet with parchment paper. Using parchment paper makes cleanup a snap and prevents the cookies from sticking to the pan. 
    • Adjust the Baking Time. For chewy cookies, bake about eight minutes. For crisp cookies, bake about 10 minutes.

    How to Store Gluten-Free Peanut Butter Cookies.

    Gluten-free peanut butter cookies stay fresh for several days. Cover the cookies and store them on the counter for four to five days. 

    If you want to freeze them, place the cooled cookies into a freezer container. You can separate the layers with parchment paper or waxed paper.

    Freeze the cookies for up to three months. Thaw the cookies at room temperature when you’re ready to enjoy. 

      Stack of gluten-free peanut butter cookies.
      4.67 from 3 votes
      Print

      Gluten-Free Peanut Butter Cookies

      These gluten-free peanut butter cookies are so easy to make! All you need is one bowl and a few simple ingredients. The recipe uses gluten-free flour, which gives them crisp edges and a tender center.

      Prep Time 10 minutes
      Cook Time 10 minutes
      Chill 30 minutes
      Total Time 50 minutes
      Servings 36 cookies

      Ingredients

      • ½ cup creamy peanut butter (4 ¾ ounces; 135 grams)
      • ½ cup butter or dairy-free margarine, softened (4 ounces; 113 grams)
      • ½ cup granulated sugar (3 ¾ ounces; 106 grams)
      • ½ cup packed brown sugar (3 ¾ ounces; 106 grams)
      • 1 large egg (about 2 ounces; 56 grams out of shell)
      • 1 ¼ cups Bob's Red Mill gluten-free baking flour, see note (6 ½ ounces; 185 grams)
      • ¾ teaspoon baking soda
      • ½ teaspoon baking powder
      • ½ teaspoon salt

      For Rolling

      • ¼ cup granulated sugar (2 ounces; 56 grams)

      Instructions

      1. Mix the peanut butter, butter, granulated sugar, brown sugar, and egg in a large bowl until smooth and fluffy, about 30 seconds.

      2. Stop the mixer. Add the gluten-free flour, baking soda, baking powder, and salt. Mix until a dough forms.

      3. Cover bowl and chill dough for 30 minutes.

      4. Preheat oven to 375° F. Line two baking sheets with parchment paper.

      5. Scoop the dough, about one heaping tablespoon, into balls. Roll in the ½ cup additional granulated sugar. Place dough, about 2 inches apart, onto prepared baking sheets. Dip a fork into the sugar and press a crisscross pattern into the top of each cookie.

      6. Bake until edges are light golden brown. For chewy cookies, bake about eight minutes. For crisp cookies, bake about 10 minutes. Rotate pans halfway through baking.

      7. Remove the pans from the oven. Allow cookies to cool on the pan for three to five minutes. Transfer cookies to a cooling rack. Repeat with remaining dough.

      8. Store cookies in an airtight container for up to four days or freeze cooled cookies in an airtight container for up to three months.

      Recipe Notes

      Gluten-Free Flour: Use an all-purpose gluten-free flour that contains xanthan or guar gum. These cookies were tested with Bob’s Red Mill 1:1 Gluten-Free Baking Flour.

      Gluten-Free Blueberry Muffins

      Gluten-free blueberry muffins on a cooling rack. One is unwrapped to show the texture.

      These gluten-free blueberry muffins are so easy to make! The recipe makes light and airy muffins that are loaded with blueberries. If you can’t find fresh blueberries, go ahead and use frozen. You don’t even need to thaw the frozen berries before using.

      Gluten-free blueberry muffins on a cooling rack. One is unwrapped to show the texture.

      Ingredients.

      Note from Elizabeth. This was one of the first recipes, way back in 2016, that I shared that used a gluten-free flour blend. The other one was my gluten-free chocolate chip cookie recipe. Prior to that, gluten-free flour blends were often hard to find and didn’t work well.

      Both recipes won rave reviews over the years. And now there are lots of gluten-free flour options. We’ve come a long way!

      • Blueberries Fresh or frozen blueberries work great in this recipe. If you have the option, grab some wild blueberries. (If you don’t live in an area where they are grown, check the freezer section. Several brands sell them.) Wild blueberries are smaller than cultivated blueberries and the flavor tends to be more intense. I love baking muffins with them because the small size means more berries in the muffin.

        You don’t need to thaw frozen berries before using. Measure right from frozen and you’re good to go.
      • Gluten-Free Flour Blend. I tested this recipe with Bob’s Red Mill 1-to-1 Baking Flour. The recipe might work differently if you use a different flour blend. If you don’t have Bob’s on hand, be sure to use a blend that includes xanthan gum.
      • Sugar. Granulated sugar brings sweetness and tenderness to the muffins. Don’t replace the sugar with a liquid sweetener like honey or maple syrup. The recipe won’t work. 
      • Eggs.Two eggs make these gluten-free blueberry muffins light and rich.
      • Milk. This recipe works with everything from fat-free to whole milk to dairy-free milks. Since fat slows down staling, muffins made with whole milk taste richer and stale less quickly than those made with fat-free milk. Pastries made with fat-free and lower fat milks dry out faster than those made with whole milk.

      Variations

      • Lemon Blueberry Muffins. Add the finely chopped zest of one lemon to the batter along with the milk.
      • Blueberry Walnut Muffins. Stir ½ cup chopped walnuts into the batter before adding the blueberries.

      How to Make Gluten-Free Blueberry Muffins: Step by Step.

      Steps one through four for making gluten-free blueberry muffins. 1. The dry ingredients together in a glass bowl. 2. The creamed butter, sugar, and eggs. 3. Adding the gluten-free flour to the butter mixture in the glass bowl. 4. The finished batter with blueberries stirred in.
      1. Whisk together the gluten-free flour, baking powder, and salt in a small bowl. Set this aside. 
      2. Mix together the softened butter and sugar until it’s thick and creamy. Add the eggs. Mix on until the butter looks light and fluffy. 
      3. Stir in the gluten-free flour mixture until it’s just combined. The mixture is very thick at this point. Add the milk and vanilla extract. Stir until the batter is smooth. 
      4. Add the blueberries. Switch to a wooden spoon or spatula. Fold in the blueberries.
      Gluten free blueberry muffin batter in a pan.
      1. Grease a muffin pan and line it with paper lines. Fill each muffin cup about 2/3 full. I like to use a large ice cream scoop for this job. It makes it quick and easy to fill the muffin cups.

        If you want, sprinkle a little sugar on the top of each muffin. It adds a nice, crunchy sweetness but is totally optional. 
      2. The muffins take about 25 minutes to bake. As with all recipes, the baking time varies depending on your oven. You can tell the muffins are done when a cake tester inserted into the center comes out clean. Or you can tap the top of the muffin. If it feels firm, the muffins are done! 

        Once the muffins are baked, allow them to cool in the pan for about five minutes and then transfer to a wire rack to cool completely. 

      A note on sinking blueberries and blue muffin batter.

      Folks get very concerned about blueberries sinking in muffins. Personally, I don’t care if a few settle to the bottom. This way every bite contains blueberries.

      If you don’t want the blueberries to sink, follow this trick I learned from Stella Parks, author of Bravetart. Before mixing the blueberries into the batter, spoon about a tablespoon into each muffin pan. 

      Then stir the blueberries into the remaining batter. The batter at the bottom of the pan acts as a cushion for the blueberries. 

      If you’r wondering why I don’t suggest tossing the blueberries in dry gluten-free flour, the answer is simple: it doesn’t reliably work.

      As for the blueberries turning the batter purple, I say don’t worry about it. Mix the berries into the batter gently. After that, don’t stress about it. In fact, I think it looks pretty to have a little purple staining in a homemade blueberry muffin.

      Storing Leftovers

      When the muffins have cooled, place them on a plate and wrap with plastic wrap. They’ll keep about three days on the counter. 

      Or you can freeze them. Place the muffins in a freezer bag and freeze for up to two months. Allow the muffins to thaw at room temperature. If you have a microwave with a reliable thaw function, you can thaw in the microwave. Take care not to overheat the muffins while thawing or they will get hard.

      2024 Recipe update note from Elizabeth

      Gluten-Free blueberry muffins on wire rack.

      Hello there! I first shared this recipe in 2016-which, from where I’m currently sitting in 2024, feels like three lifetimes ago.

      It’s been a privilege to see how many of you have made this recipe over the years. When I first posted it, taking photographs was a real challenge for me. Even with the less-than-perfect “ugly duckling” blueberry muffin photo I shared initially, you still tried the recipe. And then, you continued to make it and share it with your loved ones.

      You trusted me-with your time and your ingredients. What an honor.

      Thank you from the bottom of my heart. I hope you find the new photos and information helpful.

      Happy Baking!

      Gluten-free blueberry muffins on a cooling rack. One is unwrapped to show the texture.
      4.86 from 187 votes
      Print

      The Best Gluten-Free Blueberry Muffins

      These gluten-free blueberry muffins are packed with fruit and topped with a little granulated sugar to give the muffin top a pleasant crunch.
      Prep Time 15 minutes
      Cook Time 20 minutes
      Total Time 35 minutes
      Servings 15 muffins

      Ingredients

      • 2 cups Bob’s Red Mill 1-to1 Baking Flour* (9¾ ounces; 275 grams)
      • 2 teaspoons baking powder
      • ½ teaspoon salt
      • ½ cup butter, softened (4 ounces; 113 grams)
      • ¾ cup granulated sugar (6 ounces; 170 grams)
      • 2 large eggs
      • 1 teaspoon vanilla extract
      • ½ cup milk (4 ounces ; 113 grams)
      • 2 cups blueberries
      • ¼ cup granulated sugar, optional, for topping

      Instructions

      1. Preheat oven to 350℉. Lightly grease 15 muffins cups or line them with paper liners.

      2. Whisk together the gluten-free flour blend with the baking powder and salt in a small bowl. Set aside.

      3. In a large bowl, combine butter and granulated sugar. Beat on medium-low speed until thick. With the beater still running, add the eggs. Beat until combined.

      4. Add the dry ingredients and mix on low speed. Mix until thick. Stop the mixer and add the milk and vanilla extract. Mix until a thick batter forms. 

      5. Gently fold in the blueberries with a rubber spatula.(If you are using frozen or cold blueberries, the batter will get VERY thick. This is totally normal.)
      6. Spoon batter into prepared muffin pans. Fill each cavity about ⅔ full. Top each muffin with about 1 teaspoon of granulated sugar. (The sugar topping is optional.)

      7. Bake until a cake tester inserted into the center of one of the muffins comes out clean, about 25 minutes.
      8. Allow muffins to cool in the pan for five minutes and then transfer to a wire rack to cool completely.

        Store the cooled muffins covered on the counter. They’ll keep for about three days.

        Or you can freeze them. Place the muffins in a freezer bag and freeze for up to two months. Allow the muffins to thaw at room temperature.

      Recipe Notes

      This recipe has not been tested with other flour blends. For the best results, use the flour recommended.

      • « Go to Previous Page
      • Page 1
      • Page 2
      • Page 3
      • Page 4
      • Interim pages omitted …
      • Page 20
      • Go to Next Page »

      Primary Sidebar

      Get Recipes Delivered to Your Inbox! (Free Weekly Newsletter!)


      Elizabeth Barbone

      I'm Elizabeth. Welcome to GlutenFreeBaking.com --- a judgment-free baking space. Here you'll find easy recipes, product reviews, and other good stuff that makes gluten-free living easy and a lot more fun!

      Read More About Elizabeth →

      • Facebook
      • Instagram
      • Pinterest

      Foods You Miss the Most

      • A stack of gluten-free pancakes topped with maple syrup and butter on a plate.
        The Best Gluten-Free Pancakes
      • Gluten-free chocolate chip cookies on a cooling rack.
        Gluten-Free Chocolate Chip Cookies
      • Loaf of Baked Gluten-Free Sandwich Bread on Red Cutting Board.
        How to Make the Best Gluten-Free Sandwich Bread: An Easy Recipe for Everyone!
      • Gluten-free flour tortillas on plate.
        How to Make the Best Gluten-Free Flour Tortillas

      Footer

      ↑ back to top

      Terms

      • Privacy Policy
      • Terms & Conditions
      • Disclaimer
      • Accessibility Statement

      Follow Us

      • Facebook
      • Instagram
      • Pinterest

      About

      • Contact
      • About

      Copyright © 2026 Gluten-Free Baking