• Skip to primary navigation
  • Skip to main content
  • Skip to primary sidebar
Gluten-Free Baking logo
  • Home
  • Recipes
  • About
    • About Me
    • Contact
    • My Cookbooks
    • Work with Me
  • Nav Social Menu

    • Facebook
    • Instagram
menu icon
go to homepage
search icon
Homepage link
  • Home
  • About
  • Recipes
  • Contact
×
Home

Gluten-Free Funfetti Cake

Jul 25, 2017 · 4 Comments

Gluten-Free Funfetti Cake

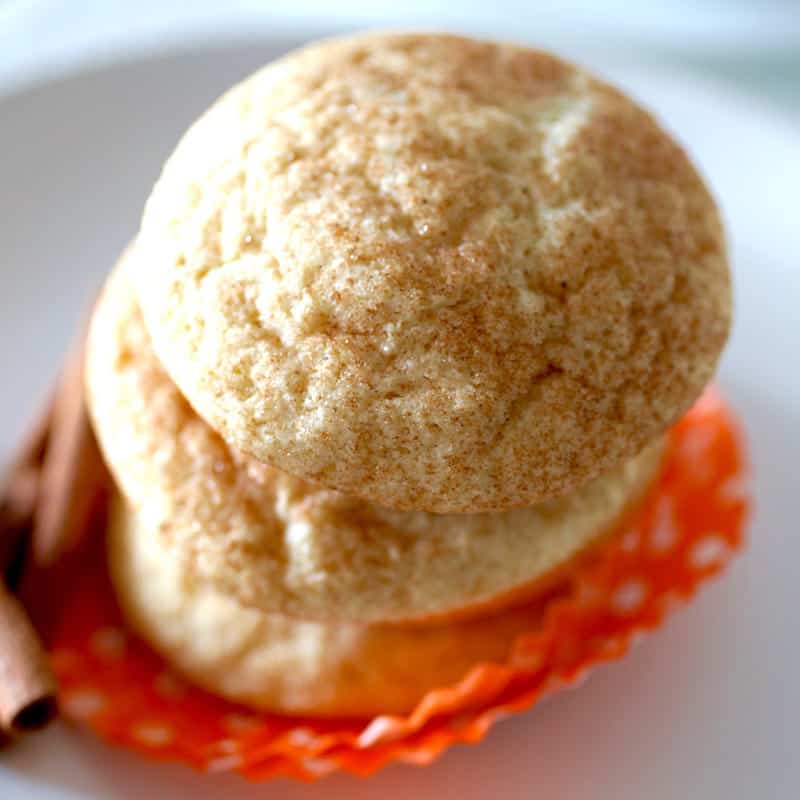
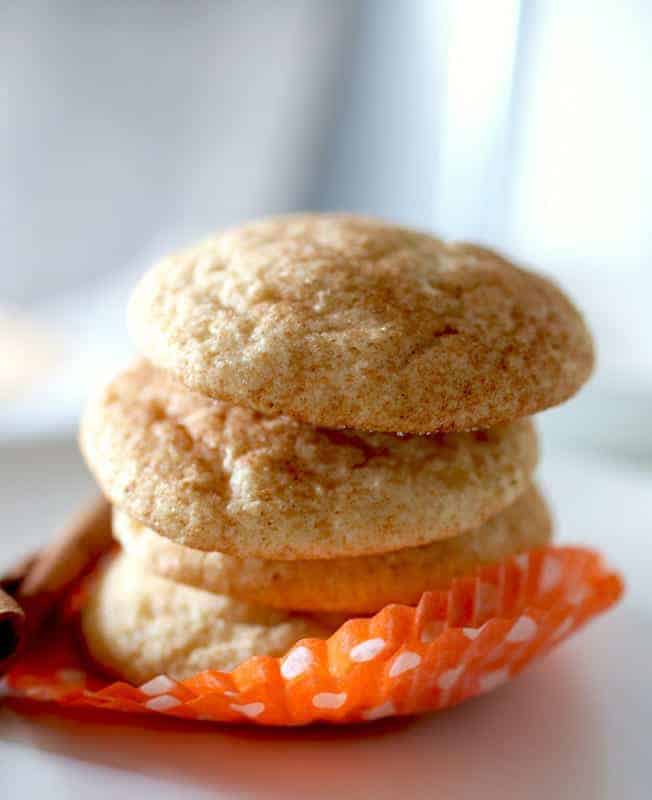
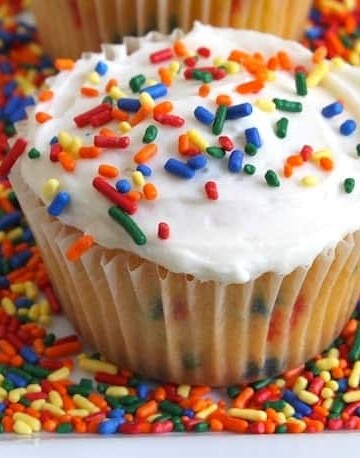
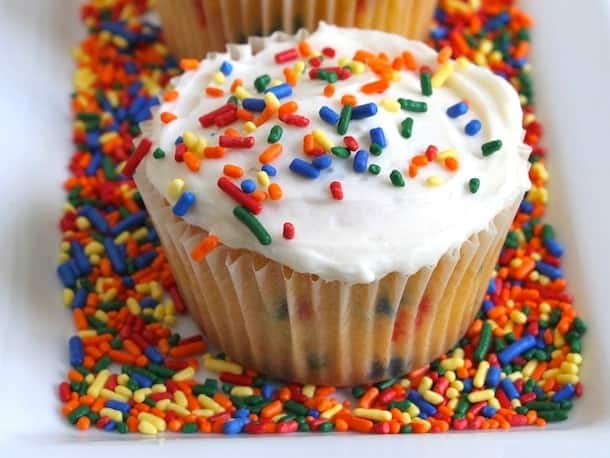
Gluten-free funfetti cake makes any event a celebration!

Gluten-Free Funfetti Cake


A few months ago, someone asked me to make a gluten-free version of Pillsbury’s Funfetti cake. This was a bit of a problem. At its heart, Funfetti cake’s just a sprinkle-studded white cake. And white cake’s always been a bit of a nemesis of mine.

You think it’d be easy: gluten-free flour, sugar, eggs, and fat. Simple, right? Not the case!

I’ve created more flops of white cakes than just about anything else (including gluten-free bread). Before creating another too-dense/too-heavy/too-dry white cake, I went to the supermarket to do some research.

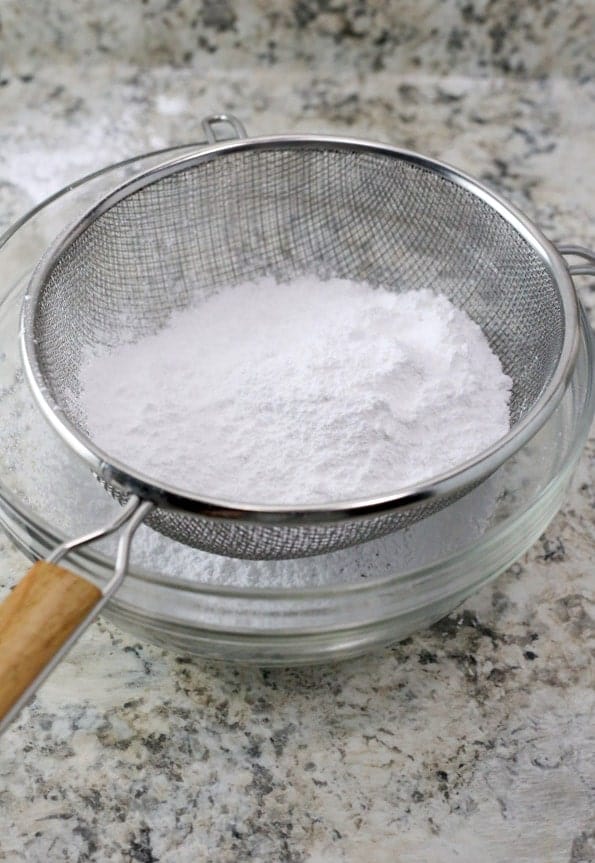
When re-creating a box mix cake, one needs to read a box mix! I noticed that all wheat-based boxed cake mixes contain shortening cut into the flour. Hmm. Could this be the secret to a light gluten-free white cake?

Shortening, when cut into flour, creates little pockets of fat. These pockets produce steam during baking and the steam helps to leaven the cake. In all my years of baking gluten-free cakes, I never tried cutting shortening to the flour. Now I am sorry I didn’t! After cutting solid shortening into the flour, and then adding eggs, oil, and water, my cake was unbelievably light.

At first, I pulled out the food processor to cut the shortening into the cake. Then I transferred the flour mixture to a stand mixer to finish making the batter. This was, well, a hassle. Turns out, I didn’t need the food processor. Using the paddle attachment of my stand mixer, I cut the shortening into the flour and then added my wet ingredients. Success without having to drag out two appliances!

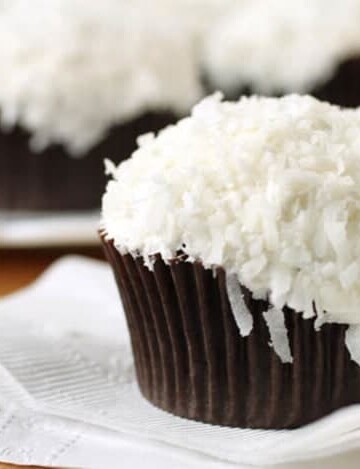
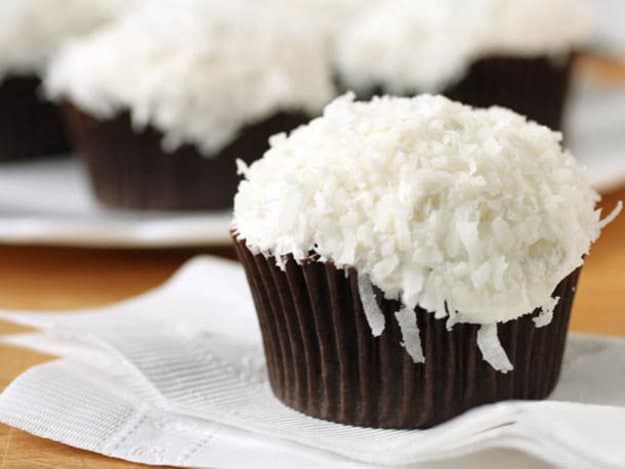
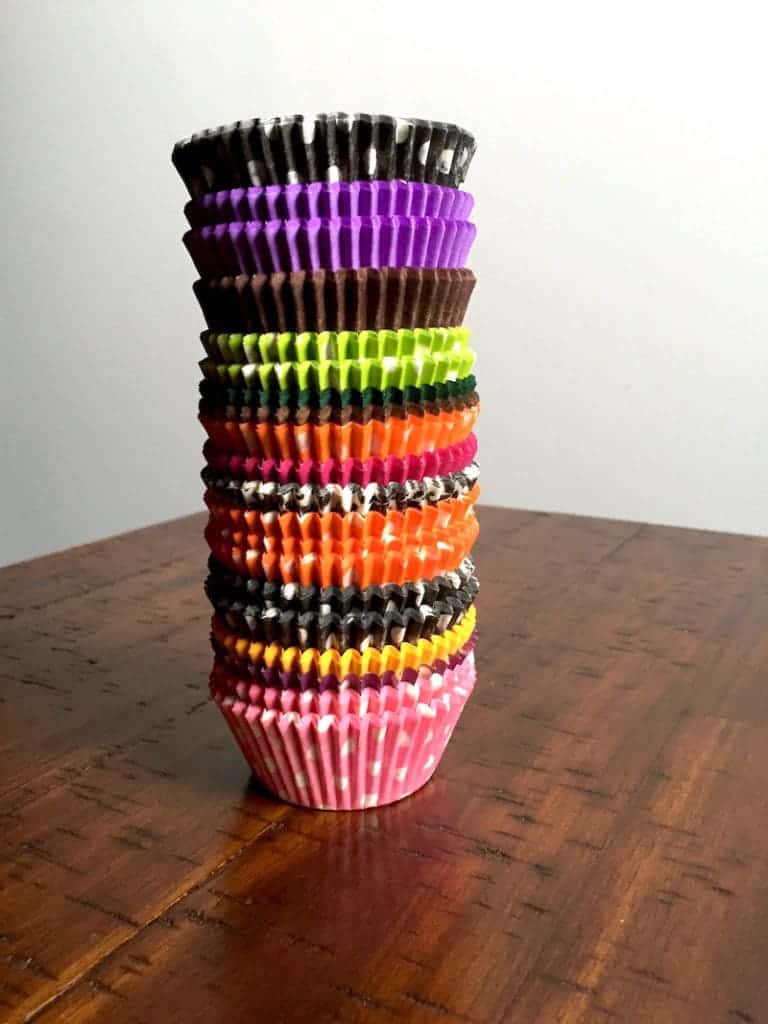
Of course you can make this cake without the sprinkles, but if you do make the Funfetti variation, be sure to use sprinkles, sometimes called Jimmies. Quins or nonpareils don’t work as well in the batter.

Baking Note: You can make your own homemade cake mix with this recipe. Simply prepare the recipe through adding the shortening to the dry ingredients. Store mix in a plastic bag for up to two months. When you are ready for cake, add the remaining wet ingredients.

Allergen Note: In addition to being gluten-free, this contains no dairy or corn. (It does contain xanthan gum, which some corn allergic folks can tolerate and others can’t.) To make the cake soy-free, use a solid soy-free shortening, like Specturm. During testing, I attempted an egg-free version using a ground flax replacement, but the results turned out heavy.

This piece first appeared on SeriousEats.com

Gluten-Free Funfetti Cake
Print

Gluten-Free Funfetti Cake

Prep Time 30 minutes
Cook Time 20 minutes
Total Time 50 minutes
Servings 24 cupcakes
Author GlutenFreeBaking.com

Ingredients

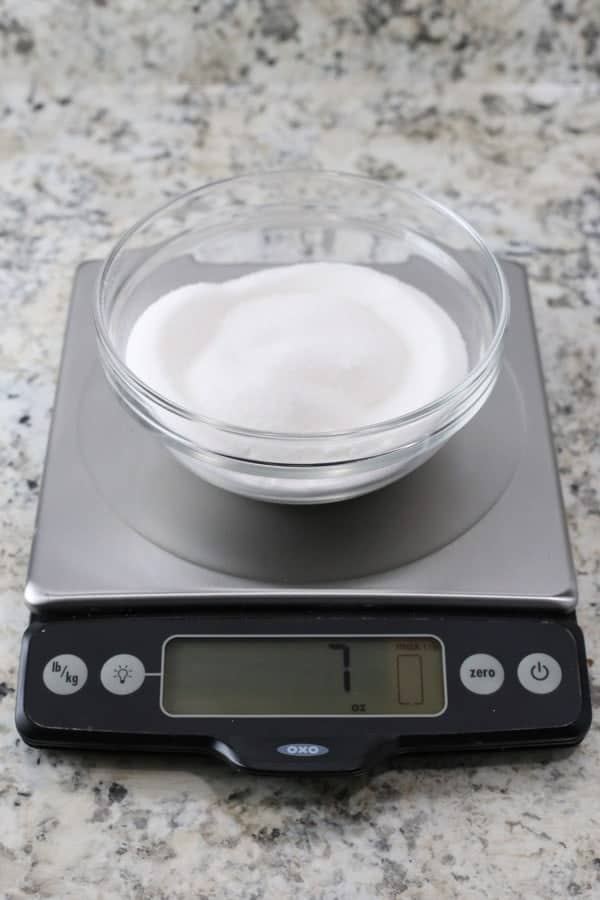
  • 1 3/4 cups granulated sugar (12 1/2 ounces; 354 grams)
  • 1 3/4 cups white rice flour (7 ounces; 198 grams)
  • 1/2 cup sweet rice flour (2 ounces; 56 grams)
  • 1/2 cup potato starch (2 ounces; 56 grams)
  • 1 tablespoon baking powder
  • 1 teaspoon salt
  • 1/2 teaspoon xanthan gum
  • 1/2 cup solid shortening (3 1/4 ounces; 92 grams)
  • 1 cup water (8 ounces; 226 grams)
  • 1/3 cup vegetable oil (2 1/3 ounces; 66 grams)
  • 4 large eggs (7 ounces; 198 grams)
  • 2 teaspoons vanilla extract
  • 1 teaspoon almond extract
  • 1/3 cup sprinkles plus more for sprinkling on top of the cake
  • Gluten-free frosting

Instructions

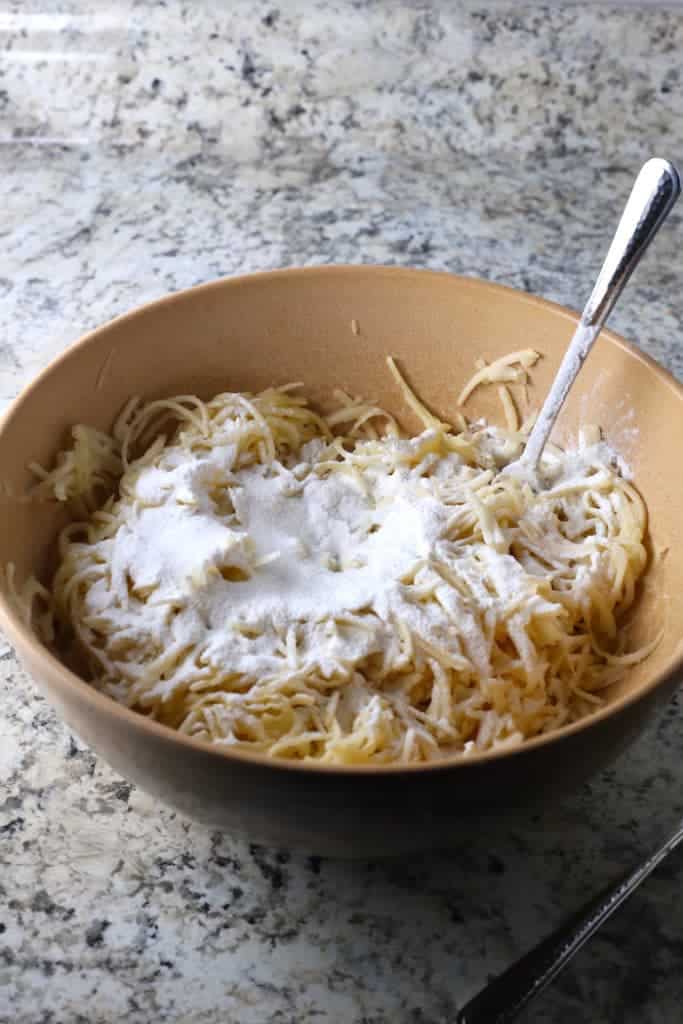
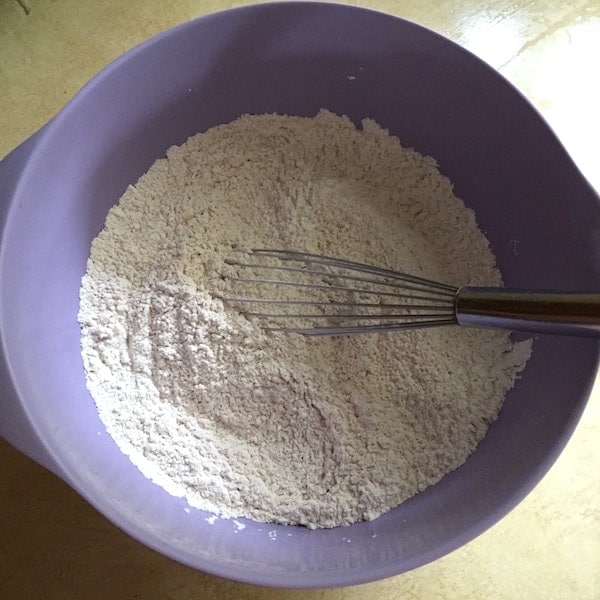
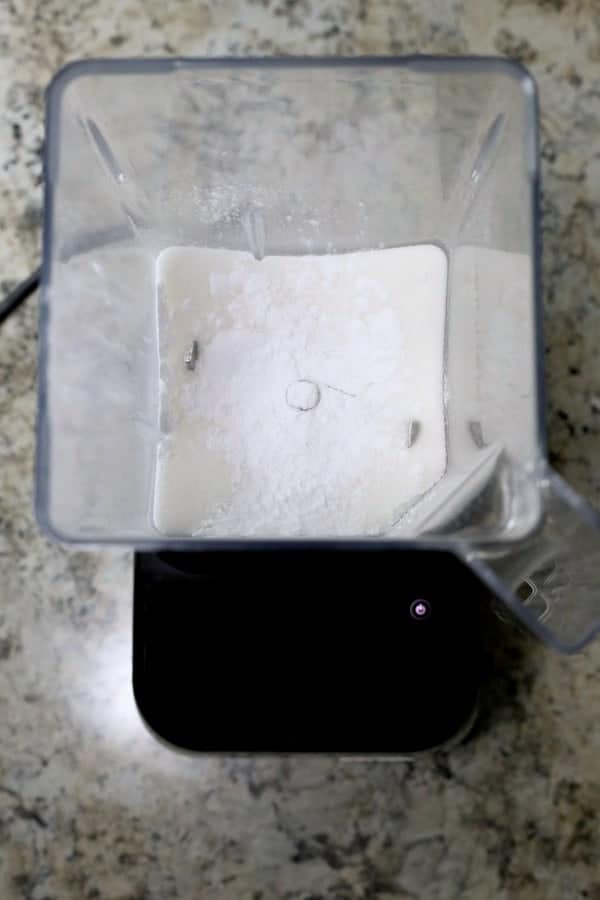
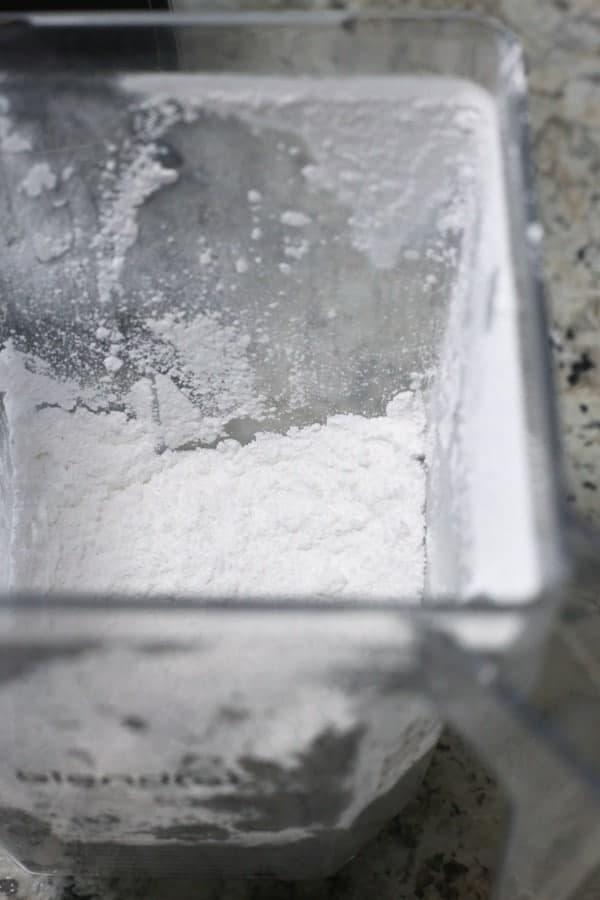
  1. Preheat oven to 350°F. Line two (24 cavities total) muffin pans with paper liners or grease lightly with non-stick cooking spray. In bowl of stand mixer fitted with paddle attachment, combine granulated sugar, white rice flour, sweet rice flour, potato starch, baking powder, salt, and xanthan gum. Stir to combine.
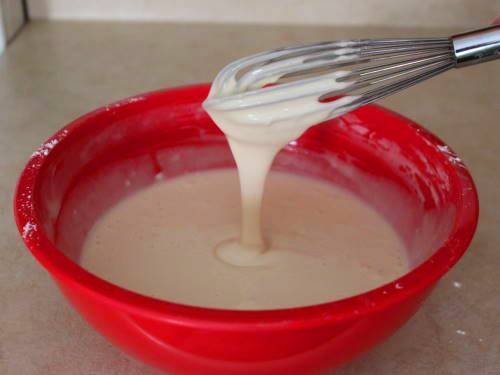
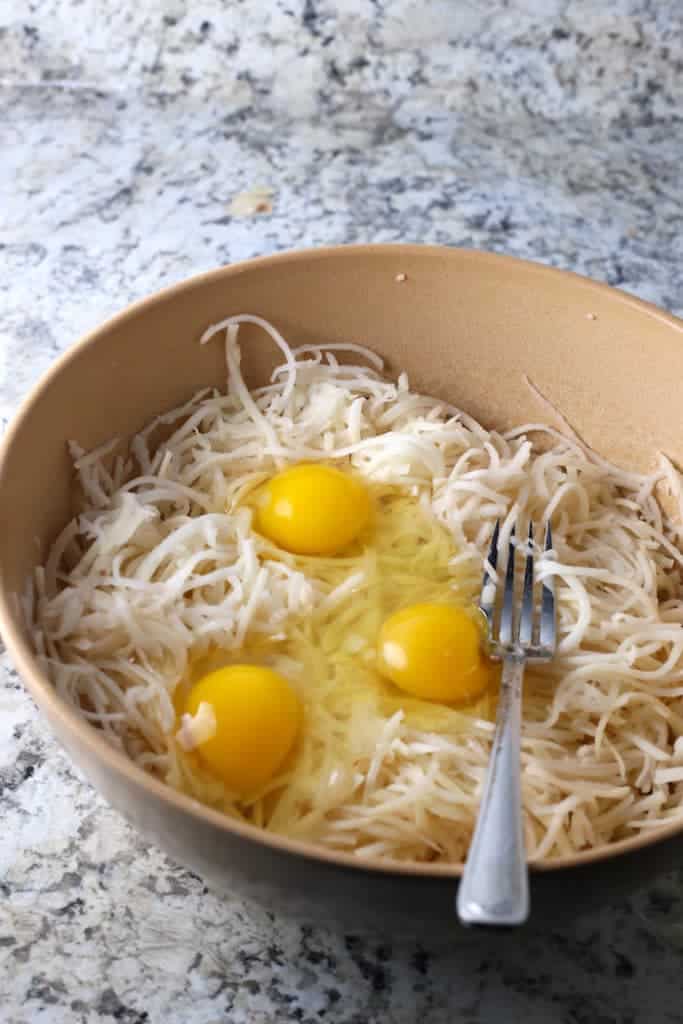
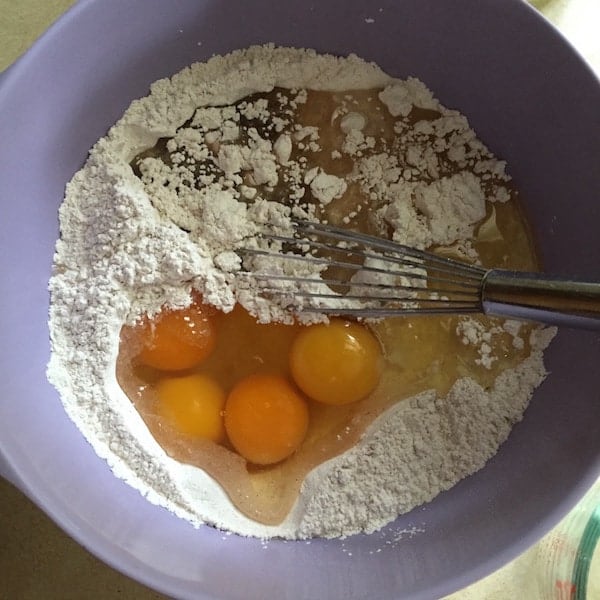
  2. Add shortening. Turn mixer on to medium-low speed. Mix until no large piece of shortening remain. Turn off mixer. Add water, vegetable oil, eggs, vanilla extract, and almond extract. Turn mixer on to medium-high. Mix for two minutes. (Timing is important with this batter.) Batter should be light and fluffy. Turn off mixer. If making a funfetti cake, add sprinkles. Turn mixer on to low and stir until sprinkles are just combined. Over-mixing causes the sprinkles to break up in the batter.
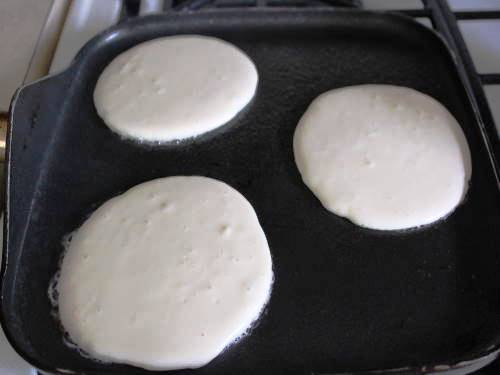
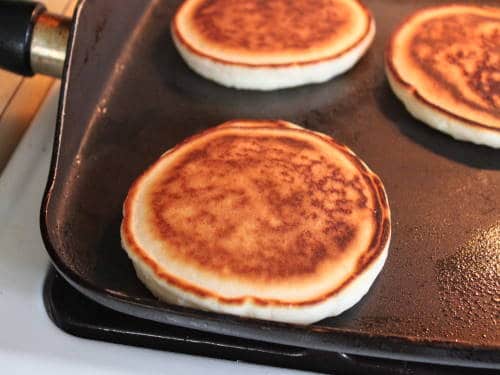
  3. Fill each muffin cup about 2/3 full. Bake until a cake tester inserted into the center of a cupcake comes out clean, about 20 minutes. Cupcake tops should be golden brown. Allow cupcakes to cool in the pan for three minutes and then transfer to a wire rack to cool completely. Once cool, ice as desired.

Gluten-Free Chocolate Graham Crackers

Jul 24, 2017 · 1 Comment

Gluten Free Chocolate Graham Crackers

Chocolate gluten-free graham crackers are a perfect treat. I think of them as cookies, but if you think of them as crackers, I don’t tell anyone.

Gluten Free Chocolate Graham Crackers

Love regular gluten-free graham crackers? Love chocolate? Then you need to try chocolate graham crackers. It’s one of my favorites.

Yup! One of my favorite chocolate cookies isn’t really a cookie at all. It’s chocolate graham crackers. Yup, those crisp, not-too sweet treats from childhood, are my favorite chocolate “cookie.” (And, this time of the year, they make an excellent s’more.)

  • Use cold fat. Like pie crust or biscuits, crackers are best when made with cold fat. The tiny pieces of cold fat release steam during baking helping to leaven the crackers.
  • Roll the dough into a thin sheet. Thin dough = crisp crackers. Thick dough yields a more shortbread-type cookie than a crisp graham cracker.
  • Dock and score the dough before baking. After rolling the dough into a large, thin sheet, score it with a pizza wheel and dock (prick) it all over with a fork before baking. Once the crackers are baked, it’s easy to snap them apart along the score-lines. Sometimes they even pull apart during baking.

Allergy-free Modifications: This recipe is naturally free of most common allergens. It does, however, contain dairy. To make the crackers dairy-free, replace the butter with shortening and the milk with a dairy-free alternative.

Gluten Free Chocolate Graham Crackers
5 from 1 vote
Print

Gluten-Free Chocolate Graham Crackers

Prep Time 25 minutes
Cook Time 15 minutes
Total Time 40 minutes
Servings 12 crackers
Author GlutenFreeBaking.com

Ingredients

  • 1 1/2 cups brown rice flour (7 1/2 ounces; 212 grams)
  • 1/3 cup dark brown sugar, packed (2 1/2 ounces; 70 grams)
  • 1/4 cup tapioca starch (1 ounce; 28 grams)
  • 1/4 cup cocoa powder, Dutch process (3/4 ounce; 21 grams)
  • 1 teaspoon baking powder
  • 1/2 teaspoon salt
  • 5 tablespoons cold butter (2 1/2 ounces; 70 grams)
  • 6 tablespoons milk (3 ounces; 85 grams)
  • 3 tablespoons light corn syrup or honey (2 1/4 ounces; 65 grams)
  • Granulated sugar for sprinkling

Instructions

  1. Preheat oven to 350°F. In bowl of a food processor, combine brown rice flour, dark brown sugar, tapioca starch, cocoa powder, baking powder, and salt. Pulse to combine.
  2. Add butter. Pulse until no large pieces of butter remain. Add milk and corn syrup (or honey). Pulse until dough forms.
  3. Turn dough out onto a lightly rice floured piece of 12 x16 parchment paper. Pat dough into rectangle. Dust top of dough lightly with rice flour. Place another piece of 12x16 parchment paper on top of dough. Roll dough out until it covers all of the paper. Dough rectangle will be about 1/8 inch thick.
  4. Using pizza wheel, score dough into rectangles. (The rectangles should be 6 x 2 3/4 inches large for standard graham crackers and 3 x 2 3/4 for a “s’more” size graham cracker.) Prick dough all over with fork. Chill dough for 15 minutes.
  5. Sprinkle granulated sugar lightly over top of dough. Bake until crackers are set, about 15 minutes. Remove graham crackers from pan and place on wire rack to cool. (I slide the parchment, with the crackers, directly onto the cooling rack.)


Gluten-Free Plum Cobbler

Jul 24, 2017 · Leave a Comment

Gluten-Free Plum Cobbler.

Plum cobbler celebrates this often overlooked summer fruit. Be sure to use ripe plums for the best flavor. Like all cobblers, this one tastes best served warm with a generous scoop of ice cream.

Gluten-Free Plum Cobbler in a cast iron skillet.

Recently, I realized I was stuck in a summer cobbler rut. If it wasn’t blueberry or peach, I simply didn’t make it. Now, this realization didn’t come to me during a meditation session or anything like that. It occurred to me as I flipped through Lisa Fain’s The Homesick Texan’s Family Table: Right in the middle of the sweets chapter is a recipe for plum cobbler.

Plum cobbler?

I’ve never made plum cobbler. In fact, I don’t think I’ve ever baked anything with plums. Don’t get me wrong, I love plums; I just always eat them raw. Suffice it to say that I was intrigued.

The original recipe calls for an easy cobbler topping, made even easier because of how Fain handles the butter: Instead of cutting cold butter into the flour mixture, she melts the butter and stirs it in with buttermilk. I grabbed some sorghum flour and a little sweet rice flour to replace the wheat flour and within minutes, the topping was ready.

Except…I made a mistake. I sliced the plums too thin. The result? A cobbler topping sitting atop a filling that had the texture of jam. All of the plum slices melted down during baking. All. Of. Them.

While not what I wanted, it wasn’t too terrible. We spooned the jammy cobbler over vanilla ice cream and it tasted fabulous. Without the ice cream? Meh. But we all loved the flavor. Seasoned with lemon zest and cinnamon, the baked filling tastes almost like cherry—enough so that a few friends thought that cherries were precisely the fruit I’d used.

I wanted to make another cobbler with thicker slices to see if I could avoid the jam-like texture and better highlight the juicy plums. So, for the next batch, I quartered the plums. Going into the oven, the dish looked almost ridiculous. Big hunks of plum sat under what seemed like not nearly enough cobbler topping. Now I was sure I’d swung to the other extreme: I’d sliced the plums too thick. But forty minutes of baking handily proved me wrong. The plums baked down a lot. They still softened considerably, but they didn’t turn to jam as they had on my first attempt. The cobbler still tasted great with ice cream, of course. Only this time, it tasted pretty great on its own, too.

And, because I’m a creature of habit, I made a peach cobbler, too. This time, however, I used half plums. Amazing. The peaches hold up a little better to the heat than the plums. So you get a cobbler with juicy peaches and soft plums all held together with a sweet, lemony sauce. Summer fruit cobbler perfection.

this piece first appeared on SeriousEats.com

Gluten-Free Plum Cobbler.
Print

Gluten-Free Plum Cobbler

Prep Time 15 minutes
Cook Time 40 minutes
Total Time 55 minutes
Servings 6

Ingredients

For the Filling

  • Nonstick cooking spray
  • 1/2 cup granulated sugar (3 1/2 ounces; 100 grams)
  • 1/4 cup sweet rice flour (1 ounce; 28 grams)
  • 1 teaspoon ground cinnamon
  • 1 teaspoon lemon zest from 1 lemon
  • 3 pounds ripe black plums, pitted and quartered
  • 3/4 cup sorghum flour (3 ounces; 85 grams)
  • 1/4 cup sweet rice flour (1 ounce; 28 grams)
  • 1/2 cup granulated sugar (3 1/2 ounces; 100 grams)
  • 2 teaspoon baking powder
  • 1/2 teaspoon table salt
  • 1/2 cup buttermilk (4 ounces; 113 grams)
  • 1/2 stick unsalted butter, melted (1/4 cup; 2 ounces; 56 grams)
  • Ice cream for serving (optional)

Instructions

  1. Preheat oven to 350°F. 

  2. Prepare the Filling: Spray a 10-inch cast iron skillet or a 9-inch square cake pan with nonstick cooking spray.
  3. In a large bowl, combine granulated sugar, sweet rice flour, cinnamon, and lemon zest. Rub mixture together with your fingers. Add plums and stir with a wooden spoon. Transfer mixture to the prepared skillet or cake pan.
  4. Prepare the Topping: In a small bowl, whisk together sorghum flour, sweet rice flour, granulated sugar, baking powder, and salt.
  5. Add buttermilk and melted butter to the dry ingredients and stir until a batter forms. Drop the batter over the plums; the batter won’t totally cover the fruit filling.
  6. Bake until topping is set and golden and the filling comes to a boil, about 40 minutes. Remove pan from oven and place on a wire rack to cool. Serve warm or at room temperature with or without ice cream. Store leftover cobbler covered in the refrigerator for up to 3 days.


Original Gluten-Free Pancake Recipe

Jul 12, 2017 · 2 Comments

Stack of gluten-free pancakes with pat of butter and drizzle of syrup.

This recipe first appeared on GlutenFreeBaking.com in 2017 and is based on the gluten-free pancake recipe in my original cookbook, Easy Gluten-Free Baking (published 2006). It uses individual gluten-free flours.

If you love this recipe, enjoy it!

If you prefer a recipe that uses a gluten-free flour blend, I’ve got you covered! Here’s the link to the best gluten-free pancakes.

Stack of gluten-free pancakes with pat of butter and drizzle of syrup.

Gluten-Free Pancakes: Tips for Success

  • Pre-measure the flour. The night before you plan to make pancakes, measure the dry ingredients. Then, in the morning, all you have to do is add the eggs, milk, and oil. Use either my suggested flours or your favorite gluten-free blend. Just be sure it contains xanthan gum, this ingredient makes for the fluffiest pancakes. If your gluten-free flour blend doesn’t include xanthan gum add a 1/4 teaspoon.
  • Use a nonstick griddle. To prevent gluten-free pancakes from sticking to the pan, use a nonstick griddle or frying pan. I prefer a flay griddle because the lack of sides makes it easy to flip the pancakes.
  • Grease the pan. Lightly oil the pan, even if it’s nonstick, with either cooking spray or a little vegetable oil. This step ensures the pancakes won’t stick and makes them easy to flip. For a different flavor, add a pat of butter to the pan and allow it to brown slightly. The brown butter adds a subtle flavor and crunch to the pancakes.
  • Serve right away or keep warm. Pancakes are best served hot from the pan. If you’d prefer to cook all the pancakes and then serve, heat your oven to 225 degrees F. Place the pancakes on a baking sheet until you’re ready to serve.
  • Freeze ’em.  If you have leftover pancakes, or want to make a batch to freeze, cook the pancakes as directed. Allow them to cool completely on a wire rack. Place a piece of waxed paper between each pancake, stack and slide into a freezer bag. Gluten-free pancakes keep in the freezer for about two months. To thaw, microwave for a few seconds.

Gluten-Free Pancakes: Step-by-Step

Gluten-free pancake batter in red bowl.

Whisk ingredients together in a medium bowl. To prevent clumping, first whisk all the dry ingredients together and then add the eggs, milk, oil, and vanilla extract. You don’t need an electric mixer for this. A regular balloon whisk works great.

Gluten-free pancake batter on skillet.

Cook over medium-high heat.  The batter should sizzle when it hits the griddle but you don’t want it too hot. When your pan is too hot, the pancakes can burn on the outside while they are still raw on the inside. Raw pancakes = blerg. To test your griddle, add a few drops of water. It should bounce across the pan and quickly evaporate.

Use a Big Spatula. You don’t want to use a tiny spatula to flip a big pancake. Grab large spatula that’s firm enough to flip the pancake and flexible enough to get under it.

Gluten-free pancakes on skillet.

Cook until golden brown. Some gluten-free pancakes cook up light and pale. Not these! If the pan is at the correct temperature, the pancakes should be golden brown all over. Cook the first side until bubbles appear on the surface. Then flip. The second side usually only requires a minute or two.

Stack of gluten-free pancakes with pat of butter and drizzle of syrup.
5 from 2 votes
Print

The Best Gluten-Free Pancakes

These gluten-free pancakes bake up light and fluffy. And, the recipe is so easy, you can whip up a batch of pancakes before your morning coffee kicks in. 

Prep Time 10 minutes
Cook Time 3 minutes
Total Time 13 minutes
Servings 4
Calories 333 kcal
Author Elizabeth Barbone

Ingredients

  • 1 cup (113 grams) white rice flour*
  • 1/2 cup (57 grams) cornstarch*
  • 1/2 cup (57 grams) sweet rice flour *
  • 1/4 cup (57 grams) granulated sugar
  • 1 tablespoon baking powder
  • 1/2 teaspoon salt
  • 1/4 teaspoon xanthan gum*
  • 2 large eggs
  • 1 cup (226 grams) milk
  • 1/4 cup vegetable oil
  • 1 teaspoon vanilla extract
  • nonstick cooking spray or vegetable oil for greasing the griddle

For Serving

  • Butter
  • Maple Syrup(If you have a maple allergy, Lyle’s Golden Syrup is a nice replacement.)

Instructions

  1. Whisk white rice flour, cornstarch, sweet rice flour, granulated sugar, baking powder, salt, and xanthan gum together in a medium mixing bowl. Add the eggs, milk, vegetable oil, and vanilla extract. Whisk until smooth.

  2. Lightly oil a flat griddle pan. Heat griddle over medium-high heat. Pour batter, approximately 1/4 cup, onto griddle. Batter should sizzle when it hits the pan.

  3. Cook for approximately 3 minutes. Flip pancakes when bubbles appear all over the surface of the pancake and begin to pop. The pancake should begin to look almost dry. Flip and cook another 1-1 1/2 minutes.
  4. Serve with butter and syrup, if desired.

Recipe Notes

*If desired, replace with 2 cups gluten-free flour blend. If the blend contains xanthan gum, omit the 1/4 teaspoon xanthan gum from the recipe. If the blend does not contain xanthan gum, be sure to include it for the fluffiest pancakes. 

Gluten-Free Chocolate Cupcakes

Apr 21, 2017 · 1 Comment

Gluten-free chocolate cupcake frosted with buttercream and topped with shredded coconut.

These Gluten-Free Chocolate Cupcakes are so easy to make. Mix everything in one bowl and you have cupcakes in less than an hour. Gluten-Free, Dairy-Free, Corn-Free.

Gluten-Free Chocolate Cupcakes are so easy to make. Mix everything in one bowl and you'll have cupcakes in less than an hour.

Gluten-Free Chocolate Cupcakes: The Flour

You can whip up a batch of these cupcakes in minutes. Minutes! Measuring the flour is the most time consuming part of the recipe. And, if you know me, I prefer to use a custom mix of gluten-free flours.

This allows me to totally control the final texture of my baked goods. And since gluten-free baked goods often suffer from a texture problem (gummy, heavy, dense), I’m sure you understand this.

However, now there are many gluten-free flour blends on the market. So if you don’t feel like measuring out flours, that’s totally fine. Replace the flours, starches, and xanthan gum in this recipe with an equal amount of Bob’s Red Mill Baking Flour or your favorite gluten-free flour blend.

Question: My flour blend doesn’t contain xanthan gum. What do I do?

Answer: If you’re flour blend doesn’t include xantham gum, add it. Use the same amount of xanthan gum called for in the recipe.

Gluten-Free Chocolate Cupcakes: Mixing

This is a one-bowl recipe. Woot! Woot! Put all the dry ingredients, the flours, sugar, cocoa powder, etc., into a large bowl. Give it a good whisk. If you skip this step, the cocoa powder can clump when you add the liquid.

Once you’ve whisked the dry ingredients, add the vegetable oil, coffee, and eggs. (Sorry, this recipe doesn’t work without eggs.) Whisk until smooth and you’re done.

Question: I don’t like coffee. What can I use?

Answer: Replace the coffee with either water or milk. Both work great in this recipe.

Gluten-Free Chocolate Cupcakes: Baking

Use a muffin scoop and scoop the batter into paper-lined muffin cups. When you use a scoop, each cupcake is the same size and the job goes so fast.

Bake until a cake tester inserted into the middle of a cupcake comes out clean. Or you could tap the top of the cupcake. It should feel firm, not squishy.

Gluten-Free Chocolate Cupcakes: Frosting

Allow the cupcakes to cool completely before you slather them with your favorite frosting. If you frost warm cupcakes, the frosting melts into a greasy mess. Whomp-whomp.  

But if you frost cooled cupcakes, the frosting stays perfect. All you need to do is unwrap the cupcake and enjoy.
Shop the Recipe

Shop the Recipe

Links listed below are affiliate links. GlutenFreeBaking.com earns a commission if you use them to shop.

Mixing Bowls
Bob’s Red Mill Gluten-Free Baking Flour
Muffin Scoop
Cupcake Pan
Handheld Mixer
Rubber Spatulas
Cocoa Powder
Sprinkles

Gluten-free chocolate cupcake frosted with buttercream and topped with shredded coconut.
4 from 1 vote
Print

Gluten-Free Chocolate Cupcakes

These Gluten-Free Chocolate Cupcakes are so easy to make. Mix everything in one bowl and you have cupcakes in less than an hour. Gluten-Free, Dairy-Free, Corn-Free.

Prep Time 10 minutes
Cook Time 20 minutes
Total Time 30 minutes
Servings 16 cupcakes

Ingredients

  • 1 1/4 cups (5 ounces) white rice flour*
  • 1/4 cup (1 ounce) potato starch*
  • 1/2 teaspoon xanthan gum*
  • 1 cup (7 ounces) granulated sugar
  • 1/4 cup (1 ounce) cocoa powder, regular or Dutch process
  • 1 1/4 teaspoons baking powder
  • 3/4 teaspoon table salt
  • 1/2 cup vegetable oil
  • 2/3 cup coffee, milk, or water
  • 3 large eggs

Frosting

  • 1 stick (4 ounces) butter, softened or vegetable shortening
  • 2 cup (8 ounces) powdered sugar, sifted
  • 2 tablespoons milk or water
  • 1 teaspoon vanilla extract

Instructions

  1. For the Cake

    Preheat oven to 350 degrees F. Line 16 standard cupcake cups with paper liners. Set pan aside. 

  2. Whisk together the white rice flour, potato starch, xanthan gum, sugar, cocoa powder, baking powder, and salt in a large bowl. (If using a gluten-free flour blend, whisk the flour blend together with the sugar, cocoa powder, baking powder and salt.)

  3. Add the vegetable oil, coffee, and eggs. Whisk until the batter is smooth. Scoop batter into prepared muffin cups, filling each cavity about 2/3 full.

  4. Bake until a cake tester inserted into the center of the cupcakes comes out clean, about 20 minutes. 

  5. Allow cupcakes to cool in the pan for five minutes before transferring to a wire rack to cool completely. 

  6. For the Frosting

    Combine the butter, powdered sugar, milk, and vanilla in a large bowl. Whisk, using a handheld mixer, until smooth. Spread on cooled cupcakes.

Recipe Notes

*To use a gluten-free flour blend: Replace the white rice flour, potato starch, and xanthan gum with 1 1/2 cups of a gluten-free flour blend. Be sure the flour blend contains xanthan gum. If it doesn't, add 1/2 teaspoon xanthan gum to the recipe. 

Krusteaz Gluten-Free Double Chocolate Brownies Review

Mar 29, 2017 · 2 Comments

Krusteaz gluten free double chocolate brownie mix box with oil, water, and an egg sitting beside it.

Krusteaz Gluten-Free Double Chocolate Brownie Mix Review. I give a new-to-me brownie mix a try.

Krusteaz gluten free double chocolate brownie mix box with oil, water, and an egg sitting beside it.

note: this is not a paid review. I bought the mix with my own money. All thoughts are mine. 🙂 

My local grocery store just underwent a complete remodel. This meant that for months, I wandered around the aisles, muttering, “Where the heck is the _______?!”.” Everyone else was doing the same thing. So I wasn’t too weird.

The best part about it was that the store brought in lots of new-to-me items. Like this Krusteaz Gluten-Free Double Chocolate Brownie Mix.

A quick google search told me that Krusteaz introduced their line of gluten-free mixes in the fall of 2014. So these aren’t new mixes. But, like I said, they are new-to-me.

The Cost

I paid $4.99 for the mix. Which is in line with most gluten-free mixes but, as you know, is more expensive than traditional brownie mixes.

The Ingredients

Sugar, brown rice flour (rice flour, stabilized rice bran with germ), semi-sweet chocolate chips (sugar, unsweetened chocolate, cocoa butter, soy lecithin [emulsifier], vanilla extract), cocoa (processed with alkali), soybean oil. Less than 2% of: salt, baking soda, natural flavor.

CONTAINS: Soy

May contain milk and eggs.

Refer to the package for the most current ingredient information.

The ingredient list made me a little happy and a little worried. It’s dairy-free and corn-free. (It does carry a “may contain” warning for dairy.) But the only gluten-free flour used is brown rice flour. This worried me.

It’s not that I don’t like brown rice flour. I do. You’ll find it used in recipes all over this blog. But when brown rice flour is used alone, the recipe tends to feel grainy.

The Add-Ins

This mix requires 1/3 cup (each) of water and oil and one egg. That’s it. This gets points from me. Too many gluten-free baking mixes have you add all sorts of ingredients. There’s one on the market that shows chocolate chip cookies on the front of the box. If you want chocolate chip cookies, however, you have to add your own chocolate chips to the recipe. This annoys me.

Mixing and Baking

Krusteaz gluten free double chocolate brownie mix in a bowl with oil and an egg.


The back of the box showed a wooden spoon mixing the batter together. So that’s what I did. Easy-peasy. I wouldn’t bother dragging out an electric mixer unless you really prefer using one.

There was a range for baking time. The box suggested 48 to 52 minutes. I baked my pan for 42 minutes and they came out perfectly.

The Taste

Krusteaz gluten free double chocolate brownie mix baked and cut in a pan.

I knew the brownies were done a few minutes early because the kitchen smelled so good. The chocolate aroma was the first introduction to how good these brownies were going to be.

These are dense, fudgy brownies that are studded with chocolate chips.

Now about that texture. I liked it. Could I detect a little of that brown rice flour? Yes. If I really thought about it. If I just ate the brownie without analyzing every bite? I’d never have noticed any problem.

Overall

I really liked this mix. It’s easy to  make and has an ingredient list that’s allergen-friendly (It carries a may contain warning and does contain soy.)

But the best part is the texture and flavor. These are really good brownies! You could add walnuts or turn them into gluten-free cheesecake brownies.

Grade: A

How to Make Chocolate Almond Butter

Mar 2, 2017 · Leave a Comment

Chocolate Almond Butter in a food processor.

Chocolate Almond Butter is even tastier than Nutella. This recipe makes a healthy spread that’s low in sugar and made without hazelnuts! 

Chocolate almond butter in a food processor.


Look at that! It’s not loaded with sugar and contains no palm oil. Plus, it’s much cheaper than buying a jar at the store. And, I promise, homemade tastes even better than the store bought variety.

Chocolate Almond Butter: The Nuts

Okay, so the Nutella that you love is made with hazelnuts. I didn’t make this spread with hazelnuts because…(dun dun dun) I’m allergic to them. I know. Not very exciting.

Here’s the thing, you can make this spread with any nut. I made mine with almonds and, oh my god, it’s so good.

Pick whatever nut you love and then roast it. (Skip this step if you buy your nuts pre-roasted.) When you toast nuts, the flavor deepens. But! Toasting nuts burn really easy. So keep your eye on it during this process. A pan of nuts usually takes about 10 minutes to toast in a 350 degree oven.

If you’re using almond, walnuts or pecans, you’re ready to move on to the next step. If you’re using hazelnuts, you need to remove the papery skin. To do this, place the roasted hazelnuts into a bowl. Cover with another bowl of the same size. Give it a shake. Remove the hazelnuts that have lost their skins. Repeat until all the hazelnuts are skinned.

This takes a few minutes but it’s worth it. If you leave the skin on the hazelnuts, it can add a bitter flavor to the spread.

Chocolate Almond Butter: The Cocoa Powder and Sugar

Unlike commercial spreads that are loaded with sugar, we only use a half cup of powdered sugar for the entire batch. Now what if you like your spread a little sweeter? Go ahead and add more sugar after you taste it. Easy-peasy.

For a deep chocolate flavor, use Dutch processed cocoa powder. This cocoa powder has a lovely dark color and an amazing chocolate flavor. If you can’t find it at your local grocery store, look for it at specialty stores or order it online. It’s worth it. I promise.

Chocolate Almond Butter: Mixing It Together

Almond butter in a food processor.

To make this spread, you need either a food processor or a high-powered blender, like a BlendTec or Vitamix. affiliate links to Amazon

Place the nuts into the food processor or blender and process until smooth. This can take a long time. How long? Up to 20 minutes in a food processor.

At first, the almond butter will look dry and weird. After a little while, the oil runs out of the nuts and it gets nice and smooth.

But what happens if your almond butter doesn’t get smooth? Good question!

This has happened to me on more than one occasion. It drives me bonkers. Thankfully, there’s an easy fix: oil. Pour in two tablespoons of almond or olive oil to smooth things out.

Chocolate almond butter in a food processor.

Once the almonds are ground into a smooth butter, add the cocoa powder and sugar. Blend until smooth. Taste. Adjust the sweetness to taste. If the chocolate almond butter seems too thick, add a little more oil. Sometimes I add a little sprinkle of Kosher salt. This doesn’t make the spread taste salty, it just enhances the flavor. 

Chocolate almond butter spread on a biscuit. A bowl of chocolate almond butter sits alongside.
That’s it! At first, the spread will be really soft. It sets up overnight. Have fun using it on everything. May I suggest starting with toasted gluten-free sandwich bread?

Chocolate Almond Butter in a food processor.
1 from 1 vote
Print

Chocolate Almond Butter

Chocolate almond butter is easy to make! It tastes similar to Nutella but without the hazelnuts or palm oil.

Ingredients

  • 2 cups raw almonds
  • 2 tablespoons almond oil
  • 1/2 cup powdered sugar
  • 1/3 cup cocoa powder, Dutch process or regular
  • 1 teaspoon vanilla extract, optional
  • 1/8 teaspoon fine salt, optional

Instructions

  1. Adjust your oven rack to the middle position. Preheat oven to 350 degrees F. Place almond on a rimmed baking sheet and roast until aromatic, about 12 minutes. 

  2. Transfer the almonds to the bowl of a food processor or place into a high powered blender. Blend until smooth. If the almond butter seems dry, add the almond oil. 

  3. Once the almond are ground into smooth butter, stop the machine and add the powdered sugar and cocoa powder. If using vanilla and salt, add these at the same time. Blend until smooth. This takes about two minutes. 

  4. Store in a airtight container, on the counter or in the refrigerator,  for up to one month.

Paleo Thin Mints | Grain-Free Recipe | Girl Scout Copycat

Feb 21, 2017 · 10 Comments

Paleo thin mint cookies dipped in chocolate.

Paleo Thin Mints are a gluten-free and dairy-free take on the classic Girl Scout cookie. This recipe uses a healthy amount of chocolate and just the right amount of peppermint to make a tasty and crunchy cookie.


Text on Image: Paleo thin mints. Image shows paleo thin mints cookies dipped in chocolate on parchment paper.

What’s your favorite Girl Scout cookie? For me, it’s a tossup between Thin Mints and Samoas (Caramel deLites). But my husband loves Thin Mints. So I decided to make a batch. 

This was a really good decision. These cookies, dipped in peppermint chocolate, came out–dare I say it?–better than the ones sold by your local Scouts. The best part? You can make ’em year round!

Paleo Thin Mints: The Ingredients

Jar filled with almond flour. A pile of almond flour sits in front of it.
The Flours

The dough for these cookies comes together easily. Since it’s a paleo recipe, I used a combination of finely ground almond flour and just a little coconut flour. The almond flour gives the cookies the crunch you expect from a thin mint cookie. The coconut flour thickens the dough and provides it with body, making it easy to roll out the dough.

When selecting your flours, look for a finely ground almond flour. I really like Honeyville Almond Flour. If you can’t find it buy regular almond flour and sift it to remove any large pieces. (Sift the almond flour before you measure it.)

The Sugar

Coconut sugar brings a rich sweetness to these cookies. I find the flavor of coconut sugar similar to that of molasses. If you prefer a sugar that doesn’t have a hint of bitterness, use evaporated cane sugar, which tastes a bit like caramel.

Just don’t use a liquid sugar, like maple syrup or honey, in this recipe. These sugars make the dough soft and sticky. A soft and sticky dough is almost impossible to roll.

Dutch processed cocoa powder in a white bowl.

The Cocoa Powder

Thin Mint cookies should be minty, of course, but they should also be chocolatey. For an intense chocolate flavor, use Dutch processed cocoa powder. This cocoa powder has been alkalized and has a dark, rich color and wonderful chocolate flavor.

If you can’t find Dutch cocoa powder at your local grocery store, try a specialty store, like Whole Foods or order it online. It’s worth it.  

Bowl of coconut oil.

The Fat

To make these thin mints dairy-free, use solid coconut oil. If dairy isn’t an issue for you, cold butter works great in this recipe. Whichever fat you use, be sure it’s cold. Unlike most cookie recipes where we cream together the softened fat and sugar, this recipe uses cold fat to give us nice flaky cookies. Cold fat= great texture.

The Egg

One egg helps to hold the dough together and brings a richness to the cookies. I haven’t tried these cookies without the egg; so I’m not sure if it would work egg-free. However, if you want to give it a try, I’d increase the amount of milk (regular or dairy-free) to make up for the missing liquid from the egg.

Baking Soda, Salt, and Milk

The remaining ingredients are pantry staples: baking soda, table salt, and milk. Any type of milk (non-dairy or traditional) works in this recipe.

Paleo Thin Mints: Mixing the Dough

This dough comes together like a pie dough. You mix all the dry ingredients together and then cut in the fat. A food processor makes quick work of this step. However, if you don’t own a food processor, don’t despair! Paleo Thin Mints can still be yours.

To make them by hand, whisk the dry ingredients together in a large bowl and then cut the fat in with a pastry cutter. Some folks use a fork to do this. A fork works fine but, just be warned, it takes forEVER.

Even if you use a food processor to mix the dough, you want to stir in the egg and milk by hand. I know this sounds crazy going from a food processor to a wooden spoon. But hear me out. When made in a food processor, sometimes the dough doesn’t come together right away, causing you to overmix it. This can cause the oil to run out of the almond flour. We want to avoid that.

So grab a wooden spoon and mix this dough by hand. You’ll be glad you did!

Paleo Thin Mints: Rolling and Cutting the Dough

After the dough chills for a little while, dust it with cocoa powder and roll it between two pieces of parchment paper. I always let my dough sit at room temperature for about ten minutes before I roll it. Cold dough, especially dough made with coconut oil, tends to rip as you roll it. Let that dough warm up a smidgen before you roll it out.

Paleo Thin Mints: Baking

Bake these cookies until they look flat and the house smells like chocolate. Seriously. These smell so good while they bake! As with any chocolate cookie, it’s hard to tell when they’re done because they won’t turn golden brown. The appearance does change. Look for a flat, not shiny finish on the cookies.

Paleo thin mints on a piece of parchment paper. Chocolate dipping tool sits on the parchment with the cookies.

Paleo Thin Mints: Dipping in Chocolate

Once the cookies have cooled, it’s time to transform them from chocolate rollout cookies to Paleo Thin Mints.

Grab your favorite dark chocolate and a few drops of pure peppermint oil. Do NOT use peppermint extract. It does not taste the same as peppermint oil and the cookies won’t be as good.

Melt the chocolate in the microwave or over a double boiler until smooth. Then add the peppermint oil and coconut oil.

Line a baking sheet with parchment paper. Dip the cookies into the warm chocolate and place on the baking sheet. Allow the chocolate to set up. If the chocolate doesn’t set (this can happen since we aren’t tempering the chocolate), pop the cookies into the fridge. 

Once the chocolate hardens, they’re ready to eat. Now the problem begins. Can you eat just one or two? (I can’t!)

Paleo thin mint cookies dipped in chocolate.
5 from 1 vote
Print

Paleo Thin Mints (Gluten-Free, Dairy-Free, Girl Scout Copycat)

Prep Time 1 hour
Cook Time 10 minutes
Total Time 1 hour 10 minutes
Servings 24 cookies
Author Elizabeth Barbone (GlutenFreeBaking.com)

Ingredients

For the Cookies

  • 170 grams (1 1/2 cups) finely ground almond flour
  • 85 grams (1/2 cup) coconut sugar or evaporated cane juice
  • 38 grams ( 1⁄4 cup plus 2 tablespoons) Dutch-process cocoa powder plus additional for dusting,
  • 21 grams (3 tablespoons) coconut flour
  • 1/2 teaspoon baking soda
  • 1/2 teaspoon salt
  • 57 grams (1/4 cup) coconut oil solid, or unsalted butter, softened
  • 1 large egg (about 50 out of the shell)
  • 1 tablespoon milk dairy-free or traditional

For the Chocolate Coating

  • 340 grams (12 ounces) 72% dairy-free dark chocolate chopped
  • 1 tablespoon coconut oil
  • pure peppermint oil (You'll only use a few drops)

Instructions

  1. Adjust an oven rack to the middle position and preheat the oven to 350 degrees F. Line a rimmed baking sheet with parchment paper.
  2. To make the dough in a food processor: Combine the almond flour, coconut sugar, cocoa powder, coconut flour, baking soda, and salt in the food processor. Pulse a few times to combine. Add the coconut oil and pulse until no large pieces of coconut oil remain, six or seven pulses. Turn the mixture out into a large bowl. Add the egg and milk. Stir together with a wooden spoon until a dough forms. 
  3. To mix the dough by hand: Combine the almond flour, coconut sugar, cocoa powder, coconut flour, baking soda, and salt in a large mixing bowl. Whisk to combine. Add the coconut oil. Use a pastry cutter or your fingers to cut the coconut oil into the dry ingredients until the mixture resembles coarse meal. You don’t want any large nubs of coconut oil. (If you use your fingers, work in the coconut oil with a quick snapping motion. Stir in the egg and milk with a wooden spoon. Mix until a stiff dough holds together.
  4. Place a 12 by 16-inch piece of parchment paper on the counter and dust it lightly with cocoa powder. Turn the dough out onto the parchment and dust the top with cocoa powder. Cover the dough with a second piece of parchment. Roll the dough out to a 1/8-inch thickness. Cut the dough into rounds with a 1 3/4-inch cutter.

  5. Transfer the cookies to the prepared baking sheet. You can place the cookies fairly close together, because the dough doesn’t spread.
  6. Bake until the cookies are set and aromatic, about 10 minutes.
  7. Allow the cookies to cool on the pan for 5 minutes, then transfer them to a wire rack to cool completely.
  8. Place chocolate in a small glass bowl. Microwave on medium heat for 30 seconds. Remove from the microwave and stir. (Do this even if it looks like the chocolate isn't melting.) Repeat until the chocolate is smooth. Stir in the coconut oil and two to three drops peppermint oils into melted chocolate. Stir gently until coconut oil melts. Taste. Add more peppermint oil if needed.

  9. Place melted chocolate into a small bowl. Dip cookies, one at a time, into melted chocolate. Place dipped cookies onto parchment lined baking sheet. When all cookies are dipped, chill until chocolate sets, about 20 minutes.
  10. Store cookies in an airtight container for up to one week.


How to Make Gluten-Free Soft Sugar Cookies (Lofthouse Copycat)

Feb 14, 2017 · 29 Comments

Gluten-Free Sugar Cookies on a Plate.

This easy recipe makes the best gluten-free soft sugar cookies. Inspired by the famous Lofthouse brand, these cookies are topped with frosting and finished with sprinkles.

Text on image: Soft gluten-free sugar cookies. Image: frosted soft gluten-free sugar cookies on a wire rack.

…

Read More

How to Make Gluten-Free Latkes

Dec 20, 2016 · 17 Comments

Gluten-Free Latkes on wire rack.

Crispy gluten-free latkes are a wonderful part of the holiday season.

Gluten-Free Latkes on wire rack.

Latkes, fried potato pancakes, are a traditional part of Hanukkah. There’s only one problem with them: they’re often heavy and greasy. Gah!

No one wants a soggy latkes. Follow these steps and you’ll make a batch of classic latkes that cooks up crispy and light.

Looking for a gluten-free sweet potato latke? I have a recipe for you! 

Gluten-Free Latkes: The Potatoes

Potatoes on digital scale. Weight reading shows two pounds seven and three quarters ounces.

My favorite potato for latkes is the classic russet potato. These potatoes, with their dry flesh and high starch content, are ideal for frying.

When selecting the potatoes for your latkes, use potatoes that are firm and blemish-free. An eye here or there is fine, just cut them away, but you don’t want a potato full of bruises or spots.

For this recipe, I use about 2 1/2 pounds of potatoes –that usually works out to five medium potatoes. This generously feeds six hungry people. If you’re frying potatoes for a large gathering, this recipe doubles nicely.

Gluten-Free Latkes: The Onion and Other Seasonings

Some foods just seem made for each other: peanut butter and jelly. Macaroni and cheese. Bread and butter. Potatoes and onions.

Yes. That’s right. Potatoes and onions are one of my favorite food combinations. There’s just one problem with it: onions get aggressive. Use too much onion and it immediately takes over the delicate flavor of the potato. Blerg.

Since I’m making potato latkes and not onion latkes, one small onion adds just the right amount of flavor to the latkes without getting all aggressively onion-y on us.

Potato and onion on a counter.

Here’s what I do: I grab an onion that’s the same size as the potatoes I’m using. This seems to always be the right amount of onion.

Salt and pepper are the only other seasonings I add to the recipe. That’s it. If you want to get all fancy-pants on me, go ahead and stir some snipped chives into the mixture. It’s a lovely addition.

Gluten-Free Latkes: The Flour

Here’s where the gluten-free part of gluten-free latkes kicks in. Traditional recipes use matzo meal or wheat flour. For these latkes, I think white rice flour or sweet rice flour works perfectly. Both flours fry up nice and crispy without weighing down the latkes or adding unwanted flavors.

The difference between the white rice flour and sweet rice flour comes down to texture. Latkes made with sweet rice flour tend to fry up a little–and, really, just a little–bit crisper than those made with white rice flour.

If you don’t keep rice flour in the house, use any gluten-free flour. They all work fairly well. Whole grain flours tend to add a bit of flavor and grit but since we use so little flour, the latkes turn out fine.

The only thing I’d avoid using is a flour blend that contains xanthan gum. Xanthan gum holds onto moisture and excess moisture in latkes makes for soggy, heavy latkes.

Gluten-Free Latkes: Shredding the Potatoes

Shredded potatoes in the bowl of a food processor.

Latkes have a reputation for being a knuckle buster recipe since the potatoes are traditionally grated on a box grater.

I see no need to include my own blood in the latkes; so I skip the box grater and use the shredding disk on my food processor. It only takes about one minute to grate all the potatoes and the onion. Magic!

If you don’t own a food processor, you’ll need to grate the potatoes and onions. Kidding aside, take care when you do this. The starchy liquid that the potatoes release as you grate them, makes everything slippery.

Gluten-Free Latkes: Getting Rid of Excess Moisture

Shredded potatoes on a green towel.

When making latkes I have a single focus: not eating them all straight from the pan. keeping them crisp.

Too often latkes end up soggy and heavy. There’s a few reasons for this. The first is excess moisture.

As soon as you begin to grate the potatoes and onions, you’ll notice that they release a lot of liquid. We want to get rid of this liquid before mixing and frying the latkes.

To do this, plop the grated potatoes and onions on a dry kitchen towel. Fold the towel over the mixture and twist the ends. Wring the towel to rid the potatoes of excess moisture. You’ll be surprised how much you’ll get out!

Liquid from drained potatoes in a brown bowl.

Usually I wring the towel out right over the sink. However, I wanted to show you how much liquid comes out of the potatoes and onion. It’s hard to see in this photo but that’s about 1/3 cup of liquid–and that doesn’t even include the liquid that’s in the towel.

As you can see, the liquid oxidized a little. Potatoes, like apples, turn brown quickly after you peel them. To prevent this, some people add lemon juice to their shredded potatoes. I don’t like the flavor this adds to the cooked latkes. So I skip it. Truthfully, it doesn’t matter if the potatoes brown a little before you fry them. Once they’re cooked, they look and taste fine.

Shredded potatoes and onion in a brown bowl.

Once you’ve wrung out the potatoes and onion, put the mixture in a large mixing bowl. The shredded potatoes should feel almost dry to the touch. To check them, push the mixture aside and look at the bottom of the bowl. You don’t want to see any pooled liquid. If you do, wring them out again. I know that this step seems a bit putzy. It’s worth it; I promise.

Gluten-Free Latkes: Mixing

Shredded latkes mixture in brown bowl with three eggs.

As soon as you’ve dried the shredded potatoes, it’s time to make the latke mixture. Add the eggs to the bowl. You don’t need to whisking them ahead of time. Just grab a fork and stir the mixture until the eggs completely coat the potatoes.

Gluten-Free latkes mixture in a brown bowl with rice flour sprinkled on top.

Add the white rice flour, salt, and black pepper. Stir with a fork to coat. Or you could use your hands!

Gluten-Free latkes mixture in a brown bowl.

Everything is mixed together and ready to go.

It’s (finally) time to fry.

Gluten-Free Latkes: Frying and Serving

Gluten-Free latkes frying in a pan.

Fry the latkes in a little hot oil. We’re not deep frying here. Coat your pan with about 1/8-inch of oil. I like to use safflower oil. If you want to go the traditional route, use a 50/50 blend of schmaltz (chicken fat) and vegetable oil.

You want the oil at just right temperature. If it’s too cold, the latkes absorb the oil like a sponge and get oily and soggy. If the oil gets too hot, the latkes burn on the outside and remain raw in the center.

Heat your pan over a medium-high heat. Once the oil starts to shimmer but not smoke, you’re set to fry. I always test my oil by dusting a little white rice flour over the pan. If the flour sizzles when it hits the oil, it’s time to fry.

Cook three to four latkes at a time. More than that and the pan gets crowded, which causes the oil temperature to drop. Place a scant 1/4 cup of potato mixture into the skillet. Then, using two forks, pull the mixture apart a little. Don’t mound up the latkes. You want them round and thin.

Adjust the heat as you cook to keep the oil sizzling but not smoking. Flip the latkes just once. More than that and they tend to break apart and get soggy.

Once they’re cooked, transfer them to a paper towel-lined baking sheet or wire rack. You can serve them right away or you can keep them warm in a low oven until you’ve fried all the latkes.

Serve the latkes with applesauce or sour cream. Or both!

Gluten-Free latkes on a wire rack.

Gluten-free latkes on a wire rack.
5 from 9 votes
Print

Gluten-Free Latkes

Servings 6 people

Ingredients

  • 2 1/2 pounds Russet potatoes, peeled about five medium potatoes
  • 1 small onion, peeled
  • 3 large eggs
  • 1/3 cup white rice or sweet rice flour
  • 1 teaspoon salt
  • 1 teaspoon freshly ground black pepper
  • safflower oil for frying, about 1/3 cup
  • sour cream optional
  • applesauce opitonal

Instructions

  1. Preheat oven to 225 degrees F. (Skip this step if you plan on serving your latkes right from the pan.) Line two baking sheets with paper towels or one large cooling rack. 

  2. Grate the onion and potatoes. I use a food processor fitted with the medium grater attachment. If you don't have a food processor, a box grater works just fine. It will just take a little longer. 

  3. Place half the onion and potato mixture on a kitchen towel. Roll towel around the grated onions and potatoes. Wring towel to draw excess moisture out of the potatoes and onions.

  4. Add the eggs and stir with a fork to combine. Add the white rice flour, salt and pepper. Add to potato mixture and stir to combine.

  5. Heat 1/8-inch of oil in a non-stick frying pan over medium-high heat until it shimmers but does not smoke.


  6. Working in batches, drop a scant 1/4 cup of potato mixture into the hot oil. (The latke mixture should sizzle when it hits the oil.) Using a fork or spatula, flatten the mixture a little in the pan. I fry three latkes at a time. This will ensure your oil doesn't get cold. Cold oil=greasy latkes!

  7. Fry for 2-3 minutes on each side or until golden brown. Transfer to baking sheet. Serve at once or keep warm in the preheated oven. 

  8. Serve latkes with applesauce and sour cream, if desired. 


10 Gifts for the Gluten-Free Baker In Your Life

Dec 6, 2016 · Leave a Comment

Different cake pans. Loaf pan. Muffin pan. Square cake pan. Round cake pan

Text on Image: 10 Gifts for the gluten-free baker in your life.

Got a gluten-free baker on your holiday list? Give them any of these gifts and they’ll probably thank you with something amazing from the kitchen.

note: I hope you love this gift guide. Just so you know, the links included are Amazon affiliate links. This means GlutenFreeBaking.com earns a small commission from any purchases made using these links. The commission helps to support the site. Thanks! 

Cake Pans

Different cake pans. Loaf pan. Muffin pan. Square cake pan. Round cake pan

There are cake pans and then there are good cake pans. What’s the difference? Weight and straight sides. If your cake pans nest easily inside each other, the walls on the pans probably flare. While this makes them easy to store, it makes stacked cakes hard to ice.

For your favorite cake baker, look for a pan that’s heavy for it’s weight and isn’t coated with a nonstick coating.

Here’s what I use:

8-Inch Cake Pans

This is my go-to size for birthday cakes.  Be sure to gift your friend with two 8-inch pans so he can make classic two-layer cakes.

Get the Pan: 8-inch round cake pan by Magic Line

8-Inch Square Pan

I use this pan for my fudgy gluten-free brownies, gluten-free maple blondies, and these awesome 4-ingredient peanut butter bars.  Look for a pan with square, not rounded, edges.

Get the Pan: 8x8x2 square cake pan by Magic Line

Loaf Pan

Get this pan for the friend who loves to make bread. (My favorite gluten-free sandwich bread uses this pan.) It a great pan for sandwich bread and quick breads, like banana bread.

Get the Pan: 1-pound loaf pan

Cupcake Pan

Bad cupcake pans drive me bonkers. Most have a ridge around each cupcake cavity. This makes them hard to clean. And you don’t want to give a gift that’s hard to clean.

These pans have seamless cups (cue hallelujah choir.) They will quickly become your friend’s favorite cupcake pan.

Get the Pan: Seamless Cupcake Pan by Nordic Ware

Sheet Pans

Stack of half sheet pans.

I use these pans all.the.time. In fact, I own a heafty stack of them. How do I use them? Cookies and gluten-free pizza, of course. But I also use them for when I bake a pie. I pop the pie onto the baking sheet to prevent drips from hitting the bottom of my oven.

This is also the pan you need for “sheet pan dinners.” So even if your friend doesn’t bake a ton, she’ll get a ton of use out of this pan. It’s such a workhorse. (pssst…when you buy one for a gift, get yourself one too!)

Get the Pan: Sheet Pan by Nordic Ware

Spatulas

Different types of spatulas. Three rubber spatulas. One angled spatula. One cookie spatula.

Many kitchen tools carry the name “spatula.” There are rubber spatulas, cookie spatulas, pancake spatulas, etc. So which one to give? Any of them! They’re all really handy and make quick work of kitchen tasks.

GIR Spatula

Best Rubber Spatula I’ve ever used. Period. Heatproof and sturdy. I have several sizes and love them all.
Get it: GIR Rubber Spatula | Mini | Skinny

Small Angled Spatula

This spatula works great for spreading peanut butter on bread, spreading batter into pans, and icing cakes. I can’t imagine my kitchen without one.
Get It: Angled Spatula

Cookie Spatula

Warm cookies are delicate little things. A small metal spatula makes it easy to move the cookies from the pan to the cooling rack. This spatula also works great for getting brownies out of the pan without destroying the first one.
Get It: Cookie Spatula

Whisks

An assortment of whisks. Small egg whisk. Balloon whisk. Slim ballon whisk.

Balloon Whisk

A good balloon whisk can combine dry ingredients when a sifter isn’t needed. It can also whip up small batches of batter.

Get it: Balloon Whisk

French Whisk

French whisks. They’re great for making pudding or stirring hot chocolate. The tines are thin, long, and clustered tighter together than you’ll find on a Balloon whisk.

Get It: French Whisk

Magic Whisk

And, finally, one last type of whisk. The magic whisk. That’s quite the name, isn’t it? This is one of my favorite whisks. It’s great for whisking eggs or making small batches icing–the mixture of powdered sugar and milk.

Get it: >Magic Whisk

Ellinger Wood Bowls

Stack of brown mixing bowls.

My favorite bowls. They are a wood-melamine blend, which makes them really sturdy. I’ve owned mine for over ten years and they haven’t cracked, chipped, or disappointed me in any way.  Made in Sheboygan, Wisconsin by the Ellinger Wood Company.

Get the bowls: Ellinger Wood Bowl Set


OXO Kitchen Scale

Digital scale.

Weighing ingredients for baking ensures excellent results. This scale from Oxo is affordable and does a great job for small to medium jobs. (This one maxes out at 11 pounds. If the baker in your life needs a larger version, get her the 22-pound model.) I love that the display pulls out. This means that if you place a large bowl on the scale, you can still see the readout.

Get the scale: OXO 11-Pound Scale

Cake Turntable

Metal cake stand.

Frosting a cake is one of life’s great pleasures. One of the essential tools for this task is a heavy cake turntable. No one wants a turntable that wobbles under her cake. This one doesn’t disappoint. It turns smoothly, even under the heaviest of cakes.

Get the Turntable: Ateco Cake Turntable

Double Mesh Strainer

Metal sifter with wooden handle.

I always think sifting isn’t one of my favorite tasks. However, there are ingredients, like high-fat cocoa powder, that must be sifted.

Whenever I pull out my classic sifter, dump the ingredients into it, and tap it gently with my hand, I find myself loving the act. There’s something gentle and soothing about the task. I always seem to forget this.

Those sifters with the crank handles and small wheel never seem to work well for me. This double mesh strainer makes quick work of sifting. And it’s a pleasure to use. Your friend will love it for sifting flours or dusting powdered sugar over a cake.

Get the Sifter: Double Mesh Strainer

Cupcake Liners

Stack of colorful paper muffin cups.

Things I hate splurging on: cupcake liners. Things I love: colorful cupcake liners.

A big stack of cupcake liners makes such a fun gift. Pair it with a small angled spatula and your favorite icing recipe for your favorite cupcake baker.

Get the Liners: Colorful Cupcake Liners

Small Bowls

Stack of small glass bowls.

Mise-en-place, the act of measuring out all the ingredients for a recipe before beginning, is an enjoyable task when you have these small bowls to hold ingredients like a teaspoon or two of vanilla extract.  Give a stack as a gift. One is not enough.

Get the bowls: Duralex Ingredient Bowls

Gluten-Free Sweet Potato Pie

Nov 11, 2016 · 1 Comment

Gluten-Free Sweet Potato Pie topped with whipped cream on a white plate.

This gluten-free sweet potato pie recipe is made with brown sugar, butter, half-and-half, spices, and a generous helping of love.

Gluten-Free Sweet Potato Pie topped with whipped cream on a white plate.

Remember last year when James Wright sang, literally sang, the praises of Patti LaBelle’s sweet potato pie? Within days of the YouTube video becoming a viral hit, Wal-Mart sold out of the pie and Mr. Wright ended up sharing Thanksgiving with LaBelle herself.

This year, sweet potato pie seems to be everywhere. Over the last few weeks, I’ve seen it on the shelves of all my local grocery stores. This is notable because I live in upstate New York and, until recently, I’ve never seen this pie for sale at so many places.

Sadly, none of these pies are gluten-free. But I didn’t want to miss out on the craze. And I bet neither do you!

Gluten-Free Sweet Potato Pie: The Sweet Potatoes

There’s a lot of confusion about sweet potatoes. They’re often labeled as yams. This is incorrect. Yams are grown in Africa and Asia and a large, starchy root vegetable. It’s rare to see a true yam for sale in the United States.

What we call “yams”–those medium-size potatoes with the copper-colored skin and bright orange flesh– are actually sweet potatoes.

When buying sweet potatoes for this pie, don’t get fancy on me. At “gourmet” grocery stores (I’m looking at you, Whole Foods), you can often find a wide variety of heirloom sweet potatoes. In fact, I just bought Japanese sweet potatoes the other day. They tasted like roasted chestnuts!

As tasty as those organic, heirloom varieties are, you don’t want them for this recipe. Traditional American sweet potatoes roast up dense and moist, making them perfect for pie filling. Other varieties can be too dry to make a creamy pie filling.

Gluten-Free Sweet Potato Pie: Roasting the Sweet Potatoes

To bring out a sweet, caramel-like flavor, roast your sweet potatoes. To do this, place an empty sheet pan on the bottom rack of your oven. (You can also line the bottom rack with foil.) Then place the sweet potatoes directly onto the top rack. The pan on the bottom will catch drips as the sweet potatoes cook.

They take about an hour to roast in a 350 degree F oven. If your sweet potatoes are especially large, pierce them a few times with a knife before roasting. Roast the sweet potatoes until tender. To test for doneness, slide a knife into the center of the potato. It should glide in easily.

Gluten-Free Sweet Potato Pie: Mixing the Filling

I don’t know about you, but I don’t want my sweet potato pie to taste like pumpkin pie. This can be tough because the ingredients for the two pies are very similar. (And they both bake up orange. So they even look similar!)

To do this, I don’t use the same spices found in pumpkin pie. In this recipe, you’ll only find ground cinnamon and nutmeg. These two spices don’t overpower the sweet potatoes. This is key. I want the flavor of the sweet potatoes to shine because I love me some sweet potatoes.

In addition to not loading up the pie with spices, I also don’t puree the filling. I prefer my sweet potato pie to have a little body. After I roast the sweet potatoes and allow them to cool, I peel them. The skins skip off easily. You can just pull them off with your fingers or, carefully, use a knife to ease the skin off the roasted potatoes.

Then I flop the roasted potatoes into a bowl and mash them with a fork. This only takes a minute or so. If you prefer a really smooth pie filling, you can puree the potatoes in a food processor or high-powered blender.

After that, the filling comes together easily. Throw the rest of the ingredients into the bowl. Stir and you’re done.

Gluten-Free Sweet Potato Pie: Baking and Cooling

Pour the filling into a 9-inch gluten-free pie crust. You can make the crust from scratch, use a gluten-free pie crust mix,affiliate link or even pick up a premade crust. (Whole Foods tends to have them in the freezer section.)

Bake the pie for an hour or so. As with any custard-style pie, it can be tough to know then the pie is done. My advice: wiggle it. Just a little bit. (If you get this song reference, you get 10 points.) The filling should move as one. If it looks thin and moves like water, it’s not done yet.

Allow the pie to cool on a cooling rack for about an hour or so before serving.

I like this pie with a generous dollop of whipped cream or whipped coconut cream. (Learn how to make whipped coconut cream, here.)


Gluten-Free Sweet Potato Pie topped with whipped cream on a white plate.
5 from 1 vote
Print

Gluten-Free Sweet Potato Pie

To roast sweet potatoes, preheat oven to 350 degrees F. Place a baking sheet on the lowest oven rack. Put the sweet potatoes directly onto the top oven rack. Roast until tender, about an hour. Remove from oven and allow to cool before using for the filling.
Prep Time 15 minutes
Cook Time 45 minutes
Total Time 1 hour
Servings 1 9-inch pie

Ingredients

  • 4 medium sweet potatoes roasted or pressure cooked, cooled (see note above.)
  • 1 cup light brown sugar
  • 1 teaspoon vanilla extract
  • 3/4 teaspoon ground cinnamon
  • 1/2 teaspoon ground nutmeg
  • 1/4 teaspoon salt
  • 3/4 cup half-and-half
  • 1/2 stick butter melted
  • 2 large eggs whisked
  • 1 9-inch unbaked gluten-free pie crust

Instructions

  1. Adjust oven rack to middle position. Preheat oven to 350 degrees F.
  2. Peel the cooled sweet potatoes and place the peeled potatoes in a medium bowl. Mash potatoes with a fork until smooth. (If you prefer a very smooth filing, puree the peeled sweet potatoes in a blender or food processor.)
  3. Stir in the brown sugar, vanilla extract, ground cinnamon, nutmeg, and salt. Add the half and half, melted butter, and eggs. Stir until smooth.
  4. Place pie pan onto a rimmed baking sheet. Pour filling into the prepared pie crust. Bake until filling is set and golden brown at the edges, about 40 minutes.
  5. Allow the pie to cool on a wire rack for one hour before serving. Store leftover in the refrigerator for up to four days.


Weight vs. Volume in Baking

Nov 2, 2016 · Leave a Comment

Measuring cup filled with stones (left). Measuring cup filled with colorful marshmallows. (Right)

Understanding the difference between weight and volume measurements is one of the key ingredients in successful baking.

Measuring cup filled with stones. Measuring cup filled with colorful marshmallows. Text on image: Baking 101 Understanding weight vs volume.
It happens at least once a week. Someone emails me a little confused about the ingredient list of a recipe. The email goes something like this: “I see that the recipe for XYZ calls for 1 cup of flour. You have that listed as 4 ounces. The same recipe calls for 1 cup of sugar. That’s listed as 7 ounces.What’s the correct measurement? There’s a mistake in the recipe! ”

Nope. Not a mistake. It’s just an example of the difference between volume and weight measurements.

To help me explain this, I’ve measured a cup of marshmallows into a measuring cup. This is a volume measurement.

Now let’s see what it weighs! (Note: Before putting the full measuring cup on the scale, I placed the empty measuring up on the scale and “zeroed” it out. This way, when I placed the filled cup on the scale, the weight would NOT include the weight of the cup. This is also called taring the scale.)

Cup of marshmallows on a digital scale. Display reads 1 5/8 ounces.

The cup of marshmallows weighs 1 5/8 ounce. Not very heavy!

I filled the same cup with stones. Let’s see what they weigh.

Cup on stones on a digital scale. Display reads 13 1/2 ounces.

A whopping 13 1/2 ounces! Almost a full pound. And 11.875 ounces less than a cup of marshmallows. But they’re both a cup!

In a recipe. I’d write this:

1 cup (1 5/8 ounces) marshmallows
1 cup (13 1/2 ounces) stones

Now, onto the ingredients we bake with on a regular basis. We’ll start with granulated sugar.

Granulated sugar on a digital scale. Display reads 7 1/8 ounces.

This cup of sugar weighs 7 1/8 ounces. This is an excellent example. Most ingredient weight charts list granulated sugar as seven ounces. Here’s the thing: volume measurement, even when done correctly, varies. The reasons for the variation depend on the situation. A measuring cup might be slightly misshapen.  Or when the ingredients were added to the cup, they were packed loosely or tightly into the cup. Perhaps when the cup was leveled, perhaps the leveling wasn’t straight. All sorts of things can affect the weight of one cup of ingredients.

In this case, 1/8 ounce won’t make much difference. Sometimes, however, a cup can be off as much as an ounce or two. With some gluten-free ingredients, like coconut flour, an ounce makes a BIG difference. This is why I suggest weighing ingredients whenever possible.

This is fun! Let’s look at another ingredient!


Cup of brown rice flour on a digital scale. Display reads 5 ounces.

Millet flour weighs in at 5 ounces. Two whole ounces less than granulated sugar.

If these two ingredients showed up together in a recipe, they’d be listed like this:

1 cup (7 ounces) granulated sugar
1 cup (5 ounces) millet flour

As you can see, I removed that extra 1/8 of an ounce because I’d do that when testing the recipe since I know that a cup of sugar should only weigh seven ounces.

Next up: Tapioca Starch!

Cup of tapioca starch on a digital scale. Display reads 4 1/2 ounces.

This cup of tapioca starch weighs 4 1/2 ounces.

Our recipe would now read:

1 cup (7 ounces) granulated sugar
1 cup (5 ounces) millet flour
1 cup (4 1/2 ounces) tapioca starch

Finally, whole almonds.

Measuring cup filled with almonds on a digital scale. Display reads 4 5/8 ounces.

4 5/8 ounces! For this one, I’d call that 5 ounces because asking someone to weigh out 4 5/8 ounces of almonds is nuts. (Sorry. I had to make that joke.) And the difference between 4 5/8 ounces of almonds and 5 ounces of almonds in a recipe doesn’t matter.

This brings our final recipe to

1 cup (7 ounces) granulated sugar
1 cup (5 ounces) millet flour
1 cup (4 1/2 ounces) tapioca starch
1 cup (5 ounces) whole almonds

As you can see, the weight of “one cup” varies greatly by ingredient. And that doesn’t even include ingredients like butter (1 cup = 8 ounces) or liquid ingredients, such as, honey (1 cup=12 ounces) or milk (1 cup =8 ounces.)

Gluten-Free Pumpkin Spice Snickerdoodles

Oct 21, 2016 · 9 Comments

Pumpkin spice snickerdoodles on an orange cupcake liner.

Coated with pumpkin spice, these easy-to-make gluten-free snickerdoodles are a lovely way to celebrate fall.

Gluten-Free Pumpkin Spice Snickerdoodles stacked on an orange cupcake liner.

You know the old saying, “Never ask a question you don’t want the answer to because you’ll get an answer you don’t want to hear”?

It’s sage advice.

It didn’t, however, stop me from asking Facebook friends if I should make snickerdoodles or chocolate chip cookies for a talk I was set to give at a local library.

The truth: I wanted to make snickerdoodles. (No offense to my friend gluten-free chocolate chip cookies.) I mean, you can’t go wrong with either cookie but there’s just something perfect about a plate of snickerdoodles in the fall.

Before I mix the dough, I scrolled through the facebook comments.

The reply from my friend Amber jumped out at me: Have you ever made them with pumpkin pie spice instead of plain cinnamon? To. Die. For. I learned to do this from Pinch My Salt and never looked back.

Two things:

1. I had NOT made snickerdoodles with pumpkin spice.

2. Why hadn’t I made pumpkin spice snickerdoodles?

Clearly I needed to remedy this asap!

Into the kitchen I went to make gluten-free pumpkin spice snickerdoodles. (Wow! That’s a mouthful.)

Coating the cookies with pumpkin spice* wasn’t the only thing I did differently. I decided to adapt my gluten-free snickerdoodle recipe and use Bob’s Red Mill Baking Flour Blend instead of a custom blend of flours.

I’ve gotten lots of great feedback to the gluten-free chocolate chip cookie recipe I posted using the flour. So I wanted to try snickerdoodles with the flour to see how it worked. I had high hopes!

(*In case you’re wondering, there’s no pumpkin in pumpkin spice. Nor has there ever been. It’s a blend of cinnamon, nutmeg, clove, and ginger. And it’s awesome. So these cookies are pumpkin-free.)

Pumpkin spice snickerdoodles on an orange cupcake liner.

As with the original, the cookies baked up crisp on the edges and soft in the center. The buttery flavor, as Amber promised, went amazing well with the pumpkin spice.

Here’s the funny thing: no one guessed that the cookies were coated with pumpkin spice. They all said, “Wow! These are good!” But no one said, “ZOMG! Pumpkin spice!”

That’s the beauty of pumpkin spice. Since it combines the best of the baking spices, it makes everything taste better without overwhelming your taste buds. And, that my friends, makes for one heck of a good snickerdoodle.

recipe inspired by Amber from Blue Bonnet Baker and by the classic snickerdoodles from Pinch My Salt. 

Gluten-Free Pumpkin Spice Snickerdoodles stacked on an orange cupcake liner.
4.5 from 4 votes
Print

Pumpkin Spice Snickerdoodles

Baker's note: If you don't have cream of tartar on hand, replace both the cream of tartar and the baking soda with 1 teaspoon of baking powder.
Course gluten-free cookies
Prep Time 15 minutes
Cook Time 12 minutes
Total Time 27 minutes
Servings 30 cookies
Author GlutenFreeBaking.com Elizabeth Barbone

Ingredients

  • 2 1/2 cups Bob's Red Mill 1-to-1 Gluten-Free Baking Flour see note below
  • 1 teaspoon cream of tartar see note above
  • 1/2 teaspoon baking soda
  • 1/2 teaspoon salt
  • 1 1/2 sticks butter, softened softened
  • 1 cup granulated sugar
  • 2 large eggs
  • 1 1/2 teaspoons vanilla extract

Pumpkin Spice-Sugar Mixture

  • 1/4 cup granulated sugar
  • 2 teaspoons ground pumpkin spice

Instructions

  1. Preheat oven to 350 degrees F. Line two rimmed baking sheets with parchment paper.
  2. Whisk together the baking flour, cream of tartar, baking soda, and salt in a small bowl.
  3. In the bowl of a stand mixer fitted with the flat paddle attachment, combine the butter and granulated sugar. Cream on medium speed until a thick paste forms. Stop the mixer and scrape down the sides and bottom of the bowl. Turn the mixer to medium-low speed. Add the eggs, one at a time, and the vanilla extract. Beat until well combined, about 30 seconds.
  4. Stop the mixer and add the dry ingredients. Turn the mixer to medium-low and blend until a dough forms.
  5. Scoop the dough, about two tablespoons, and roll into a ball. Roll the dough in the pumpkin spice-sugar mixture.
  6. Place the dough on the prepared cookie sheet, about two inches apart.
  7. Bake until the edges are golden brown, about 12 minutes. Rotate the pans halfway through baking.
  8. Remove the cookies from the oven and transfer to a wire rack to cool.
  9. Store in an airtight container for up to four days or freeze the cooled cookies for up to two months.

Recipe Notes

Gluten-Free Flour

The original version of this recipe called for 2 cups of gluten-free flour. Unfortunately readers found that the cookies spread. During re-testing, I increased the flour to 2 1/2 cups. The cookies baked up thick and puffy. 

If you prefer a thin and crisp cookie, reduce flour to 2 1/4 cups.  


Not Your Mama’s Canning Book

Sep 2, 2016 · Leave a Comment

Homemade chipotle salsa in jars.

Homemade chipotle salsa in jars.

Note: I received a review (free) copy of “Not Your Mama’s Canning Book” from Page Street Publishing. I was not paid nor asked to write a review. All opinions are my own. 

Number of canning jars I own: several dozen (and some are in pretty colors, too!).

Years I’ve owned canning jars: at least five.

What I used the jars for

  • pen holder
  • drinking glass (my mother hates this, I know.)
  • storage container
  • candy jar
  • candle holder
  • homemade lotion container

What I didn’t use the jars for

  • canning


I know. I know. I KNOW. Let me explain.

For years, I’ve wanted to learn how to can homemade jams, pickles, and other good things. But I couldn’t bring myself to actually do it.

Why the resistance? Food safety.

Eons ago, while at culinary school, I learned terrible things about home canned foods. During our required month-long food safety class I read reports of bad home canning practices. It scared me! I walked out of that class thinking that anyone who canned their own food just might be…trying to kill their family.

Obviously, what I didn’t learn were safe canning practices. This was during the late 1990s. I didn’t know anyone who canned their own food. Since the instructor of our class talked about canning like it was an arcane practice that was juuuuuust about to go out of fashion, I didn’t give it much thought.

And then, along with the food blogging boom, it seemed like everyone was canning. Honestly, at first, I thought they were nuts.

Until I didn’t.

The recipes they made looked incredible. Pickles! Salsas! Jams! Canning suddenly piqued my interest.

Here’s the thing: it’s tough to take up a hobby that you once believed would kill your family. I know, weird, right? Who’d a thunk it.

So I bought jars. I took a class. I read canning books and I could recite the ins and outs of canning safety. Still, I couldn’t bring myself to actually can anything.

Until this year.

During a visit with my friend Carrie, she opened her refrigerator and showed me a jar of pickled red onions. She that the her daughter loves the things, so Carrie started making her own. Hmmm…that sounded good. Each year, I’d make refrigerator pickles. Pickled onions were something I could easily do. No water bath processing required!

During that same visit, Carrie gave me a bag full of purple daikon radishes. At first, I wasn’t sure what to do with them. Then I decided to make a batch of  homemade Do Chua, the carrots and radishes that go on a banh-mi sandwiches. Again, it was refrigerator pickling. And I loved it.

Homemade Vietnamese daikon and carrot pickles.

There was only one problem. I had too much stuff. Two jars of red onions and three jars of Do Chua. If only there was a way to store these things without putting them in the refrigerator! 😉 (Yes, I know is usually a quick pickled item. I just made too much. But you get my point.)

Not your Mama's Canning Book cover.


Thankfully Rebecca Lindamood’s Not Your Mama’s Canning Book (affiliate link) magically showed up in my mailbox. (Her publisher kindly sent me a review copy.)

I sat down, ate lunch, and flipped through the pages. It’s not a stretch to say that within minutes, I knew I wanted to make almost all of the recipes.

Rebecca, who writes the popular Foodie with Family blog, wrote a thoroughly modern canning book. You won’t find any recipes for dill pickles or strawberry jam in this book. That’s a good thing. Lots, and I mean LOTS, of other authors have already covered the basics. And they’ve covered them well.

Not Your Mama’s Canning Book blazes a new path. With recipes for Korean Barbecue Sauce, “Instant Hummus-in-a-Jar”, and Peach Habanero Rum Preserves, this book reflects the way many of us eat today. It also reflects the way most people approach home food preservation. Unlike our forebearers, we don’t have to put up the summer bounty to survive the harsh winter. We have the  privilege of preserving food for fun.

Armed with Rebecca’s book and her thorough instructions, I finally mustered up enough courage to head into the kitchen to water bath can. Fear whispered in my ear that this was a terrible idea. I thanked Fear for trying to protect me and then I handed him an imaginary juice box and asked him to take a seat. It was time to can. And Fear was not welcome in my kitchen.

I decided to make Rebecca’s Smoky Roasted Salsa since I love Frontera’s Chipotle Salsa. This recipe sounded similar; so I thought I’d give it a try.

Now if I was an awesome food blogger, I’d have a million photos of this process to show you. However, 1. I’m not. 2. I’m new to water bath canning. So I put all my attention on the process and not the photos.

I wouldn’t call the recipe difficult but it did contain a few steps. This was one of those recipe where you put on your favorite music and hang out in the kitchen for a bit.

The recipe starts with dried chipotle peppers.(affiliate link) These were a wee bit tough for me to find. I ended up getting them at Whole Foods. The recipe also calls for either dried guajillo or cascabel chile peppers. These I couldn’t find in my area. Since I love hot food, I decided to use all chipotle peppers.

A note on this: You really shouldn’t futz with canning recipes because you can throw off the pH. For example, you’d never want to reduce the amount of acid (vinegar, lemon juice, etc.) called for in a recipe or increase the amount of onions. Swapping one dried pepper for another is fine. If you have questions about making changes to a home canned recipe, contact the author or if you can’t do that, reach out to your local cooperative extension. They can help you.

In addition to the dried chiles, you broil some tomatoes, tomatillos, onions, and garlic. Everything is pureed and then boiled for about 15 minutes to thicken.

As the salsa burbled away on the stove, I snuck a spoonful.

Holy moly.

The salsa tasted bright and flavorful and really spicy, which I loved. It took everything in me not to ladle out a small bowlful and eat it warm with tortilla chips. Somehow I resisted.

Water Bath Pot on a stovetop.

Next up, it was time to (gulp) fill and process the jars. Working slowly, I followed the steps that Rebecca provides in the book’s thorough introduction. Since I’m also a visual learner, I also watched Sherri Brooks Vinton’s helpful video on waterbath canning.

Once the jars were filled, into the canner they went. I set my timer for 15 minutes and waited.  I actually stood there and read a book while the jars processed.

When the time was up, I carefully removed the jars from the pot and set them on the counter. Within minutes, a beautiful sound rang out: pinging. All the jars had sealed. I let them cool, without moving them, for 24 hours. Then I put one in the fridge (if you think I was waiting to eat a jar, you don’t know me.) and the rest on my pantry shelf.

We ate the salsa the next day. Honestly, it’s one of the best salsas I’ve ever eaten. Smoky, spicy, and just the right balance of flavors. As I spooned a chip with salsa into my mouth, I told Greg that I wanted to try this salsa in pulled pork recipe. It was then that I noticed that Rebecca provided a recipe for pulled pork that uses, you guessed it, this salsa.

In fact, she dedicated the entire Part Two section of the book to using the recipes  you’ve preserved in Part One. How great is that? From start to finish, she’s got you covered. And if you’re like me and are nervous about canning, Rebecca even included a chapter entitled, “Step Away From the Canner” where she teaches you how to make “herb bombs”, peppermint extract, and more.

As for me, I’m actually stepping towards the canner. In fact, I just signed up for a pressure canning class. YES! I can’t wait to tell you about it!

Until next time!

-E.

Homemade chipotle salsa in jars.
Print

Spicy Chipotle Salsa

For a spicer salsa, omit the guajillo or cascabel peppers and use 16 dried chipotle peppers, about 2 ounces. This makes a VERY spicy salsa. Recipe adapted from, "Not Your Mama's Canning Book." by Rebecca Lindamood. Page Street Publishing (2016)
Prep Time 1 hour
Cook Time 15 minutes
Total Time 1 hour 15 minutes
Servings 6 pints
Author Elizabeth Barbone

Ingredients

  • 12 dried chipotle chile peppers, stems removed
  • 12 dried guajillo or cascabel) chile peppers, stems removed
  • 2 cups boiling water
  • 2 pounds tomatillos; husks removed and washed
  • 2 pounds plum tomatoes; cored and washed
  • 1 large onion; peeled and quartered
  • 1 head garlic broken into individual cloves (don't peel the garlic but remove any excess papery skin)
  • 1 cup apple cider vinegar
  • 2 teaspoons granulated sugar
  • 1 1/2 teaspoons table salt (do NOT replace with Kosher salt)

Equipment

  • 6 glass pint canning jars, lids, and bands
  • water bath canner or deep pot
  • large sauce pan
  • blender

Instructions

  1. Prepare your jars for canning and set up your water bath. For more information on this, visit FoodInJars.com
  2. Place a large pot on the stove. You'll use this for cooking the salsa.
  3. Set up your blender or food processor.
  4. Wipe the dried peppers with a damp paper towel. This removes any dust that might be clinging to the surface.
  5. Place the half the dried chiles in a large dry skillet. Cook over medium heat about 30 seconds per side. You want the chiles to be aromatic and pliable. Repeat with remaining chiles.
  6. Carefully place the warm chiles in medium glass or stainless steel bowl. Cover with two cups boiling water. If your chiles are floating out of the water, place a small plate onto the chiles to weigh them down. Soak until softened, about 20 minutes.
  7. While the chiles soak, place the tomatillos, tomatoes, onion, and garlic onto a rimmed baking sheet. Broil until the tomatoes and tomatillos are softened. They should look blistered and blackened in a few places. This takes about 15 minutes. However time will vary depending on your broiler.
  8. Remove the pan from the oven. Set the garlic aside. Place the onion into the waiting blender.
  9. Invert a rimmed baking sheet over the tomatoes and tomatillos. If you don't have a second baking sheet around, place the tomatoes and tomatillos in a large bowl and cover the bowl with plastic wrap. You want the plastic wrap stretched across the bowl, not laid on the hot tomatoes.
  10. While you wait for the tomatoes to cool, transfer the soaked chiles and hot water to the blender. Puree the chiles and onions until smooth. Pour the mixture into the waiting pot.
  11. Peel the cooled garlic and tomatoes. The skins should slip easily off both the garlic and the tomatoes. It's okay if some of the skin sticks.
  12. Puree the roasted tomatillos, tomatoes, and garlic in the blender. Work in batches if you have a small blender. The texture is up to you. I think this recipe works best as a smooth, almost sauce-like salsa. Pour the tomato puree, vinegar, sugar, and salt into the pot along with the chile-onion mixture. Stir to combine. Bring to a boil over medium heat, stirring constantly to prevent the salsa from scorching. Once it reaches a boil, reduce the heat and boil gently, stirring frequently, until the salsa thickens. You want it to be about the consistency of a thin ketchup. This takes about about 15 minutes.
  13. Ladle hot salsa into hot jars leaving 1/2 inch headspace. Using a chopstick or other non-metal tool, remove air bubbles and remeasure headspace. If needed, ladle more salsa into the jar. Wipe rim with a damp paper towel. Center metal lid on the jar. Secure the lid with a metal band. Twist on only to "finger tip tight." Do not over tighten.
  14. Using canning tongs, lower the jars into the water bath canner. The water should cover the jars by 2-inches. Process for 15 minutes, adjusting for altitude as needed. When the time is up, carefully remove the jars and place on a towel-covered counter. Allow to cool undisturbed for 24 hours.
  15. After 24 hours, check that jars have sealed. The lid should not flex up and down when center is pressed. If any jars did not seal, store those jars in the refrigerator and eat within one week.
  16. Remove the metal bands, wipe down the jars, and label. Store the salsa in your pantry, out of direct sunlight.


Gluten-Free Tomato Pie

Aug 27, 2016 · 1 Comment

Unbaked gluten-Free tomato pie topped with shredded cheese.

If you have a gluten-free pie crust in the freezer, this tomato and ricotta pie takes only minutes to make. If you don’t have a pie crust on hand, make one. This pie is worth it!

Unbaked gluten-Free tomato pie topped with shredded cheese.

Gluten-Free Tomato Pie: The Crust

Gluten Free Pie Crust pressed into pan.

A pie is only as good as its crust.

Elizabeth Barbone

A good pie crust is a thing of beauty. All those flaky layers holding a delicious filling. I mean, I love pie crust so much, I make “cookies” from the darn thing.

For this pie, use a standard pie crust. You don’t need anything fancy. (Here’s my guide on how to make gluten-free pie crust. I used the recipe for a single crust at the bottom of the page.)

If you have a favorite gluten-free pie crust mix, go ahead and use it. You can even pick up a premade frozen gluten-free pie crust at some grocery stores.

No matter what recipe you use, you want to blind bake the crust. This step keeps the crust nice and flaky since the filling for a tomato pie is somewhat wet.

Some methods for blind baking pie crusts call for lining the crust with foil and then filling it with beans.

You don’t need to do this. I find filling the crust with  beans can make a gluten-free crust heavy. Just prick the crust a few times with a fork and you’re good to go.

Gluten-Free Tomato Pie: The Filling

Apologies to my dairy-free friends, this gluten-free tomato pie can’t be made dairy-free. (I’m sorry!) It uses three cheeses: ricotta, Parmesan, and mozzarella. (Yes. Three cheeses. 🙂 )

While that sounds like it might be heavy, I promise it isn’t. Thanks to two eggs, the filling bakes up as light and creamy.

Let me tell you, it’s really easy to eat two slices of this pie. Really easy. 

Gluten-Free Tomato Pie: The Tomatoes

Colorful tomatoes in a pint.

Before you make this recipe, you need to promise me one thing: you will only use vine-ripened, summer tomatoes. The entire success of the recipe depends on it.

No hard-as-rocks supermarket tomatoes.

No white-inside tomatoes.

You want flavorful, summer tomatoes. If you grow your own, great! If you don’t, pick up some at the local farmers’ market. If they have heirloom tomatoes, get some. Those are always extra delicious!

The other ingredient that makes a big impact is fresh basil. If you don’t grown your own, pick some up at the store. It’s totally worth it.

Gluten-Free Tomato Pie: Putting It All Together

This tomato pie comes together in only a few minutes. While the crust bakes, I mix together the filling and slice my tomatoes.

After the crust bakes, all you need to do is spread the filling into the pie, top with tomatoes, and bake. In about 20 minutes, you’ll have a perfect summer tomato pie that’s begging to be finished with a sprinkle of fresh basil.

I like to serve this with a large salad and a glass of something bubbly while I enjoy the waning days of summer.

Shop the Recipe

Links listed below are affiliate links. GlutenFreeBaking.com earns a commission if you use them to shop.

Mixing Bowls
Gluten-Free Pie Mix
Pie Pan
Cooling Rack

Unbaked gluten-Free tomato pie topped with shredded cheese.
Print

Gluten-Free Tomato Pie

Be sure to use ripe summer tomatoes in this gluten-free tomato and ricotta pie. Without flavorful tomatoes, the pie just isn't the same.
Prep Time 15 minutes
Cook Time 40 minutes
Total Time 55 minutes
Servings 6 servings
Author GlutenFreeBaking.com Elizabeth Barbone

Ingredients

  • 1 9-inch single gluten-free pie crust rolled out and in the pan
  • 1 cup whole milk ricotta cheese (8 ounces; 227 grams)
  • 1/2 cup + 1 Tablespoon freshly grated Parmesan cheese (1 3/4 ounces; 50 grams)
  • 2 large eggs (about 3 ounces; 100 grams)
  • 1 teaspoon dried basil
  • 1/2 cup grated mozzarella, plus 2 tablespoons more for topping, if desired (2 ounces; 57 grams)
  • 2 large tomatoes cut into 1/4-inch thick slices OR one cup grape tomatoes, halved (about 1 pound; 453 grams)
  • 5-6 leaves fresh basil

Instructions

  1. Prepare the Crust: Preheat oven to 400 degrees F.
  2. Poke the bottom of the crust with a fork a few times. Chill crust for 15 minutes.
  3. Bake until golden brown, about 15 minutes.
  4. Make the filling: Stir together the ricotta, 1/2 cup Parmesan, eggs, and basil until smooth.
  5. Place the crust on a rimmed baking sheet. Spread the filling into the crust. Top with 1/2 cup grated mozzarella. Place tomatoes onto the cheese, pressing down lightly. Sprinkle with remaining cheese, if desired.
  6. Bake until set and bubbling, about 20 minutes.
  7. Allow the pie to cool for 10 minutes before serving.
  8. Store wrapped leftovers in the refrigerator for up to three days.


Gluten-Free Zucchini Bread

Aug 12, 2016 · 8 Comments

Gluten-free zucchini bread cooling on a wire rack.

Gluten-free zucchini bread is one of the best parts of summer! This recipe makes two spicy and moist loaves. Eat one now and freeze one for later—or share one with a friend, if you can bring yourself to part with it. 

Gluten-free zucchini bread cooling on a wire rack.

Thank goodness for flops! They make success so much sweeter! Take this zucchini bread, for example. The first time I tried the recipe, I used a commercial gluten-free flour blend. The loaves came out of the oven looking great. I couldn’t wait to cut a a slice.

Then I cut a slice.

My heart sank. The interior was gummy. Really, really gummy. Have you ever had that happen with gluten-free baked goods? They look great but the texture is off? This was one of those times.

Normally I don’t toss a flopped recipe. This one was so bad that it had to hit the bin. I knew what was wrong: the blend contained too much xanthan gum–and probably too much tapioca starch. See, zucchini contains a ton of moisture. And xanthan gum holds on to moisture like nobody’s business. When the loaf baked, the moisture got trapped in the loaf, leaving me with a gummy loaf of zucchini bread.

There was a simple solution for this problem: control the amount of xanthan gum in the recipe. I mixed up a simple blend of white rice flour and cornstarch with just enough xanthan gum to hold everything together. The result was AMAZING. I joked on Facebook that I planned to post the recipe with this intro: Oh.my.god. This is SO FRIGGIN’ GOOD. Actually, no, that’s not right. I’m sorry. This bread is GREAT. Go make it. Now.

The loaf turned out spicy and moist but not gummy at all. It’s one of those recipes you’d never guess was gluten-free.

(BTW, Just to be clear, I don’t hate all gluten-free flour blends. In fact, I really like Bob’s Gluten-Free Baking flour. I’ve used it for a gluten-free chocolate chip cookie recipe and gluten-free blueberry muffins. It’s just that in some cases, like this one, an all-purpose flour blend struggles to produce something with really good texture. If I’m going to spend my time baking, I want an awesome result.)

Here’s how I made it!

Gluten-Free Zucchini Bread: Step-by-Step

Box grated covered with zucchini.

Start by grating two small-to-medium zucchini. (You need one pound of zucchini.) Try to avoid using a huge zucchini because the seeds in those are big and bitter. If all you have are giant zucchini from your garden, cut it in half, and scrape out the seeds before using.

Drying shredded zucchini for gluten-free zucchini bread.

Since zucchini contains so much water, it’s best to wring it out before using it in zucchini bread. If the zucchini is too wet, you risk getting a soggy or gummy loaf of bread, even if everything else in the recipe is perfect.

After grating your zucchini, put it on a clean towel. Wrap the towel around the zucchini and squeeze out the liquid. You’ll be surprised how much comes out! Let the grated zucchini sit while you mix up the batter.


Flour for gluten-free zucchini bread.

Inspired by the simple flour blend used in my gluten-free pumpkin bread, I used a blend of white rice flour and cornstarch for this bread. If you want a whole grain flour, try my whole grain gluten-free zucchini bread recipe or replace the white rice flour with sorghum flour.  And if corn doesn’t work for you, go ahead and use potato starch in the recipe. I recommend staying away from tapioca starch for this one since it might turn things gummy when combined with the moisture-rich zucchini.

Since zucchini bread should be a spicy affair, I also added ground cinnamon, ginger, and cloves to the flour blend. Oh my goodness! The kitchen smelled so good!

Gluten-free zucchini bread batter being mixed.

In went the eggs, oil, and apple juice. Confession: I mixed this batter by hand. Unless you are looking for a workout, I don’t recommend it. The recipe makes two loaves and about halfway through, I wished I’d pulled out the electric hand mixer.

Grated zucchini being added to gluten-free zucchini bread batter.

The star of show: the zucchini. Even though you’ve wrung it out to remove excess moisture, you’ll notice when you stir in the zucchini, the batter loosens right away. It’s kind of neat!

I like my zucchini bread plain. If you want to add raisins or chopped nuts (or both!) this would be the time to stir them in. Some folks even add chocolate chips to their zucchini bread. Now that I think about it, that sounds kind of awesome. Hmmm…

Gluten-free zucchini bread batter in two loaf pans.

Divide evenly (or as evenly as you can by eyeballing) between two 9 by 5-inch loaf pans. (Actually, the pans I use are 8.5 x 4.5 but 9×5 work just fine.)

I have to say that I’m in love with my Chicago Metallic Pans.(affiliate link) The sides are nice and straight; so loaves come out looking really nice. Good bakeware is the best!

Gluten-free zucchini bread baking in oven.

Bake. This is the best/worst part. The loaves take about an hour to bake and the house smells so good that it’s hard to wait for them to finish baking. It’s worth it, though. I promise!

Two slices of zucchini bread on paper napkin.

Yum! The loaf bakes up nice and dense but not heavy or gummy. If you like spice cake, you’ll love this loaf!


Gluten-free zucchini bread.
5 from 3 votes
Print

Gluten-Free Zucchini Bread

Loaded with spices, this recipe gluten-free zucchini bread makes two loaves. Enjoy one now and put one in the freezer for later! Or share one with a friend!
Ty to select small to medium zucchini for this loaf. If all you have on hand is a large, overgrown zucchini, split it in half and scrape out the seeds before grating. The seeds in large zucchini tend to be tough and bitter.
Course quick bread
Cuisine Gluten-Free
Prep Time 15 minutes
Cook Time 50 minutes
Total Time 1 hour 5 minutes
Servings 2 8x4 inch loaves
Author Elizabeth Barbone

Ingredients

  • Gluten-free non-stick cooking spray
  • 1 pound (2 small-medium) zucchini, grated (3 to 4 cups) (see note above)
  • 300 grams (1 1/2 cups) granulated sugar
  • 283 grams (2 1/2 cups) white rice flour
  • 57 grams (1/2 cup) cornstarch
  • 1 tablespoon ground cinnamon
  • 2 teaspoons baking soda
  • 1 1/2 teaspoons salt
  • 1 teaspoon xanthan gum
  • 1 teaspoon ground ginger
  • 1/4 teaspoon ground cloves
  • 4 large eggs
  • 3/4 cup vegetable oil
  • 1/4 cup apple juice or water
  • 1 cup raisins, optional
  • 1 cup chopped walnuts or pecans, optional

Instructions

  1. Preheat oven to 350 degrees F. Grease two 9x5-inch baking pans with nonstick cooking spray.
  2. Place grated zucchini on a clean dishtowel. Fold towel around zucchini and twist to remove excess liquid. Set zucchini aside.
  3. Whisk together sugar, white rice flour, cornstarch, cinnamon, baking soda, salt, xanthan gum, ginger, and cloves in a large mixing bowl. Add eggs, oil, and apple juice. Blend until smooth with a handheld mixer or whisk. Batter will be thick. Add zucchini. Fold in with a spatula. Add raisins and nuts, if using. Stir just to combine.
  4. Divide evenly between prepared pans.
  5. Bake until golden brown, about 50 minutes. A cake tester inserted into the center of the loaf should come out clean.
  6. Remove pans from the oven and place on a wire rack. After five minutes, remove bread from pans and place directly on the wire rack to cool.
  7. Store bread wrapped tightly in plastic wrap on the counter for up to four days. Freeze bread, wrapped first in plastic wrap and again in aluminum foil, for up to three months. Allow bread to thaw on the counter.


Corn-Free Powdered Sugar: Step-by-Step with Recipe

Jul 28, 2016 · 13 Comments

Sifting corn-free powdered sugar.

You only need three things to make corn-free powdered sugar: granulated sugar, tapioca starch, and a high-powered blender.

Corn-free powdered sugar in glass bowl.

Corn sneaks into all sorts of unexpected things, like powdered sugar. If you have a corn allergy or are avoiding grains, this comes as decidedly unsweet news.

The reason powdered sugar contains cornstarch is simple: it keeps the sugar from caking. There are a few brands of corn-free powdered sugar on the market but they can be hard to find.

Thankfully, as with paleo baking powder, it’s easy to make at home. From start to finish, it’ll take about one minute. One minute. Not bad, eh?

Corn-Free Powdered Sugar: Step-by-Step

To make powdered sugar at home, you really need a high-powered blender or food processor. If your blender struggles with ice and frozen fruit, it probably won’t work. I use my to make powdered sugar. I’m sure a Vitamix would also work. (I’m not familiar with other brands.)

Granulated sugar in glass bowl on digital scale. Display reads 7 ounces.

First up, sugar. Regular granulated sugar is all we need. Nothing special. (Note: if you have a plastic jar on your blender or food processor, granulated sugar might scratch during blending.)

Tapioca starch on a scale. Digital display reads 1/4 ounce.

Next up: tapioca starch! Like cornstarch, tapioca starch will keep our powdered sugar from caking. And, I think, makes for a better powdered sugar.

Tapioca starch absorbs liquids faster, and a lower temperature, than cornstarch. This means that it makes smooth and silky icings and buttercream. And, in my opinion, I think it tastes less chalky than cornstarch-based powdered sugar. But that’s just a personal taste-thing. When you try it, let me know what you think.

Since tapioca starch absorbs liquids so quickly, it’s prone to clumping after it has sat around a bit. So be prepared to sift corn-free powdered sugar before using.

Corn-free powdered sugar in blender.

Place the granulated sugar and tapioca starch in your blender. Blend the sugar and tapioca starch together until powdery, about 30 seconds.

Corn-free powdered sugar in blender with lid off.

Seriously. That took 30 seconds!

Lid of blender covered with corn-free powdered sugar.

How pretty is that? (True confession: it’s hard to get that sugar off the lid and into the bowl. I don’t even bother. I just rinse it off when cleaning. )

Sifting corn-free powdered sugar.

Sift to remove any clumps.

Corn-free powdered sugar in glass bowl.

Done!

Corn-Free Powdered Sugar: Best Uses and What to Avoid

Thanks to our friend tapioca starch, corn-free powdered sugar makes excellent icing and buttercream.  The smooth tapioca starch granules swell and make for a really smooth icing. In fact, it’s my favorite powdered sugar to use in buttercream icings.

That’s the upside.

Now the downside! Since tapioca starch loves to suck up moisture so much, it will dissolve quickly when dusted onto cakes, desserts, and berries. How quick? Under ten minutes.

If you want to dust something with corn-free powdered sugar, do so right before serving and expect the sugar to dissolve pretty fast.

Shop the Recipe

The following links are affiliate links. GlutenFreeBaking.com earns a commission when you use them to shop.
BlendTec
Vitamix
Ninja Blender
Sifter

Lid of blender covered with corn-free powdered sugar.
5 from 2 votes
Print

Corn-Free Powdered Sugar

I recommend using superfine sugar to make homemade powdered sugar. If you can't find it, use traditional granulated sugar and blend it longer.
Prep Time 10 minutes
Total Time 10 minutes
Author GlutenFreeBaking.com Elizabeth Barbone

Ingredients

  • 1 cup super-fine sugar or tradtional granulated sugar (7 ounces; 198 grams)
  • 1 tablespoon tapioca starch (3/4 ounce; 22 grams)

Instructions

  1. Combine sugar and tapioca starch in a high-powered blender. Starting at low speed, increase the power until you reach the blender’s highest speed. Blend until the sugar is powder-fine, about 30 seconds. Sift to remove any remaining lumps.
  2. Store powdered sugar in an airtight container. Sift before using.

  • « Go to Previous Page
  • Page 1
  • Interim pages omitted …
  • Page 7
  • Page 8
  • Page 9
  • Page 10
  • Page 11
  • Interim pages omitted …
  • Page 20
  • Go to Next Page »

Primary Sidebar

Get Recipes Delivered to Your Inbox! (Free Weekly Newsletter!)


Elizabeth Barbone

I'm Elizabeth. Welcome to GlutenFreeBaking.com --- a judgment-free baking space. Here you'll find easy recipes, product reviews, and other good stuff that makes gluten-free living easy and a lot more fun!

Read More About Elizabeth →

  • Facebook
  • Instagram
  • Pinterest

Foods You Miss the Most

  • A stack of gluten-free pancakes topped with maple syrup and butter on a plate.
    The Best Gluten-Free Pancakes
  • Gluten-free chocolate chip cookies on a cooling rack.
    Gluten-Free Chocolate Chip Cookies
  • Loaf of Baked Gluten-Free Sandwich Bread on Red Cutting Board.
    How to Make the Best Gluten-Free Sandwich Bread: An Easy Recipe for Everyone!
  • Gluten-free flour tortillas on plate.
    How to Make the Best Gluten-Free Flour Tortillas

Footer

↑ back to top

Terms

  • Privacy Policy
  • Terms & Conditions
  • Accessibility Statement

Follow Us

  • Facebook
  • Instagram
  • Pinterest

About

  • Contact
  • About

Copyright © 2025 Gluten-Free Baking