• Skip to primary navigation
  • Skip to main content
  • Skip to primary sidebar
Gluten-Free Baking logo
  • Home
  • Recipes
  • About
    • About Me
    • Contact
    • My Cookbooks
    • Work with Me
menu icon
go to homepage
  • Home
  • About
  • Recipes
  • Contact
    • Facebook
    • Instagram
  • search icon
    Homepage link
    • Home
    • About
    • Recipes
    • Contact
    • Facebook
    • Instagram
  • ×
    Home

    Gluten-Free Cranberry Orange Bread

    Gluten-free cranberry bread in pan.

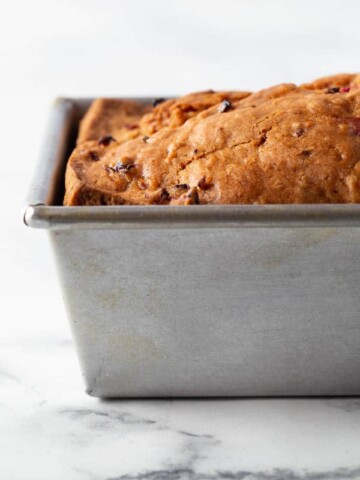
    Easy gluten-free cranberry bread. Moist. Tender. Dairy-free. 

    Slice of gluten-free cranberry bread on a plate.

    What does this bread taste like?

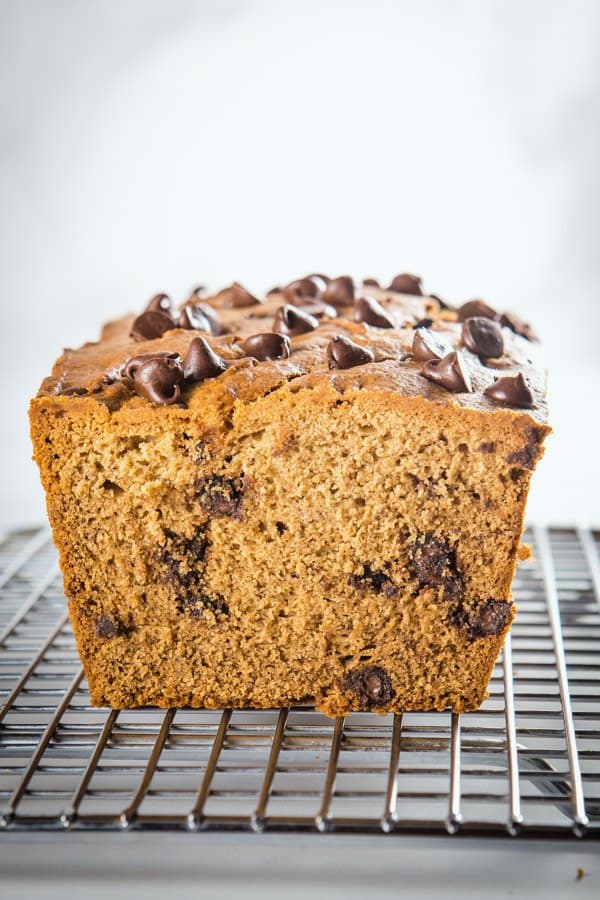
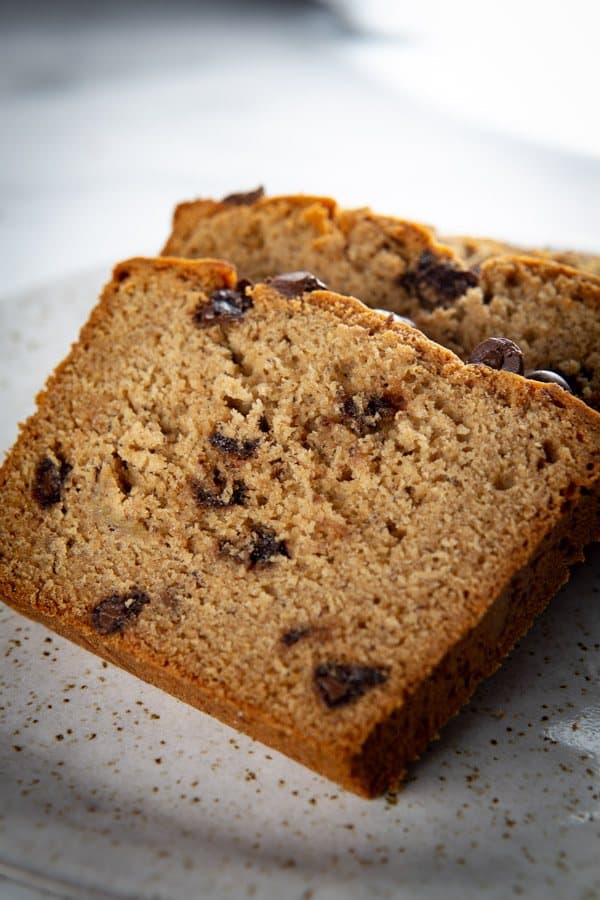
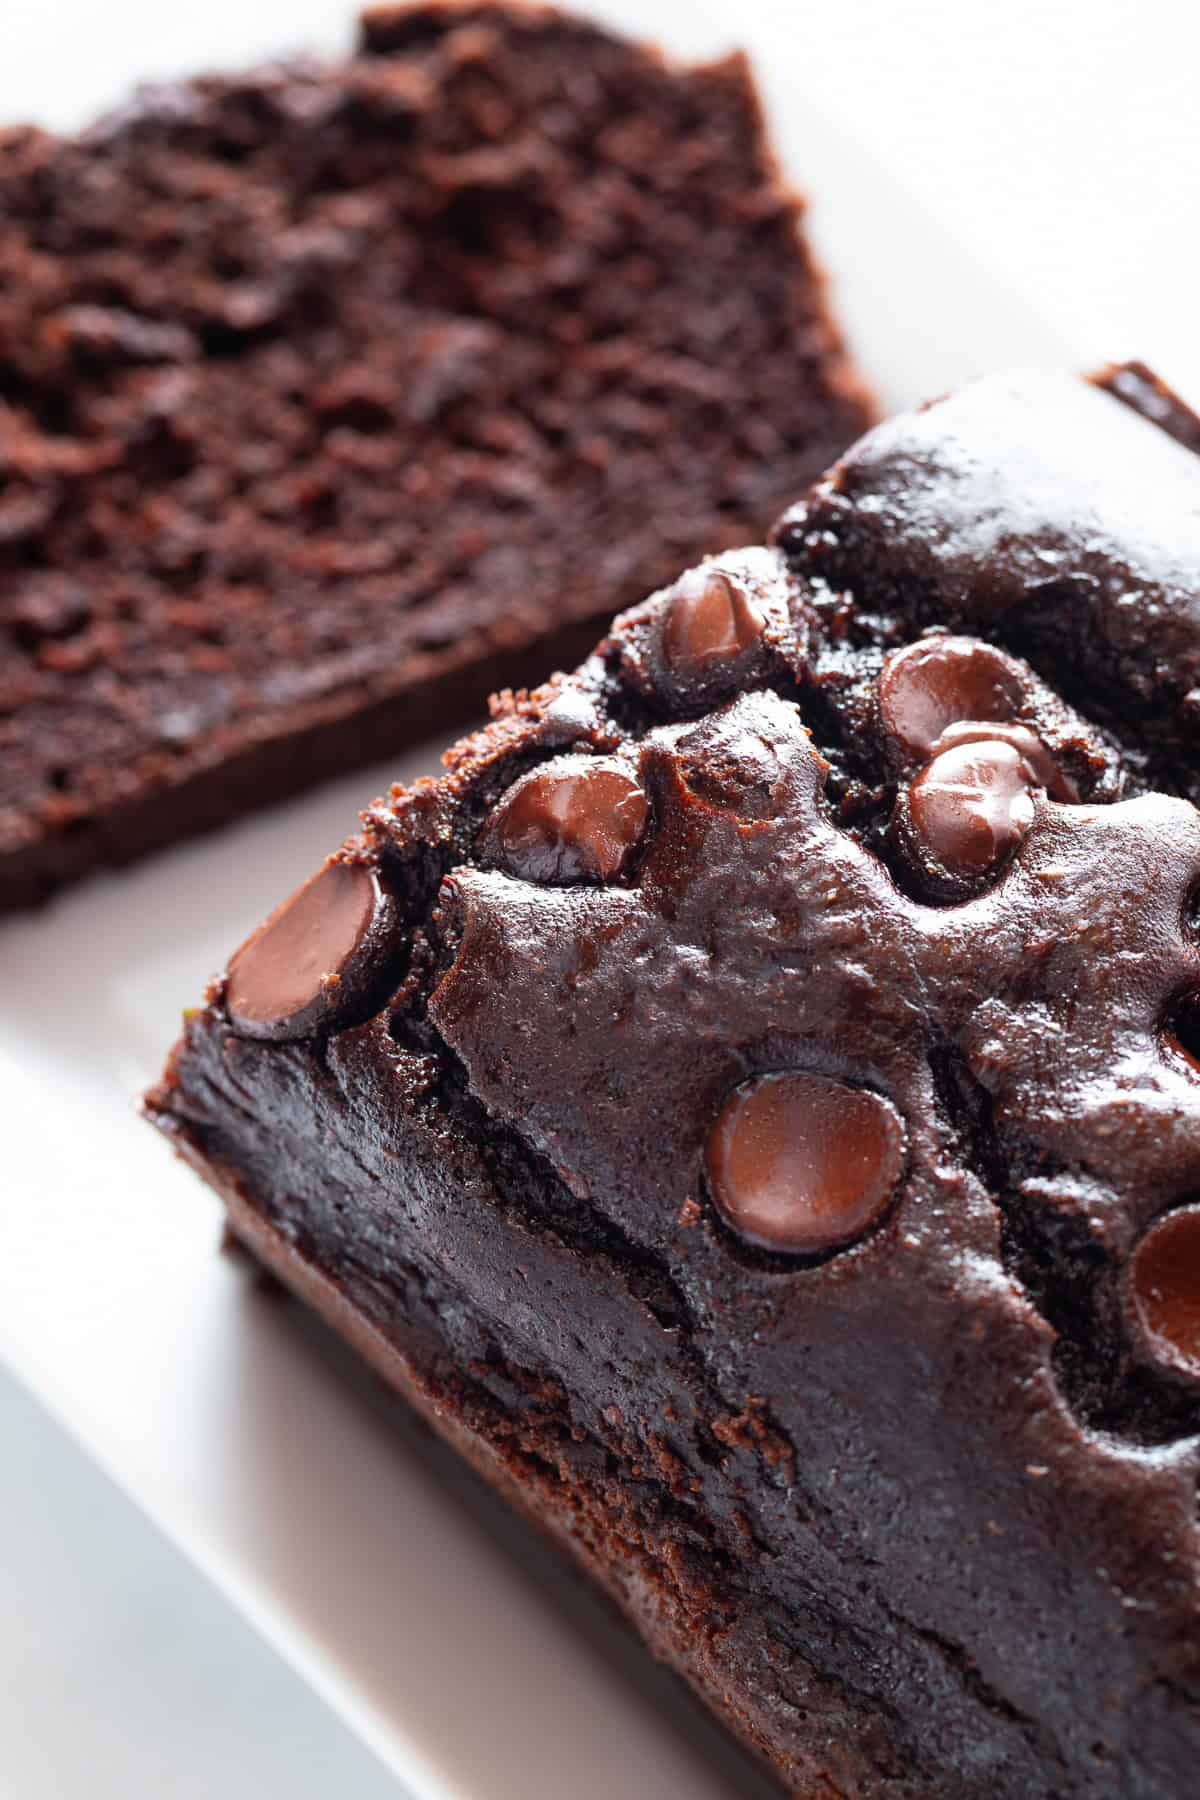
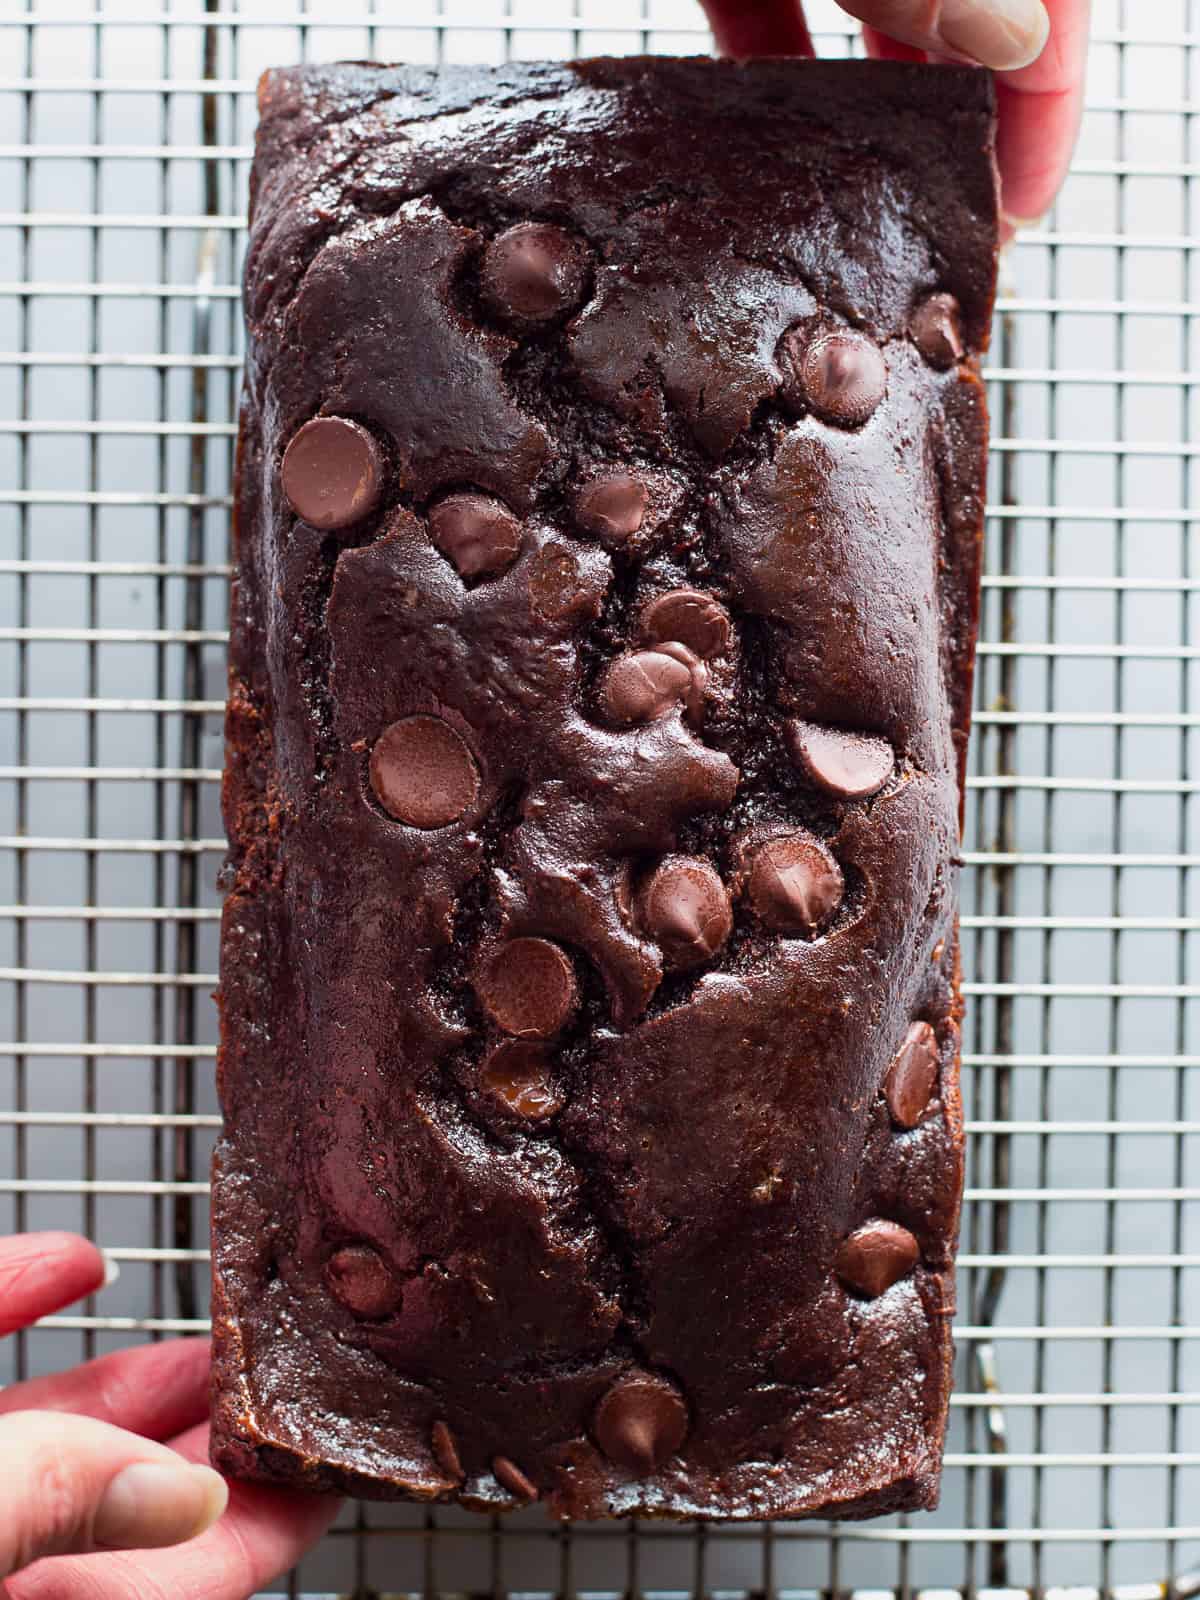
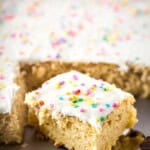
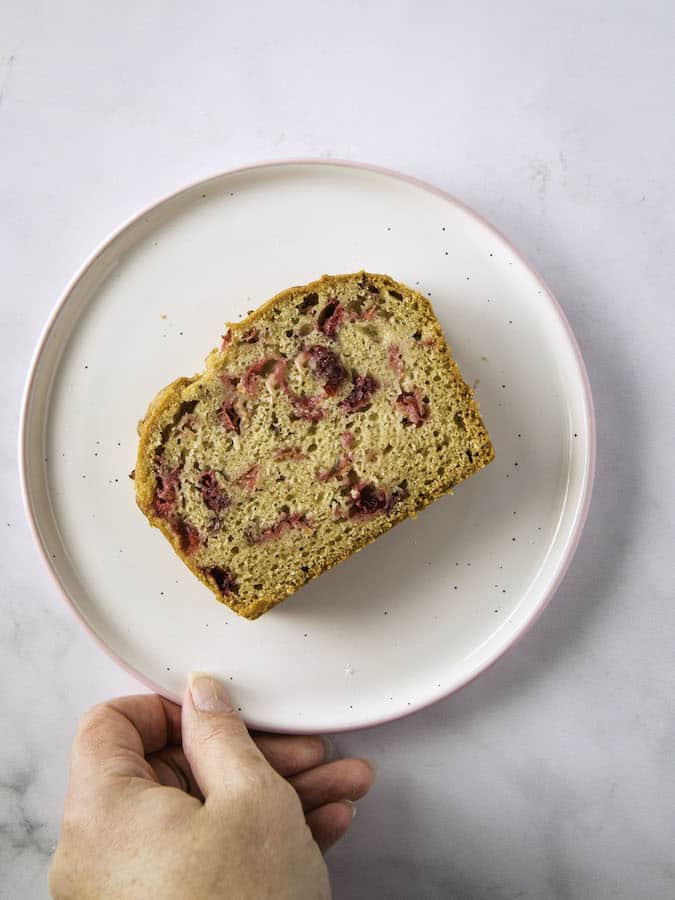
    This recipe makes a pleasantly sweet bread with a gentle tartness from the fresh cranberries and a hint of orange flavor. The texture is a cross between a cake and a muffin. 

    What you’ll love about this gluten-free cranberry bread.

    • Easy to make. No electric mixer required! You can stir everything together in a large bowl. (Of course, if you’d like to use an electric mixer, go for it.)
    • It’s moist, not gummy. Some gluten-free quick breads tend to taste gummy. Not this one! It bakes up dense and moist without any hint of gumminess.
    • It’s loaded with cranberries. You don’t have to go looking for the cranberries in this bread; it’s loaded with them.
    • Not too sweet—or too greasy. If you’ve made either my gluten-free zucchini bread or gluten-free pumpkin bread, you know that I like quick breads that are pleasantly sweet and moist but not overly sweet or oily. This bread fits the bill. It’s sweet enough to offset the tartness from the cranberries but not so sweet that you feel like you’re eating cake.

    How to Make Gluten-Free Cranberry Bread

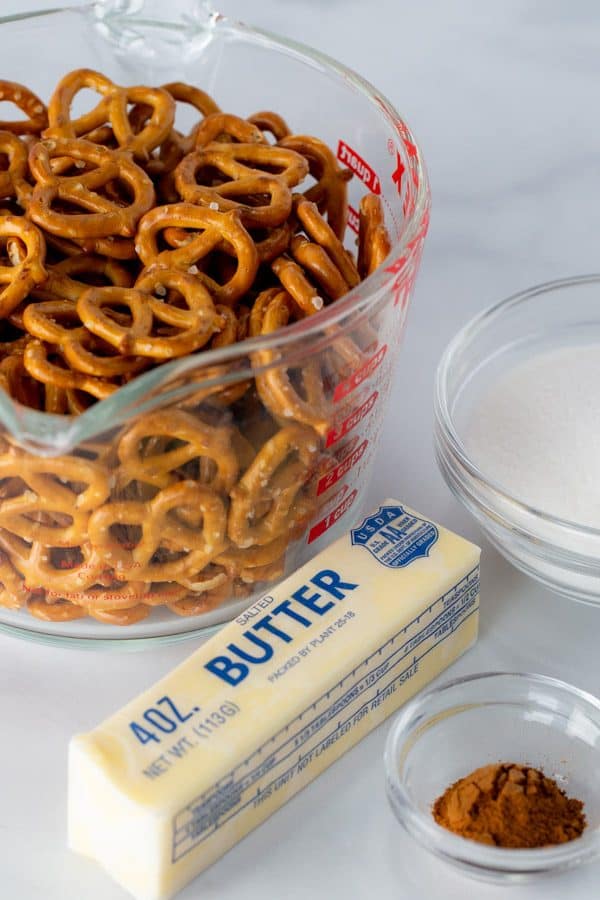
    • Chop the cranberries. You can do this by hand using a large knife and a cutting board or you can use a food processor. Either way, you want the cranberries to be coarsely chopped.
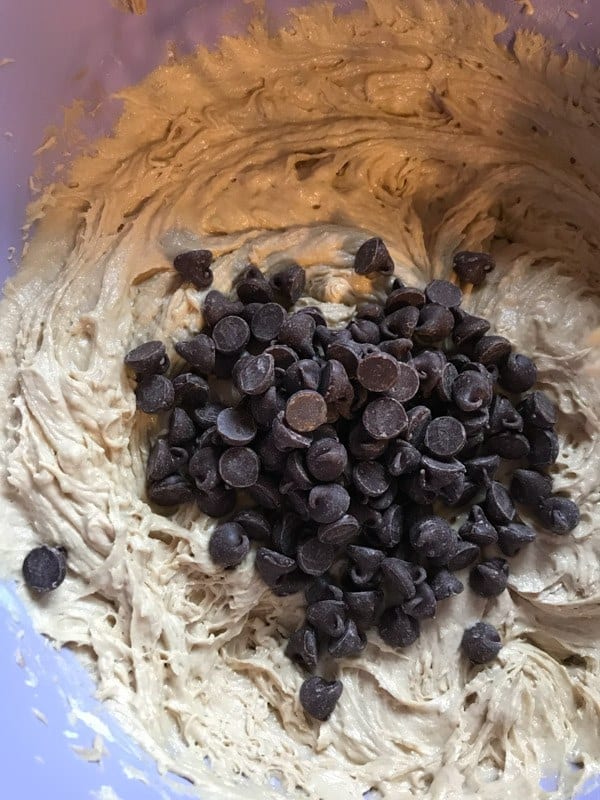
    • Make the batter. Whisk together the dry ingredients (flour, sugar, baking powder, etc.) in a large bowl and then add the wet ingredients. Stir until the batter is smooth.
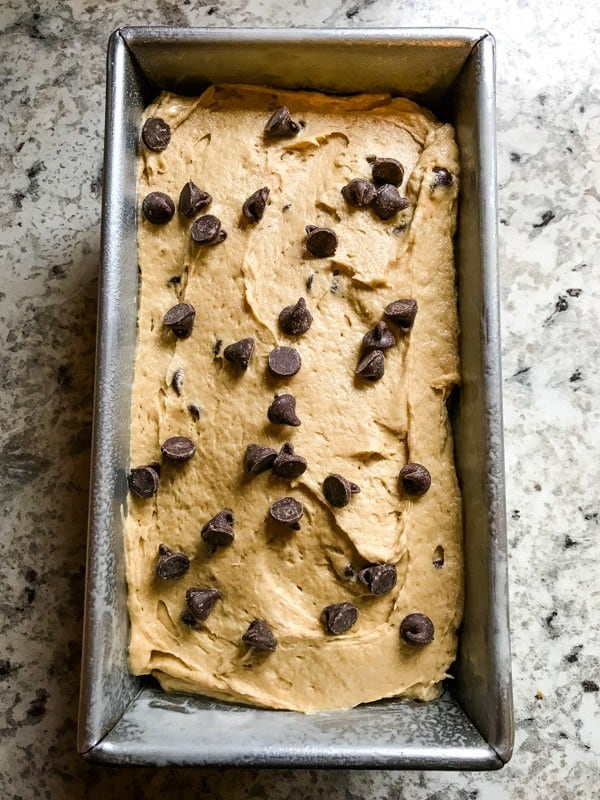
    • Add a little batter to the pan. To prevent the cranberries from sinking to the bottom of the pan, spread a little batter, about 1/2 cup into a greased baking pan. This step is totally optional. If you don’t care if some cranberries sink, skip it.
    • Stir in the cranberries. Gently stir the chopped cranberries into the batter. Look for them to be evenly spread throughout the batter but stop before the batter turns bright pink.
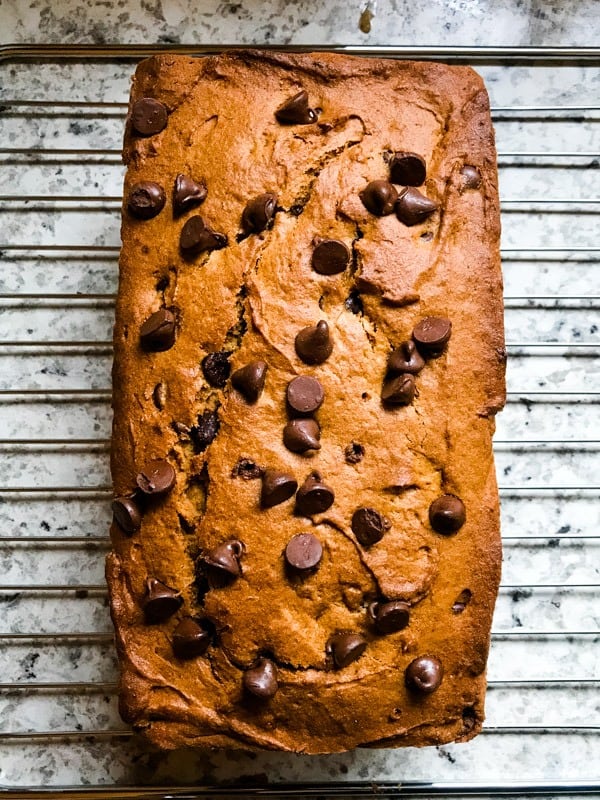
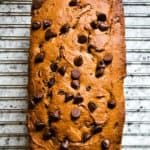
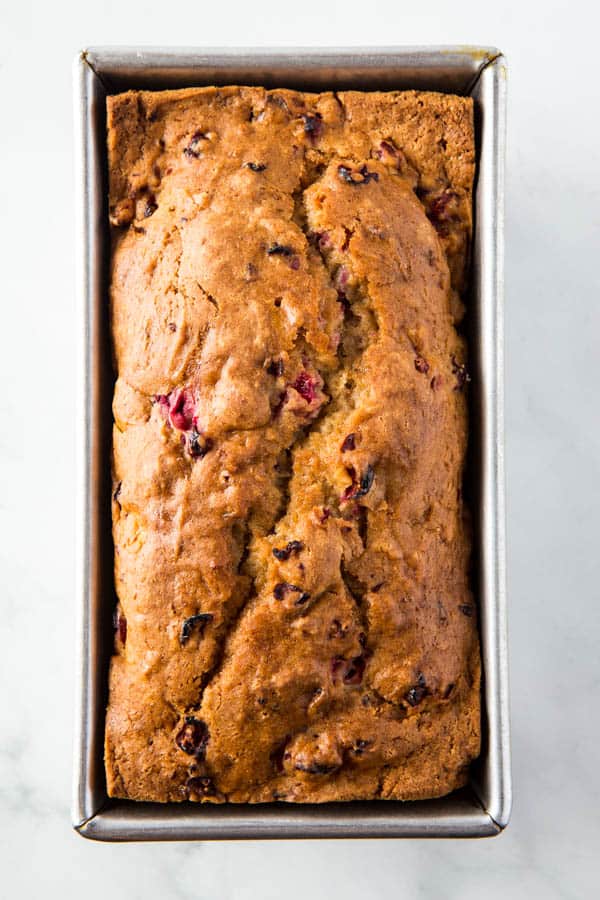
    • Bake. Spread the batter into the pan and bake until set. Like most gluten-free quick breads, this cranberry bread takes almost an hour to bake.
    • Take the temperature. The best way to ensure the loaf is done is to take its temperature. Use an instant-read thermometer to check that it’s reached 205 degrees F.
    • Cool and slice. I know it’s hard but you want to make sure the loaf cools before you slice it. This gives the bread time to set up. If you slice it too soon, it will appear gummy even though the loaf is fully baked.
    Baked loaf of gluten-free cranberry bread in pan.
    Easy Gluten-Free Cranberry Orange Bread. Perfect for Thanksgiving.

    FAQs: Gluten-Free Cranberry Bread

    What’s the best flour to use for gluten-free cranberry bread?

    I tested this recipe with Bob’s Red Mill Gluten-Free 1:1 Baking Flour and it’s the flour I recommend you use for this recipe.

    If you want to replace the flour with a different blend, be sure it contains either xanthan or guar gum or the recipe might not work. As always, using a different gluten-free flour blend can alter the recipe even if it does contain a gum.

    Can I use dried cranberries?

    Yes but…dried cranberries are sweeter than fresh cranberries. You might want to cut back on the sugar by a tablespoon or so.

    Can I use this recipe for cranberry muffins?

    Yes! This recipe for cranberry bread can be used for muffins. Line muffin pan with paper liners or grease the cavities generously with nonstick cooking spray or oil. 

    Gluten-free cranberry bread in pan.
    5 from 12 votes
    Print

    Gluten-Free Cranberry Orange Bread

    Moist and tender gluten-free cranberry orange bread. Pleasantly sweet, loaded with cranberries, and a hint of orange.

    Prep Time 15 minutes
    Cook Time 55 minutes
    Total Time 1 hour 10 minutes
    Servings 12 slices

    Ingredients

    • 1 ½ cups fresh cranberries (5 ⅓ ounces; 150 grams)
    • 2 cups gluten-free flour (10 ounces; 285 grams)
    • ¾ cup granulated sugar (5 ¼ ounces; 150 grams)
    • 1 ½ teaspoons baking powder
    • 1 teaspoon ground cinnamon
    • 1 teaspoon salt
    • ½ teaspoon baking soda
    • ¾ cup orange juice (6 ounces; 170 grams)
    • ⅓ cup vegetable oil (2 ⅓ ounces; 65 grams)
    • 1 large egg (2 ounces; 56 grams)
    • 1 teaspoon vanilla extract

    Instructions

    1. Heat Oven. Adjust oven rack to middle position. Preheat oven to 350℉ Grease a 8 ½ x 4 ½ inch loaf pan with nonstick cooking spray.

    2. Chop Cranberries. Chop cranberries coarsely with either a chef’s knife or in the bowl of a food processor. If using a food processor “pulse” the berries a few times until roughly cut. Set the chopped berries aside.

    3. Prepare Batter. Whisk together the gluten-free flour, granulated sugar, baking powder, cinnamon, salt, and baking soda in a large bowl. Add the orange juice, vegetable oil, egg, and vanilla extract. Mix until a smooth batter forms.

    4. Spread about ½ cup batter into the bottom of the prepared pan. Stir the chopped cranberries into remaining batter. Smooth batter into pan.

    5. Bake Bread. Bake until a cake tester inserted into the loaf comes out clean, about 55 minutes.

    6. Cool on a Rack. Cool bread in pan for 15 minutes and then turn out onto a wire rack to cool completely.

    7. Cut and Enjoy. Cut bread into slices with a serrated knife. Store bread, wrapped, on the counter for up to four days or freeze up to three months.

    Gluten-Free Peanut Butter Banana Bread

    Gluten-Free Peanut Butter Banana Bread on Cooling Rack.

    Gluten-free banana bread with a peanut butter twist. Chocolate chips optional.

    Gluten-Free Peanut Butter Banana Bread on Cooling Rack

    It’s no secret that I love gluten-free banana bread. And gluten-free banana muffins. So I don’t know why it took me so long to create a recipe for gluten-free peanut butter banana bread.

    If you love peanut butter-banana sandwiches, this bread is for you! (And if you’ve never had a peanut butter banana sandwich, what are you waiting for? Go make a loaf of gluten-free sandwich bread, grab some peanut butter and a ripe banana and you’re good to go.)

    How to Make Gluten-Free Peanut Butter Banana Bread

      1. Use Really Ripe Bananas. (And mash ’em)

        You need really ripe bananas for this recipe. Mash them in a small bowl (it’s easy to do this with a fork.).

      2. Whisk together the dry ingredients. (don’t skip this step!)

        Start by whisking together the gluten-free baking flour, baking soda, baking powder, and salt. This is a quick bread, meaning it’s leavened with baking powder and baking soda rather than yeast. So it’s important to evenly distribute those leaveners evenly throughout the flour mixture. It ensures an even rise while baking.

      3. Make the Batter
        Gluten-free peanut butter banana bread batter with chocolate chips on top.

        Beat together brown sugar, peanut butter, and softened butter until it’s light and fluffy. This step captures air and helps the bread to rise. Stop the mixer once or twice and scrape the sides and bottom of the bowl. You’ll see a thick paste of butter and sugar. If that paste goes into the batter, it can cause the loaf to be flat and dense; instead of tall.

        Once the mixture is light and airy, stop the mixer and the eggs. Then beat until the mixture is light and fluffy. At first, it might look curdled. After a minute or so, it should whip up and look like a light frosting.

        Again, just as you did before, stop the mixer and scrape down the bottom and sides of the bowl.

        Add the flour mixture and mashed bananas.

        Stop the mixer and add the whisked flour mixture and mashed bananas. There’s no need to add the flour in stages. Turn the mixer on to low at first to prevent the flour from flying out of the bowl. Then increase the mixer speed to medium-high. Mix until a thick batter forms.

        Use a rubber spatula to scrape the sides and bottom of the bowl. You’ll often find streaks of flour clinging to the bottom of the bow. Stir this flour into the batter with a rubber spatula

        Add the chocolate chips (optional).

        Chocolate chips are a nice addition to this loaf. Stir in about 1/2 cup of chocolate chips. (Or if you really love chocolate, up to one cup.)

      4. Bake
        Gluten-Free peanut butter banana bread batter in pan

        Spread the batter into a prepared pan. The best pan to use for quickbreads is an 8.5×4.5-inch loaf pan. It’s the same pan I use for my gluten-free sandwich bread and gluten-free pumpkin bread. If you don’t have this pan in the house, don’t worry. A 9×5-loaf pan also works. The bread just won’t rise as high.

        While this is called a  “quick bread” because of the baking powder and baking soda used in the batter. It doesn’t bake quickly. The loaf can take a little over an hour to bake. It’s best to take the temperature of the bread to ensure it’s done. Look for an internal temperature of around 205 degrees. If you don’t have an instant-read thermometer, use a small paring knife. Stick it into the loaf. It should come out clean.

      5. Cool 

        Baked gluten-free peanut butter banana bread on cooling rack

        Allow the bread to cool in the pan for about 10 minutes. If you try to remove the loaf from the pan too quickly, it can bread. After about 10 minutes, turn it out onto a wire rack to cool completely.


    Gluten-Free Peanut Butter Banana Bread: The Ingredients

    The Flour

    This recipe was tested with Bob’s Red Mill Gluten-Free 1:1 Baking Flour. Using a different flour might alter the results.

    The Peanut Butter

    It’s best to use traditional peanut butter for this bread. “Natural” peanut butter varies from brand to brand and can sometimes be too oily for baking.

    The Sugar

    Dark brown sugar gives the loaf a deep flavor. If you don’t have any in the house, replace it with granulated sugar or light brown sugar.

    The Bananas

    Be sure to use very ripe but not black bananas. They should be spotty and brown all over.

    Sliced gluten-free peanut butter banana bread on plate.

    FAQs

    Can I replace the egg with an egg-replacer?
    I’m not sure. I haven’t tested the recipe egg-free.

    Can I make this without butter? Yes. Replace the butter with an equal amount of dairy-free shortening.

    Can I make this with a sugar substitute?
    I’m not sure. I don’t bake with sugar substitutes. Sorry!

    Baked gluten-free peanut butter banana bread on cooling rack.
    5 from 4 votes
    Print

    Gluten-Free Peanut Butter Banana Bread

    Gluten-free banana bread with a peanut butter twist. Chocolate chips optional.
    Prep Time 15 minutes
    Cook Time 1 hour 10 minutes

    Ingredients

    • 2 cups Bob's Red Mill 1:1 Gluten-Free Baking Flour (10 ounces/ 280 grams)
    • 1 teaspoon baking powder
    • 1 teaspoon baking soda
    • 1/2 teaspoon salt
    • 3/4 cup lightly packed dark brown sugar (5 1/2 ounces/ 155 grams)
    • 1/2 cup creamy peanut butter (4 3/4 ounces/ 135 grams)
    • 1/3 cup butter, softened (2 3/4 ounces; 75 grams)
    • 2 medium very ripe bananas (about 8 ounces/ 226 grams)
    • 2 large eggs (out of the shell: about 4 ounces/113 grams)
    • 1/2 cup chocolate chips optional (3 ounces/85 grams)

    Instructions

    1. Heat the oven and prepare the pan. Preheat oven to 350 degrees. Spray an 8 1/2 x 4 1/2 inch loaf pan with nonstick cooking spray.

    2. Prepare the batter. Whisk together the flour, baking powder, baking soda, and salt. Set aside.

      Beat together the brown sugar, butter, and peanut butter on medium-high speed until light and fluffy. Stop the mixer once to scrape down the bottom and sides of the bowl.

    3. Add the eggs. Mix until light and fluffy. Stop the mixer once to scrape down the bottom and sides of the bowl. Beat for an additional 30 seconds.
    4. Stop the mixer and add the whisked flour and mashed banana. Turn the mixer to low. When the flour is incorporated, increase the mixer speed to medium. Mix until a thick batter forms. Stop the mixer. Add the chocolate chips. Stir into the batter with a wooden spoon.
    5. Bake the Bread. Spread the batter into the prepared pan. Bake until a cake tester inserted in the center comes out clean, about 70 minutes. (Internal temperature of the bread should be 205 degrees.)

    6. Cool the bread in the pan for 10 minutes and then turn out on a wire rack to cool completely.

    Gluten-Free Cinnamon Sugar Pretzels

    Small pretzel twists coated with cinnamon and sugar.

    Easy gluten-free cinnamon-sugar pretzels. Perfect sweet and salty snack. Easy recipe. Dairy-free option included. 

    Small pretzel twists coated with cinnamon and sugar

    There are easy recipes, like my gluten-free vanilla mug cake. And then there are ridiculously easy recipes, like these gluten-free cinnamon and sugar pretzels.

    These are something I’ve made for so long that I can’t believe I’ve never shared the recipe on the blog. If I’m honest, I don’t really think of this as a recipe. It’s more like, “Throw some gluten-free pretzels into a bowl. Add sugar, cinnamon, and some melted butter. Bake for a bit. Eat by the large handful.” 

    That last part? It’s the most important. Because, friend, this is one of those recipes that people can’t stop eating. (Myself included.)

    How To Make Gluten-Free Cinnamon Sugar Pretzels

    Measuring cup of pretzels. Stick of butter. Bowl of sugar. Small bowl of ground cinnamon.

    1. Buy a bag of gluten-free pretzels. For this recipe, I like Snyder’s of Hanover gluten-free pretzels*. Why? Because they contain less fat (as of this writing, always check labels) than other brands. *Not an ad. I just like them.  
    2. Preheat the oven. You need to bake these pretzels. This step helps the cinnamon-sugar mixture stick to the pretzels. It only takes about 15 minutes but you don’t want to skip it. 
    3. Stir together the cinnamon and sugar. This is the most important step in the recipe. It helps to distribute the cinnamon evenly. If you add the cinnamon and sugar separately, you can end up with some pretzels that have a lot of cinnamon and others that have none.  
    4. Melt the butter. If you don’t include dairy in your diet, or if you don’t have some butter in the house, you can still make this recipe. Replace the melted butter with either dairy-free margarine or vegetable oil. You could use coconut oil but I don’t love the mouthfeel that coconut oil gives the pretzels. If you like coconut oil, go ahead and use it.  
    5. Toss the gluten-free pretzels with the melted butter. Grab a large bowl. You’re going to need it. If you don’t have a large bowl, use a pasta pot. It works in a pinch. Stir until all the pretzels are coated with butter. When they’re coated, they’ll shine. 
    6. Add the cinnamon and sugar. Some folks add the cinnamon and sugar to the melted butter. I hate this. Hate it. Adding the cinnamon and sugar to the melted butter takes this recipe from easy-peasy to a pain in the…well, you know. When you mix the melted butter and cinnamon and sugar, a thick paste forms. It’s almost impossible to get this paste to evenly coat the pretzels. You’re left with pretzels that are coated in gobs of cinnamon-sugar and others that have no coating at all.It’s better to toss the pretzels with cinnamon and sugar after you’ve already coated them with butter. All the pretzels get an even coating of sugary goodness. And you don’t have to swear while making them. Everyone wins. 
    7. Bake. Spread the coated pretzles onto a parchment-lined baking sheet. Bake until the sugar almost melts. This takes about 15 minutes. 
    8. Break apart and serve. Don’t eat the pretzels as soon as they come out of the oven. This is hard. Very hard. But you’ll burn your mouth because the sugar is, what’s the term, freaking hot. Once they’ve cooled a bit, break them up–they tend to stick together during baking. You can pile them into a bowl and serve right away or put them into an airtight container. And since these make great gifts, you can spoon some into a cello bag, tie with a ribbon, and pat yourself on the back. (Don’t forget that last step.)

    Small pretzel twists coated with cinnamon and sugar.
    5 from 1 vote
    Print

    Gluten-Free Cinnamon Sugar Pretzels

    Prep Time 10 minutes
    Cook Time 12 minutes
    Servings 8 servings

    Ingredients

    • 1/2 cup granulated sugar (3 1/2 ounces; 100 grams)
    • 1 1/2 teaspoons ground cinnamon
    • 4 cups gluten-free pretzels (about 7 ounces; 200 grams)
    • 1/4 cup butter or dairy-free margarine, melted (2 ounces; 56 grams)

    Instructions

    1. Preheat oven to 350 degrees Line a rimmed baking sheet with parchment paper.
    2. Stir together granulated sugar and cinnamon in a small bowl.
    3. Stir together pretzels and melted butter in a large bowl. Sprinkle the sugar-cinnamon mixture evenly over the pretzels. Stir to coat the pretzels.

    4. Spread pretzels onto the baking sheet. Bake until sugar bubbles, about 12 minutes. Remove and let pretzels cool on the pan. Don’t eat right away. The sugar is very hot and can burn your mouth. Once the pretzels are cool, break apart.
    5. Store pretzels in an airtight container for up to one week.

    Gluten-Free Chocolate Zucchini Bread Recipe

    Gluten-free chocolate zucchini bread with chocolate chips on top. One slice has been cut from the bread.

    Gluten-free chocolate zucchini bread is moist and rich. Dairy-free and easy-to-make. 

    Gluten-free chocolate zucchini bread with chocolate chips on top. One slice has been cut from the bread.

    I’ve got a question for you! What does zucchini bread taste like? You probably didn’t answer zucchini. 

    Like pumpkin bread, zucchini bread is based on a bland, watery vegetable*. (Yes, pumpkin is rather bland. Don’t believe me? Try a spoonful of pumpkin the next time you open a can.) 

    *Fun fact: botanically speaking, both pumpkin and zucchini are fruits. Since they aren’t sweet, we treat them as vegetables in the kitchen. 

    The point of zucchini bread isn’t to celebrate the flavor of zucchini. It’s usually made for one of two reasons: 1. to use up excess zucchini from your summer garden. 2. nostalgia. Someone in your life made zucchini bread and you liked it. So when summer rolls around, you want to make a loaf. Both of these are excellent reasons to make zucchini bread. 

    Traditional zucchini bread tastes mostly of cinnamon and is often studded with nuts or raisins. And, frankly, when I’m in the mood for a spiced quick bread, I usually make gluten-free pumpkin bread or gluten-free banana bread. 

    But chocolate zucchini bread? Well, that’s a different story.  This is a bread I get excited to make. Chocolate zucchini bread is dense, moist, and, compared to other chocolate cakes, lower in fat. You can eat a slice without it feeling like an overindulgence. 

    The zucchini almost melts during baking and leaves behind a mild vegetable-sweetness that pairs really well with cocoa powder. And the texture, especially for gluten-free quick bread, is soft. There’s not a hint of gumminess in this bread.

    Gluten-free chocolate zucchini bread on a wire rack.

    Ingredients Explained

    Here’s what you’ll need to make this recipe.

    • Zucchini. Make sure your zucchini is fresh-not dried out. Select zucchini that’s about 12-inches long. If you have an overgrown zucchini, slice it in half. Scoop out the seeds, and then grate. There’s no need to remove the seeds from small zucchini.
    • Gluten-Free Flour: To keep things easy, I used Bob’s Red Mill 1:1 Gluten-Free Baking Flour. It makes a bread with a very delicate crumb. If you use your own flour blend or a different brand, be sure it contains xanthan gum for structure. Do not substitute coconut or almond flour for the all-purpose gluten-free baking flour. It won’t work. 
    • Cocoa Powder. Use unsweetened regular cocoa powder-not Dutch-process for this recipe. It works with the baking soda to make the bread rise.
    • Brown sugar. Adds sweetness and a light molasses flavor.
    • Eggs. Give the bread structure. This recipe hasn’t been tested with an egg replacer.
    • Oil. Adds richness.

    How to Make Gluten-Free Chocolate Zucchini Bread

    1. Grate the zucchini. Use in-season zucchini. The bread needs the moisture it contains. To grate, use a box grater or food processor fitted with a grating disk. 
    2. Mix together the dry ingredients in a large bowl. Whisk together the gluten-free flour with the cocoa powder and other dry ingredients. You don’t need a stand mixer for this recipe but you can use one. 
    3. Make the batter. Add the eggs, oil, and zucchini. Stir until the zucchini is coated with batter. At first, the batter might look dry. This is normal. 
    4. Give it a rest. Allow the batter to rest for two minutes. The zucchini gives off liquid during this time. Don’t skip the rest. 
    5. Bake. Spoon batter into a greased pan and bake until set. 
    6. Cool. Cool the bread, set on a wire rack, until cool to the touch. 

    Storage Tips

    Store this bread covered on the counter for up to three days.

    Gluten-Free chocolate zucchini bread freezes really well. 

    After baking, allow the loaf to cool completely. Slice and place parchment paper between the slices. Place the slices into a freezer bag and freeze up to three months. 

    Gluten-free chocolate zucchini bread with chocolate chips on top. One slice has been cut from the bread.
    5 from 24 votes
    Print

    Gluten-Free Zucchini Bread

    Moist and rich, this gluten-free chocolate zucchini bread is an easy-to-make summer classic. Dairy-Free. 

    Prep Time 10 minutes
    Cook Time 35 minutes
    Total Time 45 minutes
    Servings 12 slices

    Ingredients

    • 1 cup Bob's Red Mill 1:1 gluten-free baking flour (4 ¾ ounces ; 138 grams)
    • ¾ cup dark brown sugar (5 ½ ounces; 155 grams)
    • ⅓ cup unsweetened cocoa powder (1 ounce; 28 grams)
    • 1 teaspoon baking soda
    • ¼ teaspoon salt
    • 2 cups grated zucchini, see note (9 ounces; 255 grams)
    • 2 large eggs
    • ⅓ cup vegetable oil (2 ⅓ ounces; 65 grams)
    • 1 tablespoons chocolate chips, optional (⅓ ounce ;10 grams)

    Instructions

    1. Preheat oven to 350℉. Grease a 9×5-inch loaf pan with nonstick cooking spray.

    2. Whisk together gluten-free flour, dark brown sugar, cocoa powder, baking soda, and salt. Break up any pieces of brown sugar with your fingers. Add grated zucchini, eggs, and oil. Stir until a batter forms. Allow batter to rest for two minutes. This allows the zucchini to release a little moisture. It’s an important step. You don’t want to skip it.

    3. Stir the batter one more time to ensure no dry flour clings to the bottom of the bowl. Spread batter evenly into prepared pan. Sprinkle chocolate chips evenly over the top of the pan.

    4. Bake until a cake tester inserted into the center of the loaf comes out with only a few crumbs clinging to it, about 45 minutes.

    5. Place pan on wire rack. Allow bread to cool in the pan. Slide a metal spatula gently around the edges of the pan to loosen. Turn out bread. Slice with a serrated knife. Store zucchini bread, wrapped, on the counter for up to four days. To freeze: Slice bread and place parchment paper between the slices. Place the slices into a freezer bag and freeze up to three months.

    Recipe Notes

    Grated Zucchini

    For small (under 12-inches) zucchini, there is no need to drain or blot. For large zucchini, over, blot to remove excess moisture. 

    Review: Red Lobster’s Gluten-Free Cheddar Bay Biscuit Mix

    Red Lobster Cheddar Bay Biscuit Baked on Sheet Pan.

    Front of Red Lobster Cheddar Bay Gluten-Free Biscuit Mix Box

    When I read that Red Lobster launched a gluten-free version of their popular Cheddar Bay biscuits, I was surprised. This is not a restaurant that’s known for its gluten-free menu. 

    Then I saw that Red Lobster wasn’t making a gluten-free version of their biscuits in their restaurants. No. They created a mix so you can make the biscuits yourself. At home. (As I type this, gluten-free Cheddar Bay biscuits aren’t offered in the restaurant, nor does it sound like Red Lobster has any plans on doing so.)

    That’s…odd? But, still, the mix grabbed my attention. Because I love biscuits the way Oprah loves bread. (I created a recipe for gluten-free Cheddar biscuits a few years ago. Those biscuits, I must say, are pretty darn good.)

    So I headed to the only place selling the mix: Wal-Mart. A box cost me $3.84. The non-gluten-free version of the mix was $1.78. As is often the case, the gluten-free version cost most. Sigh. 

    The Ingredients


    Biscuit Mix

    Rice flour, palm oil, defatted soy flour, leaving (baking soda, sodium aluminum, phosphate, monocalcium phosphate), cornstarch, food starch-modified, whey powder, salt, dextrose, buttermilk, xanthan gum, soy lecithin.

    Herb Blend

    Garlic powder, maltodextrin, salt, onion powder, hydrolyzed soy protein, torula yeast, natural and artificial flavors (maltodextrin, butter oil), corn oil, silicon dioxide (anti-caking agent)

    The ingredients are pretty boring. A blend of rice flour, soy flour, and cornstarch. While the mix does contain milk, soy, and cornstarch, it looks to be egg-free.

    Making and Baking

    Red Lobster Gluten-Free Cheddar Bay Biscuit Back of Box

    The back of the box calls for 1/2 cup shredded cheese. It also includes this note on the bottom: “Some shredded cheddar cheese contains gluten. Be sure to make certain your cheese is gluten-free.”

    Here’s the deal:  I don’t know if gluten in shredded cheese is just a rumor or if there is a brand that uses it. I’ve yet to see one. (That doesn’t mean there isn’t and you should always read labels!) But at this point, I feel like this is a rumor that’s been circulating for years without any proof. I wish someone could name a brand of shredded cheese that uses wheat.  (If you know of one, let me know!)

    I shredded my own cheese for the mix. Why? I like the taste better. Pre-shredded cheese is convenient but I think it’s a bit blah when it comes to taste. So I shred my own. 

    Two biscuits on a white plate. Biscuit on left is labeled "wheat". Biscuit on right is labeled "Gluten-free"

    The mix came together easily. The box says to scoop out the dough in “about 1/4 cup” portions. So I did. And I got…nine biscuits. (My biscuits were a scant 1/4 cup each.) This isn’t the end of the world but it’s a bit annoying. 

    The biscuits took 16 minutes to bake. On the box, we’re directed to “bake until golden brown on top.”Hmm…the bottoms were a lovely golden brown. In fact, if I’d baked them much longer, they might have tipped into being too brown. 

    The top of the biscuit? Not really golden brown at all. 

    The day before I tested the mix, I picked up a 1/2 dozen (NON-gluten-free) Cheddar Bay biscuits at my local Red Lobster. Those babies were nice and golden brown. Look at how they compare to the gluten-free version. 

    I melted some butter, mixed it with “garlic herb blend” (this just smelled like garlic and onion) and slathered it on the hot biscuits. The mix says to melt 1/4 cup of butter. That’s a generous amount of butter for 9 biscuits. So I had a bit leftover. 

    The Taste

    Red Lobster Cheddar Bay Biscuit Baked on Sheet Pan

    These biscuits were very good. Like the ones sold at the restaurant, they were rich–almost a bit too rich, they left grease on my fingers. The garlic herb butter added a really nice flavor. I’d love to mix the packet into the flour mixture before baking. I think this would add a nice even flavor throughout the biscuits. 

    The one thing that surprised me was the mild cheddar flavor. It’s there but it’s not terribly strong. 

    The Texture

    The biscuits were nice and soft. None of that grit that can be present in too many gluten-free baked goods. 

    The bottom of the biscuits provided a nice crunch, while the inside was soft and tender. (And not gummy. Yay!)

    What I liked

    I really liked how easy these biscuits were to make. You add some shredded cheese, a little cold water, stir, and you’re done. I also like the texture and flavor. Did I LOVE the flavor? I can’t say that I did. I found them just a wee bit bland. They were good, not great. 

    What I didn’t like

    The price. The box cost almost $4.00, plus the added expense of having to add your own cheese. This seems a bit pricey for a mix that’s supposed to make 12 biscuits but only made nine. 

    Would I buy these again?

    That’s a solid maybe. While I liked them, they weren’t a total standout for me. Since biscuits are such a treat, I’d rather take a few extra minutes and make mine from scratch. This way I can use butter, instead of the palm oil that’s included in the Red Lobster Mix.  

    Grade: B+

    Red Lobster Introduces a Gluten-Free Cheddar Bay Biscuit Mix

    Baked Cheddar Bay Biscuits in a Basket.

    Red Lobster Is Now Selling Gluten-Free Cheddar Bay Biscuit Mix

    Baked Cheddar Bay Biscuits in a Basket

    Do you miss Red Lobster’s Cheddar Bay biscuits? Well, I’ve got good news and bad news for you. First, the good news: you can now enjoy a gluten-free version of the famous biscuits. The bad news? You’ll have to make them yourself. At home. 

    Starting in August the Gluten-free Cheddar Bay Biscuit mix will be available at Wal-Mart stores. No word on whether the mix will be available at other stores or online.

    The biscuits offered in Red Lobster restaurants will remain off-limits to those on a gluten-free diet. 

    Note from Elizabeth:

    As soon as I’ve had a chance to try the mix, I’ll share my review with you. 

    PS: Don’t want to wait for the mix? Whip up your own batch of gluten-free Cheddar biscuits with this easy recipe. 

    UPDATE: Review: Red Lobster Gluten-Free Cheddar Bay Biscuit Mix


    Celebrate National Sugar Cookie Day with these 5 Gluten-Free Recipes

    Gluten-Free Sugar Cookies on a Plate.

    It’s National Sugar Cookie Day! And, I don’t know about you, but…that sounds like a made-up holiday. But! I don’t care because I love sugar cookies. Here are five gluten-free recipes to try. 

    Gluten-Free Soft Sugar Cookies

    Gluten-free soft sugar cookies on a white platter.

    Miss soft sugar cookies? These are for you. The cookies are soft and tender and the creamy buttercream frosting is the perfect finish. (Sprinkles are optional but highly recommended.)

    Get the Recipe: Gluten-Free Soft Sugar Cookies


    Gluten-Free Cut-out Sugar Cookies

    Gluten-Free Cut out Sugar Cookies on a Plate. 

    Got time to roll out some sugar cookie dough? Then you need to make try this recipe. Made with butter, these cookies come out delicate and sweet–but not too sweet. 
    Get the Recipe: Cut-out Gluten-Free Sugar Cookies


    Gluten-Free Sugar Cookie Bars

    Stack of gluten-free sugar cookie bars. Frosted with vanilla frosting and topped with sprinkles.

    Short on time but craving sugar cookies? Make sugar cookie bars! Simply press the dough into a pan, bake, and frost. Easy-peasy! 
    Get the Recipe: Gluten-Free Sugar Cookie Bars


    Paleo Sugar Cookies

    Paleo sugar cookie hearts on white towel with cookie cutter.

    Looking for a grain-free way to enjoy some sugar cookies? This recipe for paleo sugar cookies fits the bill. Made with almond flour, they’re easy to make and have a delicate flavor and texture. 
    Get the Recipe: Paleo Sugar Cookies


    Simple Gluten-Free Sugar Cookies

    Gluten-free sugar cookies in a stack on a white plate.

    These gluten-free sugar cookies are crisp and light–and coated with sanding sugar before baking. They’re a homestyle sugar cookie that are great eaten as-is  or used in gluten-free ice cream sandwiches. 

    Get the Recipe: Gluten-Free Sugar Cookie


    Gluten-Free Skillet S’more Cookie

    Gluten-Free S'more Cookie in Skillet. Cut and topped with browned marshmallows and chocolate chips.

    A giant chocolate chip cookie that tastes like a s’more. Baking it in a skillet gives it crispy edges and a soft and chewy center.

    Gluten-Free S'more Cookie in Skillet. Cut and topped with browned marshmallows and chocolate chips


    I fell in love with chocolate chip cookie cakes in the eighth grade. My homeroom teacher made one at the beginning of each month to celebrate students’ birthdays. Our homeroom was the envy of the school. We had cookie cakes. No one else did. 

    Cookie cakes seemed to reach peak popularity during the mall culture of the late 1980s and early 1990s. Mrs. Field’s and Famous Amos always displayed cookie cakes–with thick buttercream frosting–in their cases. 

    And then? Nothing. Cookie cakes all but disappeared. 

    Like all trends, however, cookie cakes came back but with a twist. (Probably because those of us who grew up eating them were now old enough to make them for our families.) The current take on the cookie cake trend are skillet cookies. Some folks call them “brookies” because of the cookie-brownie texture of these cakes. 

    And that’s a good way to think about them. (Although I personally hate the word “brookie.”) These don’t taste like a cake. The texture is too dense. They aren’t really a brownie or blondie either. A good skillet cookie is soft and tender in the center and crunchy on the edges. This combination of crunchy and soft occurs because of the cast iron pans hold onto and transfer heat. 

    If you bake the same dough in a regular baking pan, the recipe works but the texture is different. Made in a traditional baking pan, this gluten-free skillet s’more cookie would have an even texture from the edges to the center. 

    For summer, it’s fun to make a s’more everything. So I added some marshmallows and chopped gluten-free graham crackers to a chocolate chip skillet cookie. The result is an “I CAN’T STOP EATING THIS”-gluten-free skillet s’more cookie. (Whoa, that’s a mouthful.)

    How to Make a Gluten-Free Skillet S’more Cookie

    1. Grease your cast iron skillet. Even if you have a well-seasoned skillet, you still need to grease it generously before pressing the cookie dough into the pan. 
    2. Make the dough. This is a simple gluten-free cookie dough. 
    3. Add “the good stuff.” Stir in the chocolate chips, mini-marshmallows, and chopped gluten-free graham crackers. After mixing the dough, stir in the “good stuff”. 
    4. Top with additional marshmallows and chocolate chips. This layer of marshmallows browns and melt during baking, adding a nice s’more flavor. 
    5. Add more marshmallows. For a fun s’more look, sprinkle additional marshmallows over the skillet after the cookie is baked. Broil for just a minute until the marshmallows are puffy and brown. 

    The Ins and Outs of the Recipe

    This skillet cookie is basically a chocolate chip cookie studded with broken-up gluten-free graham crackers and mini-marshmallows. Here’s what you need to know about the key ingredients. 

    Dark or Light Brown Sugar?

    For this recipe, it doesn’t matter. Dark brown sugar adds a bit more of a caramel flavor to the cookie, which I think is a delight. If you prefer light brown sugar (or only have the one in the house), use it. Either work fine in this recipe. 

    What’s the best gluten-free graham cracker to use?

    1/2 cup Broken Gluten-free Graham Crackers.


    I recommend Pamela’s gluten-free grahams. The runner-up is Schar. I’d skip kinnikinnick because they’re so thick. And if you want to make homemade gluten-free graham crackers, I am here for you! Here’s my recipe for gluten-free graham crackers. 

    Adding marshmallows to cookies. 

    Adding marshmallows to cookies sounds like a great idea but there’s one reality that we have to deal with: they melt during baking. But I add them anyway.Why? The flavor. They leave behind little nuggets of sweet-vanilla flavor.

    Gluten-Free S'more Cookie in Skillet. Cut and topped with browned marshmallows and chocolate chips.
    Print

    Gluten-Free Skillet S'more Cookie

    A giant chocolate chip cookie that tastes like a s'more. Baking it in a skillet gives it crispy edges and a soft and chewy center.

    Ingredients

    • 10 tablespoons softened butter (1 1/4 sticks; 5 ounces; 142 grams)
    • 1/2 cup packed dark brown sugar (3 3/4 ounces; 106 grams)
    • 1/3 cup granulated sugar (2 1/4 ounces; 65 grams)
    • 1 large egg (about 2 ounces; 50 grams)
    • 1 1/2 cups gluten-free baking flour* (7 ounces; 200 grams)
    • 1/2 teaspoon baking soda
    • 1/4 teaspoon salt
    • 1 1/4 cups mini-marshmallows, divided (2 1/4 ounces)
    • 1 cup chocolate chips plus one tablespoon (6 ounces; 170 grams)
    • 1/2 cup + 2 tablespoons broken gluten-free crackers, divided

    Instructions

    1. Preheat oven to 350 degrees F. Grease a 10-inch cast iron skillet with nonstick cooking spray.
    2. Combine butter, brown sugar, and granulated sugar in a large bowl. Beat until smooth, about one minute. Stop the mixer and scrape down the bottom and sides of the bowl. Add the egg and beat until combined, about 30 seconds.
    3. Add gluten-free flour, baking soda, and salt. Mix until a soft dough forms. Stop the mixer. Add one cup mini-marshmallows, one cup chocolate chips, and 1/2 cup crushed graham crackers.
    4. Press dough into prepared pan. Sprinkle 2 tablespoons mini-marshmallows and remaining chocolate chips and graham crackers over the dough.
    5. Bake until set, about 30 minutes. Marshmallows will brown and melt during baking.
    6. Remove pan from oven. Place on a wire rack. Turn on broiler. Sprinkle remaining marshmallows over the top of the skillet cookie. Broil until marshmallows are puffy and brown, about 30 seconds.

    Recipe Notes

    *Gluten-Free Baking Flour

    This recipe was tested using Bob's Red Mill 1:1 Gluten-Free Baking Flour. 

    Gluten-Free Graham Crackers

    Break graham crackers into small, bite-size pieces. Don't crush into crumbs. 

    Cookbook Review: The “I Love My Air Fryer” Gluten-Free Recipe Book

    Book Cover: I Love My Air Fryer Gluten-Free Recipe Book

    A cookbook dedicated to gluten-free Air Frying soars in some places and stumbles in others. 

    Book Cover: I Love My Air Fryer Gluten-Free Recipe Book

    “I Love My Air Fryer” Gluten-Free Recipe Book Review

    Do you own an Air Fryer? The answer is probably yes. A whopping 4 million were sold last year. (four million!)

    When Air Fryers first started getting attention, I didn’t think much of it. They’ve been around for a while and other than getting some play on television shopping channels, they never really caught on. This, of course, has changed.

    Now Air Fryers are everywhere and, if you’re like me, you’re probably wondering what the %^$ to do with one⁠—besides using it to make crispy frozen French fries.

    The “I Love My Air Fryer” Gluten-Free Recipe Book by Michelle Fagone aims to help us answer this question.

    Filled with 175 gluten-free recipes for an Air Fryer, this book surprised me. I expected it to be filled with recipes for fried foods like onions rings and other such foods.

    It’s not.

    The book covers everything from how to make gluten-free blueberry muffins to a simple recipe for Two-Ingredient Barbecued Pulled Jackfruit. (A recipe that promises to make a meat-free pulled pork in only 10 minutes.)With recipes for lobster and sea bass nestled among recipes for jalapeno poppers and “pizza bombs”, this book attempts to be a serious cookbook for gluten-free eaters who like to have a little fun in the kitchen.

    That’s where this book succeeds. The recipes are interesting, enticing, and, easy.  The photos are lovely, showcasing how many different foods can be prepared —and prepared well in an Air Fryer. 

    Cobb Salad Photo

    Where the book falls short is with the ingredient recommendations.

    Most of the recipes use naturally gluten-free ingredients. However, for the baked and breaded recipes, you’ll need a gluten-free flour blend. Since gluten-free flour blends vary so much from brand-to-brand, I wish the author had included a note about which brand of flour she used to create and test the recipes. This is especially important since some recipes call for additional xanthan gum. Some gluten-free flour blends include xanthan gum; others don’t. Adding xanthan gum to a blend that already contains it will give you a very different result than adding xanthan gum to a blend that contains none.

    Of greater concern was the inclusion of ingredients that sent up a red flag to me, specifically oyster sauce, gochujang, oats, and cornflakes. These ingredients need a clear note about using the gluten-free version. (The traditional versions often contain gluten.)

    It surprised me that these ingredients were overlooked because in the recipe for Moo Shu Pork Wrappers (p 127) there’s a helpful note about using a gluten-free hoisin sauce. And in the recipe for Giant Nachos (p 166), there’s a note about the vegetarian status of refried beans. The author clearly tried to include thoughtful and helpful notes about ingredients. 

    However, the unevenness of the ingredient notes is of concern. Knowing to select gluten-free cornflakes or to look for gluten-free oyster sauce, is one of those “big little things” that make cooking gluten-free a challenge. 

    If simple ingredient alerts were included, I would wholeheartedly recommend this book. Heck, flipping through it got me interested in Air Frying—a tough feat. I wanted to love this book.

    Unfortunately, because of the oversight of some potential gluten-containing ingredients, I can only recommend this book with reservations.

    If you understand the complex ins and outs of gluten-free cooking or follow a gluten-free diet as a lifestyle choice rather than for health reasons, this cookbook would make a lovely addition to your collection.

    For those new to the gluten-free diet, especially those who follow the gluten-free diet due to health reasons, like celiac disease,  I can’t recommend the title. I’d hate to see someone “gluten” themselves because a recipe called for cornflakes, instead of gluten-free cornflakes.

    About
    The “I Love My Air Fryer” Gluten-Free Recipe Book: From Lemon Blueberry Muffins to Mediterranean Short Ribs, 175 Easy and Delicious Gluten-Free Recipes by Michelle Fagone. 

    List Price: $16.99

    Available on Amazon (affiliate link) 
    As an Amazon Associate GlutenFreeBaking.com earns a commission from qualifying purchases.

    Easy Gluten-Free Vanilla Sheet Cake

    A slice of gluten-free sheet cake on a plate. The cake is frosted with vanilla frosting and sprinkles.

    This easy-to-make gluten-free sheet cake is rich and moist. And it only requires one bowl to make! Perfect for birthday parties, celebrations, baby showers, or a pot luck dessert.

    A slice of gluten-free sheet cake on a plate. The cake is frosted with vanilla frosting and sprinkles.

    What is it about a yellow sheet cake? For me, it’s the most comforting homemade cake. There’s just something homey about it. Sure, I love a towering gluten-free white layer cake and making a gluten-free chocolate cake always brings a smile to my face. But a sheet cake? That’s the cake I make for small family birthday parties, pot lucks, and, most importantly, just because.

    How to Make a Gluten-Free Sheet Cake

    • Use One Bowl. This recipe comes together in one bowl! No need to whip egg whites or do anything fancy.
    • Cut in Softened Butter. For a boxed cake texture, softened butter is mixed into the gluten-free flour and sugar before the eggs, milk, and oil are added. This step creates a texture that’s soft and delicate.
    • Mix Until Smooth and Fluffy. Once you’ve cut in the butter, add the wet ingredients and mix until the batter is smooth and fluffy. This takes about a minute or so.
    • Bake in a Greased Pan. If you want to serve the cake right from the pan, simply grease a 9×13-inch pan with nonstick cooking spray. But if you want to remove the cake from the pan, line the pan with parchment paper. Be sure the paper hangs over the edge of the pan. This makes it easy to lift the cooled cake out of the pan.
    • Frost with Your Favorite Frosting. What’s your favorite frosting? Oh, that’s funny! That’s the perfect frosting for this cake. (My favorite frosting varies. Some days I love chocolate frosting. Other times I like to make the vanilla frosting. And, when I’m feeling jazzy, I’ll whip up a batch of cream cheese frosting for a sheet cake. That one always wins praise.)
    Gluten free vanilla sheet cake in the pan with frosting and sprinkles on top.

    The Perfect Gluten-Free Flour for Sheet Cake

    This simple sheet cake uses Bob’s Red Mill 1:1 Gluten-Free Baking Flour. If you use another flour, the cake might turn out fine or…it might not. Gluten-free flours vary greatly. For the best results use Bob’s. If you don’t want to use Bob’s, use a blend that contains xanthan gum or add ½ teaspoon xanthan gum to the recipe.

    FAQs: Gluten-Free Sheet Cake

    Can I make this into gluten-free cupcakes?

    Sure can! Scoop the batter into 24 cupcake cups. Be sure to line the cups with paper liners or spray very generously with nonstick cooking spray.

    Can I make this into a round gluten-free cake?

    Yup! Divide the batter evenly between two 8-inch round cake pans.

    Can I freeze the gluten-free sheet cake?

    You can! Be sure to allow the cake to cool completely before freezing. And, bonus, you can frost the cake before freezing. Frosted cakes freeze really well. (The hardest part? You need room in the freezer for the cake.)

    Can I omit the eggs?

    Probably not. Cake recipes are hard to make egg-free. I don’t think this one would work without eggs. Sorry.

    Can I make this without dairy?

    Yes! Replace the butter with either softened coconut oil or softened dairy-free margarine. And replace the milk with dairy-free milk. (Just don’t use full-fat coconut milk. It’s too heavy for the cake.)

    Gluten free vanilla sheet cake in the pan with frosting and sprinkles on top.
    5 from 14 votes
    Print

    Gluten-Free Vanilla Sheet Cake

    This easy-to-make gluten-free sheet cake is rich and moist. And it only requires one bowl to make! Perfect for birthday parties, celebrations, baby showers, or a pot luck dessert.

    Prep Time 10 minutes
    Cook Time 30 minutes
    Total Time 40 minutes
    Servings 12 servings

    Ingredients

    • 2 ¼ cups Bob’s Red Mill 1:1 Gluten-Free Baking Flour (10 ½ ounces; 297 grams)
    • 1 ½ cups granulated sugar (10 ½ ounces; 297 grams)
    • 2 teaspoons baking powder
    • ½ teaspoon baking soda
    • ¼ teaspoon salt
    • ¼ cup softened butter (2 ounces; 56 grams)
    • 1 cup milk (8 ounces; 226 grams)
    • ¼ cup canola oil (1 ¾ ounces; 50 grams)
    • 3 large eggs
    • 1 ½ teaspoons vanilla extract

    Vanilla Frosting

    • 1 cup softened butter (8 ounces; 226 grams)
    • 4 cups powdered sugar (16 ounces; 170 grams)
    • 4 tablespoons milk (2 ounces; 56 grams
    • 1 teaspoon vanilla extract

    Instructions

    1. Preheat oven to 350℉. Grease a 9×13-inch pan with nonstick cooking spray Or if you want to remove the cake for serving, line the pan with parchment paper and grease with nonstick cooking spray.

    2. Whisk together the gluten-free flour, sugar, baking powder, baking soda, and salt in a large bowl. Add the softened butter. Mix, on medium speed, until the butter is incorporated. Very small pieces of butter should dot the mixture.

    3. Add the milk, oil, eggs, and vanilla extract. Mix until batter is smooth and fluffy, about one minute.
    4. Spread batter evenly into prepared pan. Bake until a cake tester inserted in the center comes out clean, about 30 minutes.

    5. While the cake cools, make the frosting.

      Mix butter until smooth in a medium mixing bowl. Add powdered sugar, milk, and vanilla extract. Mix, on low speed, until smooth.

    6. When cake is cool, frost it and then enjoy.

    Review: Trader Joe’s Cocoa Crunch Cereal

    Trader Joe's Cocoa Crunch Cereal Front of Box

    Trader Joe’s introduced Cocoa Crunch Cereal. It looks like a gluten-free version of Cocoa Puffs. But how does it taste?

    Trader Joe's Cocoa Crunch Cereal Front of Box

    Visiting Trader Joe’s on a Sunday afternoon is…never a good idea. Yet, this past Sunday, there I was, squeezing down the aisles, bumping into folks and having folks bump into me. Good times.

    I noticed a display of what looked like Trader Joe’s branded Cocoa Puffs. And, dear reader, I used you as an excuse to buy the box. As a rule, I don’t buy cereal because it seems to ~mysteriously~ disappear. One minute the box is full. The next? Not so much. And since my husband doesn’t like cereal…it must be a ghost. Yeah. That’s it. A ghost. There’s no other explanation.

    But! I was thinking of YOU! It’s a new gluten-free cereal. I *needed* to try it for you. For science. For the gluten-free community. 

    It was a duty that I needed to uphold. 

    I happily tossed a box of Cocoa Crunch Cereal into my cart. It cost $3.49 for a 9.2-ounce box. That didn’t seem overly expensive but it didn’t seem “Oh my god!”-cheap either. 

    I couldn’t wait to try it. I love Cocoa Puffs. (I haven’t had it in years but my love burns bright.) So when I opened the box, I was expecting the heavenly, cocoa-sweet aroma to great me. And…nothing. Nary a whiff of chocolate greeted my nose.

    Trader Joe's Cocoa Crunch Cereal in Glass Bowl. (No Milk)

    I took a bite. It was…not Cocoa Puffs. The cereal, which contains as much sugar per serving as Cocoa Puffs*, tasted flat.

    There wasn’t enough cocoa flavor or grain-y sweetness in the cereal. It’s not that I was looking for overly sweet cereal but, if I’m going to eat a chocolate cereal as a treat, I want it to taste like something. And this didn’t taste like much. In addition to missing the sweet grain notes that corn brings to the cereal, this cereal also needed a bit of vanilla or something.

    It tasted like someone wanted to make a health food version of cocoa puffs. Something that would look like Cocoa Puffs and would taste…almost like it. But not close enough.

    The texture worked. When eaten dry, it was nice and crunchy. When eaten with milk, it didn’t turn soggy.

    Speaking as someone who loves cereal, this one won’t tempt me again. And that’s saying something because I still miss Ice Cream Cone cereal from the 1980s.

    * Trader Joe’s Cocoa Crunch Cereal contains 9 grams of added sugar per 40-gram serving. Cocoa Puffs contains 9 grams of sugar per 27-gram serving. 

    Trader Joe’s Cocoa Crunch Cereal: Ingredients

    Trader Joe's Cocoa Crunch Cereal Ingredients

    RICE FLOUR, CANE SUGAR, SORGHUM FLOUR, YELLOW CORN FLOUR, DUTCH COCOA POWDER, CHICKPEA FIBER, PSYLLIUM HUSK POWDER, NATURAL FLAVOR, SEA SALT, CANOLA OIL, SUNFLOWER LECITHIN POWDER, TRICALCIUM PHOSPHATE (ANTI-CAKING AGENT).

    Please note: Ingredients can change at any time. Please refer to the box for the current ingredients. 

    Trader Joe’s Cocoa Crunch Cereal: Nutrition

    Trader Joe's Cocoa Crunch Cereal Nutrition Facts

    Serving size 1 cup (40g)
    Calories 150
    Total Fat 1g
    Saturated Fat 0g
    Trans Fat 0g
    Cholesterol 0mg
    Sodium 80mg
    Total Carbohydrate 33g
    Dietary Fiber 2g
    Total Sugars 9g(Includes 9g Added Sugars)
    Protein 3g


    8 Essential Gluten-free Travel Tips You Need to Know

    We asked the GlutenFreeBaking.com community for their best gluten-free travel tips and they didn’t disappoint. Here’s what you need to know when traveling while on a gluten-free diet. 


    Some answers have been edited for clarity or length.

    Gluten-Free Tavel Tip #1: Research Before You Go

    My daughter recently traveled out-of-state for a week. She researched the location in advance and called a few places to verify things like separate fryer for fries, protected veggie and salad prep, etc. It was a small town, yet she found a totally gluten-free bakery that had awesome goodies, and pizza crust. It’s five hours from home, but she and her many gluten-free friends are planning to take turns driving there every couple of weeks with a big shopping list.
    —Carol

    I always read every review on “find me gluten free”. I take snacks, I have a Nima so that I can test my food. I travel to the same places (I know not as much fun) but once I learned what’s safe I stick with it. I try to make sure I know where grocery stores are in the area.
    —Melissa

    I always do lots of research where I’m going. I always make reservations, when possible, and note on the reservation “diner with celiac will require gluten-free options.” I usually limit dining choices to restaurants with confirmed gluten-free options.
    —Michele

    Gluten-Free Travel Tip #2: Bring Snacks

    Take lots of snacks with you and have a note/card in the languages necessary that states ‘allergic to gluten’, even though it’s not an allergy that is better understood than gluten-free/celiac disease.
    —Joanne

    Always take snacks. Just in case. Then if you get caught out you don’t have to go hungry.
    —Hollie

    Bring lots and lots of snacks
    —Amanda

    Dried fruits and nuts. Larabars. Instant gluten-free oatmeal. Peanut butter packets, Protein shakes. Apples and Bananas. I never travel without these.
    —Kim


    Gluten-Free Travel Tip #3: Go to the local grocery store or Farmers’ Market

    Before you travel, check what groceries are near you. I don’t eat in restaurants. I stay in Airbnbs, buy groceries and cook my own food. This is the best way I can keep myself safe.
    —Alejandra

    I locate grocery stores nearby where I will be and research what options they have in case I run out snacks that I have packed. If we’re staying in a place that has a kitchen, I buy foil to cover baking sheets so I can warm up bread, bagels etc.
    —Michele

    Hit up the local farmers’ market. Local fruits, cheeses, and sometimes gluten-free treats are easy-to-find. Plus it’s a fun way to get to know the place you’re visiting.
    —Rose


    Gluten-Free Travel Tip #4: Bring food for the Journey


    Check if your airline has a gluten-free meal option but don’t count on it. Have a good meal just before going to the airport. In your carry on, bring a few gluten-free sandwiches and some trail mix. Put gluten-free crackers, sandwich bread, and pasta in your checked luggage.
    —Jacqueline

    Never fly without food. Ever. We got stuck on a runway for three hours. They handed out snacks, which I couldn’t eat. Thankfully I’d brought my own gluten-free snacks. If I hadn’t, I would have been out of luck. 
    —Sally

    Always travel with a packed lunch. I bring a peanut butter and jelly sandwich, some gluten-free chips, and fruit. It’s saved me on road trips many times. 
    —Martha


    Gluten-Free Travel Tip #5: Be Prepared


    Have a second or third option. One time we went to a new city. I couldn’t wait to try a gluten-free restaurant I’d read about online. We got there only to find that it was closed that week. There weren’t other options nearby. I didn’t think I needed to bring food. I ended up getting potato chips and a mealy apple at a gas station while my family ate. Never again.
    —Gabby

    Always have a backup plan!! Weather, mechanical issues, traffic tie-ups, etc. can cause short or long delays. Never travel without food!
    —Claire

    Bring your own rolls to restaurants. Some have a gluten-free menu but no bread.
    —Jessica


    Gluten-Free Travel Tip #6: Use Dining Cards


    Download and print the gluten-free language cards to be used in restaurants. Really helped us in China… both Mandarin and Cantonese.
    —Sarah

    Dining cards seem old-fashioned but they really help. 
    —Bea

    Gluten-Free Travel Tip #7: Trust your gut, not just what it says on the menu


    When you’re in a restaurant and ask about gluten-free options, trust your gut feeling when listening to staff. My “BS” sensors have become pretty good over the years and I know when to ask follow up questions or when I can trust the staff.
    —Micha

    Many places now offer “gluten-free” options but they don’t really know how to prepare a safe meal. I ask lots of questions before ordering. I don’t just trust that gluten-free means it’s safe for me. I don’t want to get sick on vacation. I’d rather go without than get “glutened” and miss fun days.
    —Jeni


    Gluten-Free Travel Tip #8: Have Fun!

    There are places out there that serve wonderful gluten-free food. Do some research and go out and have fun. Pack some snacks to cover yourself.
    —Mary Jo

    Learn how to travel gluten-free. It’s probably very different from how you traveled before your diagnosis but it’s worth it.
    —Shelia

    Don’t let your gluten-free diet stop you from seeing the world. Ask for help. Stay on your diet and go have adventures. Life is too short to always stay at home.
    —Glenn 


    Easy Gluten-Free Strawberry Cake Recipe

    Gluten-Free Strawberry Cake on a white platter. Frosted with cream cheese frosting and decorated with pink and green mini-marshmallows.

    This one-bowl gluten-free strawberry cake is so easy to make! Its moist and tender crumb makes it a favorite for birthday parties and other celebrations. Frost with cream cheese frosting or vanilla buttercream. 

    Gluten-Free Strawberry Cake on a white platter. Frosted with cream cheese frosting and decorated with pink and green mini-marshmallows.

    How to Make Gluten-Free Strawberry Cake

    1. Whisk together the dry ingredients. Don’t rush this step. You want the baking powder evenly mixed throughout the batter. (If you’re using a stand mixer, fit it with the paddle attachment. It works well to combine the ingredients.) 
    2. Add very soft butter and a little oil. Most of the time, you don’t want to bake with butter that’s too soft. Not this time. Use butter that’s squishable-y soft but not melted. 
    3. Add milk, eggs, and strawberry gelatin. This is a retro-style strawberry cake. The flavor comes from strawberry gelatin. Be sure to use regular strawberry gelatin, not sugar-free.  
    4. Mix the batter until thick and fluffy. This takes about two minutes. And you don’t want to rush! At first, the batter will seem thin. After a minute of mixing, it thickens and gets fluffy. 
    5. Divide between two greased pans. I prefer 8-inch cake pans because they make a high cake. But if you only have 9-inch cakes on hand, use them. 
    6. Bake until set. This cake takes about 30 minutes to bake. It’s done when a cake tester inserted into the center of the cake comes out clean.  
    7. Cool the cake completely. The cakes are very delicate when they first come out of the oven. Allow them to cool in the pan for five minutes and then invert them onto a wire rack to cool completely. 
    8. Frost when cool. To avoid a “baking fail”, wait until the cakes are completely cool to the touch before frosting.
    Gluten-Free Strawberry Cake Slice on Plate. Frosted with cream cheese frosting and decorated with pink and green marshmallows.

    FAQs: Easy Gluten-Free Strawberry Cake

    Do I have to use strawberry gelatin?

    Yes. If you want this recipe to make a strawberry cake, you’ll need to use a packet of strawberry gelatin.

    Can I add strawberries to the batter?

    Maybe. I haven’t tested the recipe with added strawberries. If you decided to try it, I would not add more than ½ cup of mashed strawberries. More than that might overwhelm the batter and cause the cake to sink.

    What’s the best frosting for strawberry cake?

    I like cream cheese frosting and included my favorite recipe below. Fluffy vanilla buttercream also works really well. And, if you like chocolate-dipped strawberries, frost the cake with chocolate icing. Yum!


    Strawberry cake with white frosting and pink and green marshmallows sits on a cake stand.

    Other Gluten-Free Cake Recipes You’ll Love

    • Gluten-Free White Cake
    • Gluten-Free Yellow Cake
    • Gluten-Free Chocolate Cake
    • Gluten-Free Confetti Cake
    Gluten-Free Strawberry Cake Slice on Plate. Frosted with cream cheese frosting and decorated with pink and green marshmallows.
    4.63 from 8 votes
    Print

    Easy Gluten-Free Strawberry Cake

    One Bowl Gluten-Free Strawberry Cake Recipe. Easy to make. Perfect for Birthdays! 

    Servings 12

    Ingredients

    • nonstick cooking spray
    • 2 ½ cups Bob’s Red Mill 1:1 Gluten-Free Baking Flour
    • 1 ¼ cups granulated sugar
    • 1 tablespoon baking powder
    • 1 teaspoon salt
    • ½ cup (1 stick) butter, very soft
    • 1/8 cup vegetable oil
    • 1 ¼ cup milk
    • 3 large eggs
    • 1 (3-ounce ) package strawberry gelatin
    • Cream cheese frosting or vanilla buttercream

    Cream Cheese Frosting

    • 1 (8 ounce) package cream cheese room temperature
    • ½ cup butter, softened
    • 3 ½ cups powdered sugar, sifted
    • 1 teaspoon vanilla extract

    Instructions

    For the Gluten-Free Strawberry Cake

    1. Preheat the oven and prepare the pans. Preheat oven to 350 degrees F. Grease two 8- or 9-inch round cake pans with nonstick cooking spray.

    2. Make the Batter. Mix together gluten-free baking flour, granulated sugar, baking powder, and salt in the bowl of a stand mixer fitted with the paddle attachment or a large mixing bowl. Run the mixer for 30 seconds to combine the ingredients. 

    3. Stop the mixer. Add softened butter and oil. Mix on medium-low speed until combined. The mixture will look crumbly, about 30 seconds.  Stop mixer. Add milk, eggs, and strawberry gelatin. Mix on low speed for 30 seconds. Increase mixer to medium-high and mix for two minutes.

    4. Bake the Cake. Divide batter evenly between the prepared cake pans. Spread batter evenly into pans. Bake until a cake tester inserted into the center of the pan comes out clean, about 30 minutes.

    5. Cool and Frost. Remove pans from oven and place on a wire rack. Allow cakes to cool in the pan for five minutes. Invert cakes onto the wire rack to cool completely.

    6. Prepare the frosting. Frost cooled cake. Store cake, covered, on the counter for up to three days.

    For the Cream Cheese Frosting

    1. Combine cream cheese and butter in a medium bowl. Beat on medium low speed until smooth. Stop mixer. Add powdered sugar and vanilla extract. Beat on low speed until smooth.

    Recipe Notes

    The Flour

    For this recipe, I used Bob’s Red Mill 1:1 Gluten-Free Flour. I have not tested this recipe with another flour blend. Using a different blend will affect the final cake.

    The Butter

    For the cake, be sure the butter is very soft. It should blend easily into the flour mixture. 

    Review: Aldi Gluten-Free Glazed Doughnuts

    Aldi Gluten-Free Glazed Doughnut Cut in Half on Plate

    On May 8th, Aldi’s gluten-free products hit the shelves. I decided to try some out and let you know what I thought. Please note this is NOT a sponsored post. I purchased all the products included in the review. Prior to the release, Aldi sent me a press release about the products. I was not asked to post about them. But I was curious. Would they be tasty? A good value? 

    Our store put out the limited run “liveGFree: products early. If you’re reading this before May 8th, you might want to see if your local store already has them out because I have a feeling these are going to go fast. 

    Box of Aldi Gluten-Free Glazed Doughnuts

    When I saw that Aldi had included gluten-free glazed doughnuts in their lineup this year, I almost squealed with delight. I love all doughnuts but glazed doughnuts are my favorite. 

    These, like the gluten-free chocolate frosted doughnuts, are sold in the freezer section. At our store, they were in the small case that sits in the aisle, not in the freezer case up against the wall. 

    6 Aldi Gluten-Free Glazed Doughnuts in Package

    I let the entire package thaw on the counter. There aren’t any directions for how to defrost the doughnuts. The box simply says “thaw prior to eating.” If you want to rush them, I think you could use the microwave but I’d be careful. These seem like the type of baked good that you could over-microwave quicky. 

    Aldi Gluten-Free Glazed Doughnut on Plate

    They’re a nice size, about three inches across and an inch thick. The picture on the box made me think they’d be small. I was happily surprised when I opened the box and saw six full-size doughnuts. It’s always nice when gluten-free foods aren’t waaaay smaller than their wheat-counterparts, isn’t it?

    Aldi Gluten-Free Glazed Doughnut Cut in Half on Plate

    Let’s talk about the texture of these doughnuts! Oh my goodness. I thought they were yeast-raised. The crumb is light and airy. They aren’t as soft as, let’s say, a Krispy Kreme doughnut (what is?) but they didn’t taste cake-like to me. A good cake doughnut tends to be dense. These aren’t. 

    It was only after I re-read the ingredients that I realized these doughnuts don’t contain yeast. 

    The glaze is the perfect thickness to add a hint of sweetness to the doughnuts. Like most glazed doughnuts, the glaze crackles a little as you bite into it. So grab a napkin. You might need it. 

    I also loved how the texture wasn’t gritty at all. I know some folks hate it when people say, “You’d never guess these are gluten-free!” That description of gluten-free foods doesn’t bother me. Many people come to the gluten-free diet after years of eating wheat. So the gritty texture of some gluten-free foods is offputting. I’m happy to report that these doughnuts aren’t gritty at all! 

    These don’t taste like freshly-fried doughnuts you’d make yourself or pick up at a bakery. They remind me of the type of doughnut you get at the supermarket. If you go in with that expectation, I don’t think you’ll be disappointed.  

    Aldi Gluten-Free Glazed Doughnuts: Ingredients

    Aldi Gluten-Free Glazed Doughnuts Ingredients

    Aldi Gluten-Free Glazed Doughnuts Ingredients*: Gluten Free Flour (Corn, White Rice, Tapioca), Palm Oil, Sugar, Eggs, Water, Canola Oil, Baking Powder (Sodium Acid Pyrophosphate, Sodium Bicarbonate, Corn Starch, Monocalcium Phosphate), Xanthan Gum, Salt, Pure Vanilla Extract, Sunflower Lecithin, Vanilla Glaze (Confectioners Sugar, WAter, Sugar, Canola Oil, Agar, Calcium Carbonate, Calcium Sulfate, Pure Vanilla Extract, Salt.) 

    Contains: Eggs

    As with the gluten-free chocolate frosted doughnuts, these are dairy-free! 

    *Please check the current package for up-to-date Ingredient and Nutrition Facts. Ingredients change frequently. Any ingredient or nutrition information provided by GlutenFreeBaking.com is included for educational purposes and may not reflect the current ingredients. 

    I’m neither impressed nor surprised by the ingredient label. Traditional doughnuts are always a treat. And these gluten-free doughnuts from Aldi are no exception. The gluten-free flour base is a standard “white” flour base. I think this is fine for something like a doughnut. 

    Aldi Gluten-Free Glazed Doughnuts: The Price

    A box of six cost me $4.49*. For gluten-free doughnuts, I think this is a fair price. Is it as cheap as gluten-based doughnuts? Sadly, no.  But $0.75 per doughnuts feels reasonable for doughnuts you don’t have to make yourself. (And, as I type this, I remember recently paying more than that for a box of gluten-y doughnuts. Perhaps the price of doughnuts has risen for wheat-eaters?)

    Aldi Gluten-Free Glazed Doughnuts: Stock Up or Skip?

    I say stock up! I really enjoyed these doughnuts. The taste, texture, and price didn’t disappoint. If you’ve got space in your freezer, you can’t go wrong with buying a box or three. 

    RATING: FIVE OUT OF FIVE. 

    Review: Aldi Gluten-Free Chocolate Frosted Doughnuts

    Aldi Gluten-Free Chocolate Frosted Doughnut Split on Half.

    Aldi Gluten-Free Chocolate Frosted Doughnuts

    On May 8th, Aldi’s gluten-free products hit the shelves. I decided to try some out. Please note this is NOT a sponsored post. I purchased all the products included in the review. Prior to the release, Aldi sent me a press release about the products. I was not asked to post about them. But I was curious. Would they be tasty? A good value? 

    Our store put out the limited-run “liveGFree: products early. If you’re reading this before May 8th, you might want to see if your local store already has them out because I have a feeling these are going to go fast. 

    Box of Aldi Gluten-Free Chocolate Doughnuts

    The two products I was most excited to try were the gluten-free glazed doughnuts and the gluten-free chocolate frosted doughnuts. Oprah loves bread. I love doughnuts. (shoutout to my friends who get my Oprah reference.)

    When I first saw the box, I wondered if these were chocolate doughnuts with a chocolate glaze or vanilla doughnuts with a chocolate glaze. Perhaps this is obvious to you but it wasn’t to me and the box doesn’t make it clear. I love gluten-free chocolate doughnuts; so I was hoping they’d be chocolate. Heh.

    You’ll find these in the freezer section of Aldi. At our store, they were in the small freezer on the floor. Not in the freezer case against the wall.

    Six Aldi Gluten-Free Chocolate Frosted Doughnuts in Tray

    For the review, I let the entire package defrost. If you don’t want to thaw the entire box, you can pull out one or two and keep the rest frozen. 

    As soon as I removed the tray from the box, I saw that these were vanilla doughnuts with a chocolate frosting. Mystery solved! 


    Aldi Gluten-Free Chocolate Frosted Doughnut

    They’re a good size doughnut. This surprised me a bit. For some reason, I expected them to be small. The picture on the front of the box looks a bit smaller than traditional doughnuts and, as anyone who eats gluten-free knows, sometimes gluten-free baked goods are smaller (and more expensive!) than their wheat counterpart. 

    The doughnuts are huge but they’re a nice size. No complaints there. 

    Aldi Gluten-Free Chocolate Frosted Doughnut Split in Half.

    How yummy does that texture look? The first doughnut I tried from Aldi was the gluten-free glazed doughnut. I really thought it was a yeast-based doughnut because it was so light. Usually, cake doughnuts are pretty dense compared to yeast-raised doughnuts. 

    Not these! The texture is very light and airy. Not too dry. Not too moist. 

    Based on taste, texture, and ingredients, I think this doughnut is the same doughnut that’s in the Aldi Gluten-Free Glazed Doughnut but with a chocolate frosting. 

    Speaking of that chocolate frosting…they call it frosting. I call it a glaze. 

    It’s nice and thin. The chocolate isn’t overpowering and it isn’t frosting-like at all. And I like this! When I think of “chocolate frosting,” I think of something thick and heavy. This chocolate glaze is the perfect finish to the doughnuts. 

    The funny thing about these doughnuts and the plain vanilla glazed is what appealed to me about them: they reminded me of inexpensive gluten-filled doughnuts. These don’t taste like fresh doughnuts from the bakery. They remind me of the doughnuts sold in bags at the grocery store. And I like those doughnuts.

    If you’re looking for a gourmet doughnut, these aren’t for you. But if you miss supermarket-style doughnuts, you’re in for a treat. 

    Aldi Gluten-Free Chocolate Frosted Doughnuts: Ingredients and Nutrition Facts

    Aldi Gluten-Free Chocolate Frosted Doughnut Ingredient Label

    Aldi Gluten-Free Chocolate Frosted Doughnuts Ingredients*: Gluten Free Flour (Corn, White Rice, Tapioca), Palm Oil, Sugar, Eggs, Water, Canola Oil, Baking Powder (Sodium Acid Pyrophosphate, Sodium Bicarbonate, Corn Starch, Monocalcium Phosphate), Xanthan Gum, Salt, Pure Vanilla Extract, Sunflower Lecithin, Chocolate Glaze (Confectioners Sugar, Water, Sugar, Cocoa, Canola Oil, Agar, Calcium Carbonate, Calcium Sulfate, Pure Vanilla Extract, Salt.) 

    Contains: Eggs

    *Please check the current package for up-to-date Ingredient and Nutrition Facts. Ingredients change frequently. Any ingredient or nutrition information provided by GlutenFreeBaking.com is included for educational purposes and may not reflect the current ingredients. 

    The happy surprise? These doughnuts are dairy-free! 

    As for the rest of the ingredients, I think they’re fine. These are doughnuts. So they’re a treat. The flour base is a standard gluten-free mix of corn, white rice flour, and tapioca starch.) You’re not going to get any fiber from these doughnuts. But I’m guessing you weren’t looking for fiber from doughnuts. And if you are? Skip these. 🙂 

    Aldi Gluten-Free Chocolate Frosted Doughnuts: The Price

    A box of six cost me $4.49*. For gluten-free doughnuts, I think this is a fair price. Is it as cheap as gluten-based doughnuts? Not by a long shot. But $0.75 per doughnuts feels reasonable for doughnuts you don’t have to make yourself. 

    *Prices vary depending on your location. 

    Aldi Gluten-Free Chocolate Frosted Doughnuts: Stock Up or Skip?

    I vote stock up! The taste, texture, and price are terrific for gluten-free doughnuts. Around here, gluten-free doughnuts aren’t easy to find. And when I’ve seen them, they’re usually much more expensive than $4.49. If you’ve got the freezer space, pick up a few boxes. 

    Rating: Five out of Five. 

    6 New Gluten-Free Products from Aldi We Can’t Wait To Get Our Hands On.

    Text: 6 New Aldi Gluten-Free Products We Can't Wait to Try.

    Aldi sent me a sneak peek of its upcoming gluten-free product line. The good news? There are several products on the list that I can’t wait to try. (Read: doughnuts and empanadas) The bad news? These products are only available for a short time. They hit the shelves on May 8th and are only available while supplies last. 

    Here are the six gluten-free Aldi products that I can’t wait to try along with a few others that have piqued my interest. 

    Aldi’s New Gluten-Free Products

    1. Gluten-Free Glazed Donuts

    Box of Aldi liveGfree Gluten-Free Glazed Doughnuts

    RED ALERT: There are gluten-free glazed doughnuts in Aldi’s May lineup. I repeat gluten-free glazed doughnuts. I can’t wait to try this one.

    Aldi liveGfree Glazed Gluten-Free Donuts – $4.49

    UPDATE: Aldi Gluten-Free Glazed Doughnut Review is up! 

    2. Chocolate Gluten-Free Donuts

    Box of Aldi liveGfree Gluten-Free Chocolate Doughnuts

    Chocolate doughnuts come in right behind glazed doughnuts because I’ve yet to meet a doughnut I don’t love. Here’s my question: are these vanilla doughnuts glazed with a chocolate icing? Or chocolate doughnuts finished with a chocolate frosting? I’ll do the research on this very.important.question and get back to you–I’m doing this for you, of course. 😉 

    liveGfree Chocolate Gluten-Free Donuts – $4.49

    UPDATE: Aldi Gluten-Free Chocolate Frosted Doughnut Review is up! 

    3. Gluten Free Beef Empanadas

    Box of Aldi liveGfree Gluten-Free Beef Empanadas

    Premade gluten-free empanadas? Exciting!  If you’ve never had an empanada they’re fried or baked dough filled with various fillings. According to the package, these contain onions, potatoes, peas, and queso blanco. That sounds good to me. (BTW, my husband hates peas. These will all be mine! muh hah hah.)

    liveGfree Gluten Free Beef Empanadas – $4.99

    4. Gluten Free Chicken Empanadas Chicken

    Box of Aldi liveGfree Gluten-Free Chicken Empanadas

    Aldi’s really leaning into the empanada offering. They have three varieties in the lineup. After beef, I’m most excited to try the chicken. It contains chicken, onions, red bell peppers, tomatoes, and cilantro. I read this as chicken with salsa because onions + red bell peppers+ tomatoes + cilantro= salsa in my book. But we shall see! 

    liveGfree Gluten Free Chicken Empanadas Chicken – $4.99


    5. Gluten-Free Cheese Ravioli

    Box of Aldi liveGfree Gluten-Free Cheese Ravioli

    If I could, I would live on stuffed pasta. Ravioli, pierogi and pot stickers are three of my favorite foods.  In the past, Aldi offered a little tray of gluten-free ravioli. Smothered in sauce, they reminded me of the TV dinners I loved during childhood. Will these be as good? We shall see.

    liveGfree Gluten Free Cheese Ravioli – $3.99

    6. Gluten-Free Spinach and Cheese Ravioli

    liveGfree Gluten Free Spinach and Cheese Ravioli

    More ravioli? COME TO MAMA. Gluten-free spinach and cheese ravioli sounds so good to me right now. May 8th needs to get here quick. 

    liveGfree Gluten Free Spinach and Cheese Ravioli – $3.99


    Aldi New Gluten-Free Lineup: The Rest.

    Here are the products that I’m interested in trying but am not fully excited about. Yet. 

    Gluten Free Cheesecake SamplerliveGfree Gluten Free Cheesecake

    Cheesecake is one of my favorite desserts. But, to be honest, I prefer plain cheesecake. (I don’t even like fruit topping on my plain cheesecake.) I’m excited about this because….cheesecake. But I’m not as excited as I would be if this was a box of New York-style cheesecake. 

    liveGfree Gluten Free Cheesecake Sampler – $8.99

    Gluten Free Skillet Meals

    liveGfree Gluten Free  Skillet Meals

    Am I the only one who finds premade skillet meals kind of…meh? Aldi has two this year’s: Chicken Florentine and Chicken and Broccoli Alfredo. I’ll probably buy the Chicken Florentine. (Eh, who am I kidding? I’ll probably get both). 

    liveGfree Gluten Free  Skillet Meals – $4.99


    Gluten-Free Croutons

    Aldi liveGfree Gluten Free Croutons

    This is such a fun, albeit odd, member of  Aldi’s gluten-free offerings. I mean, I love croutons. They remind me of the salads my mom served when I was growing up. But honestly, I don’t crave them much. I’ll pick up a bag because it’s crispy buttery bread. 

    liveGfree Glute Free Croutons – $1.99

    Gluten Free “Bites”

    liveGfree Gluten Free "Bites" Assorted Varieties

    I feel like I’m either going to be really excited about these gluten-free “bites” or, whomp whomp, highly disappointed. I love dark chocolate and coconut. So that’s a plus. But are these a sweet treat? Or a “good for you” snack that tastes blah? I want to find out. 

    liveGfree Gluten Free “Bites” Assorted Varieties – $3.69


    Gluten-Free Cinnamon Raisin Bread


    liveGfree Cinnamon Raisin Bread

    How much do I love gluten-free cinnamon raisin bread? So much! But premade gluten-free bread? Eh, it’s usually (not always!) disappointing. If this bread is tasty and not hole-y, I’ll be thrilled. 

    liveGfree Cinnamon Raisin Bread – $3.99


    Gluten-Free Seeds & Grains Bread

    liveGfree Seeds and Grains Bread

    If I remind you that I’m allergic to sesame seeds, I bet you can guess why I’m not wildly excited about this bread. If it’s sesame-free, I’ll throw a loaf in the cart.  

    liveGfree Seeds & Grains Gluten Free Bread – $3.99

    Gluten-Free Vegetable Empanadas

    Box of Aldi liveGfree Gluten-Free Vegetable Empanadas

    Along with the two empanadas listed above, there’s also a vegetarian option. While I want to try this one, I’m not running out the door for it. It sounds…bland. (Watch, it’ll be my favorite of the three.)

    liveGfree Gluten Free Vegetable Empanadas  – $4.99


    Gluten-Free Hot Dog Buns

    liveGfree Gluten Free Hot Dog Buns

    Do these hot dog buns look huge or is that just me?  I find this to be true with Udi’s gluten-free hot dog buns. They’re too big! In fact, I never use those for hot dogs. I use them to make “Easy Gluten-Free Garlic Bread.” The other odd thing? There are only four buns in the bag. Four! Um, okay. 

    liveGfree Gluten Free Hot Dog Buns – $3.49

    Gluten-Free Hamburger Buns

    liveGfree Gluten Free Hamburger Buns

    Lots of folks are totally fine with bunless hamburgers. I’m not one of them. And yet…this pic isn’t jingling my jangle. The buns look big and there’s only four of them, just like with the hot dogs. We shall see, folks, we shall see. 

    liveGfree Gluten Free Hamburger Buns – $3.49


    Aldi’s Year-round Gluten-Free Products

    In addition to the limited-time gluten-free offerings, Aldi has a small selection of gluten-free foods available year-round. 

    List accurate as of 5/2019. Prices and availability may vary depending on your location. 

    • liveGfree Sweet Chili or Black Sesame Brown Rice Crisps – $2.49
    • liveGfree Gluten Free Pretzel Sticks or Minis – $2.19
    • liveGfree Gluten Free Cheddar Biscuit or Cornbread Mix – $2.29
    • liveGfree Gluten Free Baking Mixes Assorted Varieties – $1.99
    • liveGfree Gluten Free Wraps Plain and Spinach – $3.99
    • liveGfree Gluten Free Pepperoni or Cheese Pizza – $5.29
    • liveGfree Gluten Free Stuffed Sandwiches – $2.99
    • liveGfree Gluten Free Multi Seed Crackers Assorted Varieties – $1.99
    • liveGfree Organic Gluten Free Brown Rice Quinoa Fusilli or Penne Pasta – $2.89

    Gluten Containing Grains

    Wondering what grains have gluten? Here are common grains that contain gluten and should be avoided by those following a gluten-free diet.*

    Photo of Wheat

    Gluten Containing Grains

    Wheat

    including the following wheat varieties

    • bulgar wheat
    • durum
    • einkorn wheat
    • emmer
    • farina
    • farro
    • freekeh/farik
    • graham
    • khorasan wheat (KAMUT®)
    • semolina
    • spelt
    • wheatberries
    • wheat starch*

    *Some wheat starch will be labeled gluten-free. For wheat starch to be labeled gluten-free it must be processed to remove the presence of gluten to below 20ppm. If wheat starch isn’t labeled gluten-free, avoid it.

    Rye

    Barley

    Including malt products that are derived from barley. 

    • malt
    • malted barley flour
    • malt extract
    • malt flavoring
    • malted milk
    • malted milkshakes
    • malt syrup
    • malt vinegar

    Triticale

    Oats*

    Oats are a complex subject for two reasons: handling and reaction. Most oats are grown and processed in a way that exposes them to cross-contact with wheat. In addition, many people with celiac disease react to oats. If you decide to introduce them to your diet, select oats that are labeled gluten-free.

    *The information provided on this website has not been evaluated by the FDA and is not intended to diagnose, treat, prevent, or cure any disease.

    Easy Gluten-Free Chocolate Mug Cake

    Gluten-Free Chocolate Mug Cake Closeup. Topped with Whipped Cream and Mini-Chocolate Chips

    This gluten-free chocolate mug cake packs a lot of flavor. Made from simple ingredients, this easy recipe is perfect whenever a chocolate craving hits. Top with whipped cream, ice cream, or an easy frosting.

    Gluten-Free Chocolate Mug Cake. Topped with Whipped Cream and Mini-Chocolate Chips

    This Gluten-Free Chocolate Mug Cake Is

    • moist
    • rich
    • chocolatey
    • easy-to-make

    Even though you can make this mug cake in about a minute, it’s anything but basic. Like my gluten-free vanilla mug cake, this chocolate version is as easy-to-make as it is tasty. 

    Gluten-Free Chocolate Mug Cake Closeup. Topped with Whipped Cream and Mini-Chocolate Chips

    How to Make Gluten-Free Chocolate Mug Cake

    1. Whisk together gluten-free flour, cocoa powder, sugar, and baking powder in a large mug. Add egg, milk, and oil. (And, if you’re in the mood, a generous sprinkling of chocolate chips)
    2. Stir together until batter is smooth. (Make sure you run the spoon around the edges of the mug. Flour loves to cling to the edges.)
    3. Microwave on high for about one minute. 
    4. Top with whipped cream, ice cream, or frosting. 

    Gluten-Free Chocolate Mug Cake Closeup of Spoon. Topped with Whipped Cream and Mini-Chocolate Chips


    FAQs: Gluten-Free Chocolate Mug Cake

    What size mug is best for mug cake?

    A large (12 ounce) mug is best. The cake puffs as it cooks, which is why it’s so important to use a large mug. You want to make a cake, not clean your microwave from overflowing batter. 

    What cocoa powder is the best to use?

    In this recipe, natural or Dutch-process cocoa powder are interchangeable. Use whatever you have in the pantry. Just be sure not to use hot chocolate powder. It’ll make the cake too sweet and not chocolatey enough. 

    Can I make this without an egg?

    No. I’m working on an egg-free version. (probably as you read this.)

    Can I make this dairy-free?

    Yes! This gluten-free mug cake is easy to make dairy-free. Simply replace the milk with your favorite dairy-free alternative. You can even use chocolate or water if you’d like. 

    Can I make this into a vanilla cake?

    For a vanilla-version, follow the recipe for my easy gluten-free vanilla mug cake. It’s just as easy, moist, and tender as this one—only without the chocolate. 

    Gluten-Free Chocolate Mug Cake. Topped with Whipped Cream and Mini-Chocolate Chips
    4.25 from 16 votes
    Print

    Easy Gluten-Free Chocolate Mug Cake Recipe

    Ingredients

    • 1/4 cup all-purpose gluten-free flour
    • 1 tablespoon cocoa powder
    • 1/2 teaspoon baking powder
    • 2 tablespoons granulated sugar
    • 1 large egg
    • 2 tablespoons vegetable oil
    • 1 tablespoon milk
    • about 1 teaspoon mini-chocolate chips optional

    Frosting

    • 2 tablespoons softened butter or dairy-free spread
    • 3 tablespoons powdered sugar
    • 1 teaspoon milk

    Toppings

    • Whipped Cream
    • Ice Cream
    • Frosting

    Instructions

    For the Microwave

    1. Spray a large (12 ounces) mug with nonstick cooking spray. Stir together gluten-free flour, cocoa powder, sugar, and baking powder in the mug. Add egg, oil, and milk. Stir until smooth with a fork or mini whisk. Stir in mini-chocolate chips if using.
    2. Microwave on high for 60-80 seconds or until cake pulls away from the sides of the mug and the top looks dry. Allow cake to cool in the mug. Top warm cake with vanilla ice cream or whipped cream, if desired. Or allow the cake to cool and frost.

    For the Oven

    1. Preheat oven to 350 degrees. Follow step one above. Be sure to use an oven-safe mug. Place mug on a baking sheet. Bake until set, about 20 minutes.

    For the Frosting

    1. Beat together the butter and powdered sugar until smooth with a spoon. Add milk. Mix until creamy. Spread frosting on cooled cake. If you put the frosting on the hot cake, it will melt.

    • « Go to Previous Page
    • Page 1
    • Interim pages omitted …
    • Page 4
    • Page 5
    • Page 6
    • Page 7
    • Page 8
    • Interim pages omitted …
    • Page 20
    • Go to Next Page »

    Primary Sidebar

    Get Recipes Delivered to Your Inbox! (Free Weekly Newsletter!)


    Elizabeth Barbone

    I'm Elizabeth. Welcome to GlutenFreeBaking.com --- a judgment-free baking space. Here you'll find easy recipes, product reviews, and other good stuff that makes gluten-free living easy and a lot more fun!

    Read More About Elizabeth →

    • Facebook
    • Instagram
    • Pinterest

    Foods You Miss the Most

    • A stack of gluten-free pancakes topped with maple syrup and butter on a plate.
      The Best Gluten-Free Pancakes
    • Gluten-free chocolate chip cookies on a cooling rack.
      Gluten-Free Chocolate Chip Cookies
    • Loaf of Baked Gluten-Free Sandwich Bread on Red Cutting Board.
      How to Make the Best Gluten-Free Sandwich Bread: An Easy Recipe for Everyone!
    • Gluten-free flour tortillas on plate.
      How to Make the Best Gluten-Free Flour Tortillas

    Footer

    ↑ back to top

    Terms

    • Privacy Policy
    • Terms & Conditions
    • Accessibility Statement

    Follow Us

    • Facebook
    • Instagram
    • Pinterest

    About

    • Contact
    • About

    Copyright © 2025 Gluten-Free Baking