• Skip to primary navigation
  • Skip to main content
  • Skip to primary sidebar
Gluten-Free Baking logo
  • Home
  • Recipes
  • About
    • About Me
    • Contact
    • My Cookbooks
    • Work with Me
menu icon
go to homepage
  • Home
  • About
  • Recipes
  • Contact
    • Facebook
    • Instagram
  • search icon
    Homepage link
    • Home
    • About
    • Recipes
    • Contact
    • Facebook
    • Instagram
  • ×
    Home

    Silver Dollar Coconut Flour Pancakes

    Stack of coconut flour pancakes topped with blueberries and maple syrup on a small pink plate.

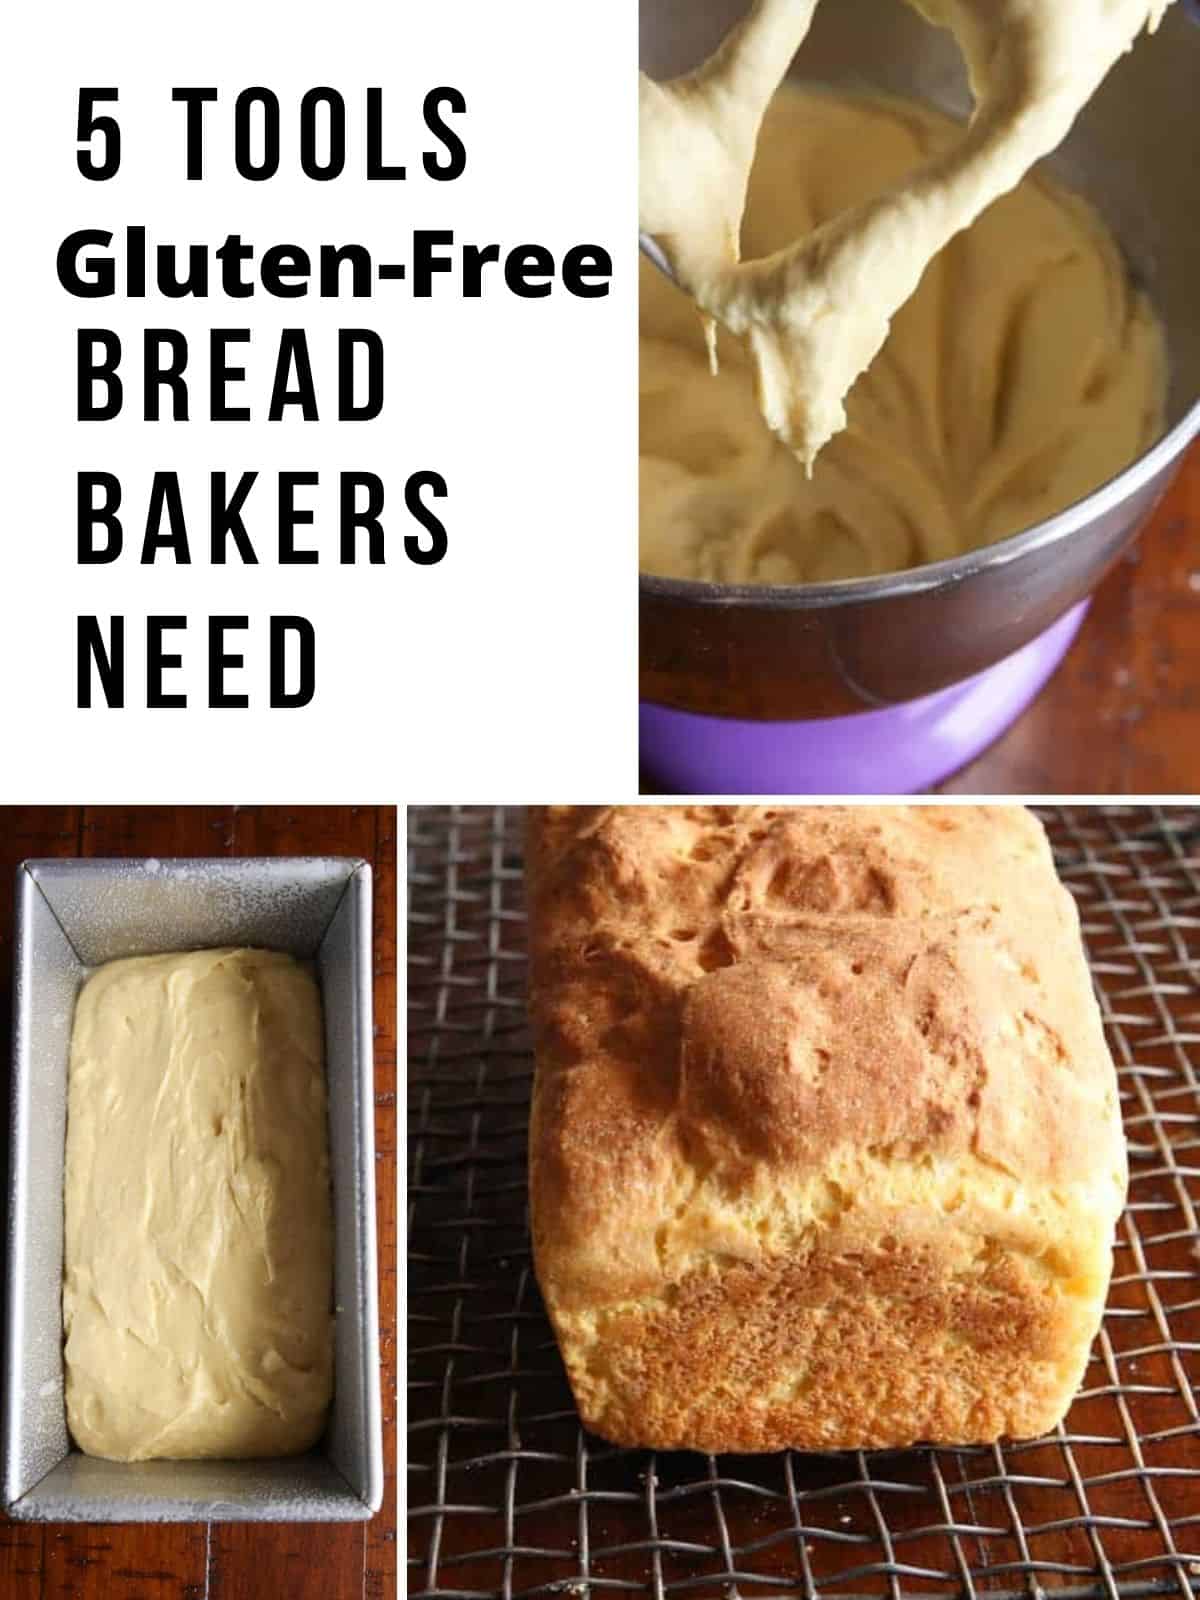
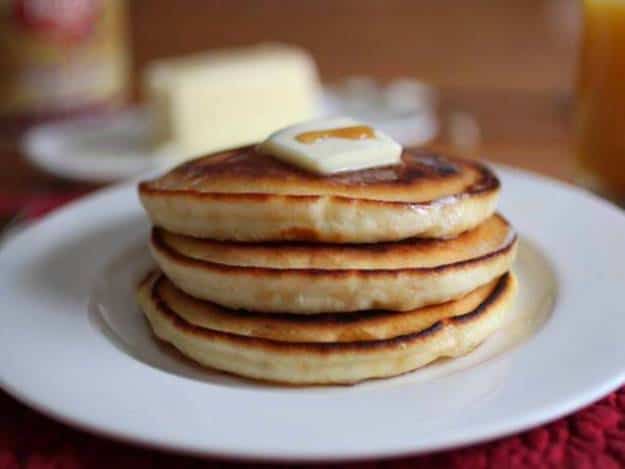
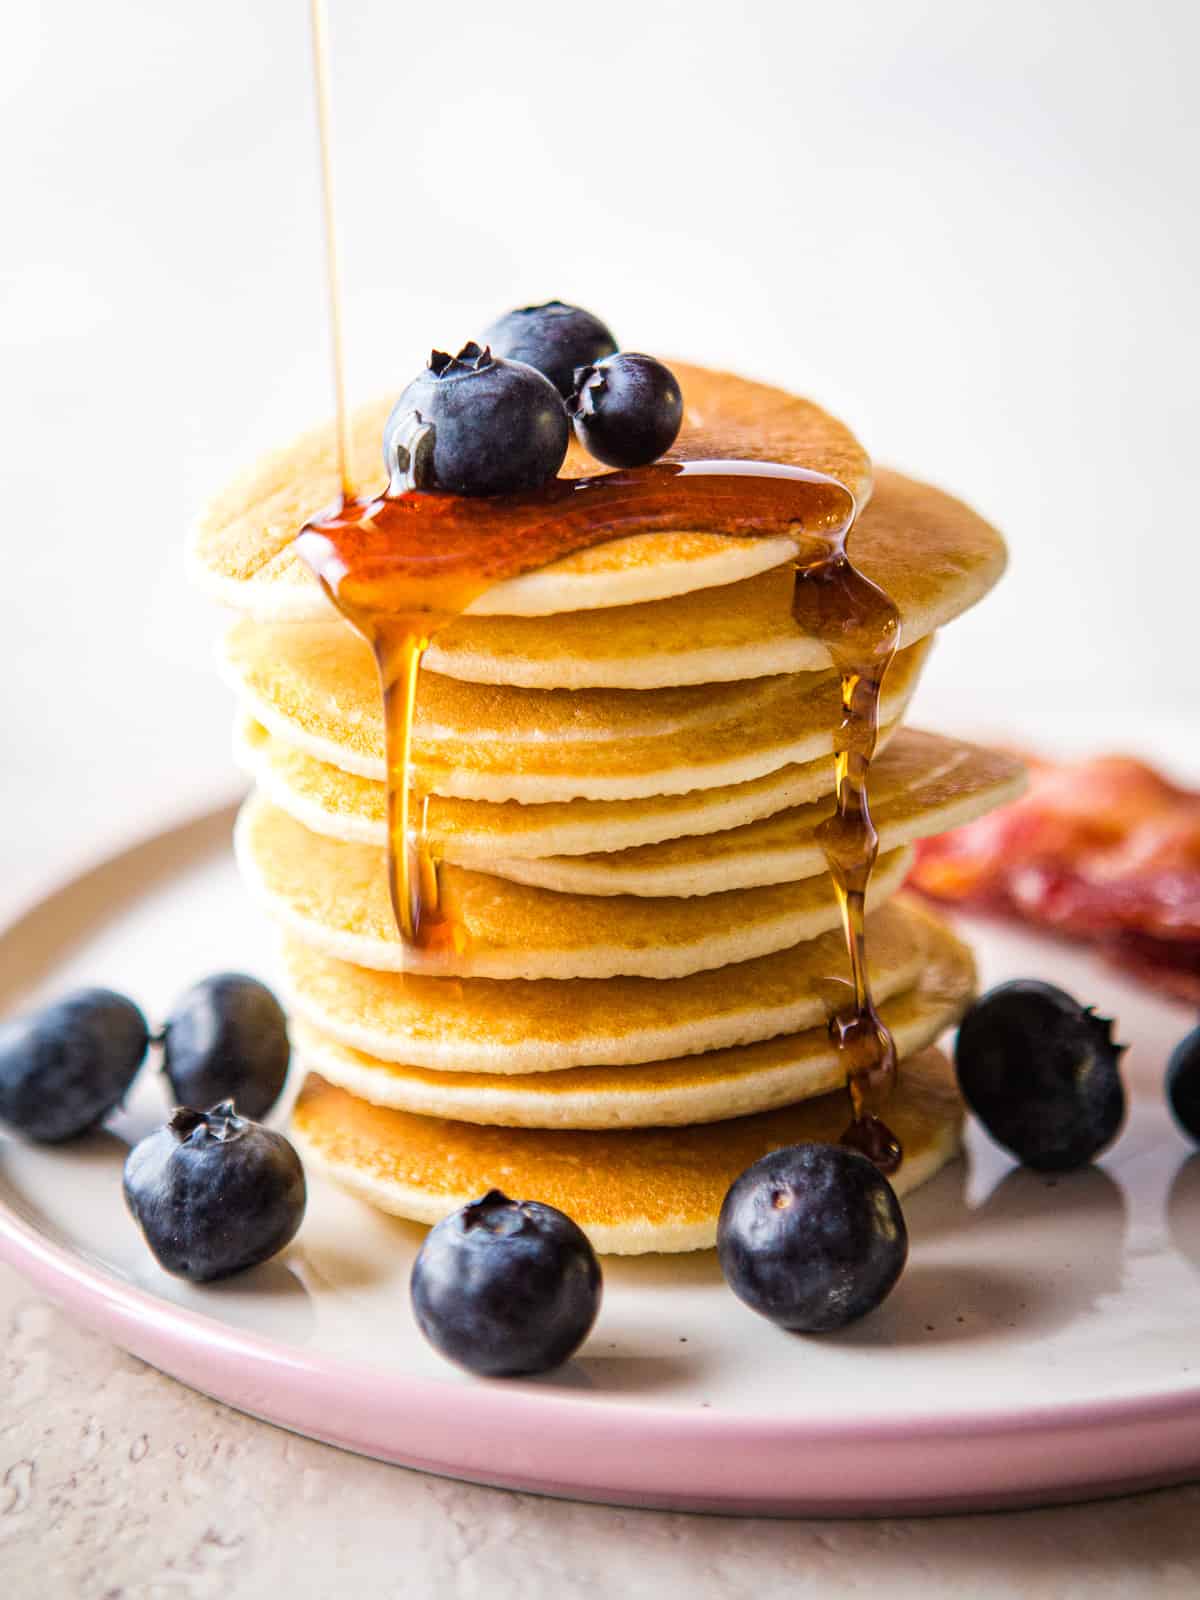
    Silver dollar coconut flour pancakes are a snap to make. They cook up light and fluffy. Perfect served with maple syrup and butter.

    Stack of coconut flour pancakes topped with blueberries and maple syrup on a small pink plate.

    Why You’ll Love These Silver Dollar Coconut Flour Pancakes

    • One bowl recipe
    • Dairy-free
    • Easy to make
    • Small and tasty
    • Grain-free

    Do you LOVE pancakes?? Then you need to try these coconut flour silver dollars. They’re one of my favorite grain-free pancake recipes. (The other? My recipe for almond flour pancakes.) Not only are these the cutest pancakes you’ll ever make, but they might also be the tastiest!

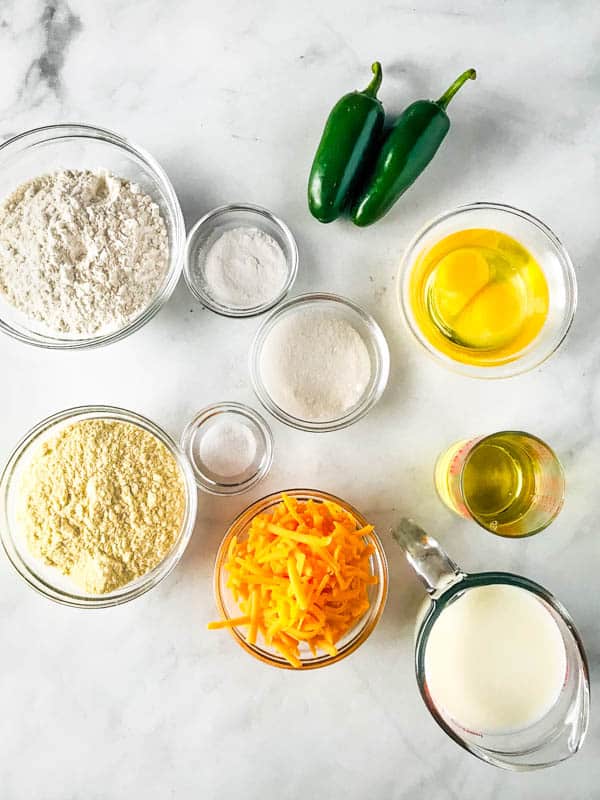
    Ingredients Explained

    • Coconut Flour. Coconut flour makes these pancakes tender and flavorful. Be sure to use coconut flour, not desiccated or shredded coconut. Unlike almond flour, it absorbs a lot of liquid. The recipe uses only ⅓ cup (36 grams) of flour for the entire recipe.
    • Eggs. With no grain in this recipe, eggs provide structure to help the pancakes rise and keep their shape. Please note: the recipe has not been tested with an egg replacer. 
    • Milk. The batter for these pancakes needs a little milk to achieve the right consistency. Use dairy or dairy-free milk in this recipe but avoid full-fat coconut milk from the can. It is too thick for the batter.
    • Coconut oil or Butter: Adds richness to make the pancakes tender.
    • Baking Powder. Helps the pancakes to rise, along with the eggs. If you are grain-free, you can use homemade baking powder or purchase a grain-free brand at the store. 
    • Salt. A little salt enhances the flavor. Use fine salt (not Kosher salt) for the best results.
    • Vanilla Extract: For flavor. You can add a sprinkle of ground cinnamon too! 

    Making Silver Dollar Coconut Flour Pancakes: Five Keys for Success

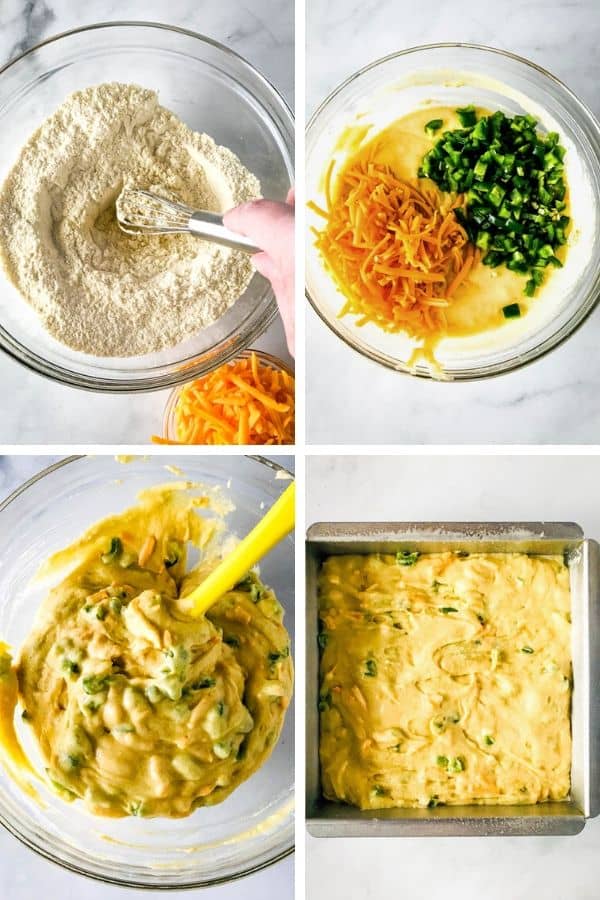
    1. Whisk the coconut flour with baking powder and salt. This step ensures the baking powder is evenly distributed. 
    2. Add the milk in two stages. Coconut flour loves to absorb liquid. Start by adding 4 tablespoons of milk, along with the eggs and vanilla. If the batter is too thick, add more milk. Also, as you make the pancakes, the batter might thicken. If it does, add milk as you work.
    3. Keep them small. Coconut flour pancakes are so tender that they are sometimes hard to flip. Making small (silver dollar) pancakes solves this problem in the cutest way!
    4. Cook on a hot griddle. Test the griddle before cooking your first pancake. To do this, drop a little water on it. You want the water to bubble and evaporate quickly. For the best pancakes, the batter should sizzle and bubble when ladled onto the griddle.
    5. Look for bubbles. Flip the pancakes when small bubbles appear all over the surface.
    5 from 1 vote
    Print

    Silver Dollar Coconut Flour Pancakes

    Easy coconut flour pancakes. Gluten-free. Grain-free. Dairy-free (if dairy-free milk and coconut oil are used)

    Prep Time 5 minutes
    Cook Time 3 minutes
    Servings 16 small pancakes

    Ingredients

    • ⅓ cup coconut flour (1 ⅓ ounces; 38 grams)
    • ¼ teaspoon baking powder, homemade or store-bought, grain-free
    • ¼ teaspoon salt
    • 4 large eggs 200 grams out of shell
    • 4 to 6 tablespoons milk dairy-free or traditional
    • 1 tablespoon coconut oil ghee, or unsalted butter, melted
    • 1 teaspoon vanilla extract
    • nonstick cooking spray, coconut oil, ghee, or butter for greasing the griddle

    For Serving

    • maple syrup

    Instructions

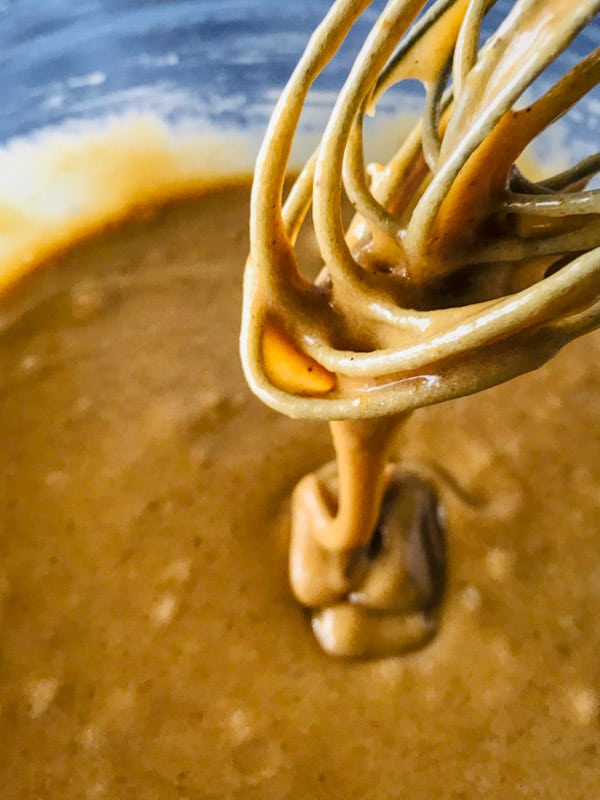
    1. Whisk the coconut flour, baking powder, and salt together in a medium mixing bowl. Add the eggs, 4 tablespoons milk, melted coconut oil, and vanilla extract. Whisk until smooth. If batter is too thick, add the additional two tablespoons milk.
    2. Heat a flat griddle over medium-high heat. Lightly grease with coconut oil, or nonstick cooking spray.
    3. Drop batter, about one tablespoon per pancake, onto hot griddle with a soup spoon. Use the back of the spoon to spread the batter out a little. Cook until bubbles appear on the surface of the pancake and edges set. Flip and cook an additional minute. Repeat with the remaining batter.

    4. Serve warm with maple syrup.

    Easy Gluten-Free Sugar Cookies

    Stack of gluten-free sugar cookies.

    Easy recipe for gluten-free sugar cookies. Tender and buttery, these cookies hold their shape during baking. Finish with colored sugar or frosting! 

    Stack of gluten-free sugar cookies.

    Several years ago, I shared a recipe for gluten-free cut out cookies that used individual gluten-free flours. At the time, gluten-free flour blends were hard to find and the results were often uneven. This is no longer the case. Since so many folks prefer to bake with a flour blend (something I totally understand!), I wanted to re-test my recipe using a blend. The result: easy to make gluten-free cut out cookies. 

    Why You’ll Love These Gluten-Free Cut-Out Sugar Cookies

    • The taste and texture. These are classic cut out cookies. They’re delicate, buttery, and not too sweet. (You can use a dairy-free spread.) Plus: they hold their shape during baking. 
    • Easy to Make. The dough takes only a few minutes to make. (They do require at least 45 minutes of chilling before they’re ready to roll.)
    • Freeze beautifully. After baking, allow the cookies to cool and then place into a freezer container.

    Gluten-free sugar cookies on a wire rack with red and green sugar.

    Five Things to Know About Making Gluten-Free Sugar Cookies

    1. Don’t overbeat the butter. For this recipe, simply mix the butter and sugar until it’s thick, not fluffy. If it gets overmixed, the cookies can spread.
    2. Chill the Dough. Unlike chocolate chip cookies or gluten-free sparkly cookies, cut out cookie dough needs to chill before baking. This prevents the cookies from spreading as they bake. Allow at least 45 minutes for chilling. 
    3. The best thickness is 1/4 inch. This is the sweet spot (Pun fully intended) for sugar cookies. 
    4. You can re-roll the dough! Since there’s no gluten in the dough, you can reroll it many times. It won’t get tough! It can, however, get warm. If the dough starts to get soft, pop it in the fridge for a few minutes before re-rolling.
    5. Bake until the edges are light brown. These cookies remain rather pale. Look for the edges to turn a very light brown, at this point, the cookies are usually done.  

    Stack of gluten-free sugar cookies.
    Print

    Gluten-Free Sugar Cookies (Cut-Outs)

    These gluten-free sugar cookies are delicate and buttery. And they keep their shape during baking. Decorate with sugar or frosting.

    Prep Time 15 minutes
    Cook Time 15 minutes
    Servings 24 cookies

    Ingredients

    • 2 cups gluten-free baking flour, see note (10 1/4 ounces; 290 grams)
    • 1 teaspoon baking powder
    • ¼ teaspoon salt
    • 12 tablespoons softened butter (10 ounces; 285 grams)
    • ¾ cup granulated sugar (5 1/4; 150 grams)
    • 1 large egg (about 2 ounces; 56 grams out of shell)
    • 1 teaspoon vanilla extract
    • colored sugar, optional

    Buttercream Frosting

    • 2 cups powdered sugar, sifted (8 ounces; 225 grams)
    • ½ cup butter, softened (4 ounces; 115 grams)
    • 2 tablespoons milk, plus more as needed (1 ounce; 28 grams)
    • ½ teaspoon vanilla extract
    • food color, optional

    Instructions

    1. Whisk together the gluten-free flour, baking powder, and salt. Set aside.

    2. Combine butter and sugar in the bowl of a stand mixer. Mix, on medium speed, until a thick paste forms, about 30 seconds. Stop mixer. Scrape down bottom and sides of the bowl. Mix again for 10 seconds.

    3. Stop mixer and add egg and vanilla extract. Mix, on medium speed, until combined, about 30 seconds. Again, stop the mixer and scrape down the bottom and sides of the bowl. Mix again for 10 seconds.

    4. With the mixer off, add the whisked gluten-free flour mixture. Mix, on medium-low speed, until a dough forms.

    5. Turn the dough out onto a lightly floured counter and pat into a round. Wrap with plastic wrap and chill at least 45 minutes. (Dough can be chilled for several days).

    6. Adjust oven rack to upper middle and lower middle positions. Preheat oven to 350 degrees F. Line to baking sheets with parchment paper.

    7. Remove dough from the refrigerator and allow it to sit on the counter for about 15 minutes. Dust counter with gluten-free flour and roll out dough, about 1/4-inch thick. (If dough cracks, it's too cold.)

    8. Cut into shapes with a cookie cutter. Place cookies onto a parchment-lined baking sheet. Sprinkle with colored sugar if desired.

    9. Bake until edges are golden brown, about 12 minutes for 3-inch cookies. Rotate pans halfway through baking.

    10. Allow cookies to cool on the baking sheet for about three minutes before transferring to a wire rack to cool completely.

    11. Prepare Frosting: In a small bowl, beat together powdered sugar, butter, vanilla, and milk until smooth and creamy. If frosting is too thick, add an additional teaspoon of milk. Divide frosting between bowls and color if desired.

    12. Frost cool cookies with frosting. Store, covered, for up to four days. Or freeze cookies in a freezer container.

    Recipe Notes

    Gluten-Free Baking Flour

    The recipe was tested with Bob's Red Mill 1:1 Gluten-Free Baking Flour.

    The Best Gluten-Free M&M Cookies

    Gluten-free M&Ms cookies with red and green M&Ms on a plate.

    Gluten-Free M&Ms Cookie Recipe. Buttery Sugar Cookies studded with M&Ms. Perfect for Christmas.

    Gluten-free M&Ms cookies with red and green M&Ms on a plate.

    If you love both sugar cookies and chocolate chip cookies, these are for you! 

    They’re easy to make; so they make perfect Christmas cookies. You can crank out several batches quickly. Placed in pretty bags and tied with a ribbon, these make great gifts.

    Like my soft gluten-free sugar cookie recipe, these are really easy to make. If you’ve never made simple sugar cookies before, here’s the lowdown.

    How to Make Gluten-Free M&M Cookies

    1. Mix the Dough. This recipe makes a simple buttery sugar cookie. Cream together butter (see note below if you can’t use dairy) and brown sugar until a thick paste forms. Don’t over-whip the butter and sugar or the cookies will spread too much as they bake. Add the eggs and mix until combined. Then add the dry ingredients. Mix until a dough forms.
    2. Add the M&Ms. Once the dough comes together, stop the mixer and add the M&Ms. There are lots of M&Ms in these cookies, ensuring that almost each bite of cookie contains an M&M. During baking, the M&Ms sometimes “hide” in the dough. If you want to see the M&Ms, press a few extra into the top of the dough before baking.
    3. Quick Chill. A quick chill, about 20 minutes, keeps the cookies from spreading too much. Pop the dough into the refrigerator to chill and turn on the oven. By the time the oven is ready to go, the cookies have chilled for long enough.
    4. Preheat the oven. Bake the cookies into a preheated oven. A cold oven can cause greasy cookies (The butter melts too much before baking as the oven gets up to temperature.)
    5. Bake. Scoop the dough and drop onto a parchment-lined baking sheet. A cookie scoop works great for this. These cookies spread a little during baking–about as much as a gluten-free chocolate chip cookie. Be sure to space each dough ball about two-inches apart. Bake until the cookies are light brown.
    6. Cool. When the cookies come out of the oven, they’re delicate. Allow them to cool on the pan for about three minutes before transferring to a wire rack to cool.

    Which gluten-free flour should I use?

    I tested this recipe with Bob’s Red Mill Gluten-Free Baking Flour. Using a different flour (or flours) can dramatically change the results.

    Can I freeze these cookies?

    Yes! Allow the cookies to cool completely before freezing. To freeze, place in a freezer container with a layer of parchment or waxed paper between the layers. Thaw the cookies at room temperature overnight.

    You can also freeze the dough. Preheat the oven as directed and bake the cookies for an additional minute or so. There’s no need to thaw the dough before baking.

    Gluten-free M&Ms cookies with red and green M&Ms on a plate.
    4.91 from 11 votes
    Print

    Gluten-Free M&M Cookie Recipe

    Gluten-Free M&M Cookie Recipe. Buttery Sugar Cookies studded with M&Ms. Easy to Make.

    Prep Time 30 minutes
    Cook Time 12 minutes
    Total Time 42 minutes
    Servings 30 cookies

    Ingredients

    • 2 cups gluten-free flour (see note) (10 ounces; 285 grams)
    • 1 teaspoon baking soda
    • ½ teaspoon salt
    • ¾ cup butter, softened (1½ sticks; 6 ounces; 170 grams)
    • 1 cup light brown sugar (7 ½ ounces; 212 grams)
    • 2 large eggs (about 4 ounces ; 100 grams out of shell)
    • 1 teaspoon vanilla extract
    • 2 cups chocolate M&Ms, plus additional if desired, see note

    Instructions

    1. Whisk together the gluten-free flour, baking soda, and salt in small bowl. Set aside.

    2. Cream together the butter and brown sugar in a large mixing bowl until a thick paste forms, about 45 seconds. (Use medium speed on a stand mixer and medium-high speed on a handheld mixer.)

    3. Stop mixer. Scrape down bottom and sides of the bowl. Turn mixer on. Add eggs, one at a time, mixing well between each addition. Stop mixer. Scrape down sides and bottom of the bowl. Add vanilla extract. Mix for 20 seconds.
    4. Stop mixer. Add whisked gluten-free flour. Turn mixer to low speed. Mix until a dough forms. Stop mixer. Add the M&Ms. Mix until just combined. Chill dough for 20 minutes while you preheat the oven. 

    5. Preheat oven to 350℉. Line two baking sheets with parchment paper. 

    6. Scoop dough, about two tablespoons each, and round into balls. Place dough onto prepared baking sheet. If desired, press a few additional M&Ms onto each cookie. Space dough  about 2-inches apart, as cookies spread during baking.

    7. Bake until edges are golden brown, about 12 minutes. Allow cookies to cool on the pan for about three minutes before transferring to a wire rack to cool completely.

    Recipe Notes

    Gluten-Free Flour

    This recipe was tested with Bob’s Red Mill Gluten-Free Baking Flour. Using a different flour can change the texture of these cookies. If you need to replace the flour, use a flour blend that contains xanthan gum or add ¼ teaspoon to the recipe. 

    10 Gluten-Free Thanksgiving Side Dishes and Desserts

    Gluten-free stuffing in a blue dish.

    On Thanksgiving, Turkey might get top billing but it’s often the side dishes that steal the show. If you avoid gluten, however, it can feel like many of the traditional Thanksgiving dishes — stuffing, gravy, rolls — are off-limits.

    Thankfully, it doesn’t need to be this way! Here’s a list of ten gluten-free dishes and desserts that are perfect for your Thanksgiving table.

    1. Gluten-Free Bread Stuffing

    Gluten-free stuffing in a blue dish.

    Traditional bread stuffing goes gluten-free. This easy recipe includes sausage and sage but you can customize it to fit your family’s tastes. 

    Get the recipe: Classic Gluten-Free Stuffing

    2. Gluten-Free Cornbread Stuffing

    Baked gluten-free cornbread stuffing in a casserole dish.

    Are you a fan of cornbread stuffing? This version celebrates the Southern classic: it’s deeply flavorful and not soggy.

    Get the Recipe: Gluten-Free Cornbread Stuffing

    3. Gluten-Free Gravy

    Gluten-free gravy being poured on turkey.

    Is it Thanksgiving without gravy? Doubtful. You can, of course, make a gluten-free gravy with cornstarch. But if you love the deep flavor of a flour-thickened gravy, this one’s for you. 

    Get the Recipe: Gluten-Free Gravy

    4. Gluten-Free Macaroni and Cheese

    Gluten-free macaroni and cheese on a plate.

    One year a friend invited me over for Thanksgiving. They served macaroni and cheese! It was amazing. If mac and cheese gets a spot on your Thanksgiving table, this gluten-free version will win raves. 

    Get the recipe: Gluten-free Mac and Cheese

    5. Gluten-Free Cornbread

    Gluten-Free Cornbread Sliced in Skillet

    The bread basket is always abundant on Thanksgiving (Along with someone saying, “Don’t let me fill up on bread!”). This hearty, not-sweet cornbread, is delicious. And wonderful the next morning, toasted and served with butter.

    Get the Recipe: Gluten-Free Cornbread

    6. Gluten-Free Soft Dinner Rolls

    Gluten-Free Soft Dinner Roll Baked and Spread with Butter.

    You can never go wrong with a basket of warm rolls on the table. These gluten-free soft rolls are so easy to make — and so easy to eat!

    Get the Recipe: Gluten-Free Dinner Rolls

    7. Gluten-Free Green Bean Casserole

    Gluten-Free Thanksgiving Green Bean Casserole.

    This gluten-free version of green bean casserole made me fall in love with the dish. It starts with fresh mushrooms and includes homemade fried onion strips. It’s a little bit of work but it’s so worth the effort.

    Get the recipe: Gluten-Free Green Bean Casserole

    8. Gluten-Free Cranberry Bread

    Gluten-free cranberry bread in pan.

    Make room in your Thanksgiving lineup for a loaf of gluten-free cranberry bread. This recipe makes a sweet and tender loaf of bread, that’s perfect to enjoy while sitting on the couch in your stretchy pants. 

    Get the recipe: Gluten-Free Cranberry Bread

    9. Gluten-Free Pumpkin Bread

    Sliced gluten-free pumpkin bread on brown parchment paper.

    Thanksgiving is the day to celebrate all things pumpkin! This moist and tender gluten-free pumpkin bread recipe makes two loaves. One you can enjoy on Thanksgiving and the other you can tuck into the freezer to enjoy during December.

    Get the Recipe: Gluten-Free Pumpkin Bread

    10. Gluten-Free/Egg-Free Pumpkin Pie

    Egg-free, dairy-free, gluten-free pumpkin pie in pan.

    This pumpkin pie recipe is gluten-free, dairy-free, and egg-free. But the best part? It’s smooth, creamy, and packed with great flavor.

    Get the Recipe: Gluten-Free Dairy-Free Pumpkin Pie


    Easy Almond Flour Yellow Cake. (Grain-free!)

    Slice of almond flour cake on a plate.

    This almond flour cake is moist, tender, and flavorful. It’s great if you need a grain-free recipe or if you just love almond desserts! Easy one-bowl cake recipe. Perfect for birthdays and other celebrations! 

    Slice of almond flour cake on a plate.


    Looking for a moist, soft, and delicious yellow cake made with almond flour? This recipe has you covered. It’s so easy-to-make! And is perfect frosted with buttercream or simply sprinkled with powdered sugar and served with fresh berries.

    People often ask me if they can swap almond flour for gluten-free flour in my gluten-free yellow cake recipe. That’s not a good idea because almond flour, which is made from ground almonds, contains fat and no starch. The good news? This recipe was developed with almond flour. No need to make swaps! It’s moist and tender and grain-free. 

    Why You’ll Love This Almond Flour Yellow Cake

    • Made with simple ingredients
    • One bowl recipe.
    • Flavorful
    • Moist and tender
    • Freezes well

    Important Ingredients

    • Finely ground almond flour. This cake uses almond flour for a rich flavor and moist texture. For the best results, use a finely ground almond flour. 
    • Tapioca Starch/Flour. During testing, I found that tapioca starch made for a yellow cake with a “bakery-style” crumb. It adds softness to the cake while letting the flavor of the almond flour shine. 
    • Eggs. There’s a generous amount of whole eggs in this recipe. They provide structure to the cake. Please note: the recipe has not been tested with an egg replacer. 
    • Grapeseed Oil. To keep the crumb of this cake light and tender, use a liquid oil, like grapeseed oil. I found that melted coconut oil made the cake heavy. 
    • Coconut Sugar or Evaporated Cane Sugar. The sweetness in this cake comes from either coconut sugar or natural cane sugar. If you use coconut sugar, the cake looks a bit darker and has a more caramel-like flavor than if you use cane sugar
    • Milk. For a nice smooth batter, a little milk is needed. Traditional milk or a dairy-free replacement may be used. The only milk to avoid is full fat coconut milk. The added richness that full fat coconut milk brings to the recipe creates a cake that’s unpleasantly rich.

    Almond flour cake with pink frosting on a cake stand.

    How to Make Almond Flour Yellow Cake. Keys for Success

    • Whisk the almond flour to remove lumps. Due to the oil content in almond flour, sometimes it clumps together. Before using, whisk it, with either a fork or balloon whisk, to break up any lump.
    • Mix the batter until smooth and creamy. You don’t need an electric mixer for this recipe. (Although you can use one if it’s easier for you.) Simply combine all the ingredients in a large bowl and whisk until smooth and creamy. When you’re done with whisking, take a moment to run a spatula along the side and bottom of the bowl. (Sometimes a little of the flour mixture is hanging out there.) And give the batter a few more stirs with the whisk.
    • Cool the cake on a wire rack. This cake is fragile when it comes out of the oven. Allow it to cool in the pan for a few minutes. And then, when it’s still warm to the touch but not, remove the cake from the pan and allow it to cool on a wire rack.

    Almond Flour Cake: Dos and Don’ts

    Don’t use coconut flour. This cake uses almond flour and tapioca starch. Coconut flour or a grain-based gluten-free flour won’t work in this recipe.

    Do use coconut sugar or pure cane sugar. This is a mildly sweet cake. 

    Do test the cake for doneness. Insert a cake tester or toothpick into the center of the cake to check it for doneness. The cake tester should come out clean or with a few crumbs clinging to it. You don’t want to see any batter.

    Slice of almond flour cake on a plate.
    5 from 1 vote
    Print

    Almond Flour Yellow Cake

    Easy almond flour cake recipe. Moist and tender, this grain-free almond flour cake is perfect for birthdays. Dairy-free.

    Servings 12 servings

    Ingredients

    For the Cake

    • 3 cups finely ground almond flour (12 ounces; 340 grams)
    • 1 cup tapioca starch (4 ounces; 113 grams)
    • 1 cup coconut sugar or evaporated cane juice (6 ounces; 170 grams)
    • 2 teaspoons baking powder, homemade or grain-free store-bought
    • 1 teaspoon salt
    • ⅔ cups grapeseed oil 4 ⅔ ounces; 132 grams
    • 6 large eggs (about 10 ½ ounces; 300 grams out of the shell)
    • ½ cup milk, dairy-free or traditional, (4 ounces; 113 grams)
    • 2 teaspoons vanilla extract

    For the Frosting

    • 1 cup dairy-free butter spread or butter, softened (8 ounces; 226 grams)
    • 4 cups powdered sugar, grain-free, see note (16 ounces; 453 grams)
    • ¼ teaspoon salt
    • ¼ cup milk, dairy-free or traditional, more as needed (2 ounces; 56 grams)

    Instructions

    For the Cake

    1. Preheat Oven. Adjust an oven rack to the middle position and preheat the oven to 350ºF.

    2. Grease Pans. Grease two 8-inch round cake pans with nonstick cooking spray or brush lightly with melted coconut oil. Place an 8-inch parchment-paper round in the bottom of each pan and grease it lightly with nonstick cooking spray or brush lightly with melted coconut oil.

    3. Make Batter. Whisk the almond flour, tapioca starch, sugar, baking powder, and salt together in a medium mixing bowl. Break up any clumps of almond flour with your fingers or a fork. Add the oil, eggs, milk, and vanilla and whisk until smooth.

    4. Fill Pans. Spread the batter evenly into the prepared cake pans. Gently tap the pan on the counter to settle the batter.

      Bake until a cake tester inserted in the center of each cake comes out clean, about 30 minutes.

    5. Cool the Cake. Allow the cake(s) to cool in the pan for about 8 minutes, then turn out to a wire rack to cool completely. Peel off the parchment paper and allow to cool completely before frosting.

    6. Store the Cake. Cover leftover cake and store on the counter for up to three days. To freeze the cake: cool cake completely. Wrap tightly with plastic wrap and freeze up to two months. Thaw cake overnight in the refrigerator.

    For the Frosting

    1. Make Frosting. Beat the dairy-free spread until light. Stop mixer. Add the powdered sugar, salt, and milk. Turn mixer to low. Mix for a few seconds. Increase speed and beat the frosting until light and fluffy. If frosting is too thick, add additional milk as needed.

    Recipe Notes

    Powdered Sugar

    Many brands of powdered sugar contain corn starch. If you need a grain-free powdered sugar, look for a grain-free brand or make your own with this corn-free powdered sugar recipe.


    5 Tools Gluten-Free Bread Bakers Need

    5 Tools Gluten-Free Bread Bakers Need

    5 Tools Gluten-Free Bread Bakers Need

    Gluten-free bread baking presents unique challenges. The dough, unlike wheat-based doughs, is very soft and sticky. And sometimes it’s tough to tell if the bread is baked all the way through. 

    Here’s the gear you need to bake your best loaf of gluten-free bread yet. (And don’t worry, a bread machine isn’t on the list.)

    #1 Flat Paddle Attachment

    Flat paddle attachment for stand mixer.

    Gluten-free bread dough doesn’t form a ball like wheat dough. It’s similar to a very thick batter. This makes the paddle attachment of a stand mixer a better choice than the dough hook. 

    Don’t have a stand mixer? That’s okay! Use a heavy-duty handheld mixer. 

    #2. Mini Offset Spatula

    Small metal offset spatula

    This tool, often used for frosting, makes it easy to spread gluten-free bread dough evenly into the pan. The reason this matter is because as gluten-free bread dough rises, it doesn’t move much. It’s best to start with the dough evenly spread into the pan. If the dough is higher on one side than the other, the loaf will bake unevenly.


    #3. One pound loaf pan with straight sides. 

    Metal loaf pan.

    When making gluten-free bread, the pan matters. If it’s too big, you’ll get a loaf that’s flat and wide. For nice high slices of gluten-free bread, use a one-pound loaf pan. My favorite pan measures 8.5-inch by 4.5-inch by 2.75-inch and is made by Chicago metallic. (And the edges make for a beautiful loaf of bread!)

    #4. Instant Read Thermometer

    Instant read thermometer.

    The best way to ensure you’re loaf is baked in the center is to use an instant-read thermometer. Gluten-free bread is best baked to a temperature of about 208 degrees F. Be sure to take the temperature in the center of the loaf, not the edges where the temperature is higher. 

    #5 Cooling Rack

    Wire cooling rack.

    A good cooling rack allows air to circulate around hot baked goods. This allows steam to escape and prevents the center of gluten-free bread from turning gummy. After allowing a freshly baked loaf of bread to cool in the pan for a few minutes, transfer it to a cooling rack for the best texture. 

    Gluten-Free Bread Recipes to Try

    • Gluten-Free Sandwich Bread
    • Gluten-Free Cinnamon Raisin Bread
    • Gluten-Free Dinner Rolls


    Easy Gluten-Free Chocolate Cupcakes

    Gluten-free chocolate cupcake with chocolate frosting. Unwrapped from cupcake liner.

    Easy recipe for gluten-free chocolate cupcakes. The best one bowl, small-batch recipe. Moist and tender. Dairy-free option.

    Gluten-free chocolate cupcakes with frosting on platter.

    After creating an easy recipe for one bowl gluten-free vanilla cupcakes, I wanted to do the same thing for chocolate cupcakes. 

    Some gluten-free chocolate cupcake recipes rely on a combination of cocoa powder and melted chocolate. While this makes for a yummy cake, it’s not what I’d call easy. Some days I’m just not in the mood to chop and melt chocolate. Actually, make that most days. 

    My goal was to create a recipe for soft and tender gluten-free cupcakes that’s super easy to make.

    After a few flops, I settled on a recipe that, if I’m honest, is one of the best chocolate cupcakes I’ve ever had. Gluten-free or not. 

    These gluten-free chocolate cupcakes are

    • Dense and tender
    • Chocolatey
    • Easy to make. You only need one bowl! 

    Ingredients for Gluten-Free Chocolate Cupcakes

    Baked gluten-free chocolate cupcake in cupcake pan.

    Gluten-Free Baking Flour. I developed and tested this recipe with Bob’s Red Mill 1:1 Gluten-Free Baking Flour. Using a different flour blend may change the texture of the cupcakes.

    Cocoa Powder. This recipe uses natural cocoa powder, not Dutch process. For the best flavor, use a cocoa powder that contains fat. The fat in cocoa powder is what carries the flavor. 

    Granulated Sugar. Granulated sugar allows the cocoa flavor to shine. 

    Baking Powder. Gives the cupcakes rise. 

    Salt. Salt is always important in baked goods. It enhances flavors and tempers the sweetness. Use table salt, not Kosher salt for baking.

    Eggs. Provide structure. This recipe has not been tested with egg replacers. 

    Milk or Coffee. For a box mix style cupcake, use milk. (Either cow’s milk or a dairy-free option.) If you like chocolate cupcakes with a deeper flavor, use cooled coffee.

    Oil. Adds richness and gives the gluten-free cupcakes a soft crumb.

    How to Make Gluten-Free Chocolate Cupcakes

    1. Preheat the oven. Baked goods rise best when baked in a hot oven. Before you start measuring ingredients and making the batter, turn the oven on. It should be ready for you when you’re done making the batter.
    2. Sift the cocoa powder. Since it contains fat, (which is a good thing), cocoa powder tends to clump. Even though it’s a bit of a pain, take a minute to sift the cocoa powder to remove lumps. 
    3. Make the batter. Whisk together the gluten-free flour, cocoa powder, sugar, baking powder, and salt. You can use a handheld whisk or an electric mixer for this step. Whisking the dry ingredients together evenly distributes the cocoa powder, baking powder, and salt throughout the mixture. Add the milk, eggs, and oil. Stir until the batter is smooth.
    4. Fill the cupcake cups. Line a standard cupcake pan with paper liners. Fill each cup 2/3 of the way with batter. Don’t add more batter or the cupcakes might overflow during baking. 
    5. Bake until set. Use a cake tester to check the cupcakes for doneness. No batter should stick to the tester. 
    6. Cool on a rack. After baking, allow the cupcakes to cool in the pan for about five minutes. Remove the cupcakes from the pan and place them on a wire rack to cool completely. This allows steam to escape, so the cupcakes don’t get soggy or gummy.
    7. Frost with buttercream. Once the cupcakes are cool, frost with your favorite frosting. I love chocolate buttercream with chocolate cupcakes

    Storing Gluten-Free Cupcakes

    Gluten-free chocolate cupcake with chocolate frosting. Unwrapped from cupcake liner.

    Cover the cupcakes (or use a cake holder) and store them on the counter for up to three days. Check out my guide on how to freeze cupcakes if you’d prefer to keep some for later.

    FAQs Gluten-Free Chocolate Cupcakes

    Can I replace the gluten-free flour with almond flour or coconut flour?

    This recipe was developed for a grain-based flour. Almond flour or coconut flour won’t work. 

    Is this recipe dairy-free?

    Yes. Use dairy-free milk in the batter and a dairy-free spread for the frosting and you’re good to go.

    What’s the best frosting for chocolate cupcakes?

    I like chocolate buttercream and I included my favorite recipe below. Use my recipe for vanilla buttercream if you like the combo of chocolate cake and vanilla frosting.

    Gluten-free chocolate cupcake with chocolate frosting. Unwrapped from cupcake liner.
    5 from 3 votes
    Print

    Gluten-Free Chocolate Cupcakes

    Easy recipe for gluten-free chocolate cupcakes. The best one bowl, small-batch recipe. Moist and tender. Dairy-free option. Makes 12 cupcakes.

    Prep Time 10 minutes
    Cook Time 15 minutes
    Total Time 25 minutes
    Servings 12 cupcakes

    Ingredients

    Gluten-Free Chocolate Cupcakes

    • ¾ cup gluten-free flour (4 ounces; 113 grams)
    • ¾ cup granulated sugar (5 ½ounces; 158 grams)
    • ½ cup natural cocoa powder, sifted (1 ½ ounces; 45 grams)
    • 1 teaspoon baking powder
    • ½ teaspoon salt
    • 2 large eggs (about 4 ounces; 113 grams out of shell)
    • ½ cup milk or cooled coffee, see note (4 ounces; 113 grams)
    • ⅓ cup vegetable oil (2 ⅓ ounces; 65 grams)

    Chocolate Frosting

    • 2 cups powdered sugar (8 ounces; 226 grams)
    • ⅓ cup cocoa powder
    • ½ cup softened butter or dairy-free spread (4 ounces; 113 grams)
    • 3 tablespoons milk plus more as needed

    Instructions

    1. Heat Oven. Adjust oven rack to middle position. Preheat oven to 350℉. Line 12 standard muffin cups with paper liners.

    2. Make Batter. Whisk together gluten-free flour, granulated sugar, cocoa powder, baking powder, and salt in a medium bowl. Add eggs, milk, and vegetable oil. Whisk until batter is smooth.

    3. Bake. Fill cups ⅔ full. Bake until set, about 15 minutes. A cake tester inserted into the center of the cupcakes should come out clean.

    4. Cool and Frost. Allow cupcakes to cool in the pan for five minutes and then transfer to a wire rack to cool completely. Frost with buttercream if desired.

    5. Chocolate Frosting. Whisk together powdered sugar and cocoa powder. In a medium bowl, cream butter until smooth. Stop mixer. Add sugar-cocoa mixture and milk. Mix until smooth. If frosting is thick, add additional milk, one teaspoon at a time.

    Recipe Notes

    Ingredient Note: Using Coffee

    For a more intense chocolate flavor, use cooled coffee in the recipe. It enhances the chocolate flavor. 

    Storage Directions

    Store cupcakes, covered and at room temperature for up to three days. Freeze frosted or unfrosted cupcakes for up to 2-3 months. When ready to serve, thaw cupcakes overnight in the refrigerator or at room temperature for several hours.

    Easy Gluten-Free Cupcake Recipe

    Gluten-Free vanilla cupcake. White frosting. Unwrapped in front.

    Easy gluten-free vanilla cupcakes. These are the best cupcakes to make on a weeknight! You only need one bowl and a whisk. 

    Gluten-free vanilla cupcake. Frosted with vanilla frosting. Bite taken out.

    One Bowl Gluten-Free Cupcakes

    I wanted to create a recipe for gluten-free cupcakes that were as easy to make as a boxed mix. My early attempts were…interesting.  The first ones came out flat. The next were too sweet and the batch after that tasted like a dry muffin. Not what I was going for in a cupcake recipe. 

    After several tries, the cupcakes were finally what I wanted.

    These gluten-free cupcakes are:

    • Easy-to-make! 
    • Soft and tender, like my gluten-free funfetti cake
    • A simple, small batch recipe. 
    • Dairy-free.

    The recipe makes about dozen cupcakes. So it’s perfect for a weeknight birthday or one of those nights you just want cake. (If you don’t want to bake a dozen cupcakes, make a gluten-free mug cake.)

    Gluten-free vanilla cupcakes with white frosting on a cake platter.

    Gluten-Free Cupcakes: Key Ingredients

    • Gluten-Free Baking Flour. An all-purpose gluten-free baking flour that contains xanthan gum or guar gum makes it easy to whip up these cupcakes in a snap. 
    • Granulated Sugar. Cupcakes are sweet but you don’t want them too sweet. My first tests included a full cup of sugar. These made for very tender cupcakes because sugar acts as a tenderizer but they were too sweet. Three-quarters of a cup is just right. 
    • Baking Powder. Makes the cupcakes light and tender. Check the expiration date on your baking powder. You don’t want to use expired baking powder. The cupcakes won’t rise as much.
    • Salt. A half teaspoon of salt enhances the flavor. Use table salt, not kosher salt. Table salt dissolves easily in batter. 
    • Eggs. Provide structure. This recipe has not been tested with egg replacers. 
    • Milk. Use regular milk or dairy-free. The recipe works well with either! Milk adds flavor and helps the cupcakes to brown. 
    • Oil. Adds richness. If you prefer to use butter, melt butter and allow it to cool before adding it to the batter. 
    • Vanilla. Gives the cupcakes a nice “birthday cake” flavor.

    How to Make Gluten-Free Cupcakes: Keys to Success.

    1. Make the Batter. Whisk together the gluten-free flour, sugar, baking powder, and salt. You can use a handheld whisk or an electric mixer for this step. It doesn’t matter! Doing this evenly distributes the baking powder and salt throughout the mixture. If you add the liquid ingredients right away, the baking powder can clump and the cupcakes won’t rise as well. Once that’s done, add the milk (regular or dairy-free), eggs, and oil. Whisk until the batter is smooth and you’re ready to bake.
    2. Fill the Cupcake Cups. Line a standard cupcake pan with paper liners. Fill each cup ⅔ of the way with batter. Don’t add more batter or the cupcakes can overflow during baking.
    3. Bake Until Set. These gluten-free cupcakes stay very light. Check the cupcakes with a cake tester to see if they’re done. No crumbs should stick to the tester.
    4. Cool Before Frosting. After baking, allow the cupcakes to cool in the pan for about five minutes. Then remove them from the pan and place on a wire rack. This allows steam to escape, so the cupcakes don’t get soggy or gummy.
    5. Frost. Once the cupcakes are cool, frost with your favorite frosting. I love vanilla buttercream with these but chocolate or lemon is yummy too!
    Gluten-free vanilla cupcake. Frosted with vanilla frosting. Bite taken out.

    The Best Flour for Gluten-Free Cupcakes

    I developed this recipe using Bob’s Red Mill 1:1 Gluten-Free Baking Flour. Using a different flour blend can change the texture of the cupcakes. 

    The Key to Even Cupcakes

    Other than a cupcake pan, you don’t need any special kitchen tools to make gluten-free cupcakes. But…if you want perfectly even cupcakes, grab a muffin scoop. (It looks like an ice cream scoop.) Fill each cup ⅔ full. Using a scoop makes this easy and less messy!

    Gluten-Free vanilla cupcake. White frosting. Unwrapped in front.
    5 from 20 votes
    Print

    Gluten-Free Vanilla Cupcakes

    Easy one-bowl gluten-free cupcakes. Soft and tender. Small batch recipe.
    Prep Time 10 minutes
    Cook Time 18 minutes
    Total Time 28 minutes
    Servings 12 cupcakes

    Ingredients

    For the Cupcakes

    • 1 ¼ cups gluten-free flour (6 ¾ ounces; 192 grams)
    • ¾ cup granulated sugar (5 ¼ ounces; 148 grams)
    • 1 teaspoon baking powder
    • ½ teaspoon salt
    • 2 large eggs
    • ½ cup milk, regular or dairy-free (4 ounces; 113 grams)
    • 6 tablespoons vegetable oil (2 ⅔ ounces; 75 grams)
    • 1 teaspoon vanilla extract

    For the Frosting

    • ½ cup butter, room temperature (regular or dairy-free butter replacement) (4 ounces; 113 grams)
    • 2 cups powdered sugar, sifted (8 ounces; 226 grams)
    • 2 tablespoons milk, regular or dairy-free, more as needed
    • 1 teaspoon vanilla extract

    Instructions

    Make the Cupcakes

    1. Preheat oven to 350℉. Line a 12-cup muffin pan with cupcake liners. Set pan aside.

    2. Whisk gluten-free flour, sugar, baking powder, and salt in a medium bowl. Add milk, eggs, oil, and vanilla extract. Mix until the batter is smooth.
    3. Spoon the batter into the cupcake liners. Fill each cup ⅔ full. This prevents overflow during baking. Bake until a toothpick inserted in the center of the cupcake comes out clean, about 18 minutes.

    4. Allow cupcakes to cool in the pan for five minutes. Then transfer to a wire rack to cool completely. Frost cupcakes when cool. Use your favorite gluten-free frosting or the recipe below.

    5. Store cupcakes, tightly covered, on the counter for up to three days or freeze for up to two months.

    Make the Frosting

    1. Beat butter until smooth in a medium bowl. Add powdered sugar, milk, and vanilla extract. Turn mixer to medium-low speed. Mix. Increase speed to medium-high and beat until light. If frosting is too thick, add more milk.

    Recipe Notes

    Notes

    Recipe Yield: Cupcake pans vary slightly in size. This recipe makes between 10 to 12 cupcakes. 

    Gluten-Free Flour: This recipe was tested with Bob’s Red Mill Gluten-Free Baking Flour. Using a different flour might change the taste and texture of the cupcakes.

    Grain-Free Baked Chocolate Doughnuts (Paleo, Grain-Free, Dairy-free)

    Glazed grain-free chocolate doughnuts on a cooling rack.

    Easy-to-make baked chocolate doughnuts. Gluten-free, dairy-free, and grain-free. And, the best part, they’re incredibly delicious. 

    Glazed grain-free chocolate doughnuts on a cooling rack.

    So you want to bake some doughnuts? Excellent! I’m here for that. For years, folks have loved my recipe for baked gluten-free chocolate doughnuts. (I have to say, it’s a good one.) But what if you want a grain-free doughnut recipe? I got you!

    This recipe makes twelve delicate doughnuts. And the ingredients couldn’t be simpler. 

    Ingredients for Grain-Free Chocolate Doughnuts

    • Coconut flour. Adds texture. And absorbs liquid like crazy. Don’t replace coconut flour with any other flour, the recipe won’t work. 
    • Cocoa powder. For the best flavor, use a Dutch-processed cocoa powder. 
    • Baking powder. This is what gives the doughnuts lift. You can use a commercial baking powder or make your own grain-free version. (Grain-free baking powder recipe.)
    • Honey. Adds sweetness. Not too much. Not too little. Just the right amount. 
    • Coconut oil. For tenderness. If you don’t want to use coconut oil, melted butter or any other neutral oil works.
    • Eggs. This recipe uses four large eggs. They provide structure, fat, and tenderness. 
    • Nutmeg. There’s a pinch of nutmeg in the doughnuts. Don’t stress about this. If you don’t have nutmeg in the house, omit it.
    • Salt. Enhances the flavor of the doughnuts. 

    One glazed grain-free chocolate doughnut.

    How to Make Baked Chocolate Doughnuts

    This is a “whisk and bake” recipe. Simply whisk the ingredients together in a bowl and then place the batter into a prepared doughnut pan. 

    Getting the batter into the pan that can be tricky. 

    Batters made with coconut flour thicken quickly. And because of this, it can prove a little challenging to spread the batter evenly into the doughnut pan. 

    There’s two ways to do it. 

    1. Use a spoon. Take your time and spoon the batter into a greased doughnut pan. Tap the pan as you go to evenly distribute the batter into the ring. 
    2. Use a piping bag. This is probably the easiest way to fill the doughnut cavities but you do need a pastry bag. Fill the pastry bag with batter and squeeze the batter evenly into the cavities. 

    No matter how you fill the mold, make sure it’s greased well. Coconut flour-based batters love to stick to pans. 

    Once you’ve baked the doughnuts, you can leave them as-is, dust them with powdered sugar, or glaze them. I like a lemon glaze on chocolate doughnuts but if you want a chocolate glaze, I’ve included a recipe for that too. 

    One grain-free chocolate doughnut with a bite taken out of it.

    Grain-Free Baked Chocolate Doughnuts FAQs

    Are these paleo?

    It depends on how you define paleo. They are grain-free but the recipe uses honey. 

    Are these keto?

    I don’t think so because the recipe uses honey. 

    Can I use almond flour?

    Not in this recipe, sorry. 

    Can I use regular gluten-free flour?

    No. If you want a traditional gluten-free baked chocolate doughnut, use my other recipe. 

    Can I omit the eggs?

    This recipe doesn’t work without eggs, sorry. 

    Can I make these without a doughnut pan?

    Yes! Use a muffin pan. 

    Can I fry these?

    I don’t think so. I haven’t tested the recipe fried.


    One glazed grain-free chocolate doughnut.
    Print

    Grain-Free Chocolate Doughnuts (Paleo, Gluten-Free)

    Grain-free baked chocolate doughnuts. (Gluten-free, dairy-free, paleo) Coconut flour-based, these doughnuts bake up soft and tender.

    Prep Time 8 hours 30 minutes
    Cook Time 12 minutes
    Servings 12 doughnuts

    Ingredients

    Grain-free Chocolate Doughnuts

    • 1/3 cup (36 grams) coconut flour
    • 1/4 cup (28 grams) 1/4 cup Dutch-process cocoa powder*
    • 1 teaspoon baking powder homemade or store-bought, grain-free
    • 1/4 teaspoon ground nutmeg
    • 1/4 teaspoon salt
    • 1/3 cup (113 grams) honey
    • 1/4 cup (57 grams) 1/4 cup coconut oil, melted
    • 4 large eggs (200 grams out of shell)

    Lemon Glaze

    • 1/2 cup (50 grams) powdered sugar, grain-free
    • 2 teaspoons lemon juice, more as needed

    Chocolate Glaze

    • 1/2 cup (50 grams) powdered sugar, grain-free
    • 1 tablespoon cocoa powder
    • 1 tablespoon coconut milk, plus more as needed

    Instructions

    1. Adjust oven rack to middle position and preheat oven to 350 degrees F. Grease two* six-cavity doughnut pans with nonstick cooking spray or brush with coconut oil.
    2. Whisk the coconut flour, cocoa powder, baking powder, nutmeg, and salt together in a medium mixing bowl. Add honey and melted coconut oil. Whisk until smooth. Add the eggs and mix well.
    3. Spoon batter into prepared pan. Fill each cavity about half full. Lightly tap the pan on the counter to settle the batter.
    4. Bake until doughnuts are puffy and set, about 12 minutes. Allow doughnuts to cool in the pan and then turn out onto a wire rack.
    5. When doughnuts are cool, make the glaze.
    6. Lemon Glaze: Stir together the powdered sugar and lemon juice together in a small mixing bowl. The glaze should be thick but pourable. If it’s too thick, add a little extra lemon juice.
    7. Chocolate Glaze Stir together the powdered sugar, cocoa powder and coconut milk together in a small mixing bowl. The glaze should be thick but pourable. If it’s too thick, add extra coconut milk, one teaspoon at a time.
    8. Dip the doughnuts, one at a time, into the glaze. Or you can place a piece of parchment paper under the cooling rack and pour the glaze over each doughnut.
    9. Doughnuts are best enjoyed the day they are made. Freeze leftovers for up to one month.

    Recipe Notes

    *If you only own one doughnut pan, no problem! Bake six doughnuts and allow them to cool in the pan as directed. Wipe out the pan and grease again with nonstick cooking spray or coconut oil. Repeat using the remaining batter.

    12 Easy Gluten-Free Recipes for Comfort Baking

    12 Easy Gluten-Free Recipes

    12 Gluten-Free Recipes for Comfort Baking


    There’s something magical about baking. Right now, with the world feeling sharp and uncertain, more folks than ever are baking at home. Not only does baking provide a delicious reward, but it also gives us time to spend in the kitchen–either alone or with our loved ones–to focus on something other than the state of the world. I think any baking recipe is a comfort recipe but these twelve are especially lovely. 

    Easy Gluten-free Sandwich Bread

    Loaf of Baked Gluten-Free Sandwich Bread on Red Cutting Board.

    There’s something wonderfully comforting about making a loaf of bread, especially now. This easy recipe for gluten-free bread is wonderfully soft and is perfect (of course) for sandwiches but it’s also great as a base for French toast. 

    Get the Recipe: Gluten-Free Sandwich Bread

    Gluten-Free Cinnamon Raisin Bread

    Stack of toasted cinnamon raisin bread slices. Melted butter on top slice.

    Speaking of French toast, cinnamon raisin bread makes wonderful French toast. It also makes great toast. 😉 This loaf of warm and filled with cinnamon and raisins and, the best part, it’s not too sweet.

    Get the Recipe: Gluten-Free Cinnamon Raisin Bread

    Gluten-Free Banana Bread and Muffins

    Loaf of gluten-free banana bread.


    It feels like everyone is making banana bread. Why miss out? Got some overripe bananas on the counter? Then it’s time to make a batch of banana bread or banana muffins! 

    Get the Recipe: Gluten-Free Banana Bread

    Get the Recipe: Gluten-Free Banana Muffins


    Gluten-Free Blueberry Muffins

    Gluten-Free blueberry muffins on wire rack.


    Nothing says “weekend breakfast” like a pan of warm blueberry muffins. These blueberry muffins are tender, buttery, and loaded with blueberries. (Don’t have fresh blueberries yet? That’s fine! Frozen berries work great in this recipe!)

    Get the Recipe: Gluten-Free Blueberry Muffins

    Gluten-Free Chocolate Cake

    Slice of Gluten-Free Chocolate Cake on a Plate.

    I think there’s only one thing that’s better than the smell of chocolate cake baking. And that’s eating a slice of chocolate cake. This one is moist, rich, and really, really chocolaty.

    Get the Recipe: Easy Gluten-Free Chocolate Cake

    Gluten-Free Oatmeal Cookies

    Stack of baked gluten-free oatmeal cookies with chocolate chips.

    Crisp on the edges. Soft and chewy in the center. These gluten-free oatmeal cookies are the cookie version of a warm hug. You can make them with chocolate chips or raisins. (I vote for chocolate chips.)

    Get the Recipe: Gluten-Free Oatmeal Cookies


    Easy Gluten-Free Chocolate Chip Cookies

    Stack of gluten-free chocolate chip cookies. Top cookie is broken in half to show texture.

    Oatmeal cookies not your thing? Prefer the grande dame of cookies, the chocolate chip cookie? I got you! I just shared a recipe for easy chocolate chip cookies, it only uses rice flour and one that uses a gluten-free flour blend. Use whichever one works for you. 

    Get the Recipe: Easy Gluten-Free Chocolate Chip Cookies (white rice flour-based)

    Get the Recipe: Gluten-Free Chocolate Chip Cookies (gluten-free flour blend)

    Gluten-Free Spice Cake

    Gluten-free spice cake in pan with cream cheese frosting.


    Moist, loaded with spices, and so easy to make, this gluten-free spice cake is really irresistible. I know that for some folks think of spice cake as a fall dessert but, really, it’s an anytime cake.

    Get the Recipe: Gluten-Free Spice Cake

    Gluten-Free Coffee Cake

    Baked gluten-free coffee cake sliced in a pan.

    Do you eat coffee cake just for the streusel? I get it. The good news is that the cake that’s buried under that delicious streusel is equally delicious. It’s a sour cream cake that’s delicious on its own but even better paired with wonderful cinnamon streusel.  If you want a grain-free option, I’ve got that too! 

    Get the Recipe: Gluten-Free Coffee Cake

    Get the Recipe: Almond Flour Coffee Cake (grain-free)

    Gluten-Free Dinner Rolls

    Gluten-Free Soft Dinner Roll Baked and Spread with Butter.

    Tearing into a warm dinner roll and slathering it with butter is one of life’s great pleasures. This recipe uses a gluten-free flour blend and is a great recipe if you’ve never baked with yeast before.

    Get the Recipe: Soft Gluten-Free Dinner Rolls

    Gluten-Free Funfetti Cake

    Gluten-Free funfetti cake on white platter.

    Life needs sprinkles right now. I mean, life always needs sprinkles but it needs sprinkles now more than ever.

    Get the Recipe: Gluten-Free Funfetti Confetti Cake 

    Gluten-Free Monster Cookies

    Stack of gluten-free monster cookies on a wire rack.


    Cookies with candy pieces *and* peanuts *and* butterscotch chips *and* oats *and* peanut butter sound pretty good right about now.  

    Get the Recipe: Gluten-Free Monster Cookies


    Almond Flour Coffee Cake (Grain-Free/Gluten-Free)

    Almond flour coffee cake on plate. One slice is cut from the cake.

    This easy almond flour coffee cake recipe is gluten-free and grain-free. It makes a moist and tender cake that paleo eaters and others love! 

    Almond flour coffee cake on plate. One slice is cut from the cake.

    My love of coffee cake started years before I tasted a sip of coffee. My mom made a Bisquik coffee cake often during my childhood. We never ate it for breakfast; it was always an after-dinner treat. This recipe, with its sweet cinnamon flavor, makes a nice breakfast or dessert–coffee optional! This grain-free recipe is a love letter to the coffee cakes of my childhood. 

    Why You’ll Love This Grain-Free Coffee Cake

    • Delicate and tender
    • Not too sweet
    • Easy-to-make
    • Dairy-Free (with an option to use butter if that works for you.)
    • Freezes well

    Key Ingredients for Almond Flour Coffee Cake

    • Finely ground almond flour. This is the backbone “flour” for this recipe. It adds wonderful flavor, texture, and richness. Please do not replace the almond with traditional gluten-free flour or additional coconut flour. 
    • Coconut flour. There are only three tablespoons of coconut flour in this cake. It provides the cake-like texture we all know and love in coffee cake. As with the almond flour, it can’t be replaced with either gluten-free flour or almond flour or it will adversely affect the texture of the cake.
    • Coconut Oil. Some brands of coconut oil taste strongly of coconut. Others do not. For this recipe, I prefer mild coconut oil; I find the coconut flour adds enough coconut flour without overwhelming the flavors of the almond flour and cinnamon. If you use a strongly flavored coconut oil, this coffee cake has more of an almond/coconut flavor.
    Slice of almond flour coffee cake on plate.

    How to Make Almond Flour Coffee Cake: Keys for Success

    1. Use parchment paper. Grease the cake pan with oil and then line the bottom with a piece of parchment paper. Why? Cakes made with coconut flour tend to stick to the pan. Parchment paper prevents this. 
    2. Soften the coconut oil. You want the coconut oil soft, not hard and brittle, and not melted. 
    3. Use a large balloon whisk. Thanks to the coconut flour in the recipe, the dough is thick. If you notice it’s sticking inside your whisk, switch to a larger whisk or use an electric (handheld or stand) mixer.

    Note: This recipe is dedicated to Julia who loves to bake and to her mom, Kendall, who so beautifully introduced her daughter to the kitchen. 

    Almond flour coffee cake on plate. One slice is cut from the cake.
    5 from 4 votes
    Print

    Almond Flour Coffee Cake (Gluten-Free & Grain-Free)

    Prep Time 15 minutes
    Cook Time 30 minutes
    Total Time 45 minutes
    Servings 8 slices

    Ingredients

    • 1 ¾ cups finely ground almond flour (7 ounces; 198 grams)
    • 3 tablespoons coconut flour (¾ ounce; 21 grams)
    • 1 ½ teaspoons baking powder, homemade or store-bought (grain-free)
    • ½ teaspoon salt
    • ¼ cup coconut oil, solid or unsalted butter, softened (2 ounces; 58 grams)
    • 4 large eggs (about 8 ounces; 225 grams out of shell.)
    • ⅓ cup maple syrup (3 ½ ounces; 100 grams)
    • 1 teaspoon vanilla extract

    Streusel Topping

    • 2 tablespoons granulated maple sugar
    • 1 ½ teaspoons ground cinnamon

    Instructions

    1. Heat the oven and prepare the pan. Adjust oven rack to middle position and preheat oven to 350℉. Grease an 8-inch round cake pan with nonstick cooking spray or brush lightly with coconut oil. Place a parchment paper round in the bottom of the pan.

    2. Prepare the batter. Whisk the almond flour, coconut flour, baking powder, and salt together in a medium mixing bowl. Cut in coconut oil until no large pieces of coconut oil remain. I like to use my fingers for this. If you don’t want to use your fingers, use a pastry cutter. Remove two tablespoons of dry mixture for the streusel and place in a small mixing bowl. Set aside.

    3. Add the eggs, one at a time, to the remaining dry ingredients. Allow each egg to incorporate before you add the next. After you add the final egg, whisk in the maple syrup and vanilla extract. Spread batter into prepared pan.

    4. Prepare the streusel. Stir together the reserved almond flour mixture, maple sugar, and cinnamon. Sprinkle the mixture evenly over the top of the cake.

    5. Bake the cake. Bake until a cake tester inserted into the center of the cake comes out clean, about 30 minutes.

    6. Remove pan from the oven and place on a wire rack. Allow cake to cool completely in the pan.
    7. Store, wrapped tightly, on the counter for up to three days.

    Easy Gluten-Free Angel Food Cake Recipe

    Gluten-free angel food cake with whipped cream on plate.

    Easy Recipe for Gluten-Free Angel Food Cake. Follow this simple recipe for the best angel food cake you’ve ever made. Perfect served with berries and whipped cream. 

    Gluten-Free Angel Food Cake on Cake Stand


    If you’ve baked angel food cake before, this recipe asks you to forget almost everything you know about the process. And if you’ve never baked an angel food cake, you’re in luck. This version is ridiculously easy–and you don’t need to forget any prior techniques!

    Why You’ll Love This Gluten-Free Angel Food Cake

    • Easy to Make. You start by whipping together cold eggs and sugar. A sturdy stand mixer does all of the work. 
    • Light and Tender. This gluten-free angel food cake bakes up so light and tender. 
    • Perfect Served with Whipped Cream and Berries. This cake tastes great on its own but it’s also really tasty with a dollop of whipped cream and some fresh berries.

    How to Make a Gluten-Free Angel Food Cake: The Important Steps

    Egg Whites and Sugar Whipped to Soft Peak Stage

    • Whip together the egg whites, cream of tartar and sugar. This isn’t a fussy recipe. Simply combine the egg white, cream of tartar, and salt and whip until thick and shiny. This takes about 10 minutes on a stand mixer. Don’t give up! Unlike some recipes for angel food cake, there’s no need to add the sugar a little at a time.
    • Slowly add the gluten-free flour. Once the egg whites are thick and shiny, add the gluten-free flour. Go slow here. It’s important. You want to add about a quarter cup at a time. Be sure each addition of flour is incorporated before adding more.For the first few tests, I attempted to fold the flour into the whipped egg whites with a rubber spatula. This lead to some of the flour sinking to the bottom of the mixing bowl—causing the batter to deflated and bake with streaks of unhydrated flour throughout.

      The solution to the problem was simple. I added the flour, in four additions, with the stand mixer running. As soon as the last bit of flour is incorporated, you’re done.

    • Gently spread the batter into an ungreased angel food pan. It’s important that you don’t grease the pan when making angel food cake. You want the batter to climb the sides of the pan and stick. 
    • Bake until set. Bake until the internal temperature of the cake reaches 205 degrees F. or until the cake is golden brown. Underbaked gluten-free angel food cakes can collapse. So it’s important to bake it thoroughly. 
    • Cool upside down. Before baking, check out your pan. Does it have little feet sticking up on the edge? These are for cooling. You invert the pan onto the feet. Some pans have this feature and some don’t. If your pan doesn’t have cooling feet, find a glass bottle before baking. As soon as the angel food cake comes out of the oven, turn it over onto the neck of the bottle to cool. 

    Gluten-Free Angel Food Cake: The Ingredients

    Cold Egg Whites: Angel food cakes requires a lot of egg whites. How many? A full dozen! And there’s no need to use room temperature eggs. Cold egg whites work great in this recipe.

    Cream of Tartar: A little cream of tartar has a big impact. Just 1 1/2 teaspoons allows the egg whites to whip up thick and shiny.

    Granulated Sugar: Angel food cakes are, simply put, a baked sweet meringue. This is why they taste a bit like cotton candy. Reducing the amount of sugar called for in the recipe doesn’t work. Sorry! 

    Salt: A little salt balances out the sugar and gives our angel food cake it’s delicate-sweet flavor.

    Gluten-Free Flour: During testing, I used Bob’s Red Mill 1:1 Gluten-Free Baking Flour. If you use a different flour blend, the cake might turn out differently from mine and some blends can cause the cake to collapse as it cools. For the best results, I strongly recommend using this blend. 

    Vanilla Extract: Use vanilla extract to flavor the cake. Some flavorings, like peppermint, orange, and lemon, many contain oil and cause the cake to collapse. (see troubleshooting for more information on why to avoid oil in your angel food cake.)


    Gluten-Free Angel Food Cake: The Pan

    Empty angel food cake pan


    The pan is an important part of the success of angel food cake. Here’s the lowdown: you need a 10-inch uncoated pan.

    As the cake bakes, it needs to cling to the sides of the pan. If it can’t stick to the pan, the cake will sink and turn out heavy.

    If you need to buy an angel food pan, look for one with legs. The cake is cooled upside down. If your pan has feet, you simply flip it over. If the pan doesn’t have legs, you need to find something, like a bottle or stack of cans, to rest the pan on while it cools. While this isn’t hard, it’s a bit of a pain.

    Troubleshooting Gluten-Free Angel Food Cake

    Slice of Gluten-Free Angel Food Cake on Plate with a Dollop of Whipped Cream


    De-grease the Bowl and Whisk. Angel food cake requires a grease-free mixing bowl and whisk. Even just a little bit of grease can prevent the egg whites whipping into a thick meringue. Before mixing, wash your bowl and whisk to remove any greasy film that might be clinging to it.

    Keep Egg Yolks Out the Mix. When separating the egg whites from the yolks, it’s a good idea to separate the egg white into an individual bowl. Then pour the white into the mixing bowl. This way if a little bit of egg yolk gets into the white, you can easily remove it. (To remove a little yolk, use half an eggshell. The edge of the shell cuts through egg whites.)

    Cool Upside Down Angel food cakes, like chiffon cakes, require an unusual step: you cool them upside down. As soon as the cake comes out of the oven, flip it over.

    Many angel food cake pans have little legs on them, making it easy to flip the pan over and cool it on the legs. If your pan doesn’t have feet, carefully invert the pan onto the neck of a bottle or a stack of cans.

    Why did my angel food cake fall out of the pan?

    There are some common causes for this.

    1. The cake was underbaked. This is the most common problem. If the cake is underbaked, even just a little, the moisture remaining in the cake makes it heavy and the weight pulls it out of the pan. Bake the cake until the internal temperature reaches 205 degrees F. At this point, the cake will look golden brown.
    2. The pan was coated. Angel food cake needs to cling to the pan when cooling. If the pan was coated with a nonstick coating or if it was sprayed with oil before baking, it will slip from the pan.
    3. The Kitchen was cold. If your kitchen is 68 degrees for below, the cake can contact and fall from the pan before it sets. Stella Parks suggests this solution for cold kitchens: open the oven door and place the inverted cake on the stovetop, where drafts of warm air will stabilize its temperature.

    Gluten-Free Angel Food Cake: Supplies

    The list below includes affiliate links. GlutenFreeBaking.com earns a commission from sales made using the links.

    KitchenAid Stand Mixer

    10-inch Aluminium Uncoated Tube Pan

    Bob’s Red Mill 1:1 Gluten-Free Baking Flour

    Gluten-Free Angel Food Cake on Cake Stand
    5 from 6 votes
    Print

    Gluten-Free Angel Food Cake

    Easy Gluten-Free Angel Food Cake. Light and Tender.

    Prep Time 20 minutes
    Cook Time 50 minutes
    Cooling Time 2 hours
    Total Time 1 hour 10 minutes
    Servings 8

    Ingredients

    • 1 cup gluten-free baking flour (5 ounces; 142 grams)
    • 1 1/2 cups granulated sugar (11 ounces; 312 grams)
    • 1 1/2 teaspoons cream of tartar
    • 1/4 teaspoon salt
    • 12 large egg whites (about 14 ounces; 396 grams)
    • 2 teaspoons vanilla extract

    Instructions

    1. Preheat Oven. Adjust oven rack to the middle position and remove the top rack. Preheat oven to 350°F (180°C). Sift gluten-free flour and set aside.(This removes any lumps in the gluten-free flour.)

    2. Whip the Egg Whites. Stir together granulated sugar, cream of tartar, and salt in the bowl of a stand mixer fitted with the whisk attachment. Add egg whites and vanilla extract. Whisk on low to combine, about 1 minute. Increase speed to medium-high (6-8 on a KitchenAid) and whip 6 minutes.

      Increase speed to high (10 on a KitchenAid) and whip until the meringue is shiny, white, and thick. This takes between 2-4 minutes. The tines of the whisk should leave a pattern in the meringue. Stop the mixer and remove the whisk attachment from the bowl. The meringue clinging to the whisk should form a very soft peak. You want it to fall in a thick ribbon off the whisk. Replace the whisk and turn the mixer back on to high speed.

    3. Slowly the Gluten-Free Flour. Add the flour, 1/4 cup at a time, and mix until incorporated. Allow each addition of flour to incorporate before adding the next.

    4. Bake the Cake. Spoon batter into an ungreased 10-inch aluminum tube pan. Bake until the cake is golden brown and firm to the touch, about 50 minutes. (The internal temperature of the cake should be 206°F.)

    5. Cool the Cake. Remove pan from the oven and immediately invert onto the legs of the pan. If the pan does not have legs, invert onto the neck of a wine bottle. Cool for at least 2 hours. If the kitchen is cold, place the pan on top of the oven to cool and prop the oven door open. 

    6. Remove the Cake from the Pan. Slide an offset spatula around the sides of the cake to loosen. Remove the insert, and slide a spatula under the bottom of the cake. Gently lift the cake off the insert and place onto a serving dish.

      To serve, cut with a serrated knife. Store leftovers wrapped tightly in plastic for up to 1 week at room temperature.

    Easy Gluten-Free Chocolate Chip Cookies

    Stack of gluten-free chocolate chip cookies. Top cookie is broken in half to show texture.

    Thick and buttery gluten-free chocolate chip cookies.

    Handwritten gluten-free chocolate chip cookie recipe on paper. Three cookies sit on the paper.

    Yesterday I tested a recipe for chocolate chip cookies. I’m working on a thin chocolate chip cookie recipe and…this isn’t it. 

    But these gluten-free chocolate chip cookies are undeniably good. They’re thick and buttery. So I thought I’d share the recipe with you today because I’m guessing you could use a good chocolate chip cookie recipe right about now.

    Why You’ll Love These Easy Gluten-Free Chocolate Chip Cookies. 

    • Easy to Make. This recipe only uses rice flour and you can mix it together with a wooden spoon. You don’t need to pull out the electric mixer unless that’s easier for you. (Want a recipe that uses a gluten-free flour blend? You can either try it in this recipe or you can make a batch of my classic gluten-free chocolate chip cookies.)
    • Thick and Buttery. The buttery flavor of these cookies and thick texture makes them a winner. They remind me of a thick version of Toll House cookies. 
    • Small Batch. This makes about 16 small-ish cookies.  

    Stack of gluten-free chocolate chip cookies. Top cookie is broken in half to show texture.

    Easy Gluten-Free Chocolate Chip Cookies: The Ingredients

    White Rice Flour. I used finely ground white rice flour. If you use stone-ground white rice flour, you might notice a slightly coarse texture. 

    Xanthan Gum. This is why the cookies turned out thick. The recipe only contains 1/4 teaspoon of xanthan gum. Can you skip it? Probably but I haven’t tested the recipe without it.

    Baking Soda. This helps give the cookies lift and aids in browning.

    Salt. It enhances flavor and controls sweetness. 

    Butter. Use very soft butter. How soft? Almost melted. When removing the butter from the wrapper, it should stick a bit. We aren’t creaming the butter together with the sugar as we do in traditional chocolate chip cookie recipes. 

    Sugar in the Raw. This was a test recipe and I used sugar in the raw. It’s a coarse granulated sugar. It adds a nice caramel flavor and a light crunch. Don’t have it on hand? No problem. Use an equal amount of cane or granulated sugar.

    Light Brown Sugar. There’s only a little brown sugar in this chocolate chip cookie recipe. It adds a nice flavor and delicate texture.

    Egg. Just one. It keeps the cookies moist. 

    Vanilla. It’s here for the flavor.

    Chocolate Chips. There are chocolate chips in every bite. If you want more chocolate chips, add them. Want less? Reduce the amount to three-quarters of a cup or less! 

    Stack of gluten-free chocolate chip cookies. Top cookie is broken in half to show texture.
    4.75 from 4 votes
    Print

    Easy Gluten-Free Chocolate Chip Cookies

    Thick and buttery gluten-free chocolate chip cookies.
    Prep Time 10 minutes
    Cook Time 12 minutes
    Servings 16 cookies

    Ingredients

    • 1 cup plus 2 tablespoons white rice flour (5 ounces; 142 grams)
    • 1/2 teaspoon baking soda
    • 1/4 teaspoon salt
    • 1/4 teaspoon xathan gum
    • 1 stick very soft butter (1/2 cup; 4 ounces; 113 grams)
    • 1/2 cup sugar in the raw (coarse cane sugar), see note (3 3/4 ounces; 105 ounces)
    • 1/4 cup light brown sugar (2 ounces; 56 grams)
    • 1 large egg (about 2 ounces; 56 grams, out of shell)
    • 1 teaspoon vanilla extract
    • 1 cup chocolate chips (about 5 ounces; 142 grams)

    Instructions

    1. Heat Oven. Preheat oven to 350 degrees Line a baking sheet with parchment paper.

    2. Whisk Dry Ingredients. In a small bowl, whisk together white rice flour, baking soda, salt, and xathan gum.

    3. Make the Dough. In a medium bowl, beat together butter, sugar in the raw, and brown sugar until smooth. Add the egg and vanilla. Beat until smooth. Add whisked dry ingredients. Mix until a dough forms. Add chocolate chips. Mix to combine.

    4. Bake the Cookies. Drop dough, about two tablespoons, onto the prepared baking sheet. Bake until cookies are golden brown and set, about 12 minutes.

    5. Cool on a Rack. Remove pan from oven and allow to cool for five minutes. Transfer to a wire rack and allow to cool completely.

    6. Store the Cookies. Keep the cookies wrapped on the counter for up to four days or freeze in a freezer bag for up to one month.

    Recipe Notes

    Sugar in the Raw

    Don't have sugar in the raw (coarse cane sugar) on hand? No problem. Replace it with cane sugar or regular granulated sugar. 

    Gluten-Free Spice Mug Cake

    White mug with gluten-free spice mug cake

    Single serving microwaved gluten-free spice mug cake. It contains brown sugar and spices. Takes less than five minutes to make! 

    Mug with gluten-free spice mug cake in it. Frosted with cream cheese frosting and sprinkled with ground cinnamon.

    Someone saw my recipe for gluten-free spice cake on Facebook and said that the cake looked great but (there’s always a but) they didn’t need that much cake. 

    That gave me an idea: a gluten-free spice mug cake. 

    As you know, I love gluten-free mug cakes. And while I’ve made a gluten-free vanilla mug cake and a gluten-free chocolate mug cake, it never occurred to me to make a spice version. Until now. 

    It’s quick. It’s easy. And it’s really good. Perfect for a cold night when all you want to do is curl up with a movie or good book and some cake. 

    Sheet pan with ingredients for gluten-free spice mug cake on it.

    How to Make Gluten-Free Spice Mug Cake: The Ingredients

    • Gluten-Free Flour. Use a gluten-free flour blend that contains xanthan gum or guar gum. Without a gum, the cake doesn’t rise well. 
    • Egg. For a light and airy cake, an egg is needed. I haven’t tested the recipe with an egg-replacer. 
    • Brown Sugar. Adds a molasses flavor. If you don’t have brown sugar in the house, replace it with an equal amount of granulated sugar. 
    • Spice Blend. Unlike my gluten-free spice cake, we’re using a spice blend for this mug cake to keep things simple.

    White mug with gluten-free spice mug cake

    How to Make Gluten-Free Spice Mug Cake: Keys for Success

    Like my other gluten-free mug cakes, this recipe is easy-peasy. 

    1. Use a large (but not too large!) mug. You need a mug that can hold about 12 ounces. The cake rises (and then falls a bit) as it bakes. If the mug is too small, the cake can fall out. If you use a really tall mug, think Starbucks grande-size or bigger, it’ll be hard to eat the baked cake. 
    2. Stir the dry ingredients together. Before you add the egg, oil, and milk, take a second to whisk the gluten-free flour, brown sugar, spices, and baking powder together with a fork.  This ensures that you don’t get clumps of brown sugar or spices in the finished cake. 
    3. Expect the cake to rise and fall. It’s totally normal for a gluten-free mug cake to rise during baking (microwaving) and fall a little as it cools. This is simply the egg expanding and contracting. 

    White mug with gluten-free spice mug cake
    5 from 3 votes
    Print

    Gluten-Free Spice Mug Cake

    Prep Time 5 minutes
    Cook Time 1 minute
    Servings 1 serving

    Ingredients

    • 1/4 cup all-purpose gluten-free flour
    • 1/2 teaspoon baking powder
    • 1/4 teaspoon pumpkin pie spice
    • 2 tablespoons brown sugar, light or dark
    • 1 large egg
    • 2 tablespoons vegetable oil or melted butter
    • 1 tablespoon milk

    Toppings

    • whipped cream
    • vanilla ice cream
    • cream cheese frosting, recipe below

    Cream Cheese Frosting

    • 2 tablespoons softened cream cheese
    • 3 tablespoons powdered sugar
    • 1 teaspoon milk

    Instructions

    1. Spray a large (12 ounce) mug with nonstick cooking spray. Stir together gluten-free flour, brown sugar, spices, and baking powder in the mug. Add egg, oil, and milk. Stir until smooth with a fork or mini whisk.
    2. Microwave on high for 60-80 seconds or until cake pulls away from the sides of the mug and the top looks dry. Allow cake to cool in the mug. Top warm cake with vanilla ice cream or whipped cream, if desired. Or allow the cake to cool for a few minutes and frost.
    3. For the Frosting

    4. Beat together the butter and powdered sugar until smooth with a spoon. Add milk. Mix until creamy. Spread frosting on cooled cake. If you put the frosting on the hot cake, it will melt.

    Gluten-Free Spice Cake

    Slice of gluten-free spice cake with cream cheese frosting on plate.

    Easy gluten-free spice cake. Moist and tender. Perfect finished with cream cheese frosting.

    Gluten-free spice cake in pan with cream cheese frosting.

    This Gluten-Free Spice Cake is

    • a one-bowl recipe
    • easy-to-make
    • tender-and-moist (not heavy or gummy)
    • great with frosting; great without
    • made in a sheet pan (Layers and cupcakes are options too!)

    Gluten-Free Spice Cake Ingredients

    Ingredients in bowls for gluten-free spice cake.

    Here’s the thing: the ingredient list for gluten-free spice cake looks long. Why? The spices. But if you take a second to read the other ingredients, you’ll see that they aren’t anything too fancy.

    Gluten-Free Flour: This recipe was tested with Bob’s Red Mill 1:1 Gluten-Free Baking Flour. It makes for a nice moist and dense spice cake. If you use a different flour, use one that includes xanthan or guar gum. Without those ingredients, the cake comes out too dense and won’t rise.

    Brown and Granulated Sugar. Brown sugar adds a nice molasses flavor and helps to keep the cake moist. But too much of it proved too much of a good thing. It made the cake a bit too moist. To solve this, I swapped out half the brown sugar for half granulated sugar. It gave me a cake with a moist, delicate crumb and just the right level of sweetness. (I haven’t tested this recipe with sugar-replacements.)

    Baking Powder and Baking Soda: A combination of baking powder and baking soda helps the cake rise.  And the baking soda enhances the flavor and browning.

    Salt. Enhances the flavor and controls the sweetness.

    Ground spices in bowl.

    Spices. Here’s where the magic is at! Ground cinnamon, ginger, and nutmeg give the spice cake it’s spicy flavor. You can replace the individual spices with a spice blend, like pumpkin spice, but the flavor will be a little different.

    Vanilla Extract. There’s only a teaspoon of vanilla extract in this cake and you can’t really taste it. So why use it? The vanilla extract enhances the spices and, frankly, just makes the cake taste good.

    Eggs. Helps the cake to rise and gives it structure and a delicate texture. (I haven’t tested this cake with a flax egg but several of my testers did with excellent results.)

    Oil: Makes for a moist, light cake.

    Water. Smooths out the batter.

    How to Make Gluten-Free Spice Cake

    Batter for gluten-free spice cake

    This is a one-bowl gluten-free cake. You don’t even need to use an electric mixer to make the batter. (But if you want to use on, go ahead!)

    1. Preheat the oven. Baking a cake in a hot oven ensures it rises to its full potential.
    2. Whisk together the dry ingredients. Take care to break up the brown sugar so there are no little lumps of it. 
    3. Add the eggs, oil, and water. Whisk until a batter forms. Switch to a rubber spatula to ensure there’s no dry gluten-free flour hanging out in the bottom of the pan. 
    4. Spread batter into prepared pan. I like to make spice cake in a 9×13-inch pan. Instructions are included below for two rounds and cupcakes.
    5. Bake. As always, it’s best to use visual cues to tell when this cake is done. Look for it to be set in the center. A 9×13 inch cake takes about 40 minutes to bake. (Bonus: the house smells amazing while the cake bakes.)
    6. Make Frosting. While the cake bake, make the frosting. Cream cheese is the classic frosting for spice cake but use any frosting you love.(Or skip this step if you don’t want frosting.)
    7. Cool the cake. Unlike most cakes, this one cools right in the pan. It takes about an hour or so to cool.
    8. Frost. Once the cake is cool, frost it. (To make sure it’s cool, put your hand on the bottom of the pan, right in the center. It should not feel warm. If it’s still warm, the frosting will melt into a mess.)
    Slice of gluten-free spice cake with cream cheese frosting on plate.
    Gluten-free spice cake in pan with cream cheese frosting.
    5 from 16 votes
    Print

    Gluten-Free Spice Cake

    Easy and moist gluten-free spice cake.

    Prep Time 15 minutes
    Cook Time 30 minutes
    Total Time 45 minutes
    Servings 12 servings

    Ingredients

    • 2 cups Bob’s Red Mill 1:1 Gluten-Free Baking Flour (10 ounces; 285 grams)
    • ¾ cup packed dark brown sugar (5 ½ ounces; 158 grams)
    • ¾ cup granulated sugar (5 ½ ounces; 158 grams)
    • 1 ½ teaspoons baking powder
    • 1 teaspoon baking soda
    • 1 teaspoon salt
    • 1 ½ teaspoons ground cinnamon
    • 1 teaspoon ground ginger
    • ½ teaspoon ground nutmeg
    • ¼ teaspoon ground cloves
    • ¾ cup canola or other vegetable oil (5 ¼ ounces; 148 grams)
    • 4 large eggs (out of shell, about 8 ounces; 226 grams)
    • ⅓ cup water (2 ⅔ ounces; 75 grams)
    • 1 teaspoon vanilla extract

    Cream Cheese Frosting

    • 4 ounces cream cheese, softened (4 ounces; 113 grams)
    • 2 tablespoons butter, softened (2 ounces; 56 grams)
    • 1 teaspoons vanilla extract
    • 2 cups powdered sugar, sifted (8 ounces; 226 grams)

    Instructions

    1. Preheat oven to 350℉. Grease a 9×13-inch pan with nonstick cooking spray and set aside.

    2. Whisk together the flour, sugars, baking powder, baking soda, salt, cinnamon, ginger, nutmeg, and clove. Add the oil, eggs, water, and vanilla extract. Whisk until smooth.

      Divide the batter evenly between the two prepared pans.

    3. Bake until golden brown. A toothpick inserted into the center of the cake should come out clean, about 40 minutes.

    4. Cool and frost. Allow cake to cool in the pan. When cool, frost with Cream Cheese Frosting.

    5. Cream Cheese Frosting

    6. Combine cream cheese, butter and vanilla extract in a large bowl. Cream until light and smooth. Add powdered sugar. Mix until smooth. Spread on cooled cake.

    Recipe Notes

    Other Pan Sizes

    Round Layer Cake: Use two greased 8-inch round cake pans. Bake until a cake tester inserted into the center of the cake comes out clean, about 30 minutes. Double cream cheese frosting recipe when making a round layer cake.

    Cupcakes: This makes about 24 standard cupcakes. Line cupcake pans with paper liners. Fill cupcake liners about 2/3 full.  Bake until a cake tester inserted into the center of the cupcakes comes out clea, about 20 minutes.


    Gluten-Free Jalapeño Cheddar Cornbread

    Slice of Jalapeno cornbread on brown parchment paper.

    Easy-to-make sweet and spicy gluten-free cornbread. Perfect served with chili!

    Slice of gluten-free jalapeño cheddar cornbread.


    Cornbread is one of my go-to side dishes. It’s great with chili (of course), roast chicken, and shredded Mexican beef. But sometimes I want something just a little different than my usual pan of gluten-free cornbread: enter cheesy jalapeno cornbread. 

    The great thing about this recipe is that it isn’t too hot, not is it too cheesy. It’s, as Goldie Locks would say, “just right.”

    Gluten-Free Jalapeño Cheddar Cornbread: The Ingredients

    Ingredients for Gluten-Free Jalapeño Cheddar Cornbread

    Gluten-Free Cornmeal

    I prefer a finely ground gluten-free cornmeal when making cornbread. It gives the bread a lovely cake-like texture. If you prefer a cornbread with a bit more crunch, use a gluten-free stone-ground cornmeal. 

    Gluten-Free Flour

    Some recipes call for all cornmeal. This isn’t one of them. The recipe uses half cornmeal and half gluten-free flour for a nice texture. Unlike some gluten-free recipes, this one isn’t picky. I used (and recommend) Bob’s Red Mill 1:1 Gluten-Free Baking flour. But any good gluten-free flour blend should do the job well. 

    Sugar, Baking Powder, and Salt

    Three other ingredients are important to the flavor and lift of this cornbread: sugar, baking powder, and salt. 

    The sugar adds sweetness and color. (I love the combo of sweet and spicy!) If you want your cornbread to be a bit less sweet, reduce the sugar from 1/4 cup to 2 tablespoons. 

    Jalapeño

    With ghost peppers and habaneros going mainstream, jalapeños now seem somewhat quaint. And, in this recipe, I guess they are. They aren’t terribly hot. They just add a pop of spice here and there. And you can control that spice by either omitting the seeds or leaving them in. 

    If you prefer a milder heat, remove the seeds. (The seeds contain the heat.) If you want some spice, leave the seeds in. 

    No matter which you prefer, with seeds or without, remember to wash your hands after chopping jalapeños. You don’t want to touch your eyes or other parts (ahem) with pepper spice on your fingers. You’ll remember the burn for a long time. Trust me. 

    Eggs, Milk, and Cheese

    I haven’t tried this recipe without eggs. So, for our egg-free friends, I can’t say whether or not it works with an egg-replacer. 

    As for the milk and cheese, the recipe was tested with traditional (dairy) versions. If you’re dairy-free and have substitutes you love, they should work well. 

    4 Images Showing Gluten-Free Jalapeno Cornbread Being Mixed

    How to Make Gluten-Free Jalapeño Cornbread

    • Heat the Oven.
    • Mix the Batter. 
    • Bake. (It’s that easy!)

    Heat the Oven 

    Preheat the oven while you prep the other ingredients. And if you have a cast-iron pan, throw it in the oven while the oven preheats. Pouring batter into a hot skillet gives the cornbread a lovely crust. 

    If you don’t own a cast-iron pan, don’t preheat the pan. (And consider getting a cast-iron pan. They’re wonderful!)

    Chop the Jalapeños

    I like to get this step out of the way first. Grab a jalapeño or two and cut off the stem. Now you’ve got options. If you like things spicy, leave in the seeds and chop the pepper into small pieces. Take care when chopping as seeds can sometimes make a knife slide on a cutting board. 

    If you prefer a milder heat, cut the jalapeño in half lengthwise. Use a spoon and scoop out the seeds. (The seeds contain the heat) and then chop.

    No matter which you prefer, seeds in our out, remember to wash your hands after chopping jalapeños. You don’t want to touch your eyes or other parts (ahem) with pepper spice on your fingers. You’ll remember the burn for a long time. Trust me. 

    Grate the Cheese (Or Not)

    I prefer the texture of freshly grated cheese but, for this recipe, pre-grated cheese works well. As always, read labels to ensure the cheese is gluten-free. 

    And if you want to skip the cheese, that works too. 

    Make the Batter

    This batter combines gluten-free flour and cornmeal to make a cornbread that has a soft, cake-like texture. 

    Whisk together the gluten-free flour, cornmeal, baking powder, and salt together in a medium bowl. This step helps to distribute the baking powder so your cornbread rises evenly.  

    Then add the milk, eggs, and oil. Stir until the batter is smooth. No need to use a handheld mixer for this recipe, a wooden spoon works great. (Unless a handheld mixer is easier for you to use.)

    Add the jalapeños and grated cheese. Stir until evenly distributed and you’re all set.

    Pan of Baked Gluten-Free Jalapeno Cornbread

    Slice of Jalapeno cornbread on brown parchment paper.
    5 from 3 votes
    Print

    Gluten-Free Jalapeño Cheddar Cornbread

    Easy-to-make sweet and spicy gluten-free cornbread. Perfect served with chili!
    Prep Time 15 minutes
    Cook Time 20 minutes
    Servings 12 slices

    Ingredients

    • nonstick cooking spray
    • 1 cup gluten-free cornmeal (4 ounces/ 113 grams)
    • 1 cup gluten-free all-purpose flour (5 ounces/ 142 grams)
    • 1/4 cup granulated sugar (2 ounces/ 56 grams)
    • 3 teaspoons baking powder
    • 1/2 teaspoon salt
    • 1 cup milk (8 ounces/ 226 grams)
    • 2 large eggs (about 4 ounces out of shell/ 113 grams)
    • 1/3 cup vegetable oil (2 1/3 ounces / 65 grams)
    • 2 large jalapeno pepper, diced (see note) (about 3/4 cup)
    • 1 cup shredded Cheddar cheese or Pepper Jack (3 ounces/ 85 grams)

    Instructions

    1. Heat Oven and Prep Pan. Preheat Oven to 400 degrees Grease an 8-inch square baking pan with nonstick cooking spray.

    2. Make the Batter. Whisk together the cornmeal, gluten-free flour, sugar, baking powder, and salt in a large bowl. Add the milk, eggs, and vegetable oil. Stir until a batter forms. Add chopped pepper and cheese. Stir to combine. Spread batter evenly into prepared pan.

    3. Bake and Cool. Bake until cornbread is set and a cake tester inserted into the middle of the cornbread comes out clean. Place pan on a wire rack and allow to cool for 20 minutes before serving. Store leftover cornbread wrapped on the counter for up to three days.

    Recipe Notes

    Notes:

    The Cheese: Grate your own cheese or use pre-grated cheese. 

    The Jalapeño: The jalapeño seeds contain most of the heat. For a spicy cornbread, leave the seeds in the pepper. For a cornbread with less heat, scoop out the seeds before chopping. 

    Gluten-Free Jalapeño Cheddar Skillet Cornbread: Place an 8-inch cast-iron skillet in the oven as the oven heats. Remove it from the oven, grease with nonstick cooking spray and carefully spread the batter into the pan. Bake about 18 minutes. 

    Gluten-Free Jalapeño Cheddar Cornbread Muffins: Scoop batter into 12 paper-lined muffin cups. Bake about 18 minutes. 

    Freezing: Allow the cornbread to cool completely. Wrap and freeze up to two months. Allow cornbread to thaw on the counter. 

    Gluten-Free Peanut Butter Swirl Brownies

    Stack of gluten-free peanut butter brownies.

    Gluten-free peanut butter swirl brownies are so easy to make. This recipe, which is loaded with peanut butter, makes the best dessert for any peanut butter cup lovers in your life.

    Gluten-free peanut butter swirl brownies on a wire rack.

    The other day I made a batch of gluten-free peanut butter blondies and it reminded me how much I love peanut butter.  I mean, why don’t I make more peanut butter treats? It’s not like they’re hard to make. One of my favorite cookies are these 5 ingredient gluten-free peanut butter cookies. Five ingredients! 

    And not only are peanut butter desserts easy, they’re also tasty. Super-duper tasty. Since gluten-free brownies are always popular in our household, I decided make a batch of gluten-free peanut butter swirl brownies. Good idea, right?

    Spoiler: it was a great idea.

    If you love peanut butter cups, then these are for you. It’s a thick swirl of peanut butter batter nestled into the the best gluten-free brownies you’ve ever tasted. (Fun fact: I made my brownies from scratch but you can always use a box of your favorite gluten-free brownie mix.)

    But I have to admit that I’m biased. I love swirl brownies of all sorts. Gluten-free cheesecake brownies and gluten-free pumpkin cheesecake brownies both make my list of top ten desserts.

    Why do I love swirl brownies so much? They’re:

    thick and fudgy.

    loaded with flavor. 

    so pretty! 

    Stack of gluten-free peanut butter brownies.

    How to Make Gluten-Free Peanut Butter Swirl Brownies

    1. Preheat the Oven. While you make the brownie batter, preheat the oven. This way it’s ready to go as soon as you finish mixing the batter.
    2. Line the Pan (optional) I always make this step optional but, in my opinion, it’s optional only if you enjoy struggling with getting brownies out of a pan. If you do, go right ahead and skip this step. If you prefer ease, then line your pan with parchment paper or foil.To line the pan with parchment paper, cut two long (about 12-inches by 8-inch) strips of parchment paper. Lay one sheet in the pan. Run your finger along the bottom two corners of the pan, pressing the parchment into the corners. This helps to hold the parchment in the pan. Repeat with the second sheet, going in the opposite direction, crisscrossing the sheets in the pan so all the edges are covered.To line your pan with foil, cut a piece of foil about 12-inches long (don’t use heavy-duty foil for this, it’s too stiff.). Lay one sheet of foil in the pan. Gently push the foil into the corners of the pan and up the sides. Repeat with the second sheet, going in the opposite direction, crisscrossing the foil in the pan so all the edges are covered.
    3. Mix the Batter. This batter comes together so easily, you can skip an electric mixer if you feel like it.
    4. Make the Peanut Butter Swirl. After spreading the brownie batter in the pan, mix the swirl. If you make it before you mix the brownie batter, it gets too thick to spread easily. Drop the peanut butter mixture evenly over the pan and use a knife to swirl it through the batter.
    5. Bake. These brownies take about 30 minutes to bake. A cake tester inserted into the center of the pan should come out few a few damp chocolate crumbs clinging to it.
    6. Cool and Cut. This step is always the hardest part of making a bar cookie. You need to wait for the brownies to cool before you cut them. It’s worth the wait, I promise.

    Gluten-Free peanut butter brownies cut on a wire rack.

    Shop the Recipe

    The links below are affiliate links. GlutenFreeBaking.com earns a commission when you use them to shop.

    • Square cake pan. I love, love square cake pans with square, not rounded, edges. This is just a personal preference. If you like square edges, this is the pan for you.
    • Small angled spatula. Spreading batter evenly into the pan is important. I use this small angled spatula for the job.

    Stack of gluten-free peanut butter brownies.
    5 from 2 votes
    Print

    Gluten-Free Peanut Butter Swirl Brownies

    Gluten-free peanut butter swirl brownies are so easy to make. This recipe, which is loaded with peanut butter, makes the best dessert for any peanut butter cup lovers in your life.

    Servings 12 brownies

    Ingredients

    • 3/4 cup gluten-free flour
    • 1/2 cup unsweetened cocoa powder, natural or Dutch process
    • 1/4 teaspoon salt
    • 2 sticks butter, melted and cooled slightly
    • 1 cup granulated sugar
    • 2 large eggs
    • 2 teaspoons vanilla extract

    For the Peanut Butter Swirl

    • 3/4 cup peanut butter
    • 1/3 cup granulated sugar
    • 1 large egg

    Instructions

    1. Preheat oven to 350 degrees F. Line an 8x8x2-inch pan with foil. Lightly grease the foil with nonstick cooking spray. 

    2. Whisk together gluten-free flour blend, cocoa powder, and salt in a medium mixing bowl. Add the melted butter, sugar, eggs, and vanilla extract. Whisk until smooth. Batter will be thick. 

    3. In another bowl, combine the peanut butter, granulated sugar, and egg. Mixture will be thick. 

    4. Spread about half of the chocolate batter evenly into the pan. Drop large spoonfuls of peanut butter all over the chocolate batter. Using a knife, swirl the peanut butter batter into the chocolate batter. Drop the remaining chocolate batter on top. Swirl lightly with a knife. 

    5. Bake until set, about 30 minutes. Allow brownies to cool in the pan and then cut into squares. 

    21 Gluten-Free Recipes for Christmas Morning

    text: 21 Gluten-Free Recipes for Christmas Morning

    There’s nothing quite like Christmas morning! Here are 21 gluten-free recipes to make for Christmas breakfast. 


    text: 21 Gluten-Free Recipes for Christmas Morning

    Gluten-Free Coffee Cake

    Squares of baked gluten-free coffee cake on a wire rack

    This gluten-free coffee cake is an easy—and delicious—recipe for Christmas breakfast.

    Get the recipe —> Gluten-Free Coffee Cake

    Gluten-Free Corn Muffins

    Gluten-Free Corn Muffins on a white plate.

    Bakery-style gluten-free corn muffins–without a trip to the bakery!  These are sweet and tender. And taste wonderful toasted and spread with butter.

    Get the recipe —>Gluten-Free Corn Muffins

    Gluten-Free Cranberry Bread

    Baked gluten-free bread in pan. Two hands are lifting the pan.

    This gluten-free cranberry bread looks festive and, if I dare say, tastes like the holidays.

    Get the recipe —>Gluten-Free Cranberry Bread

    Gluten-Free Beignets

    Gluten-Free Beignet Tossed in Powdered Sugar

    Feeling ambitious? Make a batch of gluten-free beignets! These taste best right out of the fryer. So you might want to wait until after presents are opened to whip up a batch. 

    Get the recipe —> Gluten-Free Beignets

    Easy Gluten-Free Pancakes 

    Fluffy Gluten Free Pancakes with a pat of butter and drizzle of syrup.

    Fluffy gluten-free pancakes taste extra-special on Christmas morning. It’s a fact.

    Get the recipe —> Easy Gluten-Free Pancakes 

    Gluten-Free Sour Cream Muffins

    Gluten-free sour cream muffins on a white plate.

    There’s nothing plain about these simple gluten-free sour cream muffins. They’re light and sweet and go great with a cup of coffee–or hot cocoa! 

    Get the recipe —> Gluten-Free Sour Cream Muffins

    Gluten-Free Soft Rolls

    Gluten-Free Soft Dinner Roll Baked and Spread with Butter.

    A gluten-free soft roll, toasted and served with a hot cup of coffee is a great Christmas breakfast for parents who spent all night helping Santa wrap presents. 

    Get the recipe —> Gluten-Free Soft Rolls

    Gluten-Free Peanut Butter Banana Bread with Chocolate Chips

    Baked gluten-free banana bread with chocolate chips on a cooling rack.

    Chocolate on Christmas morning? Yes please! Especially when it’s tucked into this gluten-free peanut butter banana bread! 

    Get the recipe —> Gluten-Free Peanut Butter Banana Bread with Chocolate Chips

    Gluten-Free Chocolate Chip Muffins

    Gluten-Free Chocolate Chip Muffins

    Peanut butter banana not your thing? I get it. How about a batch of gluten-free chocolate chip muffins? 

    Get the recipe —> Gluten-Free Chocolate Chip Muffins

    Gluten-Free Doughnut Holes

    Gluten-free doughnut holes on plate

    Gluten-free doughnut holes somehow manage to taste even better than gluten-free doughnuts. I don’t know why. I just know it’s true.

    Get the recipe —> Gluten-Free Doughnut Holes

    Gluten-Free Pumpkin Bread

    Sliced gluten-free pumpkin bread on brown parchment paper.

    Sure we all love pumpkin bread in the fall but, happy news, it tastes just as good (maybe better?) on Christmas morning! 

    Get the recipe —> Gluten-Free Pumpkin Bread

    Gluten-Free Blueberry Muffins

    Gluten-free blueberry muffins on a wire rack. One muffin is sitting in front of the rack.

    Frozen blueberries make it easy to make gluten-free blueberry muffins at the end of December! 

    Get the recipe —> Gluten-Free Blueberry Muffins

    Gluten-Free Waffles

    Gluten-free waffles in a waffle iron.

    Santa loves gluten-free waffles. How do I know this? He told me. 

    Get the recipe —> Gluten-Free Waffles

    Gluten-Free Panettone 

    Slice of gluten-free panettone on a dish.

    Making a gluten-free panettone requires a bit of planning but it’s worth it! (What’s panettone? A classic Italian yeast bread that’s studded with dried fruit. It’s so good!)

    Get the recipe —> Gluten-Free Panettone 

    Gluten-Free Banana Muffins

    Gluten-free banana muffins in a muffin tin.

    While you were busy wrapping presents, those bananas on your counter were busy turning brown. No problem! Use them up in a batch of gluten-free banana muffins! 

    Get the recipe —> Gluten-Free Banana Muffins

    Gluten-Free Baked Chocolate Doughnuts

    Baked gluten free chocolate doughnut on cooling rack

    Did you know you can make doughnuts without pulling out the fryer? You can! These glazed gluten-free chocolate doughnuts are so easy and so tasty! 

    Get the recipe —> Gluten-Free Baked Chocolate Doughnuts

    Gluten-Free Cinnamon Bun Waffles

    Gluten-Free Cinnamon Bun Waffles

    “I don’t want none unless you got buns, hon.” Sir Mix a Lot was clearly talking about these gluten-free cinnamon bun waffles. ?

    Get the recipe —> Gluten-Free Cinnamon Bun Waffles

    Gluten-Free Cinnamon Raisin Bread

    Stack of toasted cinnamon raisin bread slices. Melted butter on top slice.

    Gluten-free cinnamon raisin bread taste great toasted and spread with butter? And! It’s also amazing turned into French toast. That’s a win-win.

    Get the recipe —> Gluten-Free Cinnamon Raisin Bread

    Paleo (Grain-Free) Apple Muffins

    Paleo apple muffins on a cooling rack.

    Baking for a grain-free friend on Christmas morning? These paleo apple muffins are a perfect treat! 

    Get the recipe —> Paleo (Grain-Free) Apple Muffins

    Gluten-Free Pumpkin Scones

    Gluten-Free Pumpkin Scones on a cooling rack.

    Scones are so pretty and so yummy! These gluten-free pumpkin scones were inspired by the ones Starbucks once sold, so you know they’re good! 

    Get the recipe —> Gluten-Free Pumpkin Scones

    Gluten-Free Sandwich Bread

    (Because sometimes you just want a piece of toast on Christmas morning.)

    Loaf of Baked Gluten-Free Sandwich Bread on Red Cutting Board.

    Did you enjoy a big meal on Christmas Eve? Then maybe you’re in the mood for a cup of tea and a slice of toast on Christmas morning. That sounds good to me! 

    Get the recipe —> Gluten-Free Sandwich Bread


    • « Go to Previous Page
    • Page 1
    • Interim pages omitted …
    • Page 3
    • Page 4
    • Page 5
    • Page 6
    • Page 7
    • Interim pages omitted …
    • Page 20
    • Go to Next Page »

    Primary Sidebar

    Get Recipes Delivered to Your Inbox! (Free Weekly Newsletter!)


    Elizabeth Barbone

    I'm Elizabeth. Welcome to GlutenFreeBaking.com --- a judgment-free baking space. Here you'll find easy recipes, product reviews, and other good stuff that makes gluten-free living easy and a lot more fun!

    Read More About Elizabeth →

    • Facebook
    • Instagram
    • Pinterest

    Foods You Miss the Most

    • A stack of gluten-free pancakes topped with maple syrup and butter on a plate.
      The Best Gluten-Free Pancakes
    • Gluten-free chocolate chip cookies on a cooling rack.
      Gluten-Free Chocolate Chip Cookies
    • Loaf of Baked Gluten-Free Sandwich Bread on Red Cutting Board.
      How to Make the Best Gluten-Free Sandwich Bread: An Easy Recipe for Everyone!
    • Gluten-free flour tortillas on plate.
      How to Make the Best Gluten-Free Flour Tortillas

    Footer

    ↑ back to top

    Terms

    • Privacy Policy
    • Terms & Conditions
    • Accessibility Statement

    Follow Us

    • Facebook
    • Instagram
    • Pinterest

    About

    • Contact
    • About

    Copyright © 2025 Gluten-Free Baking