• Skip to primary navigation
  • Skip to main content
  • Skip to primary sidebar
Gluten-Free Baking logo
  • Home
  • Recipes
  • About
    • About Me
    • Contact
    • My Cookbooks
    • Work with Me
menu icon
go to homepage
  • Home
  • About
  • Recipes
  • Contact
    • Facebook
    • Instagram
  • search icon
    Homepage link
    • Home
    • About
    • Recipes
    • Contact
    • Facebook
    • Instagram
  • ×
    Home

    Gluten-Free Chocolate Chip Muffins

    Gluten-free chocolate chip muffins cooling on a rack.

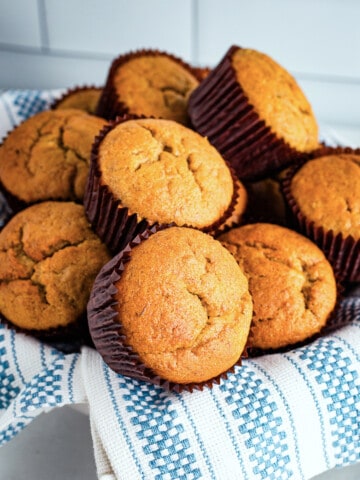
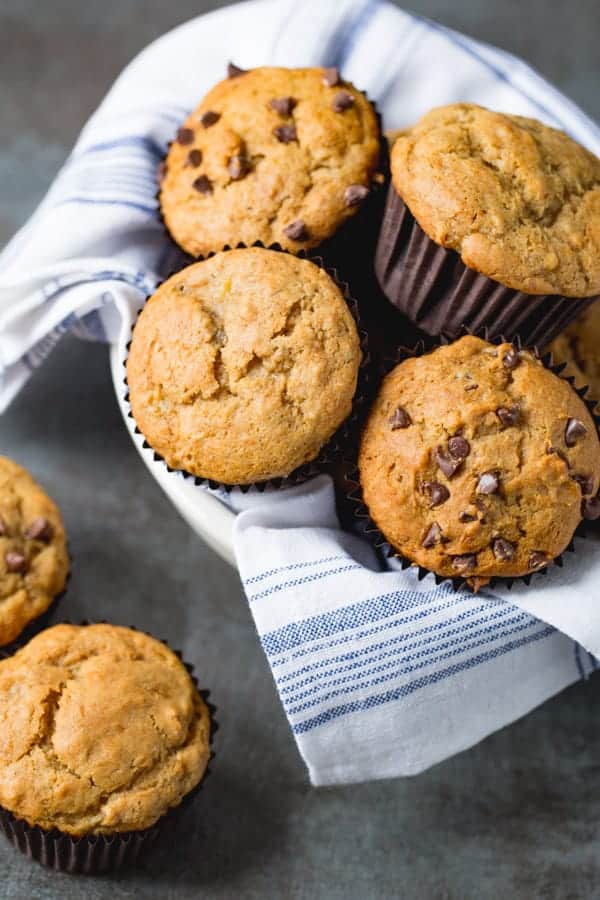
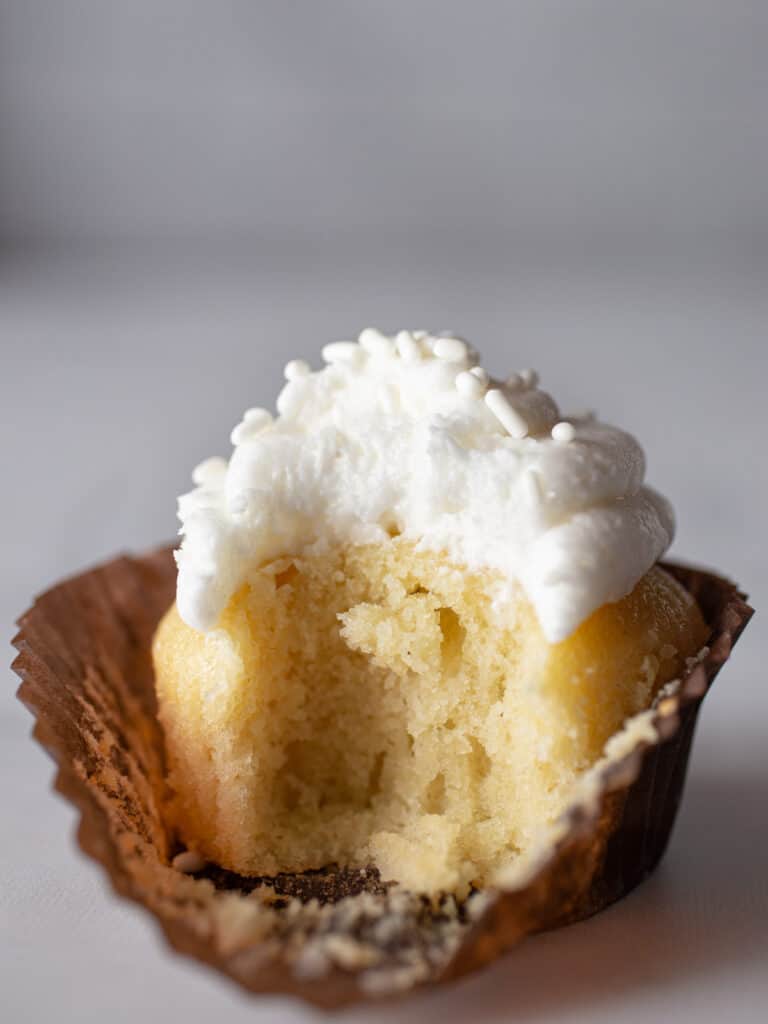
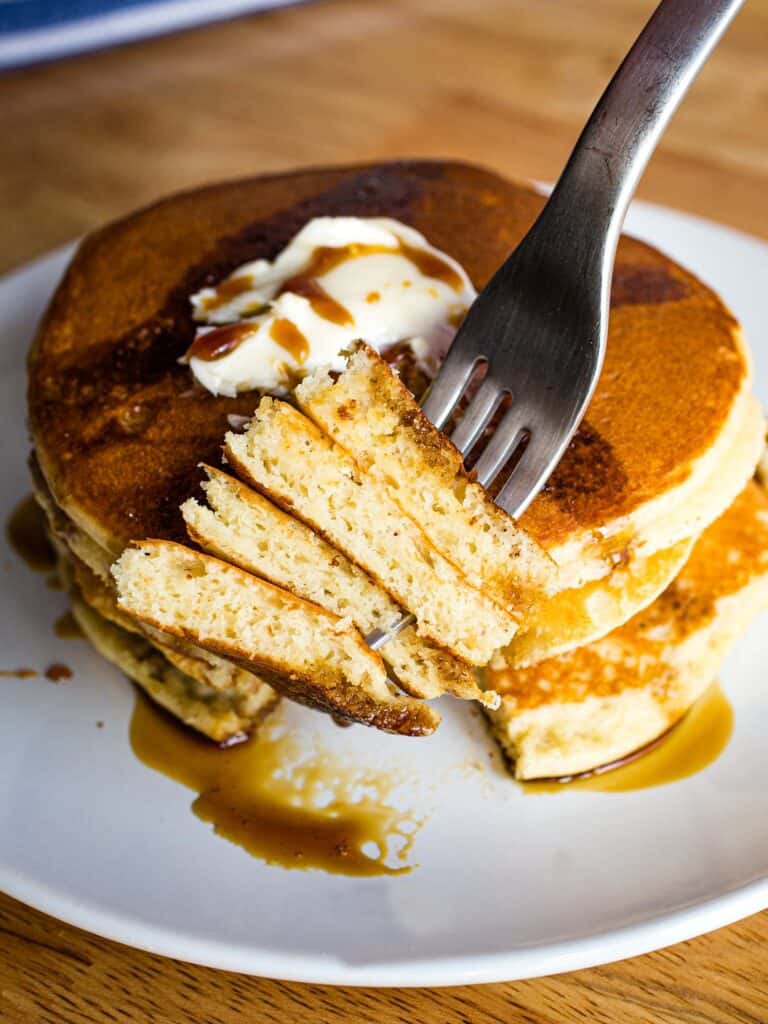
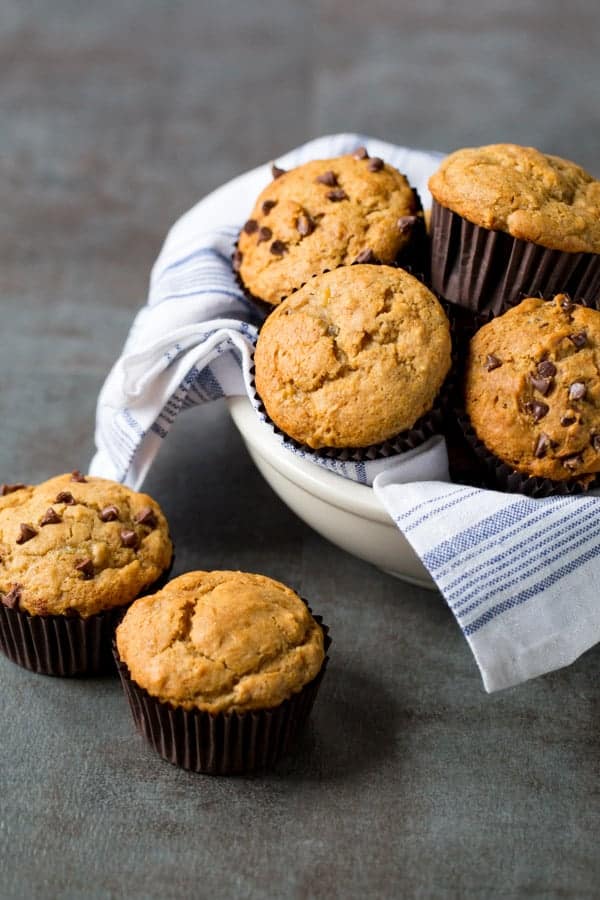
    The best gluten-free chocolate chip muffins. This easy recipe is made with a combination of sour cream and brown sugar. Plus lots of chocolate chips, of course.

    Gluten-free chocolate chip muffins cooling in a muffin pan.

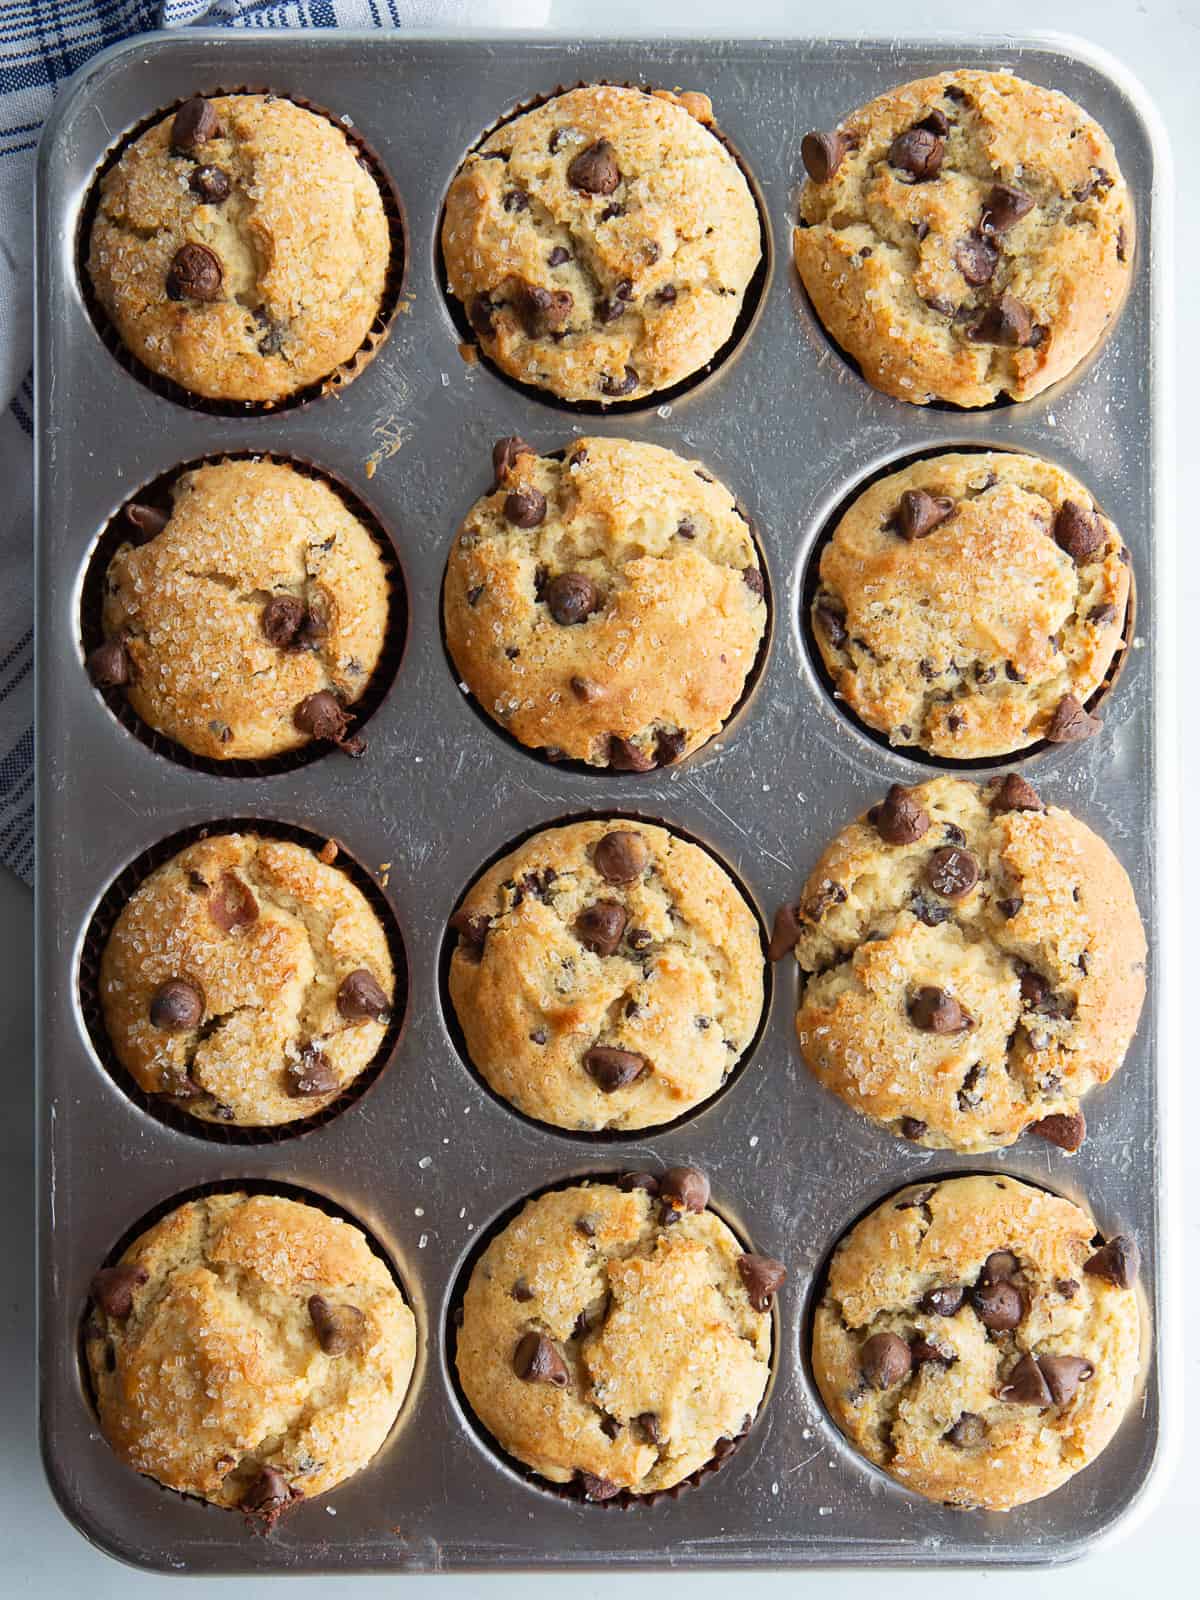
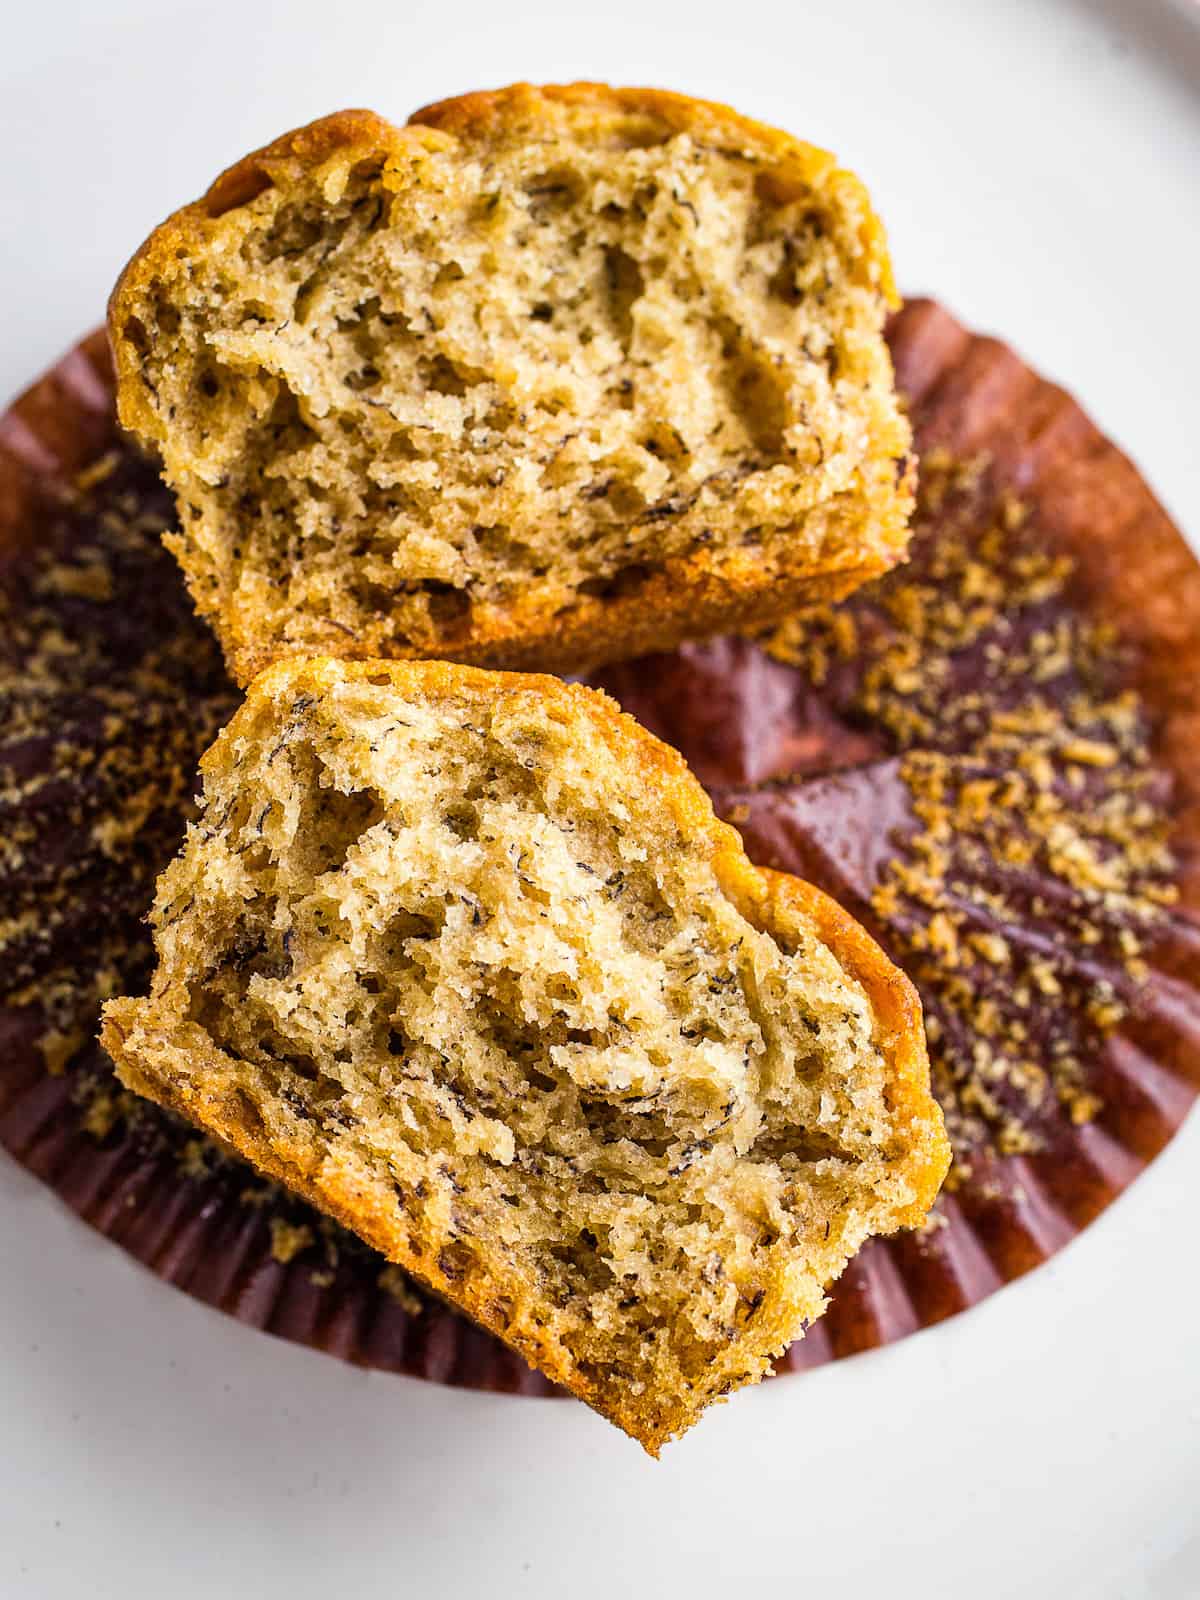
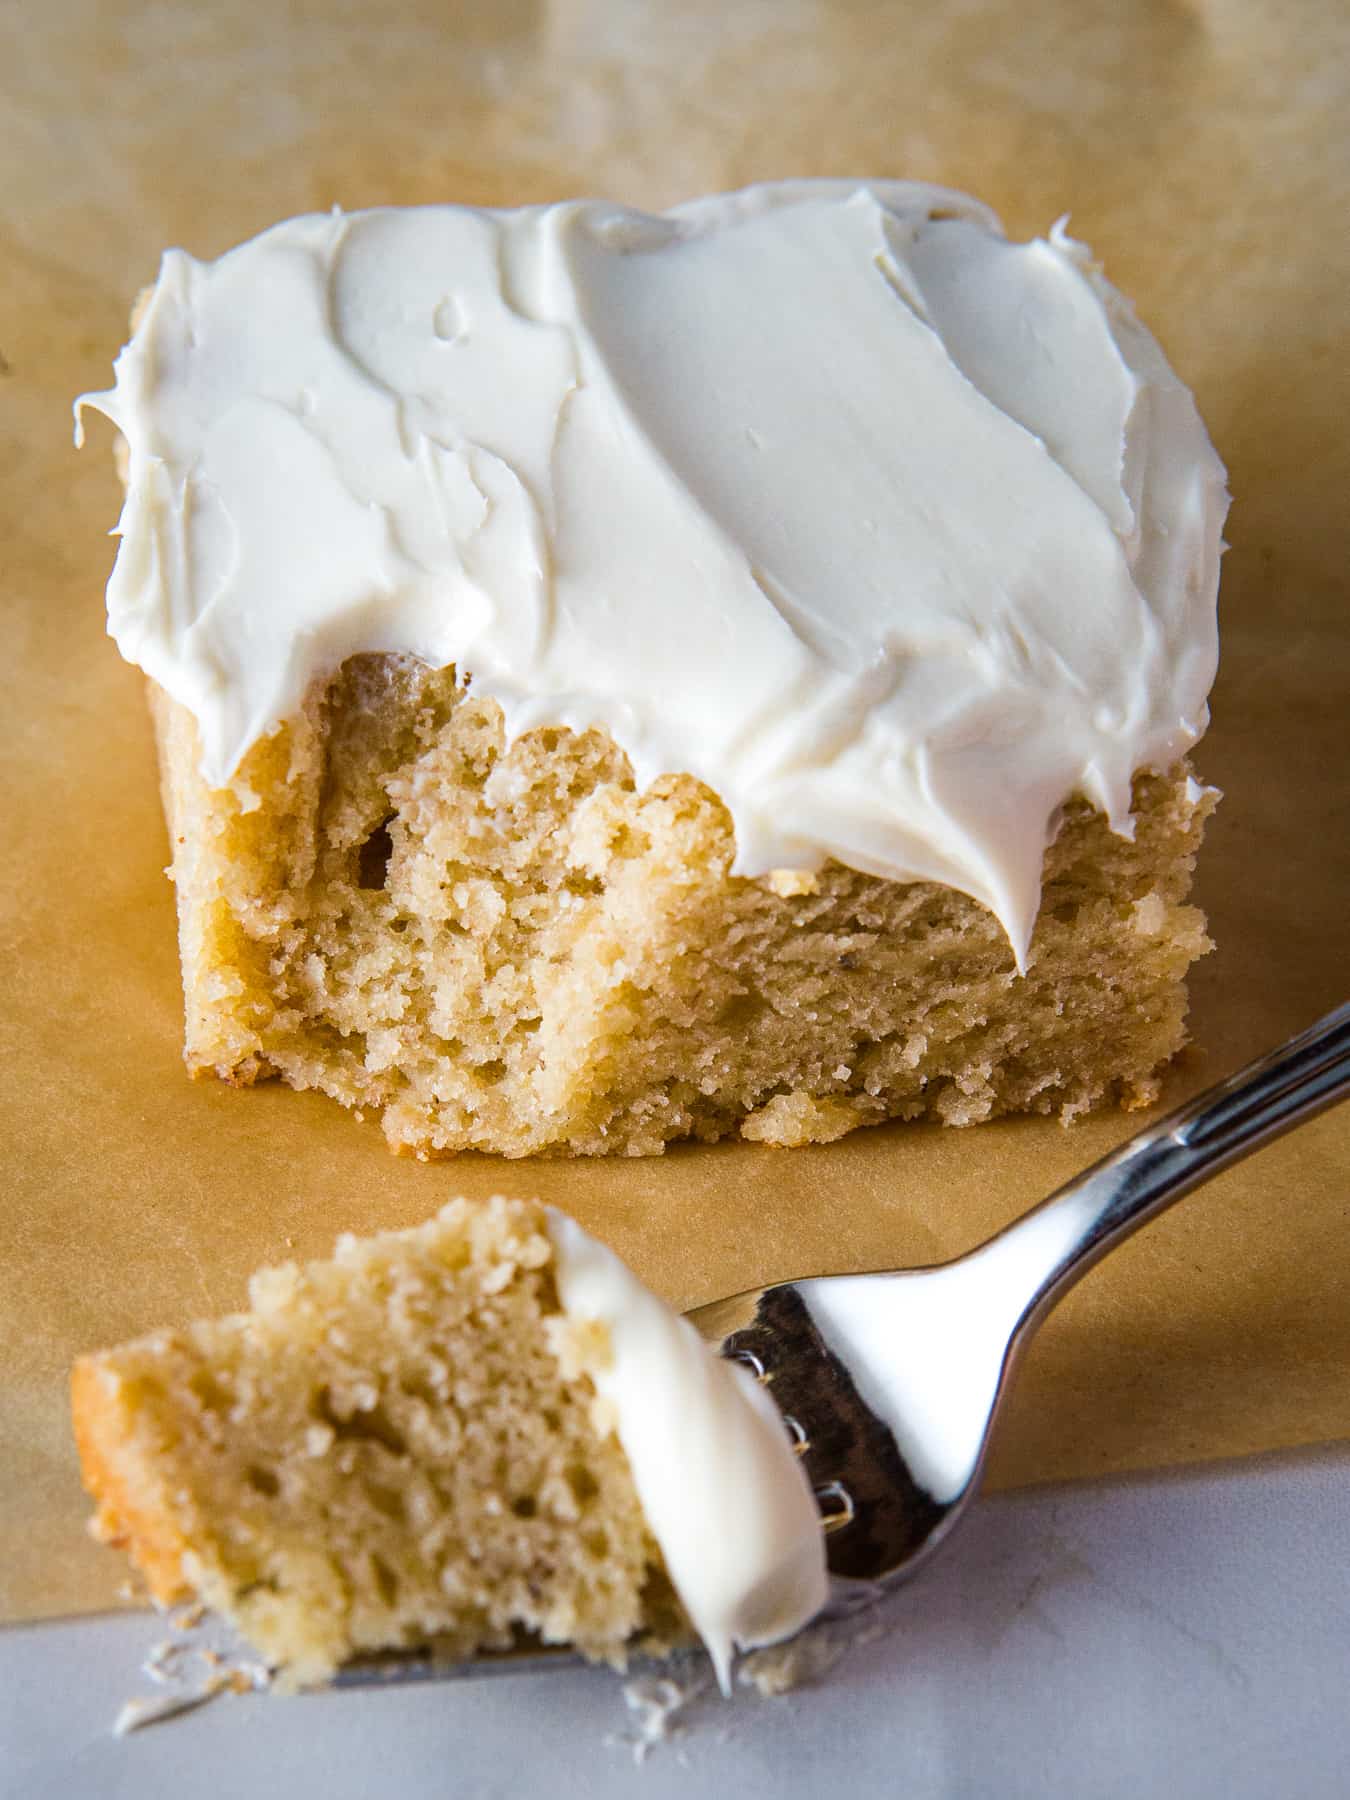
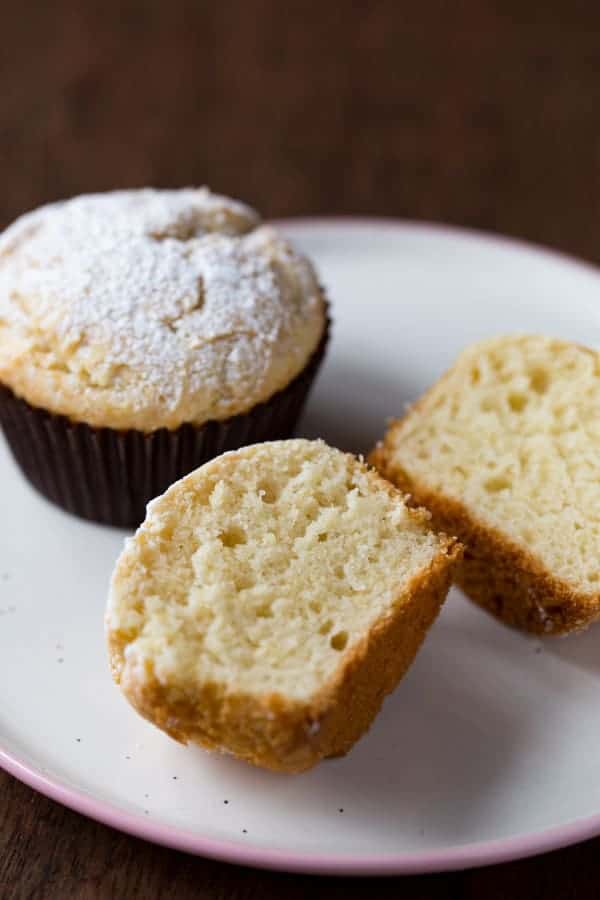
    These gluten-free chocolate chip muffins are a variation of my gluten-free sour cream muffins. Like those muffins, these are dense, tender, and just sweet enough to be called a muffin and not a cupcake. The combination of brown sugar and chocolate chips makes for a really tender and flavorful gluten-free muffin.

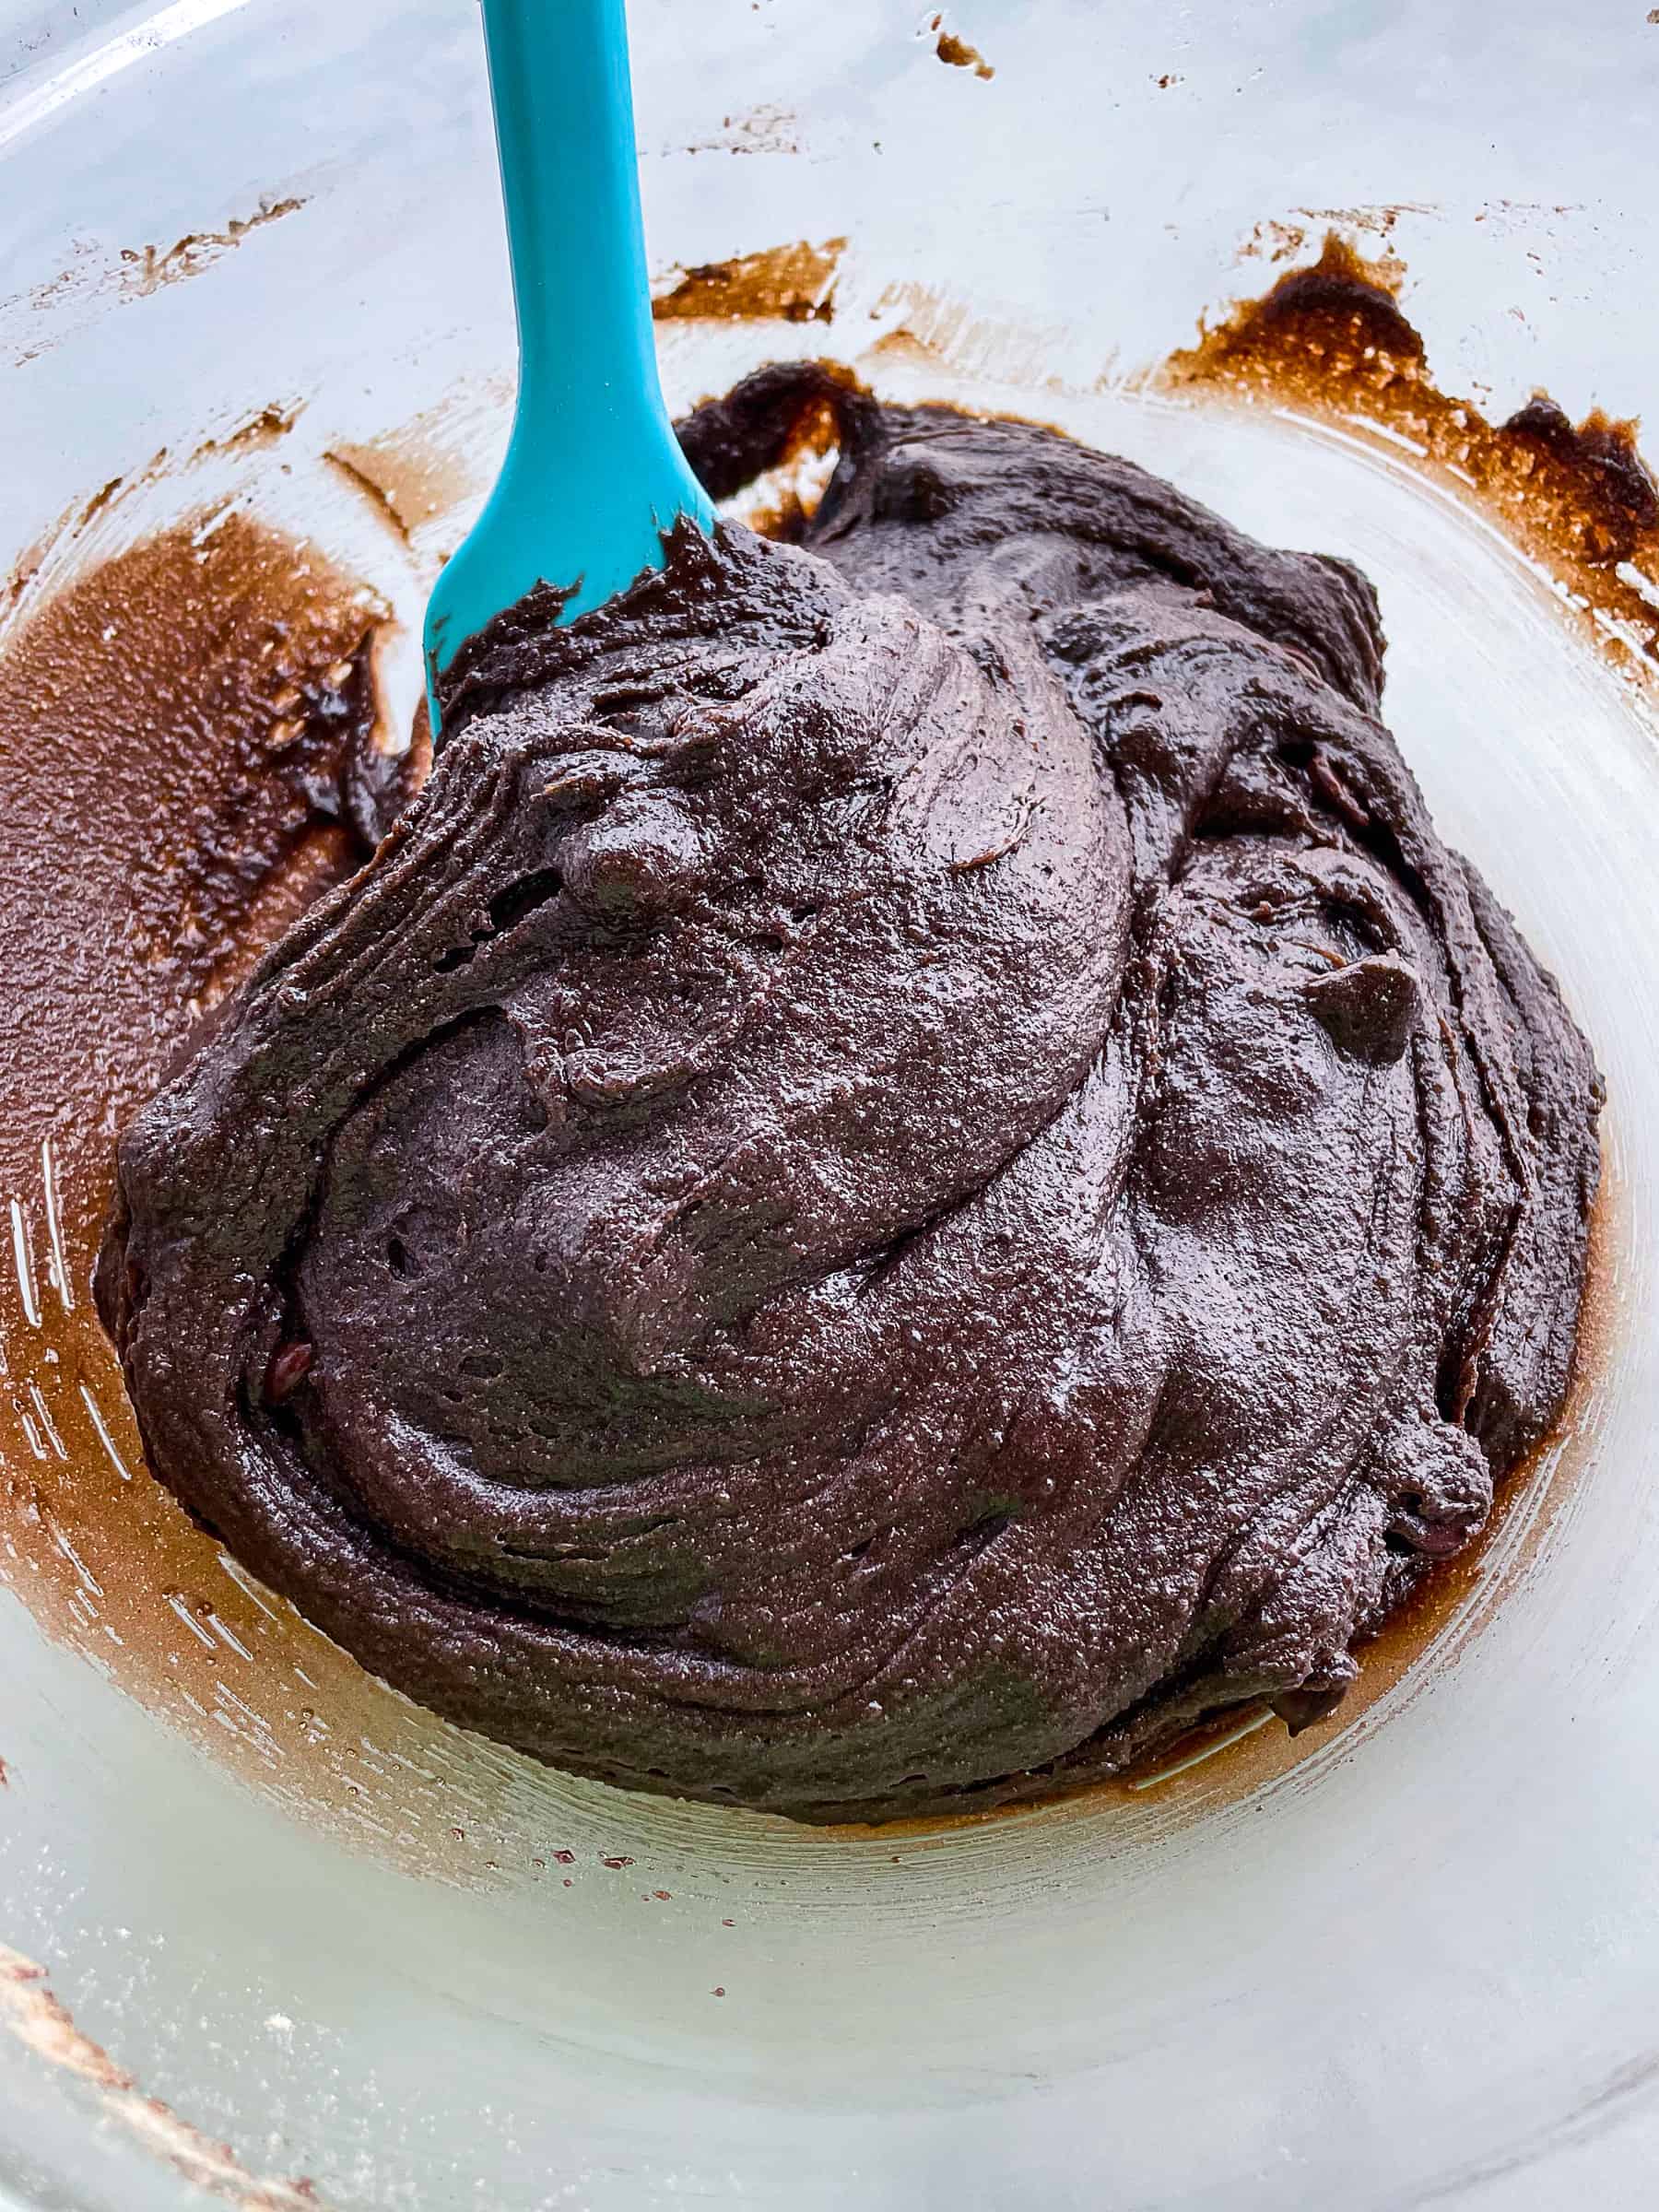
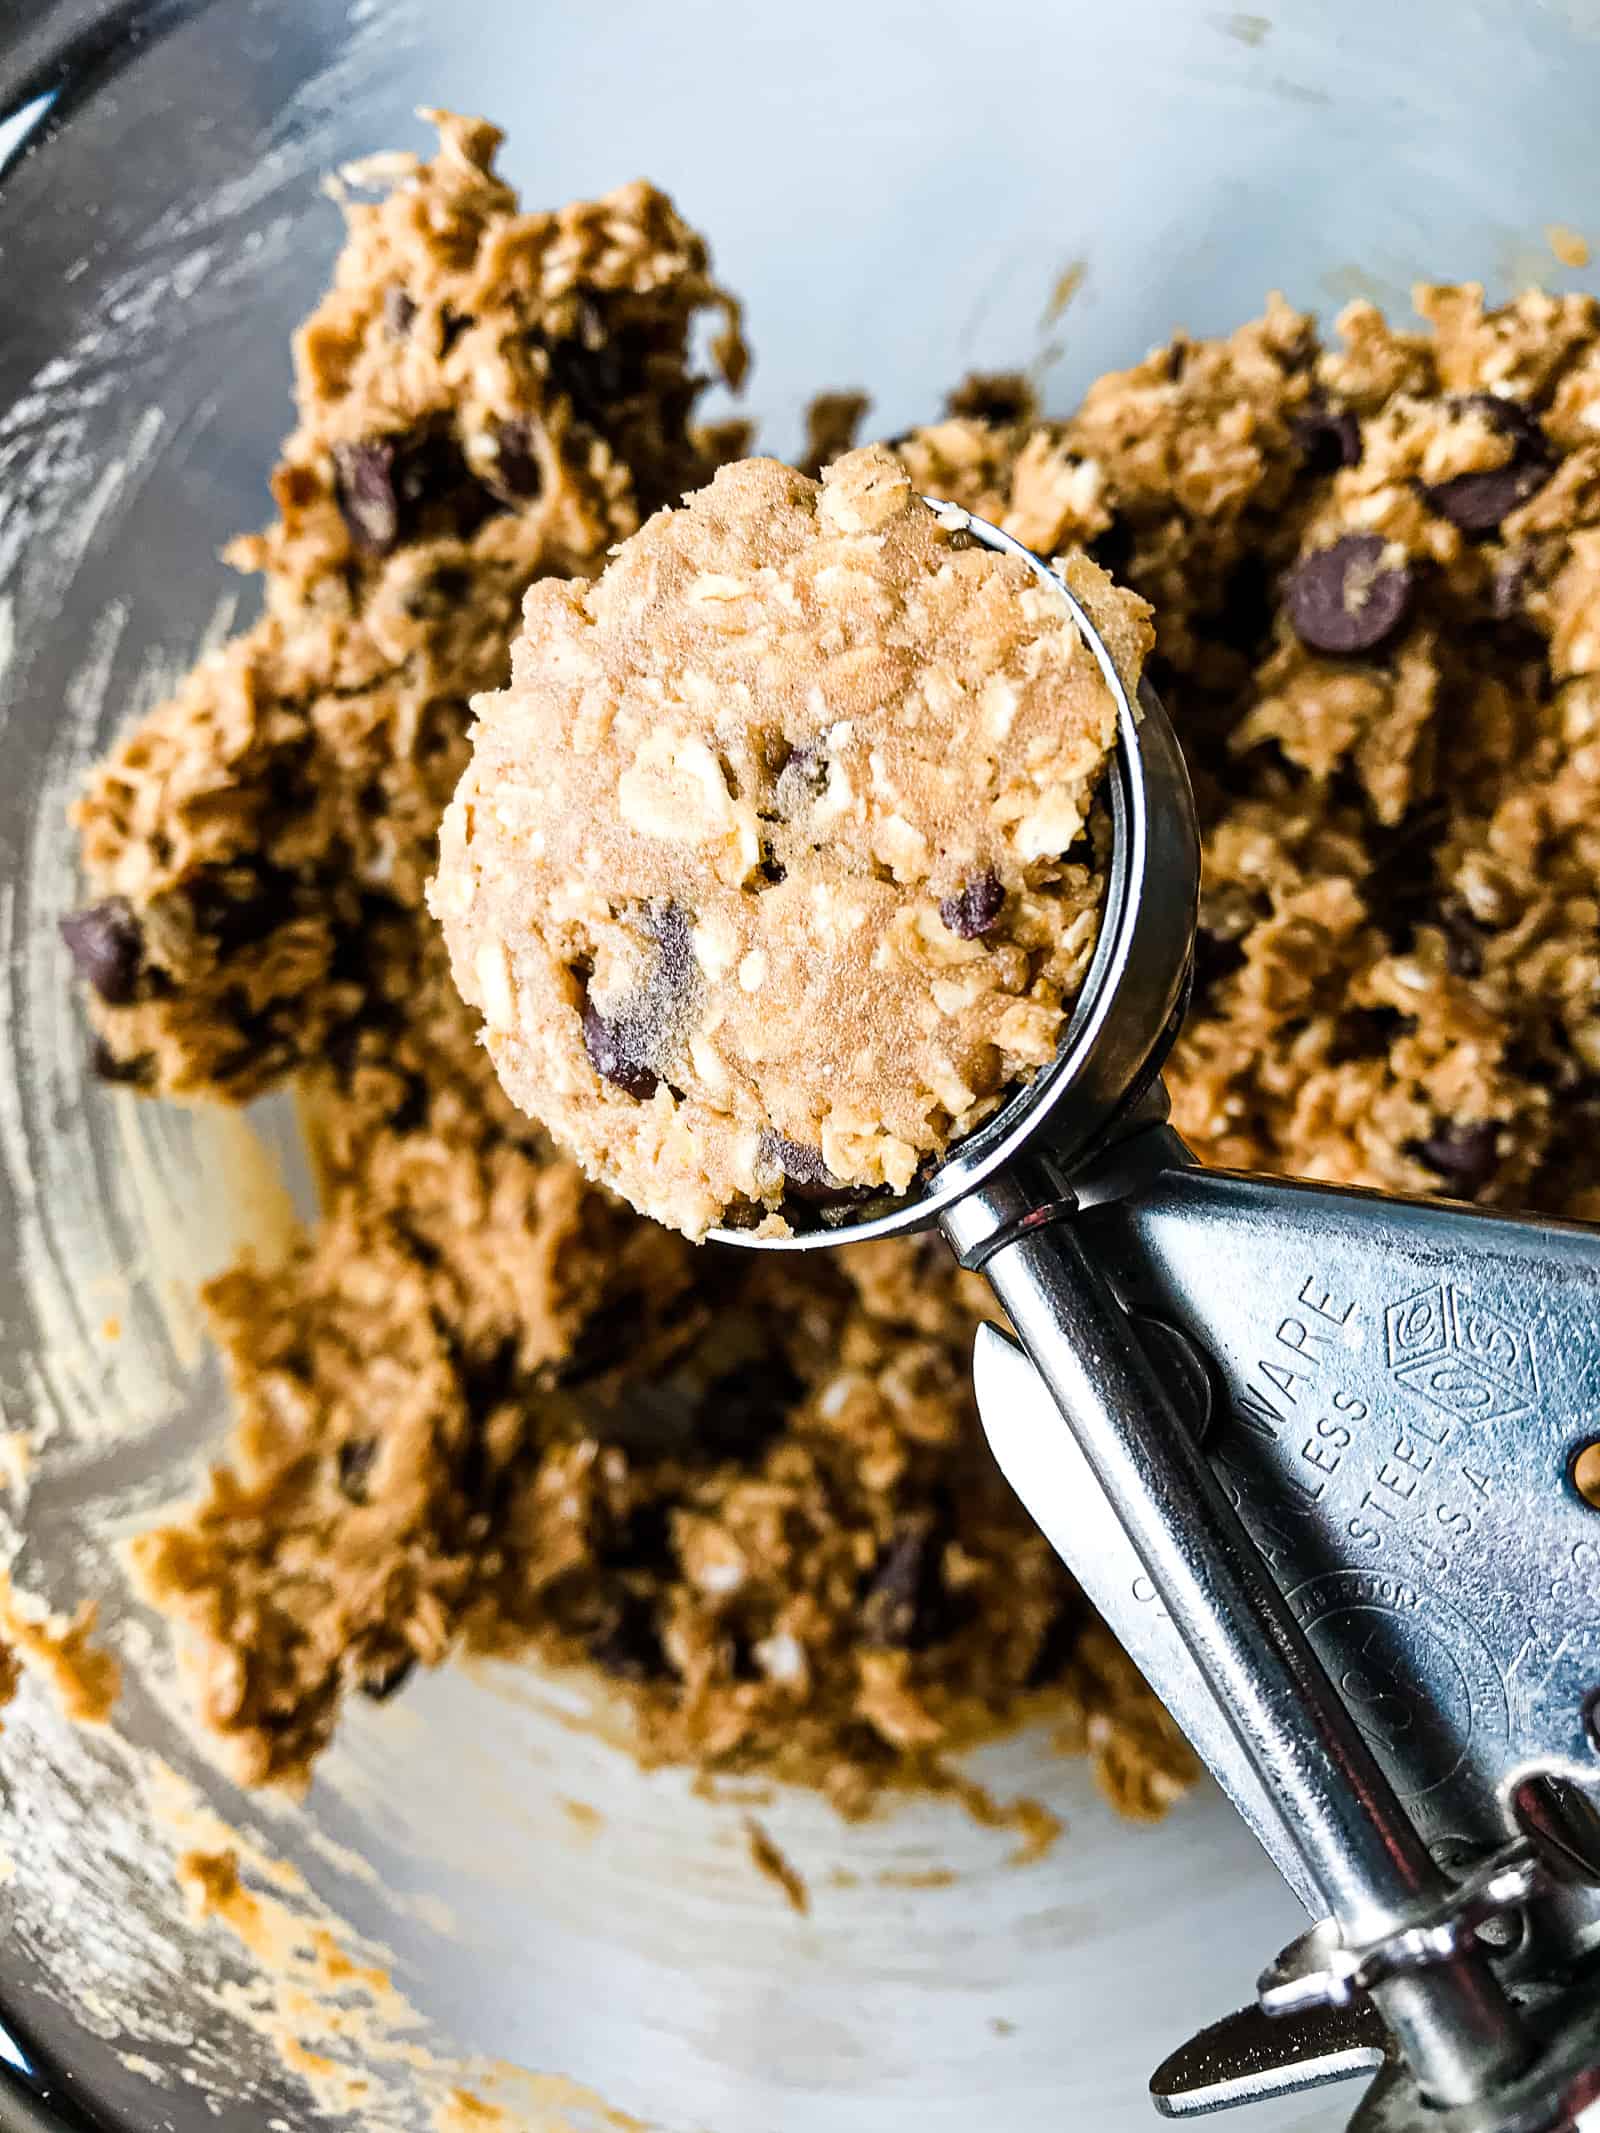
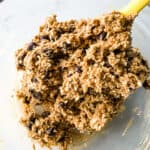
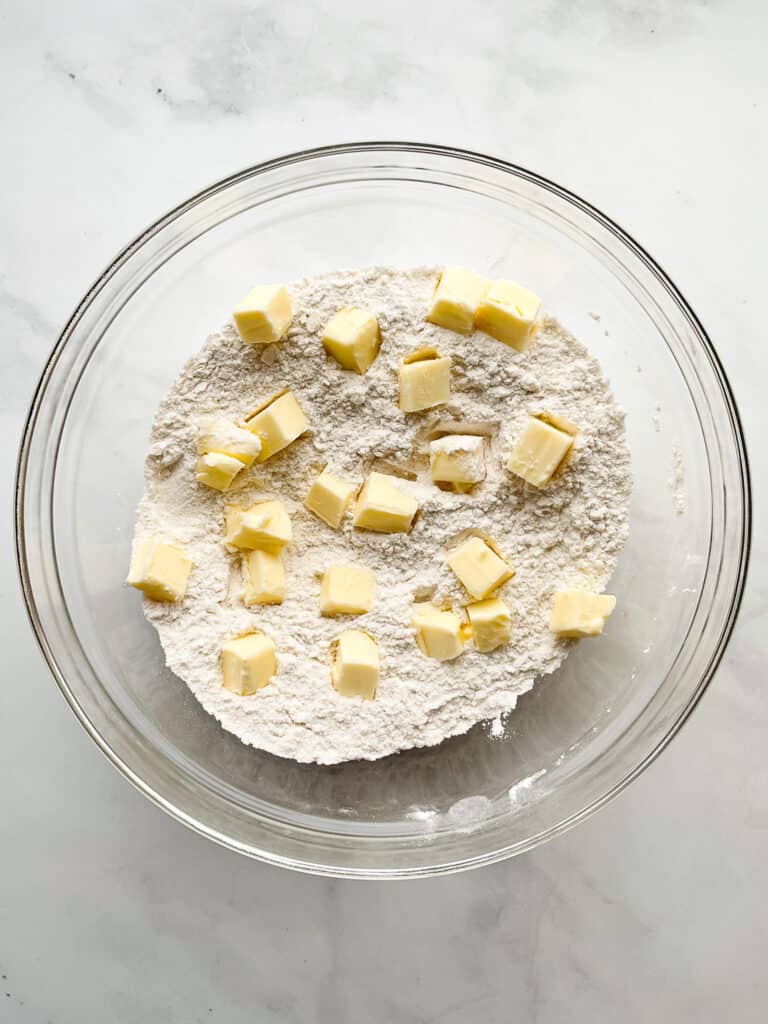
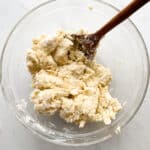
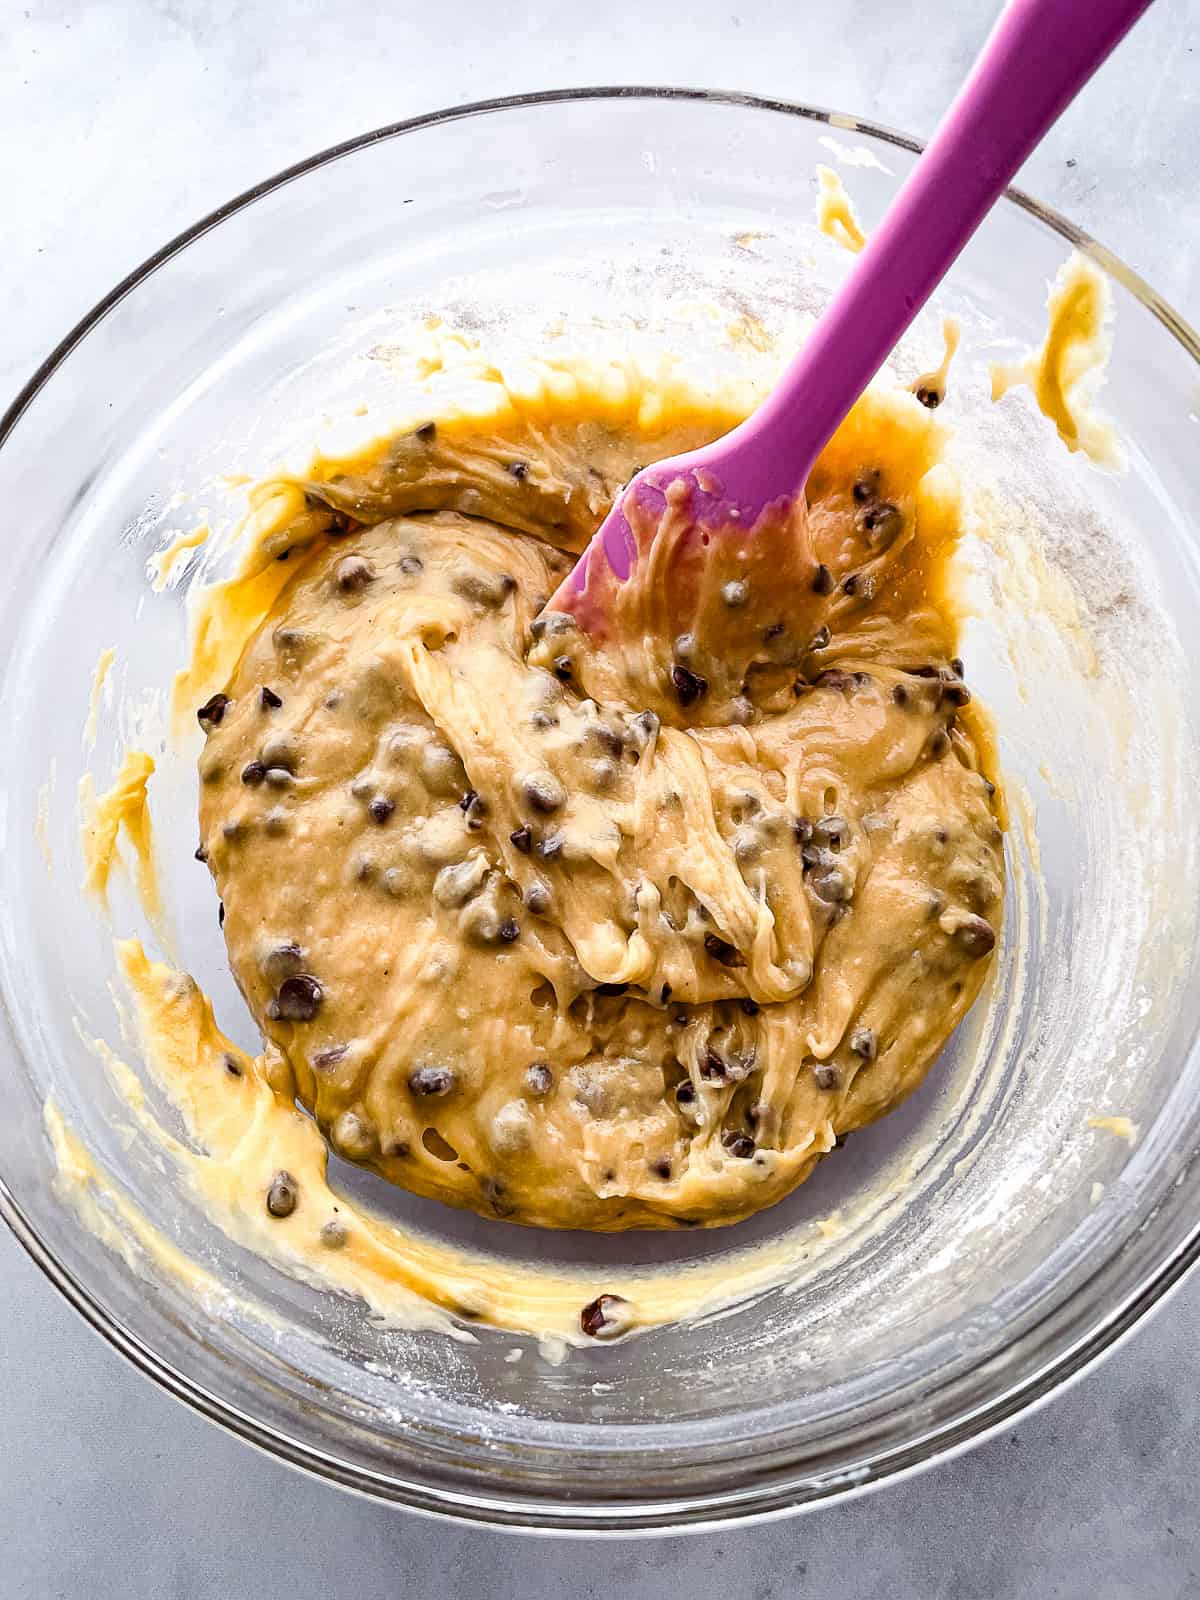
    This recipe comes together in one bowl. You simply whisk together the dry ingredients and then add the wet ingredients.
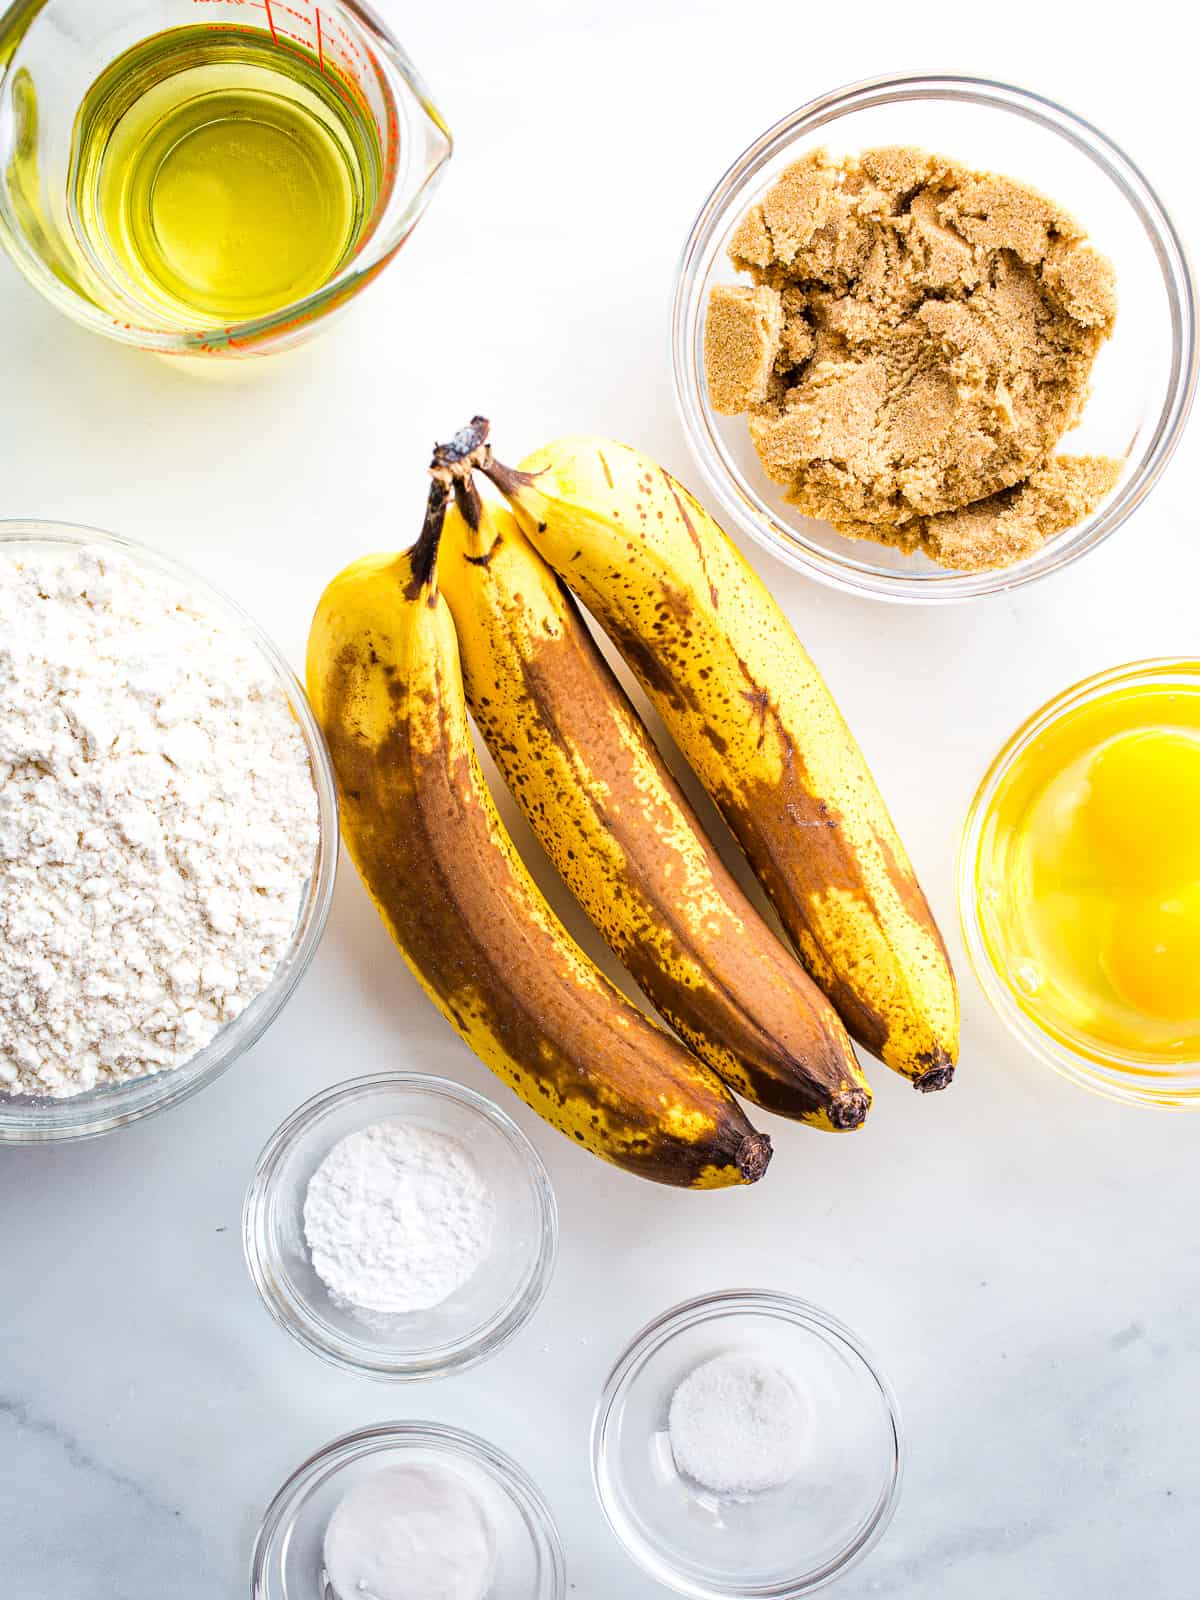
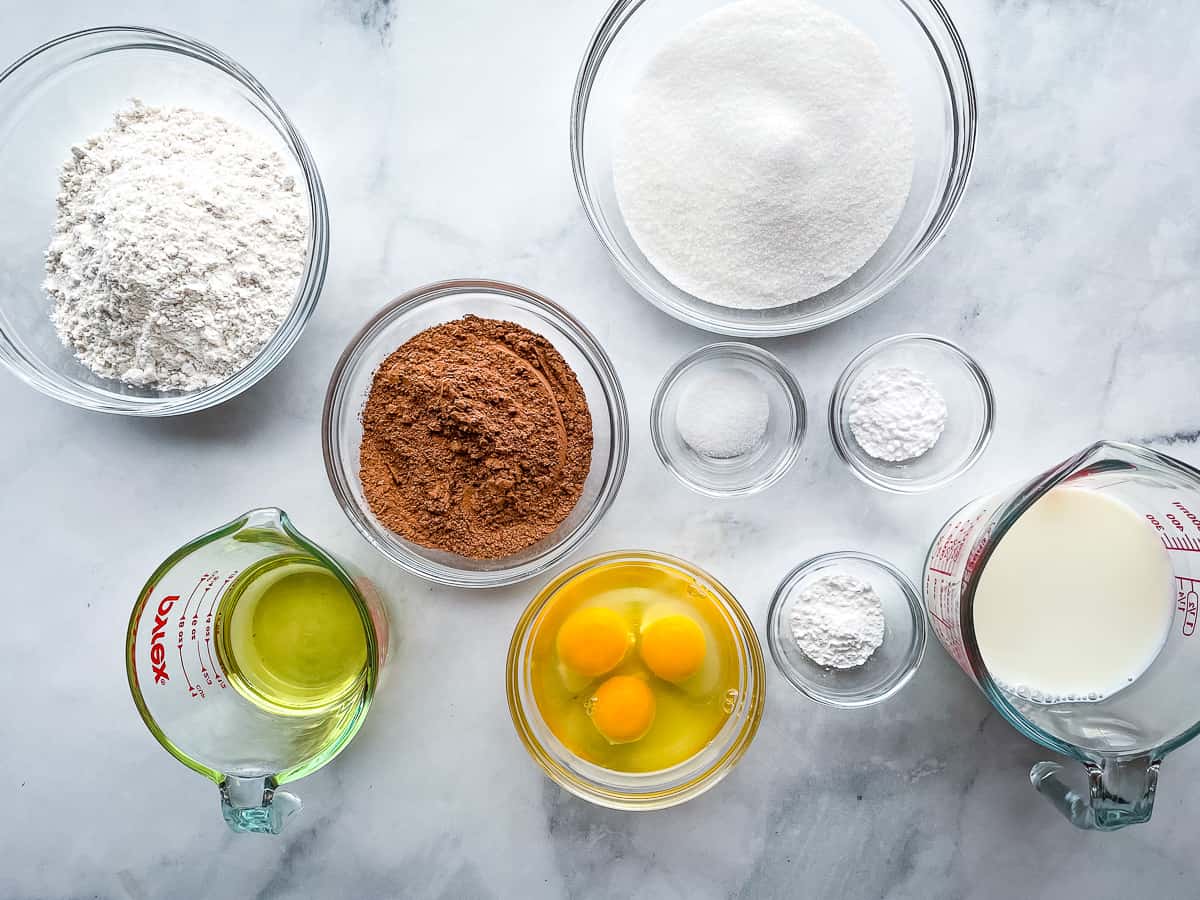
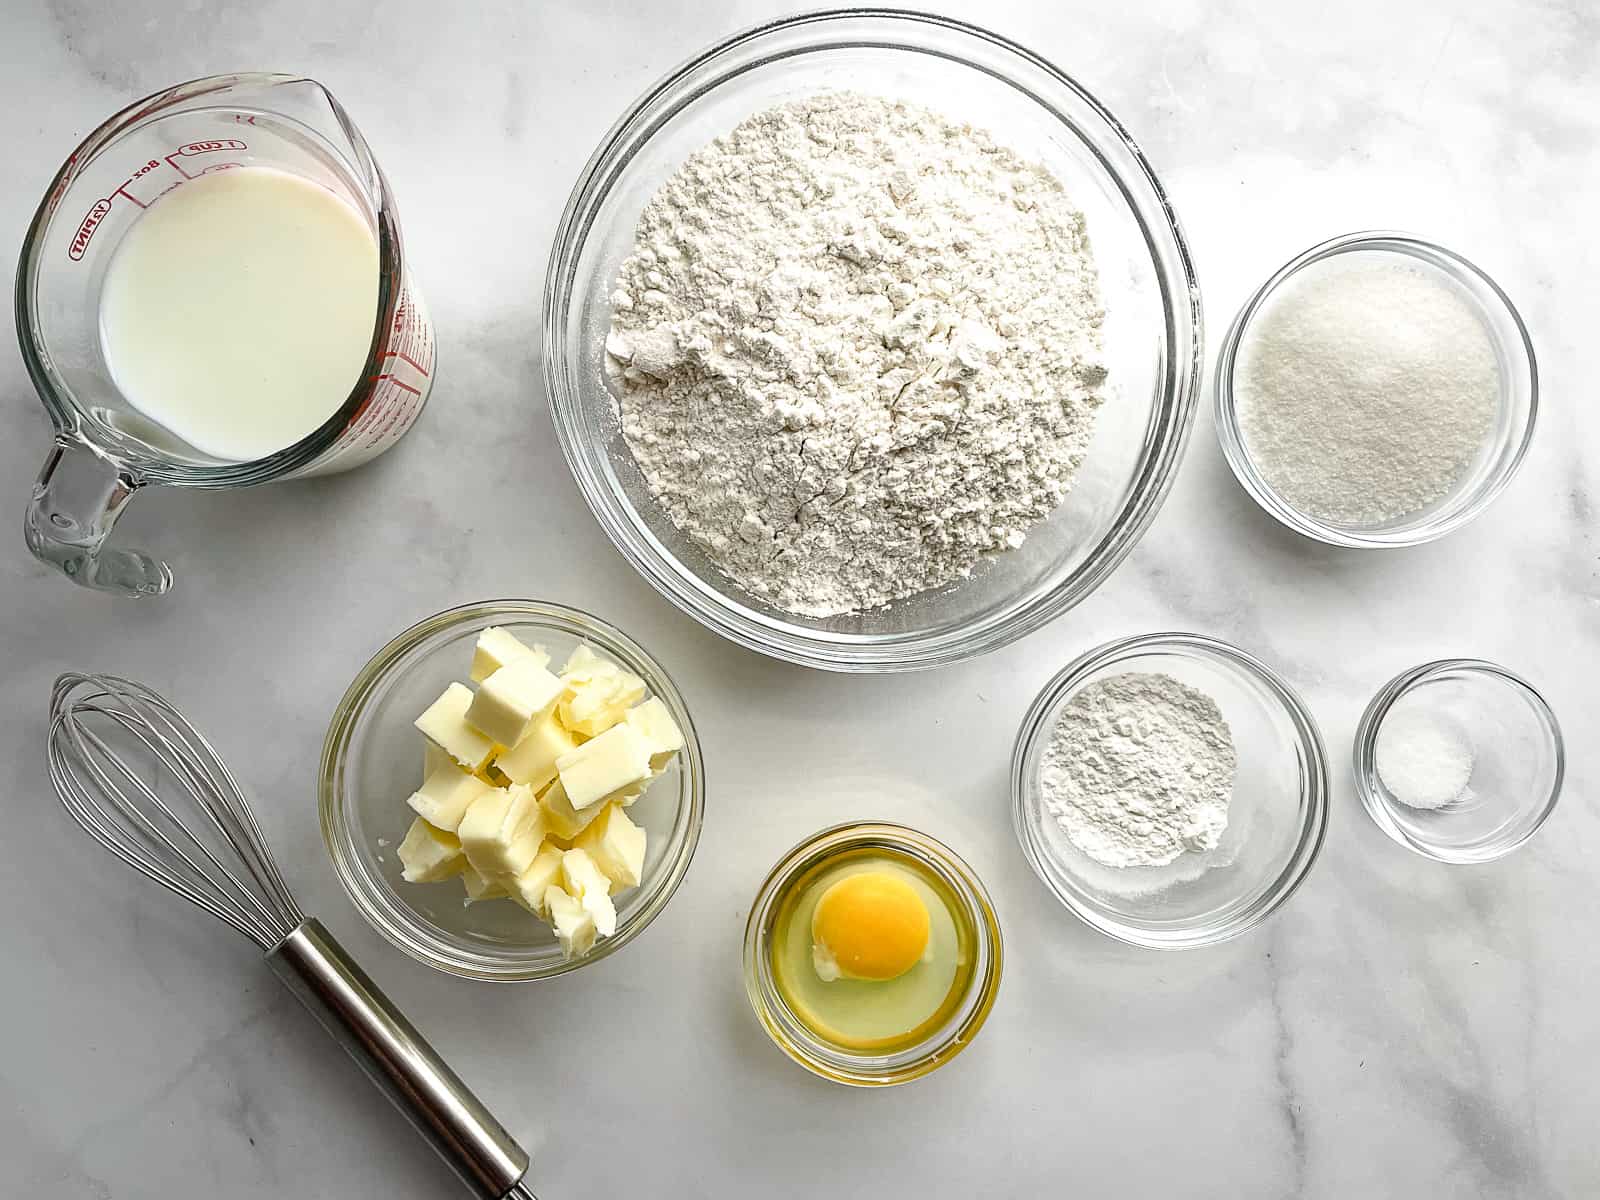
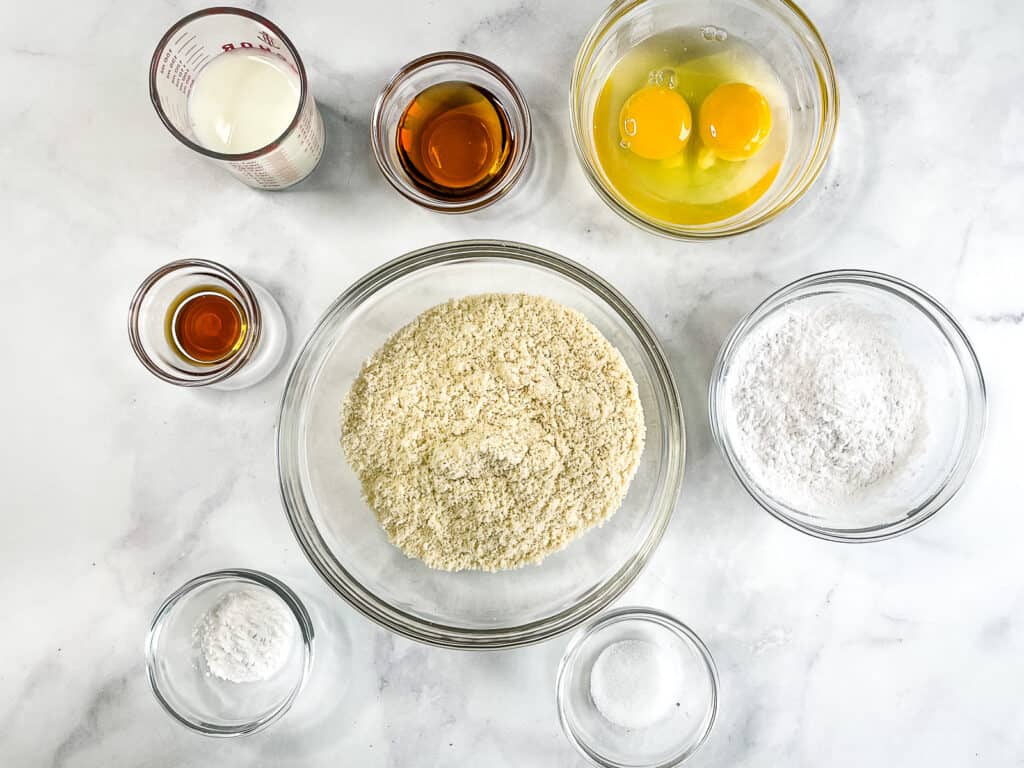
    Ingredients.

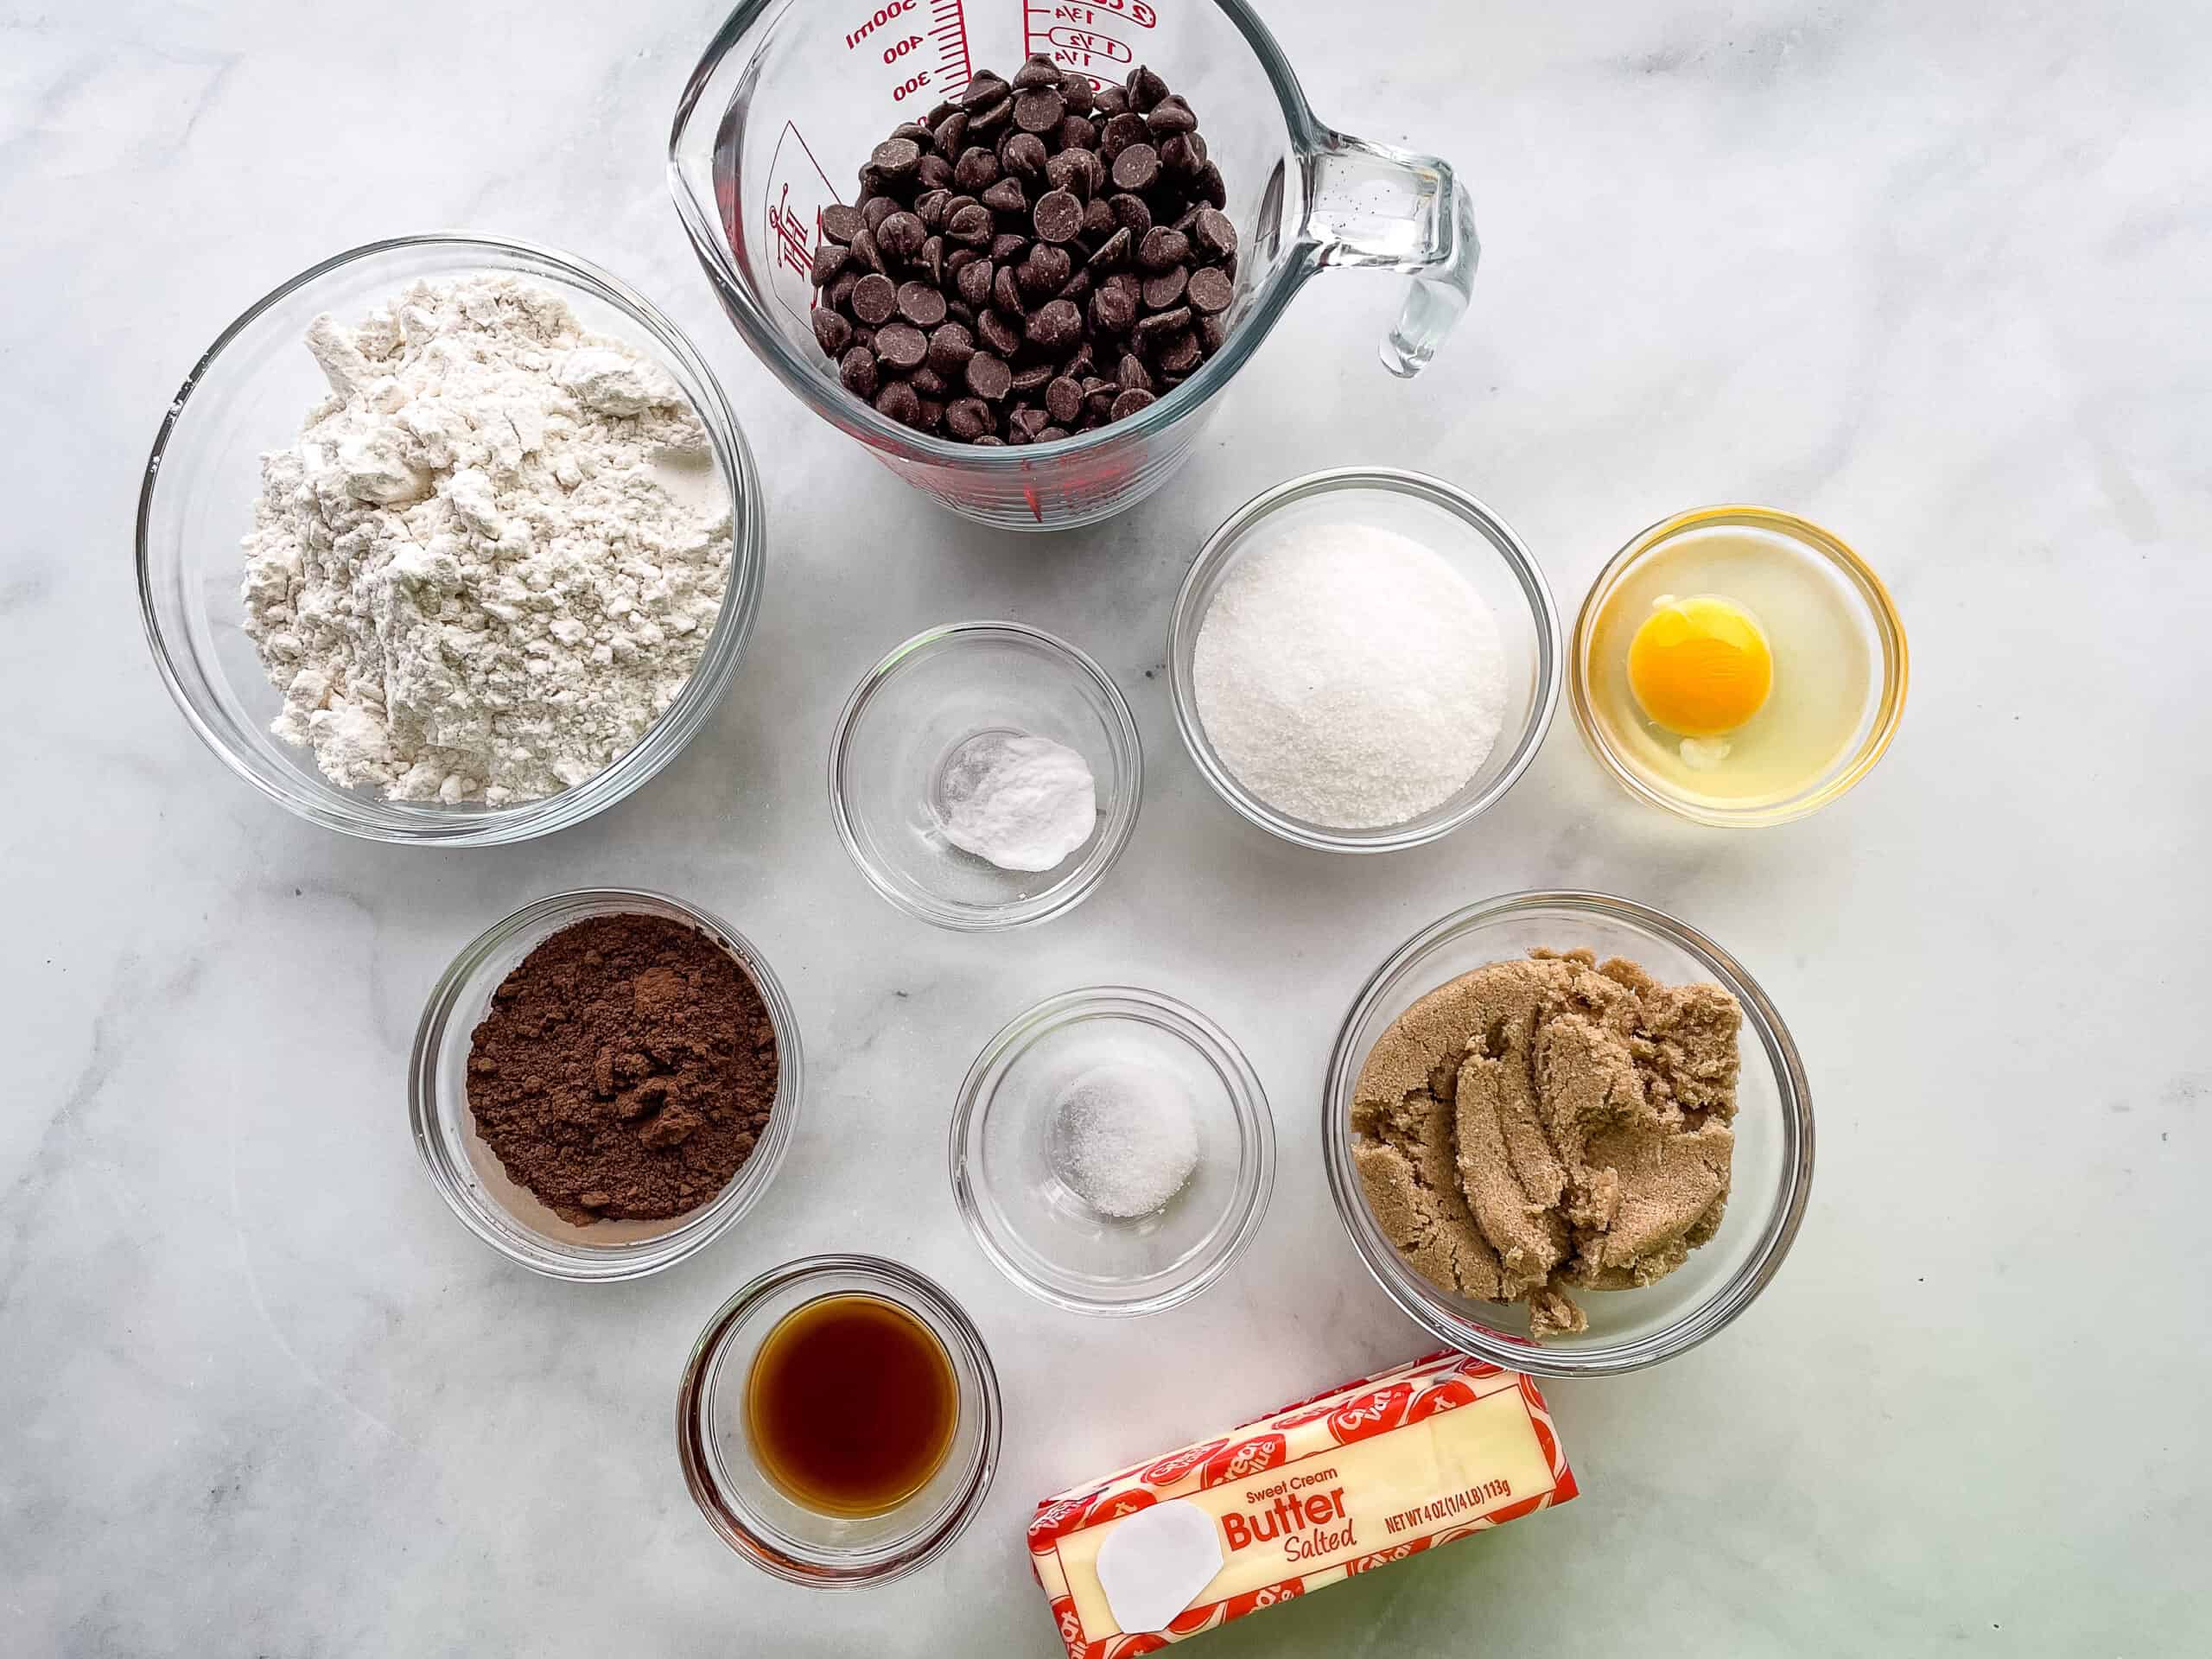
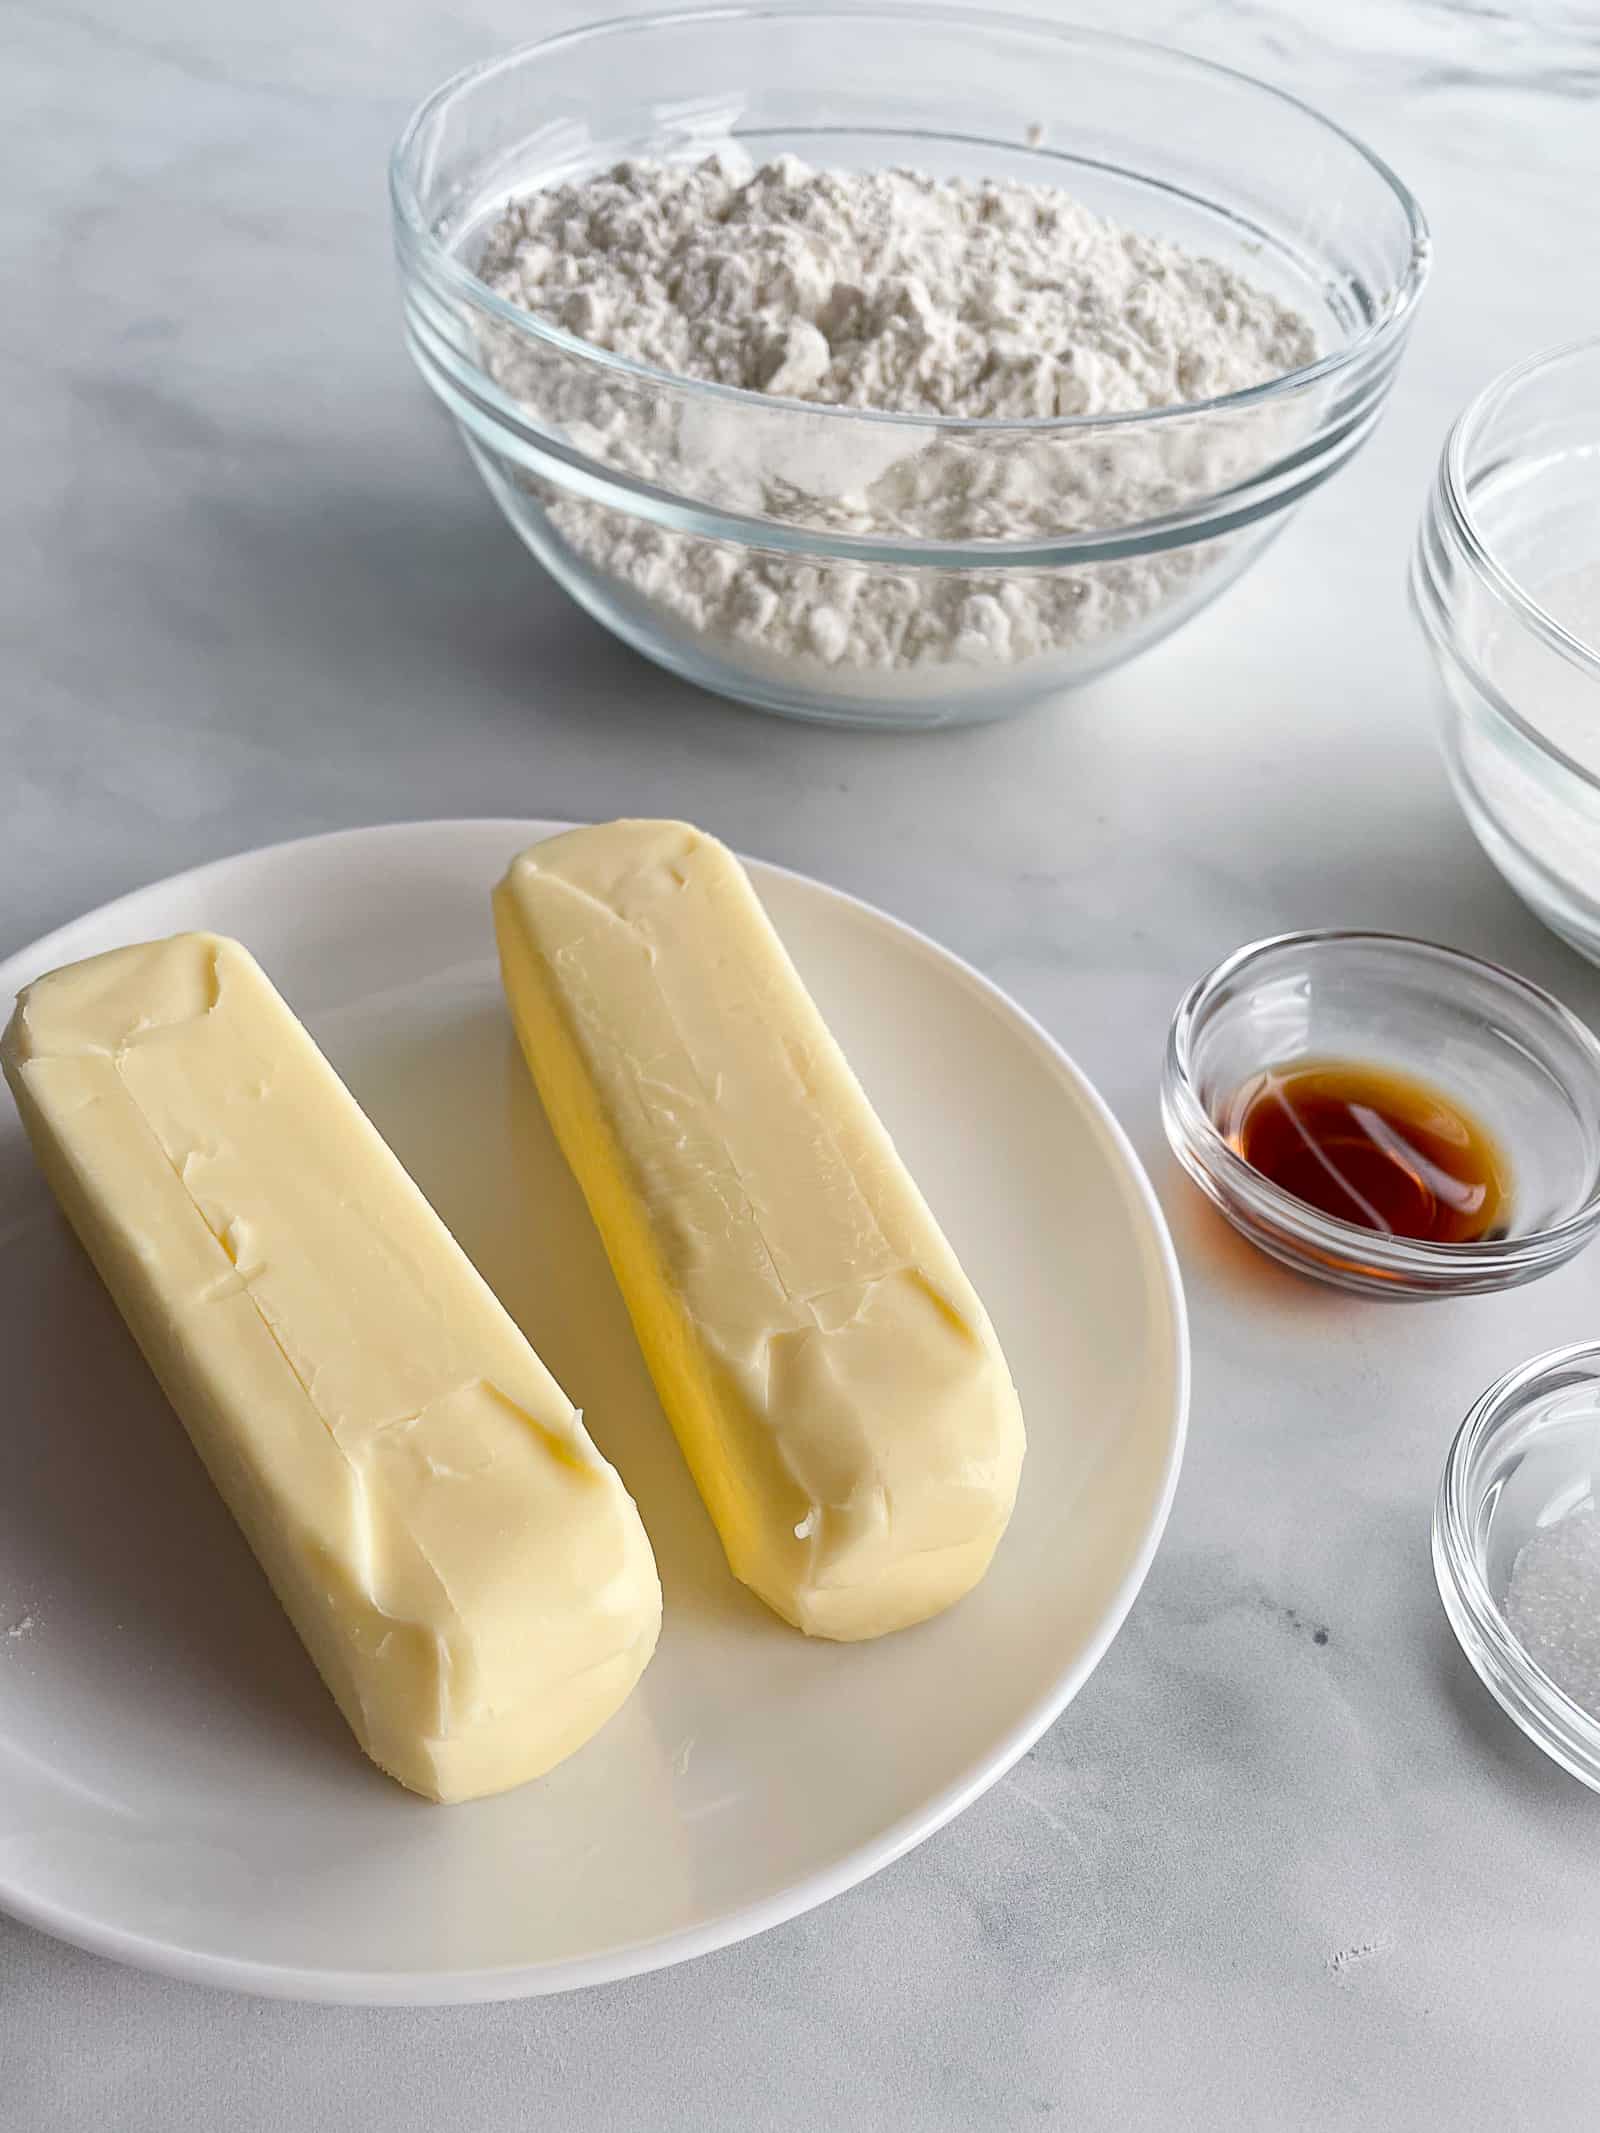
    Here’s what you need to make a batch of these muffins.

    Gluten-free chocolate chip muffin ingredients.
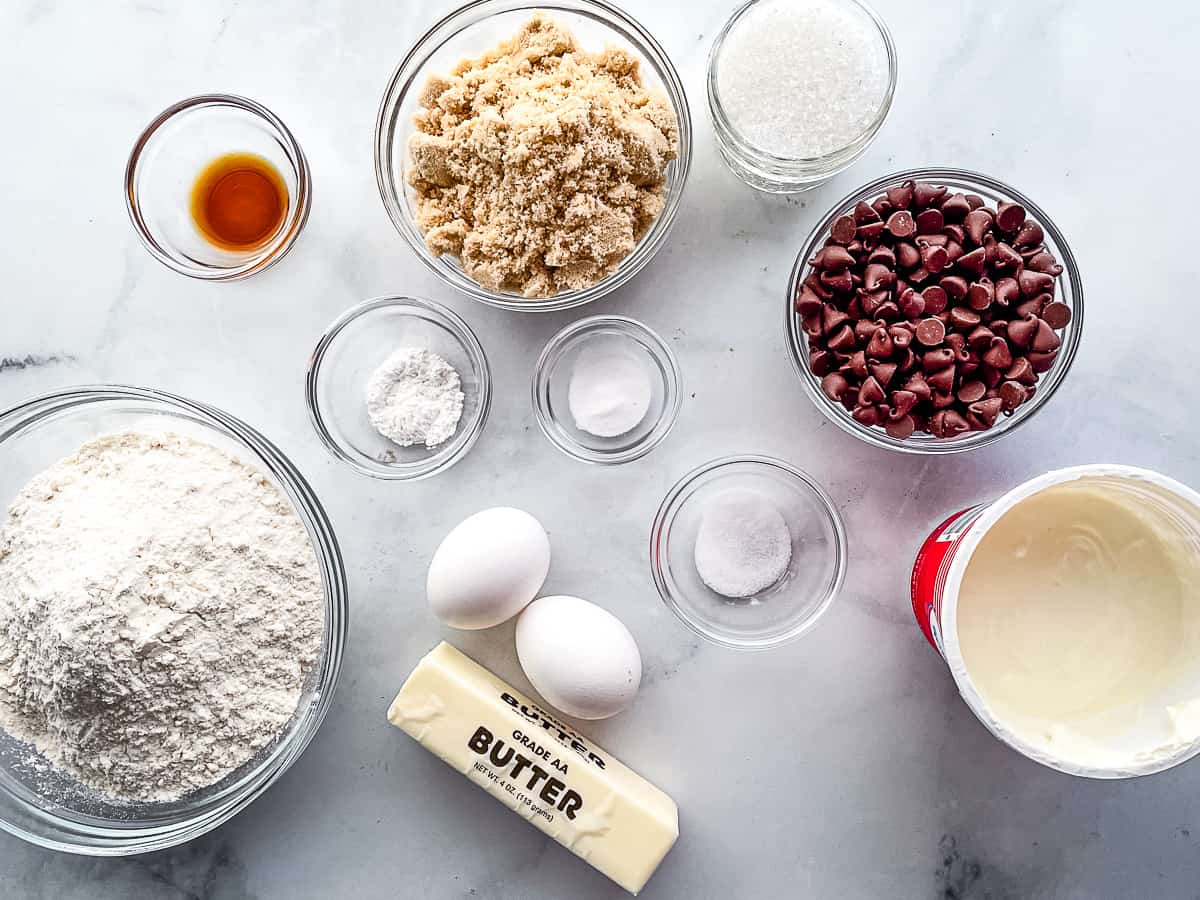
    • Gluten-Free Baking Flour. Use a gluten-free flour blend that contains xanthan or guar gum. If your blend doesn’t, whisk a half teaspoon into the flour before using. 
    • Brown sugar. Light or dark brown sugar both work. Dark brown sugar adds a more pronounced molasses flavor and a darker color. 
    • Butter. Melt the butter and let it cool slightly before adding to the batter. Dairy-free butter works great in this recipe. 
    • Eggs. Two eggs gives the muffins a nice lift and texture. I haven’t tested the recipe with an egg-replacer. 
    • Sour cream. Adds richness and flavor. You can substitute the sour cream with full-fat Greek yogurt. 
    • Vanilla Extract. Makes the muffins flavorful.
    • Baking powder and baking soda. Helps the muffins rise and brown. 
    • Salt. Enhances all the other flavors. Use fine or table salt. It blends easily into the batter. 
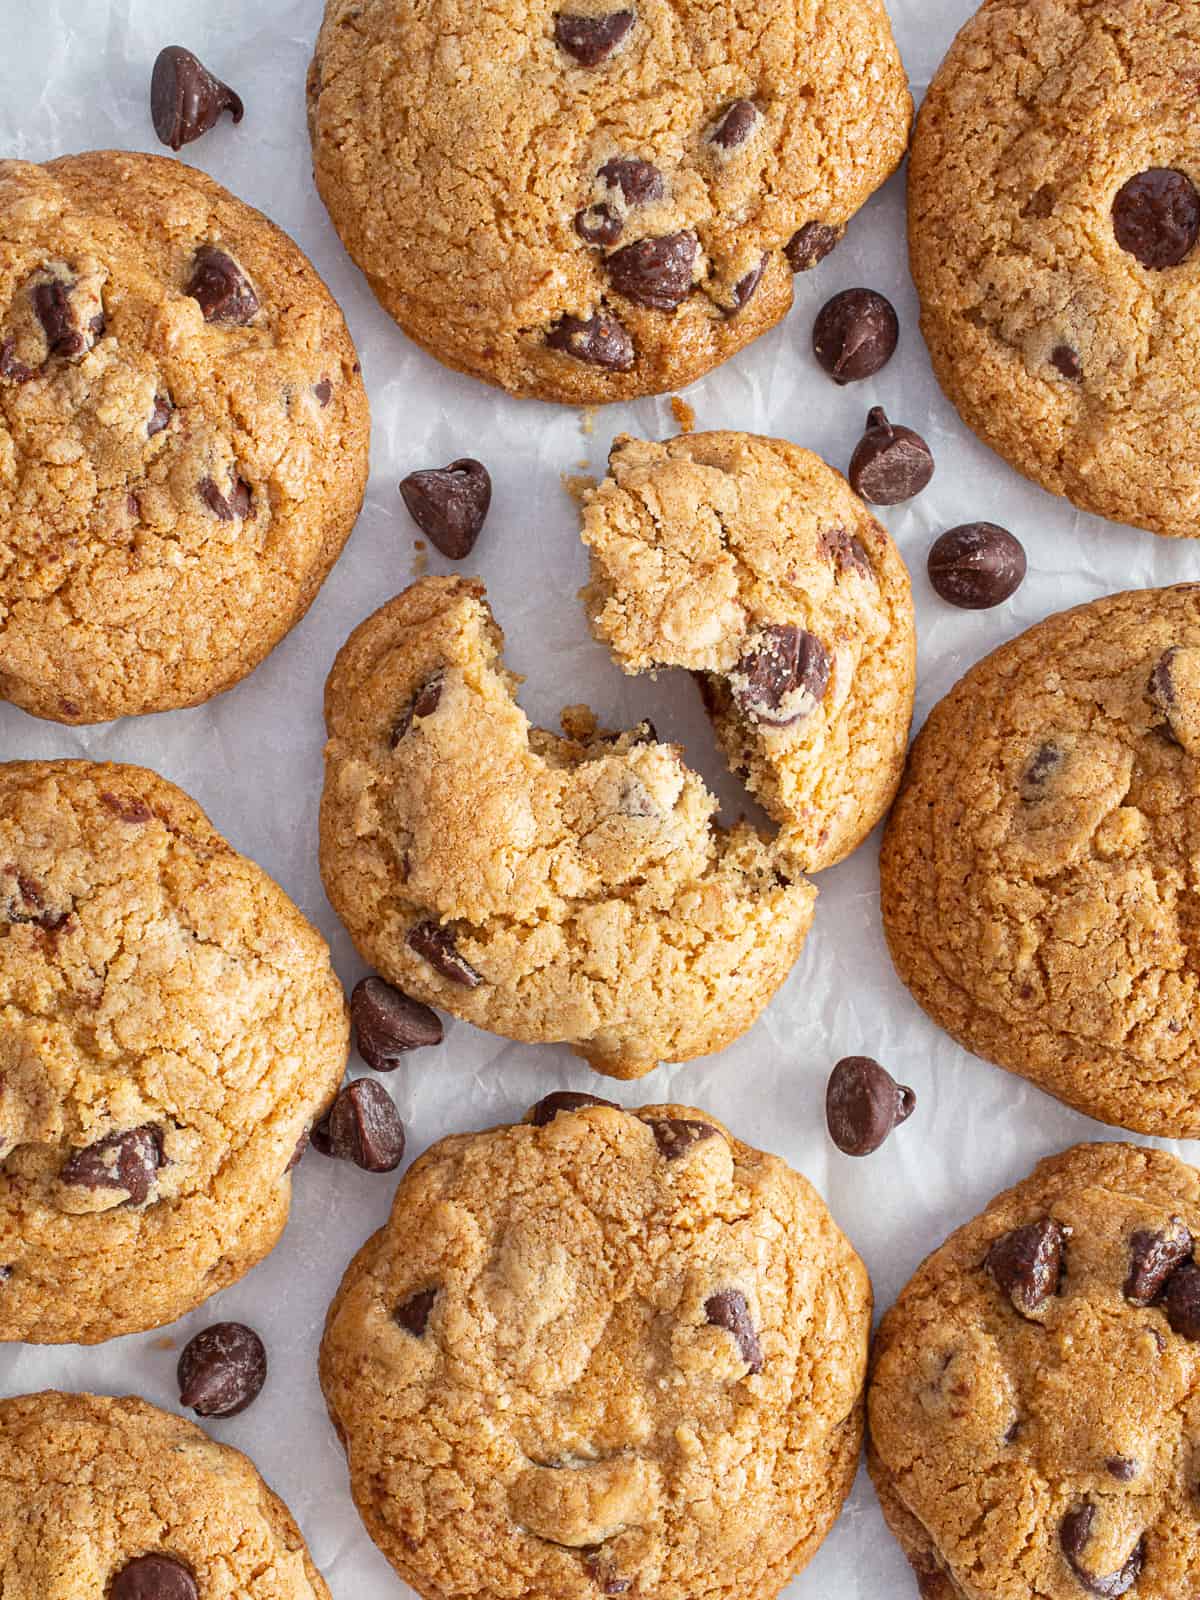
    • Chocolate chips. For a taste of chocolate in each bite, use mini-chocolate chips. If you prefer larger pieces of chocolate, use regular chips. Or use a blend of both.
    • Walnuts (optional) Stir in up to ¾ cup of chopped walnuts. 
    • Coarse Sugar. (optional) A sprinkle of coarse sugar on the muffins gives them a little extra sweetness and a nice crunch. 

    How to Make Gluten-Free Chocolate Chip Muffins. 

    Gluten-free chocolate chip muffin batter in a glass bowl.

    Prepare your pan and heat your oven. 

    Line a standard muffin pan with paper liners or grease it generously with either nonstick cooking spray or brush each cup with oil. 

    Turn on the oven before making the batter. This way it’ll be ready and waiting when the batter is mixed. 
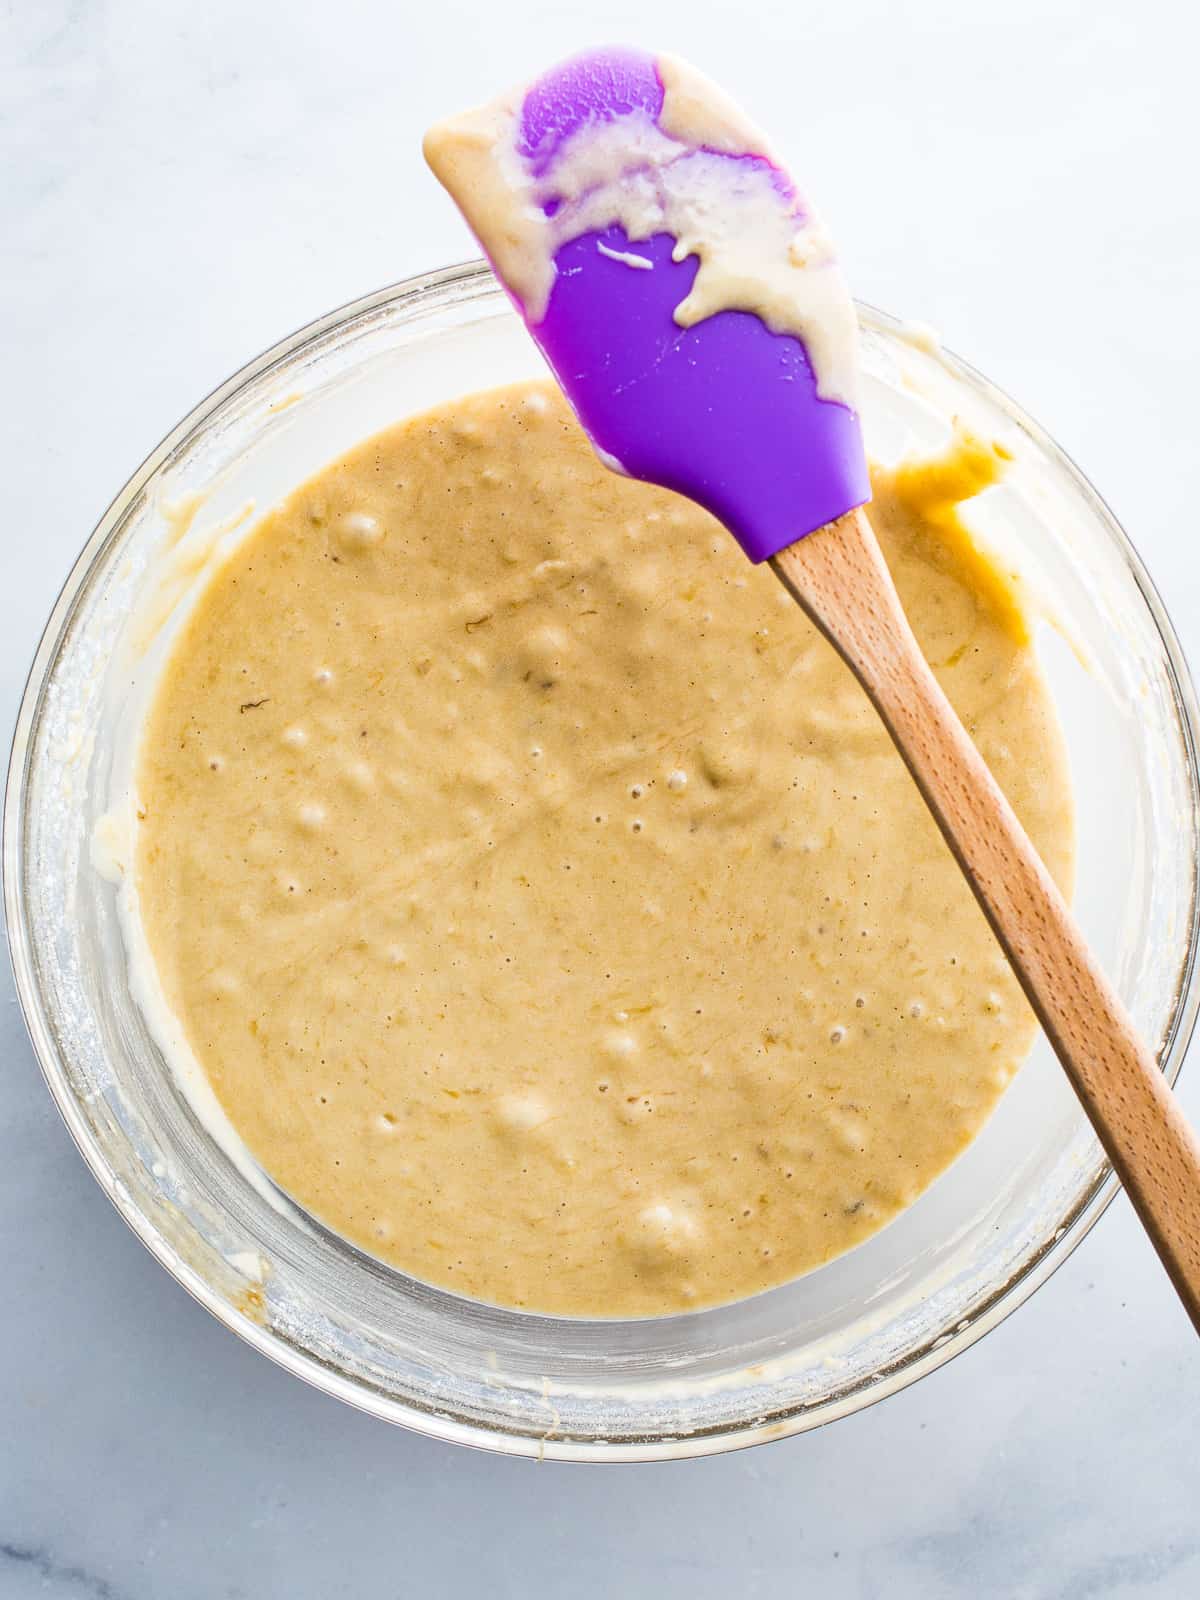
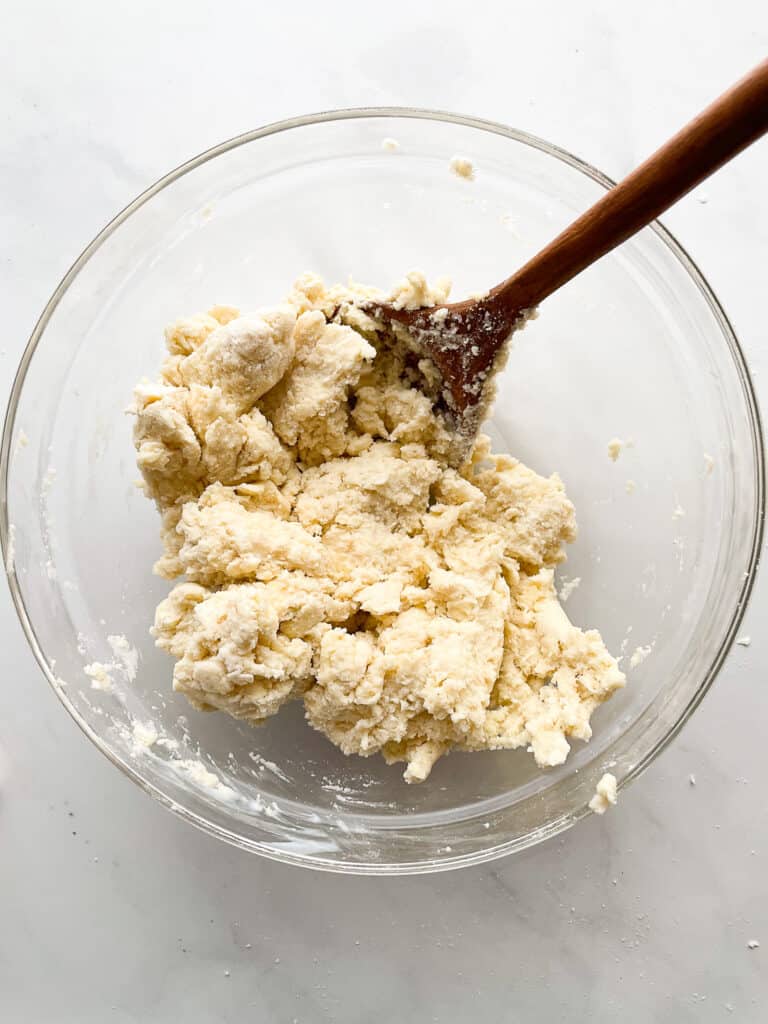
    Prepare the batter. 

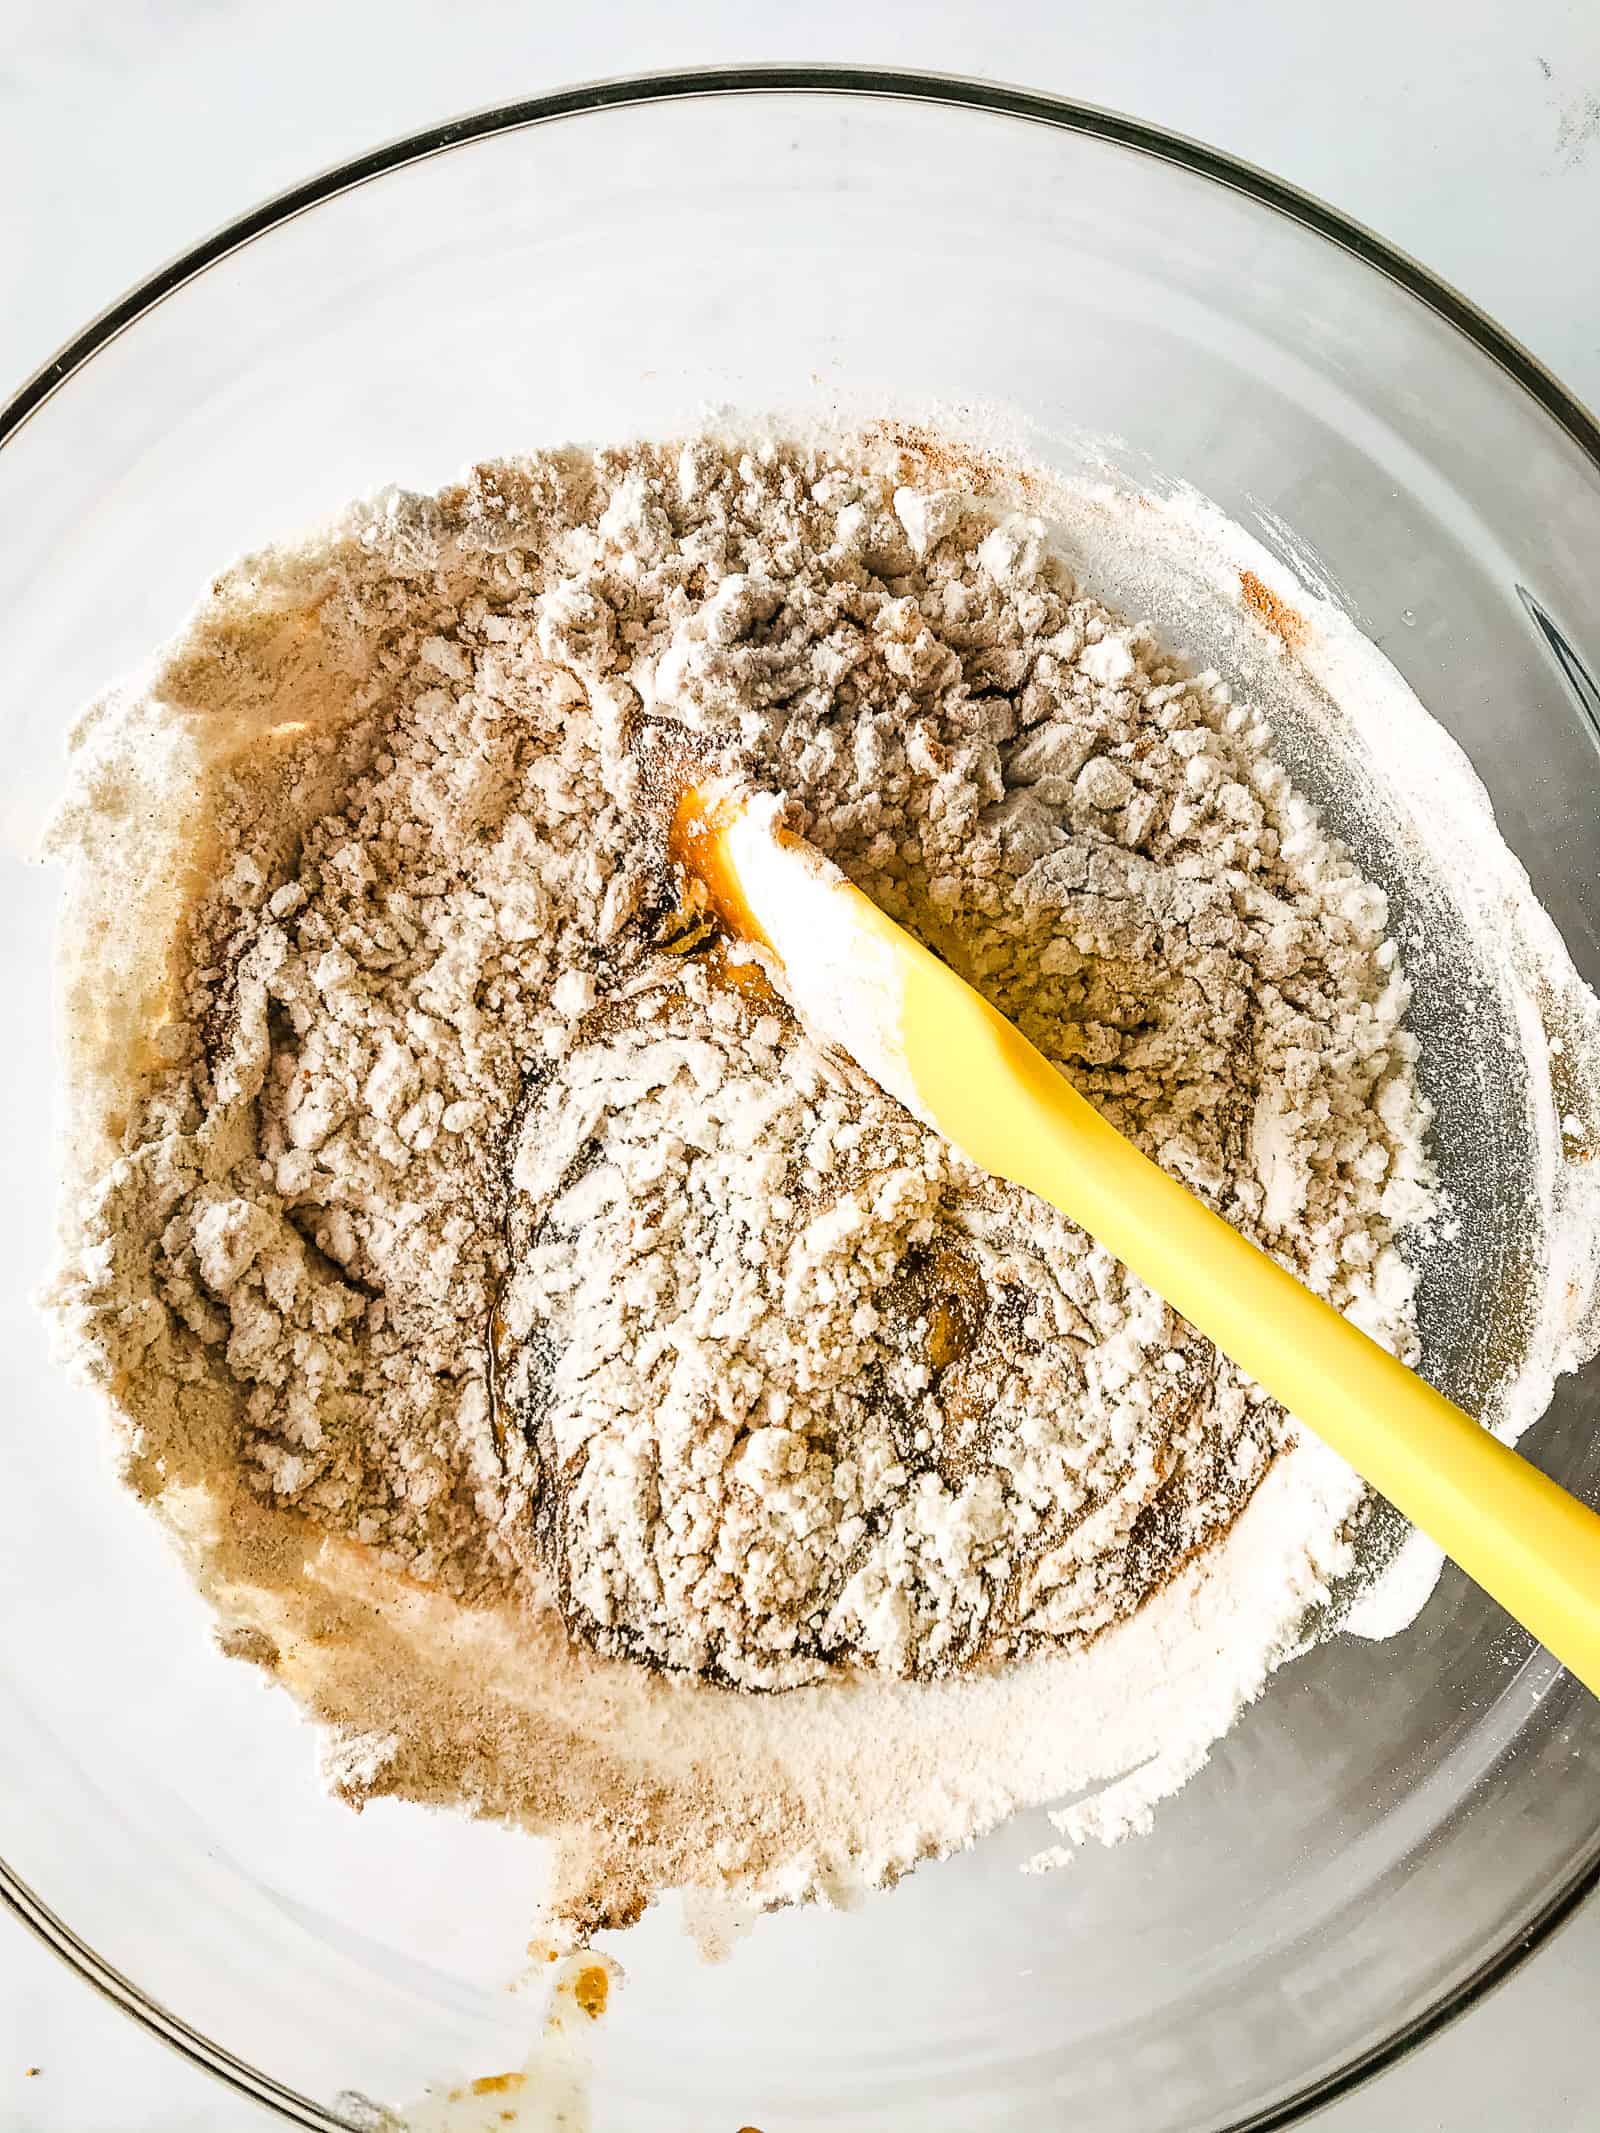
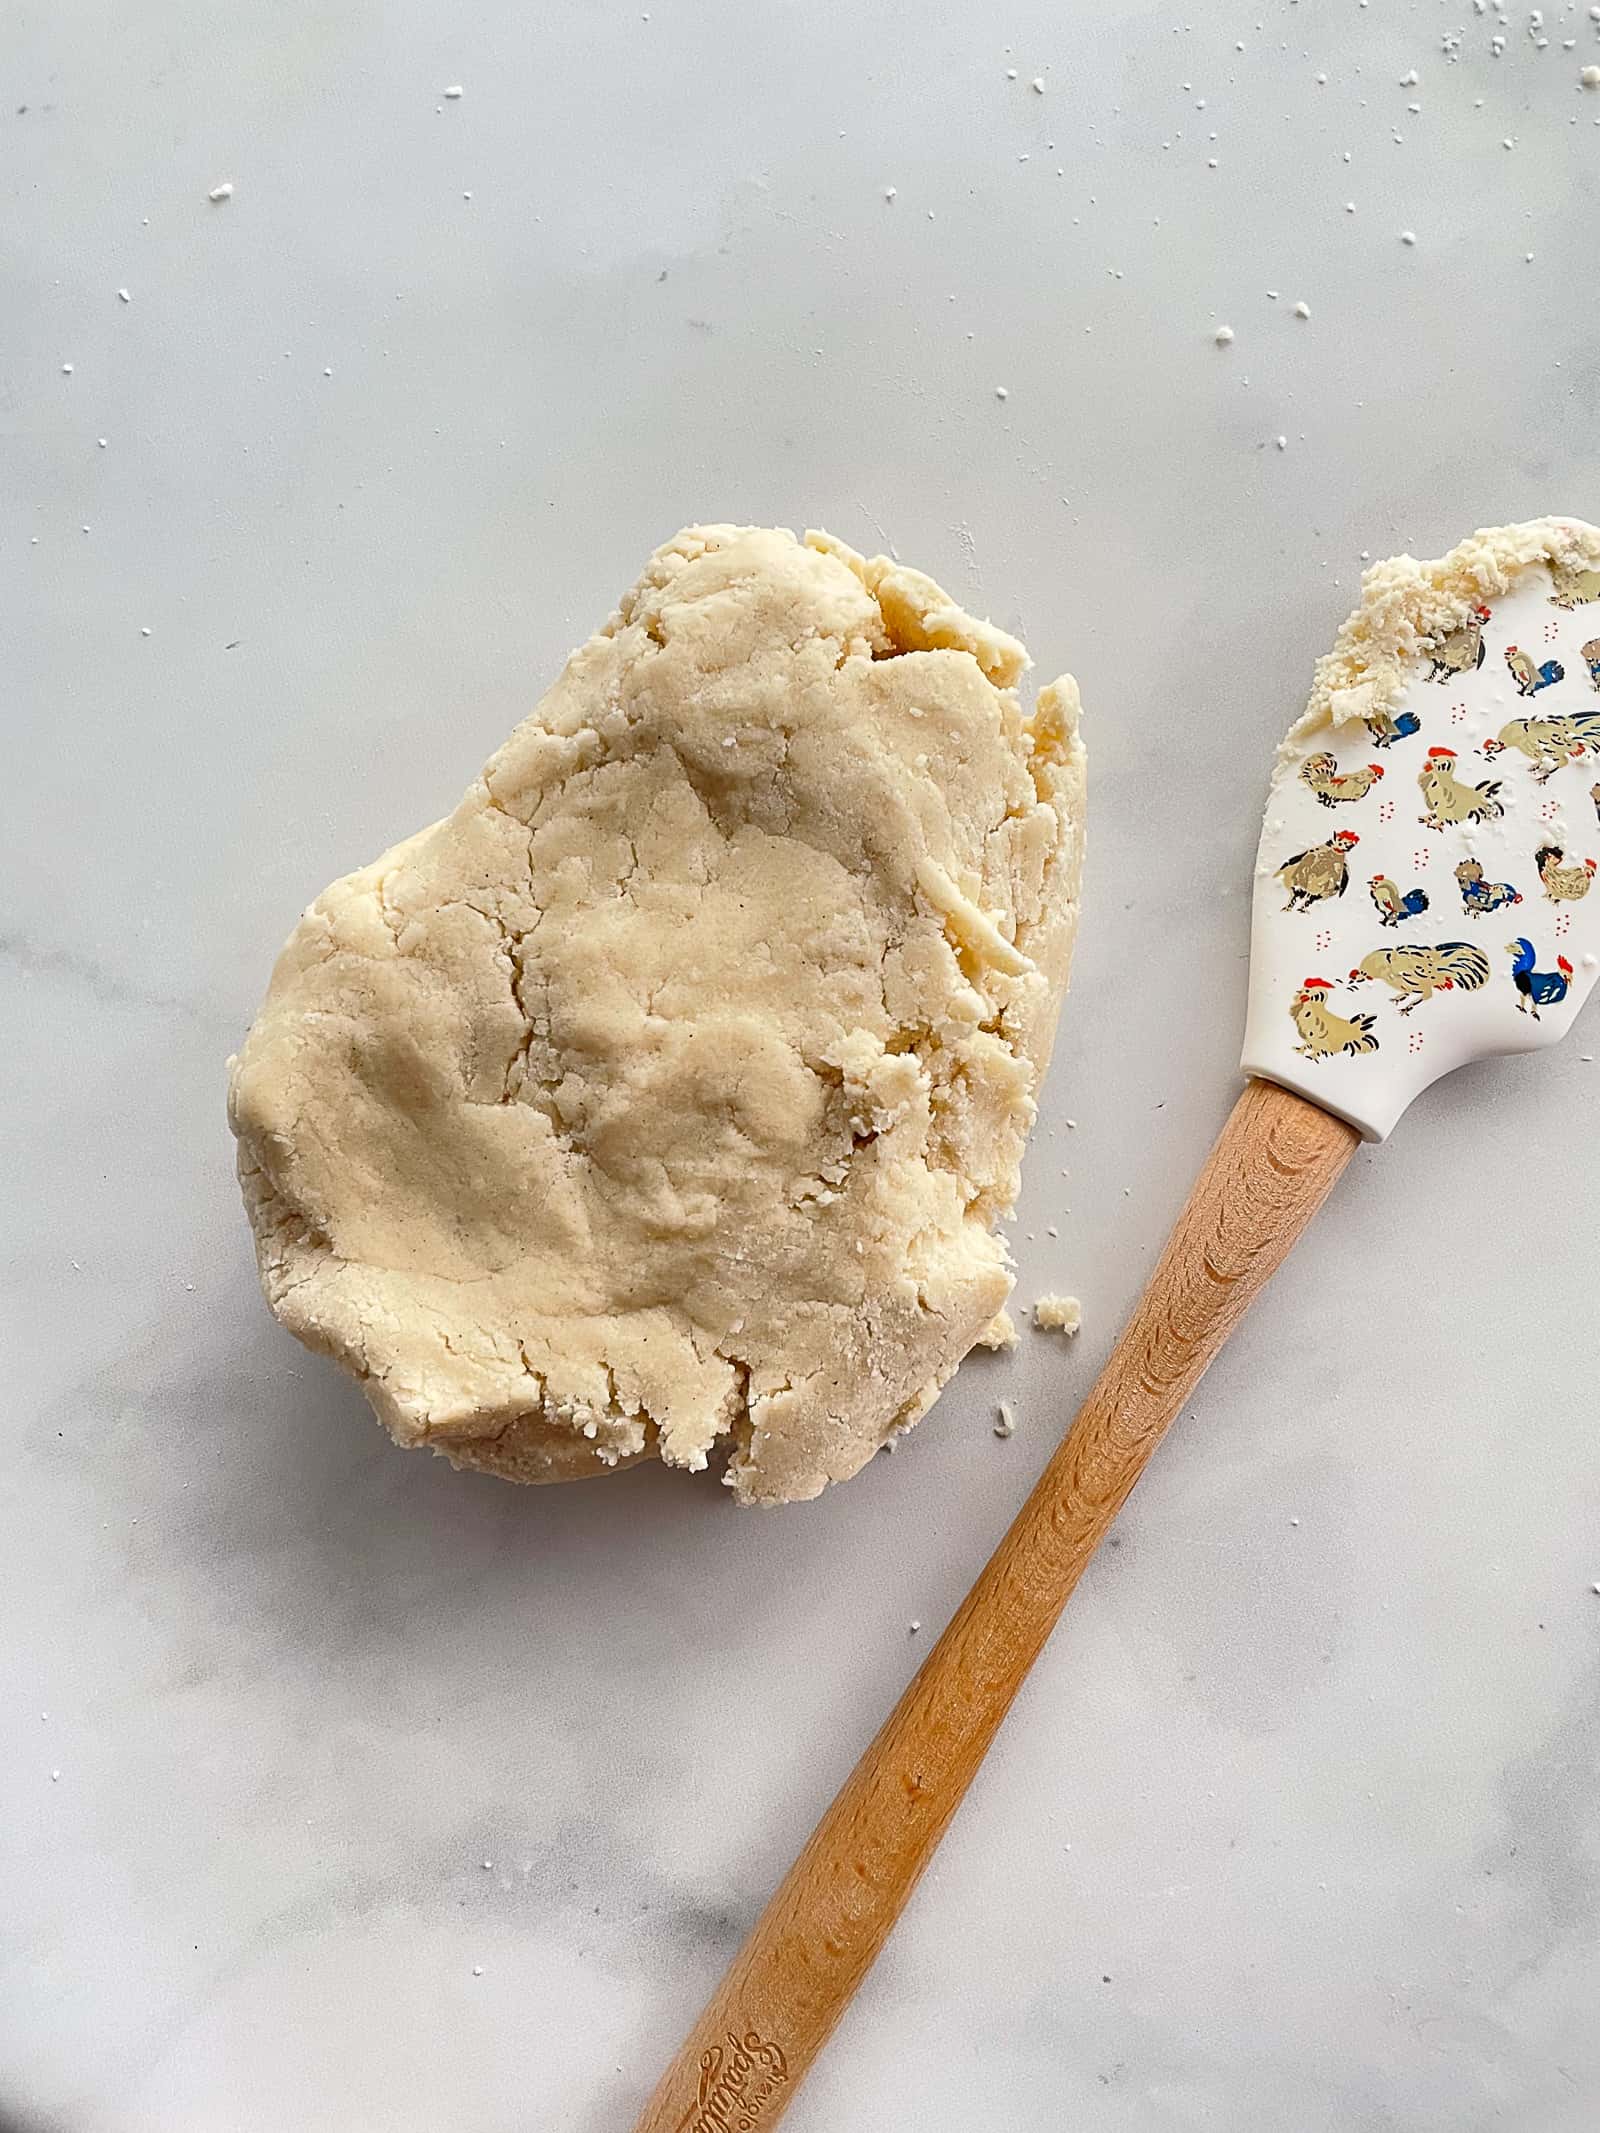
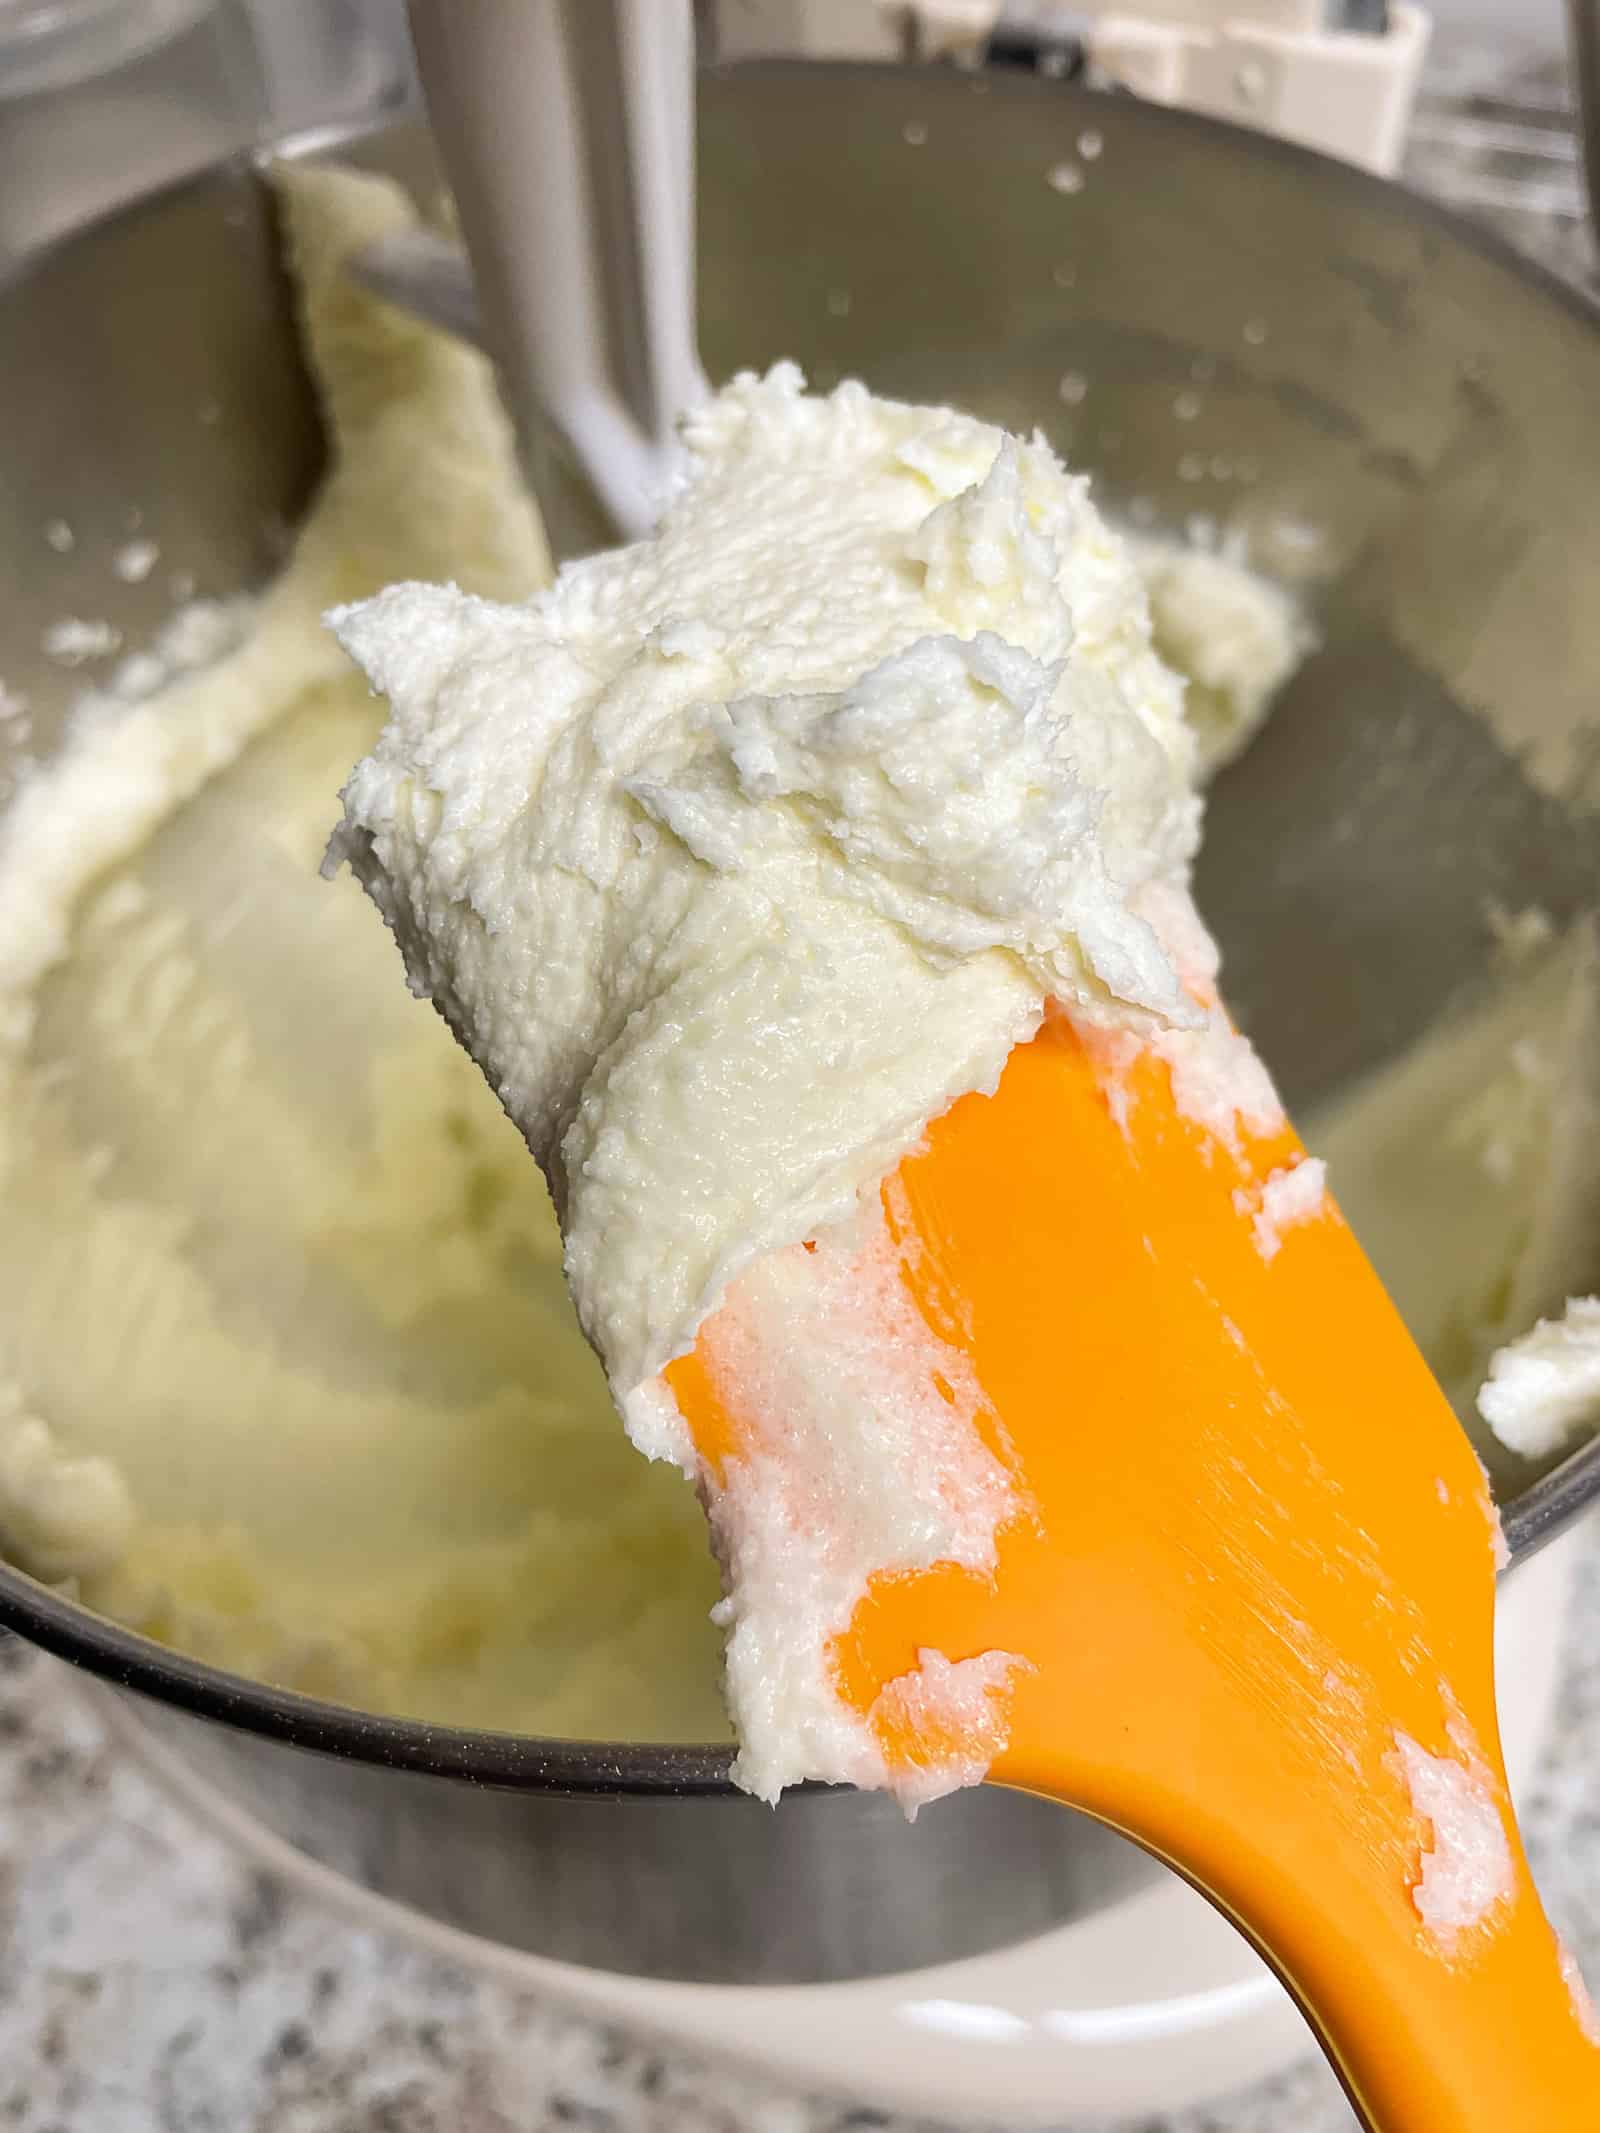
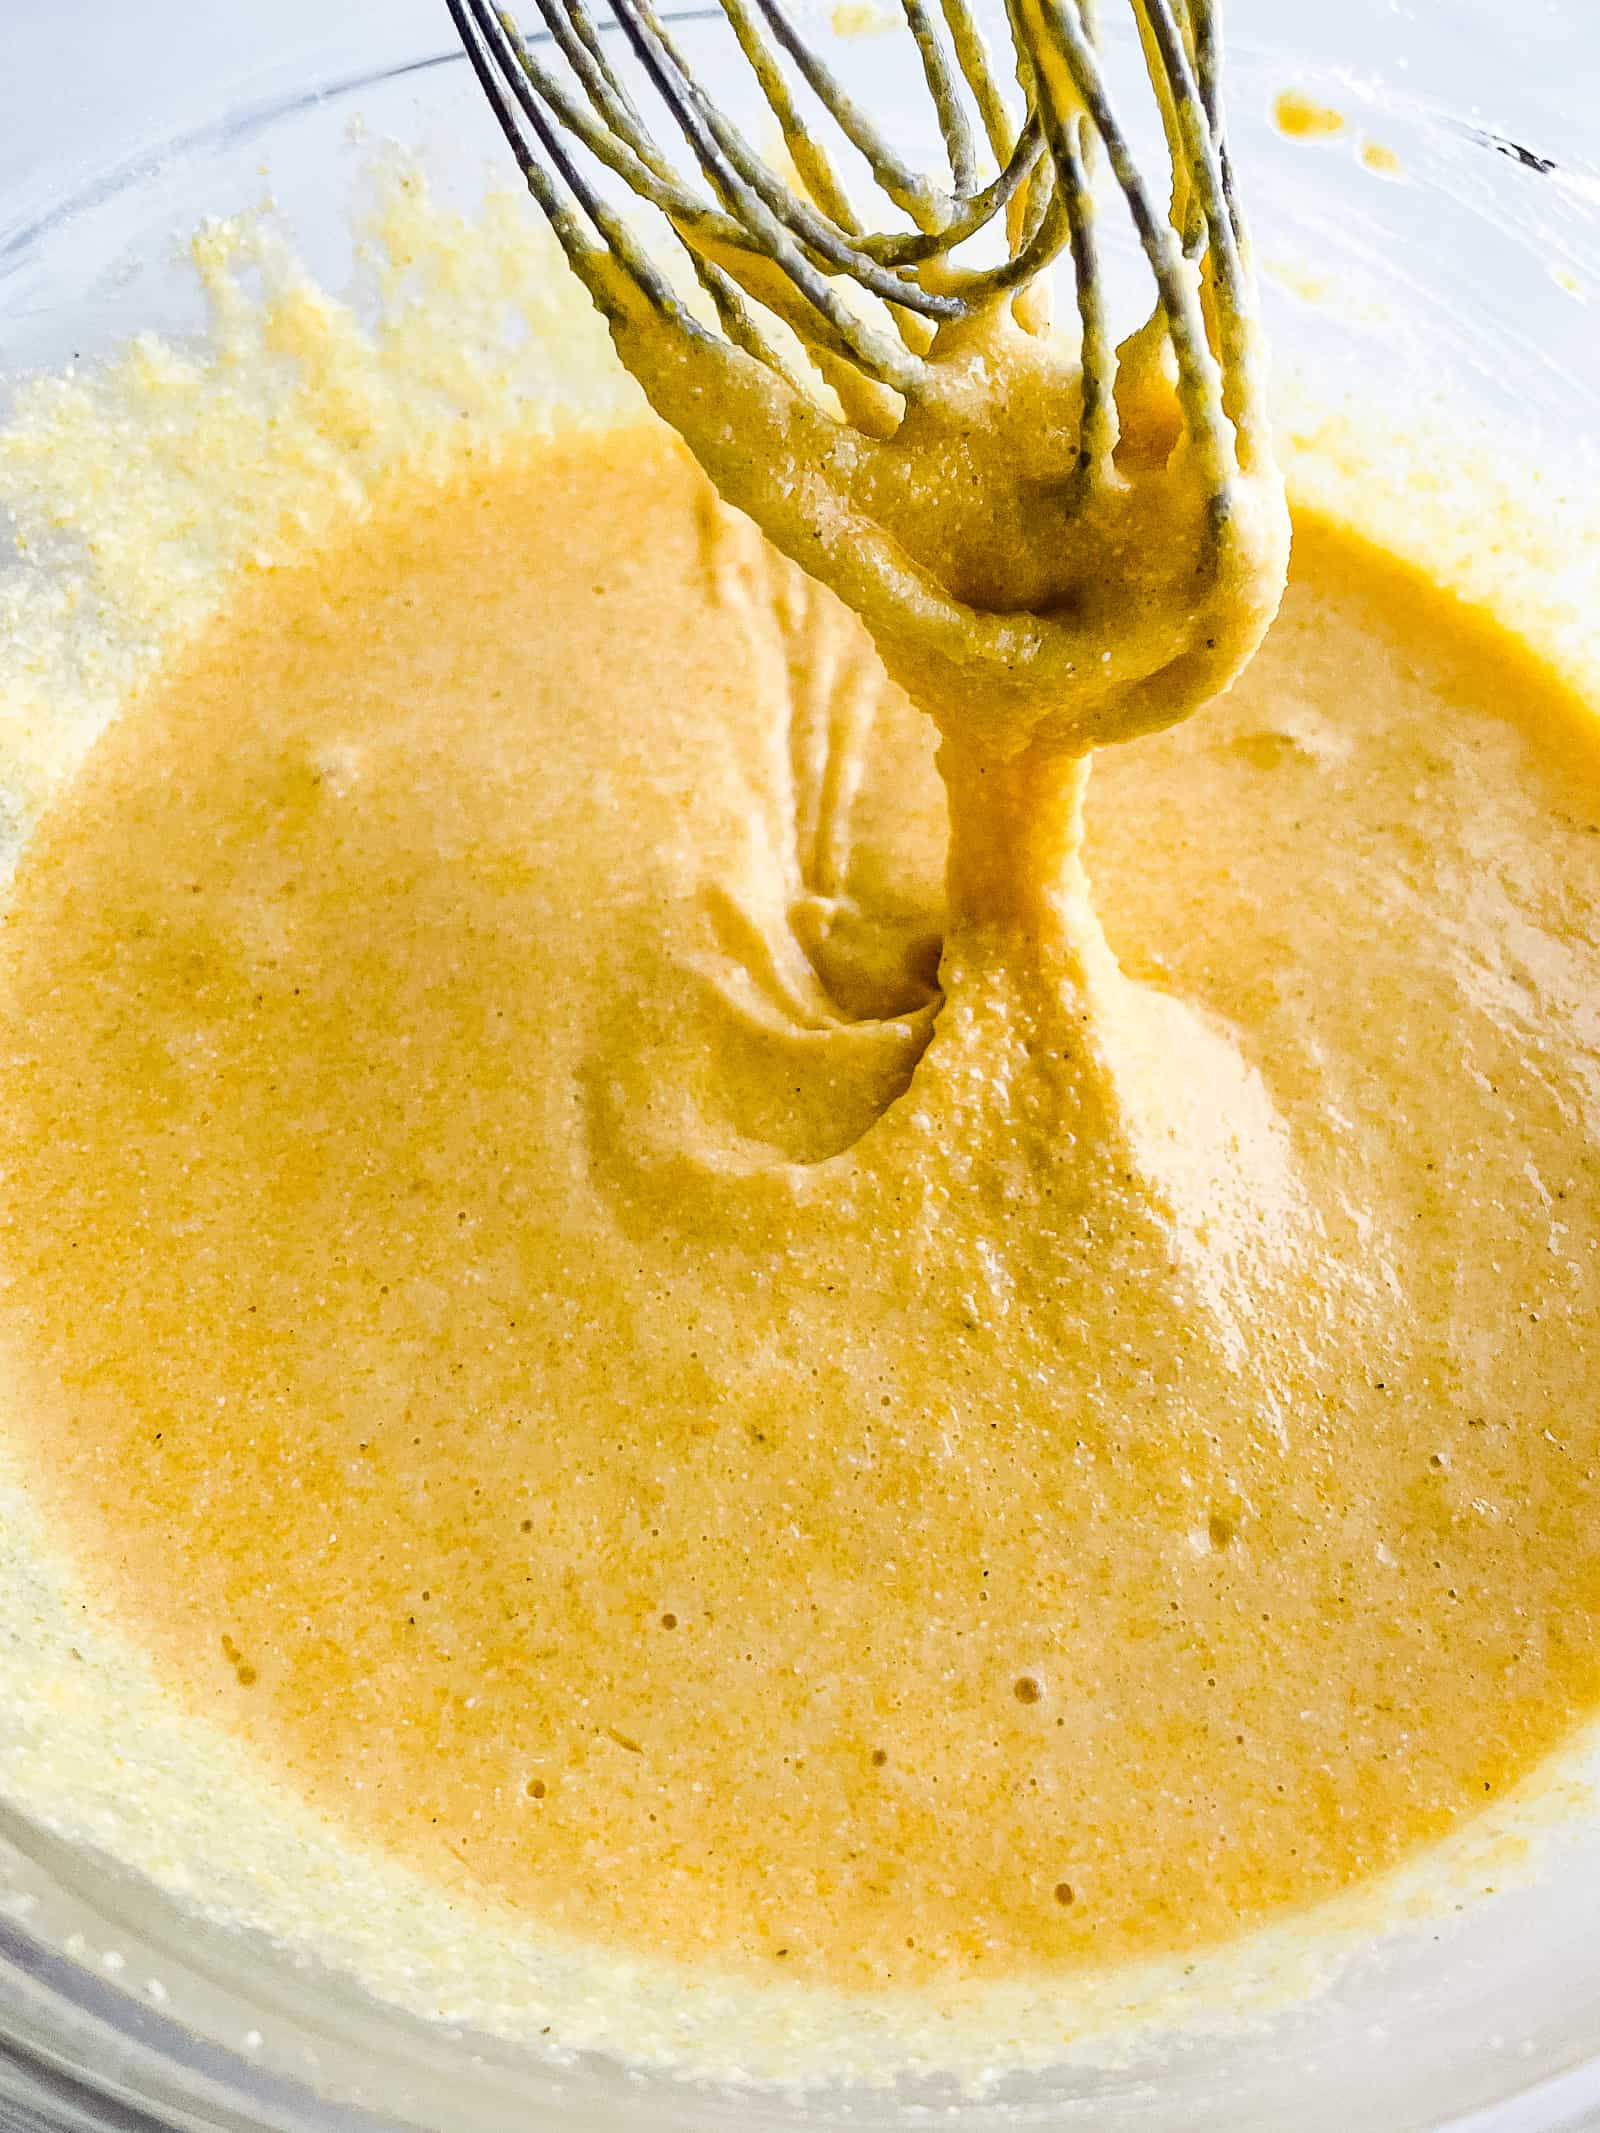
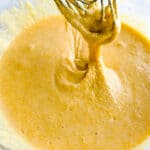
    Whisk the gluten-free flour, baking powder, baking soda, and salt together in a large bowl. Stir in the melted butter, brown sugar, sour cream, eggs, and vanilla. 

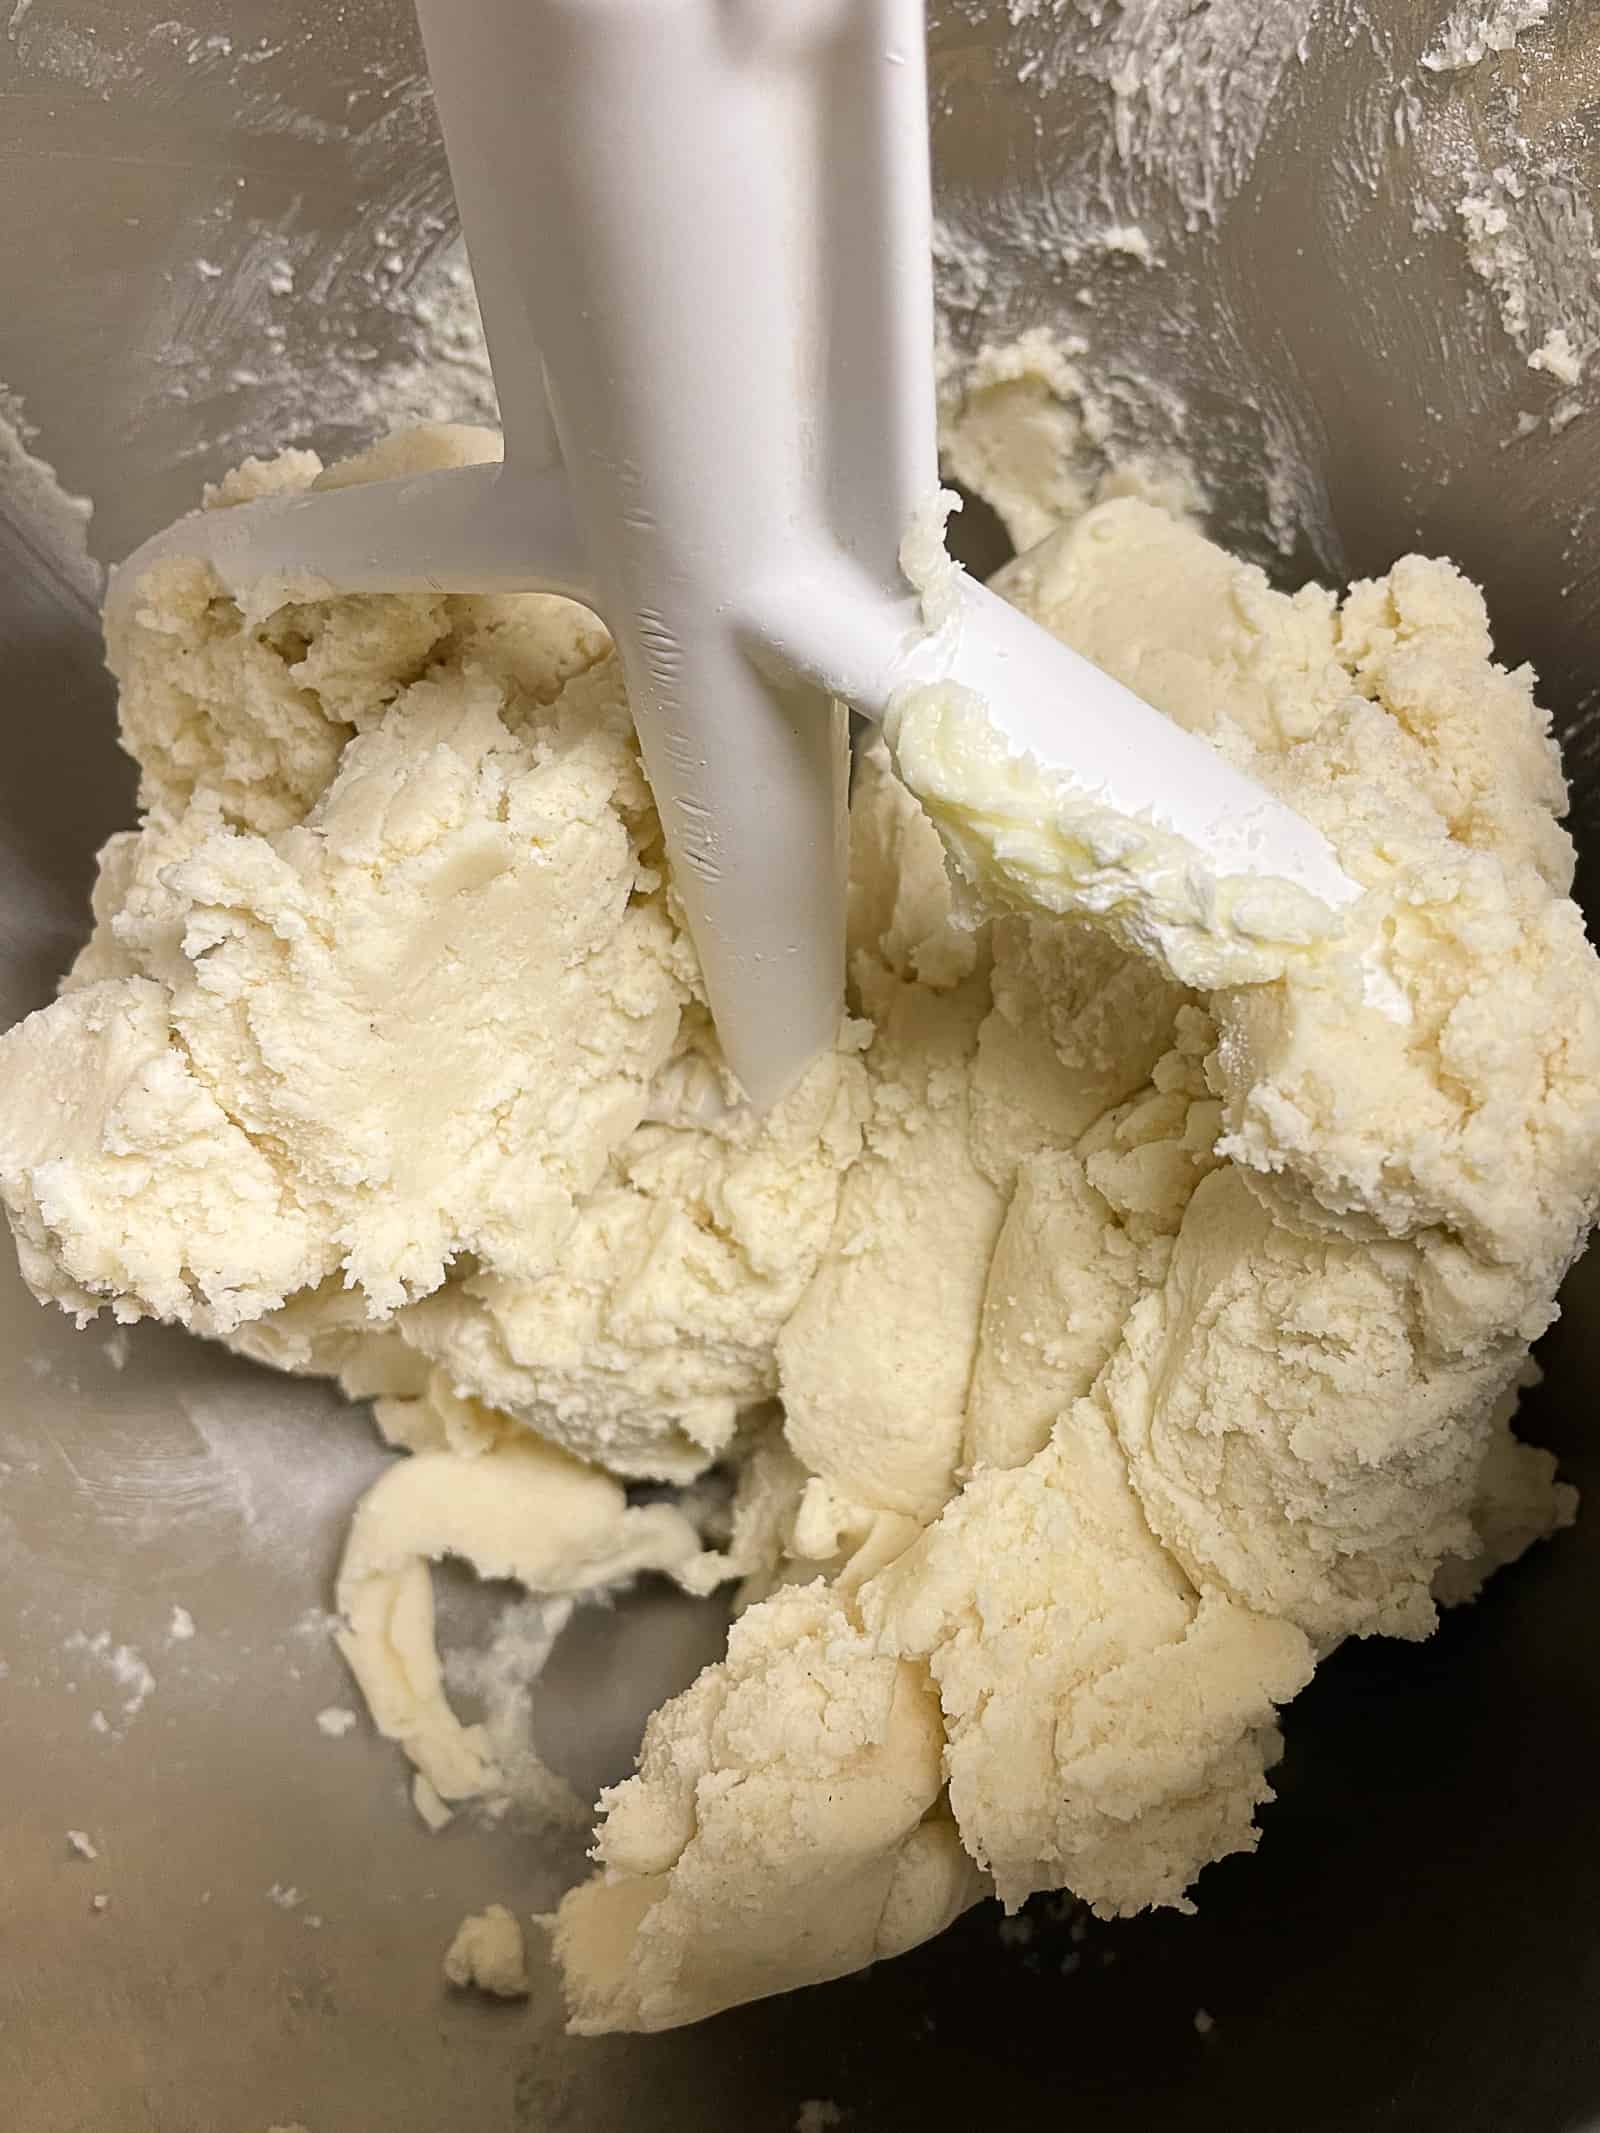
    Mix until the batter is thick and creamy. 

    Add the chocolate chips. If you’re using walnuts, add them now. 

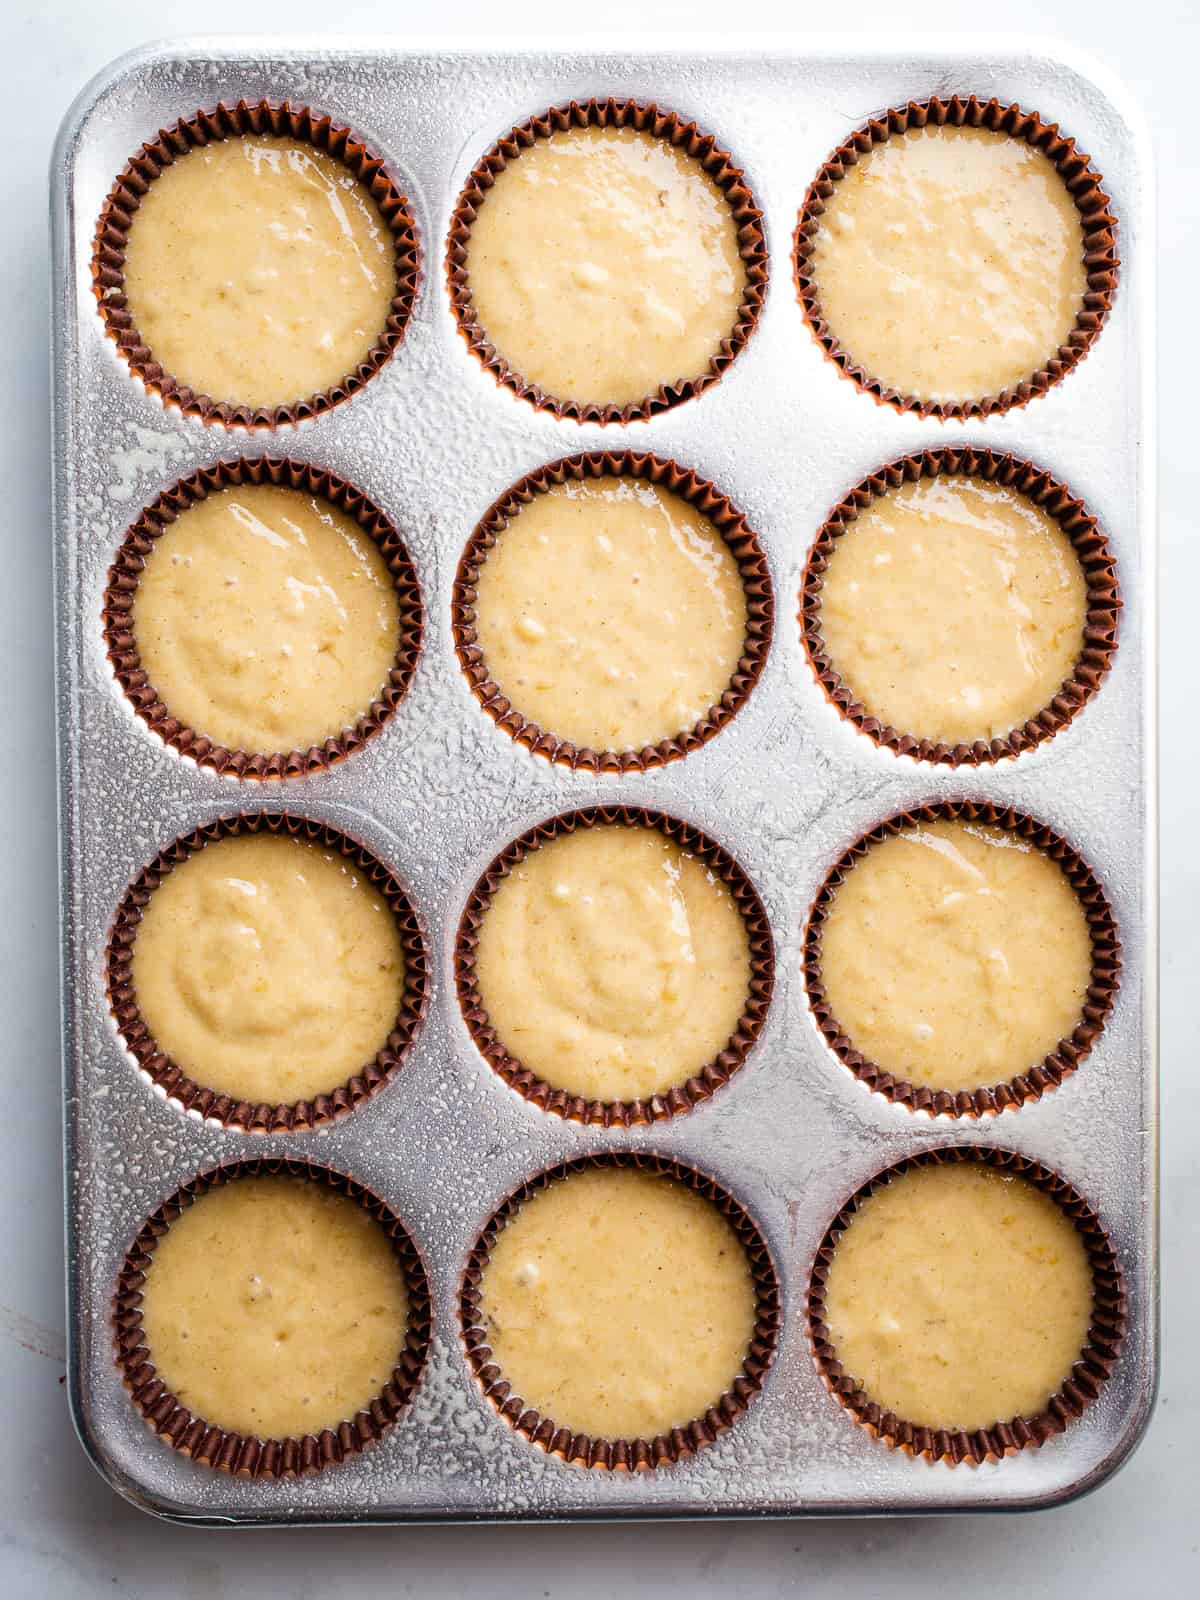
    Fill the Pan and Bake.

    Gluten-free chocolate chip muffin batter in a pan.

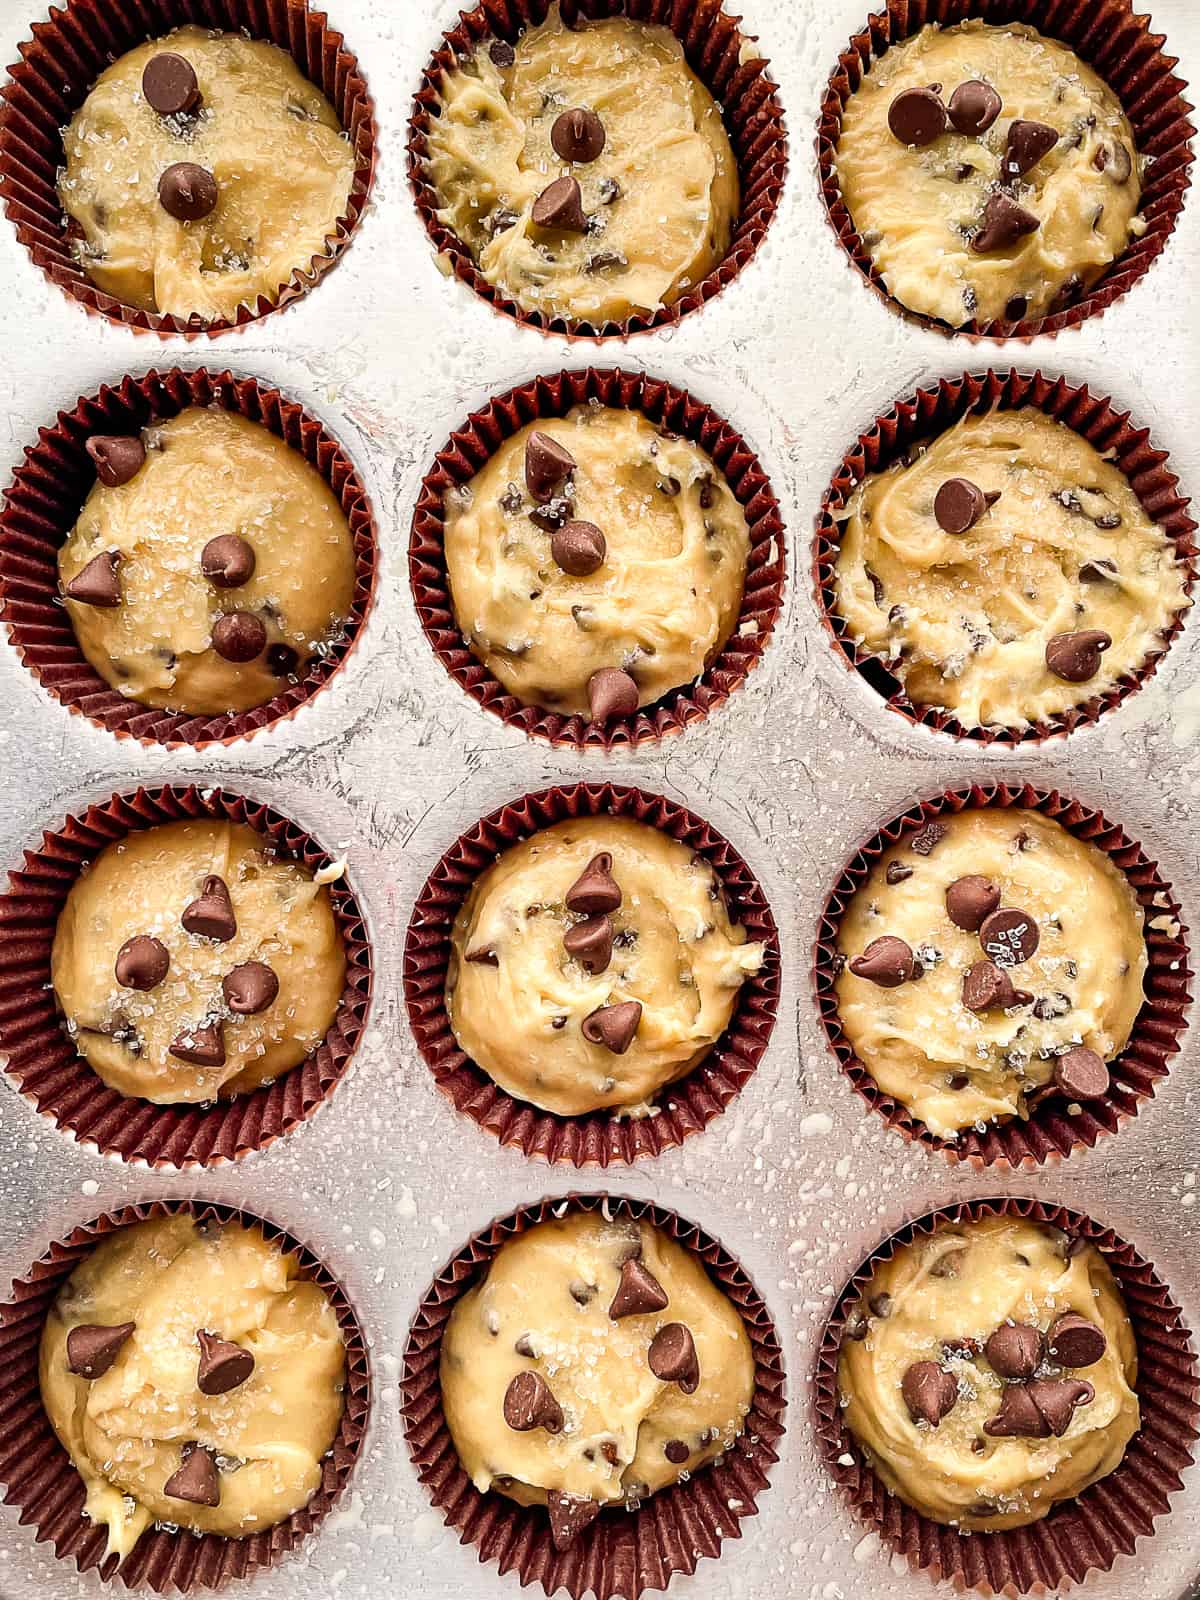
    Scoop the batter into the prepared muffin pan. You want to fill each cup about ⅔ full.

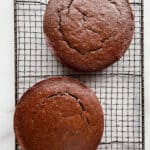
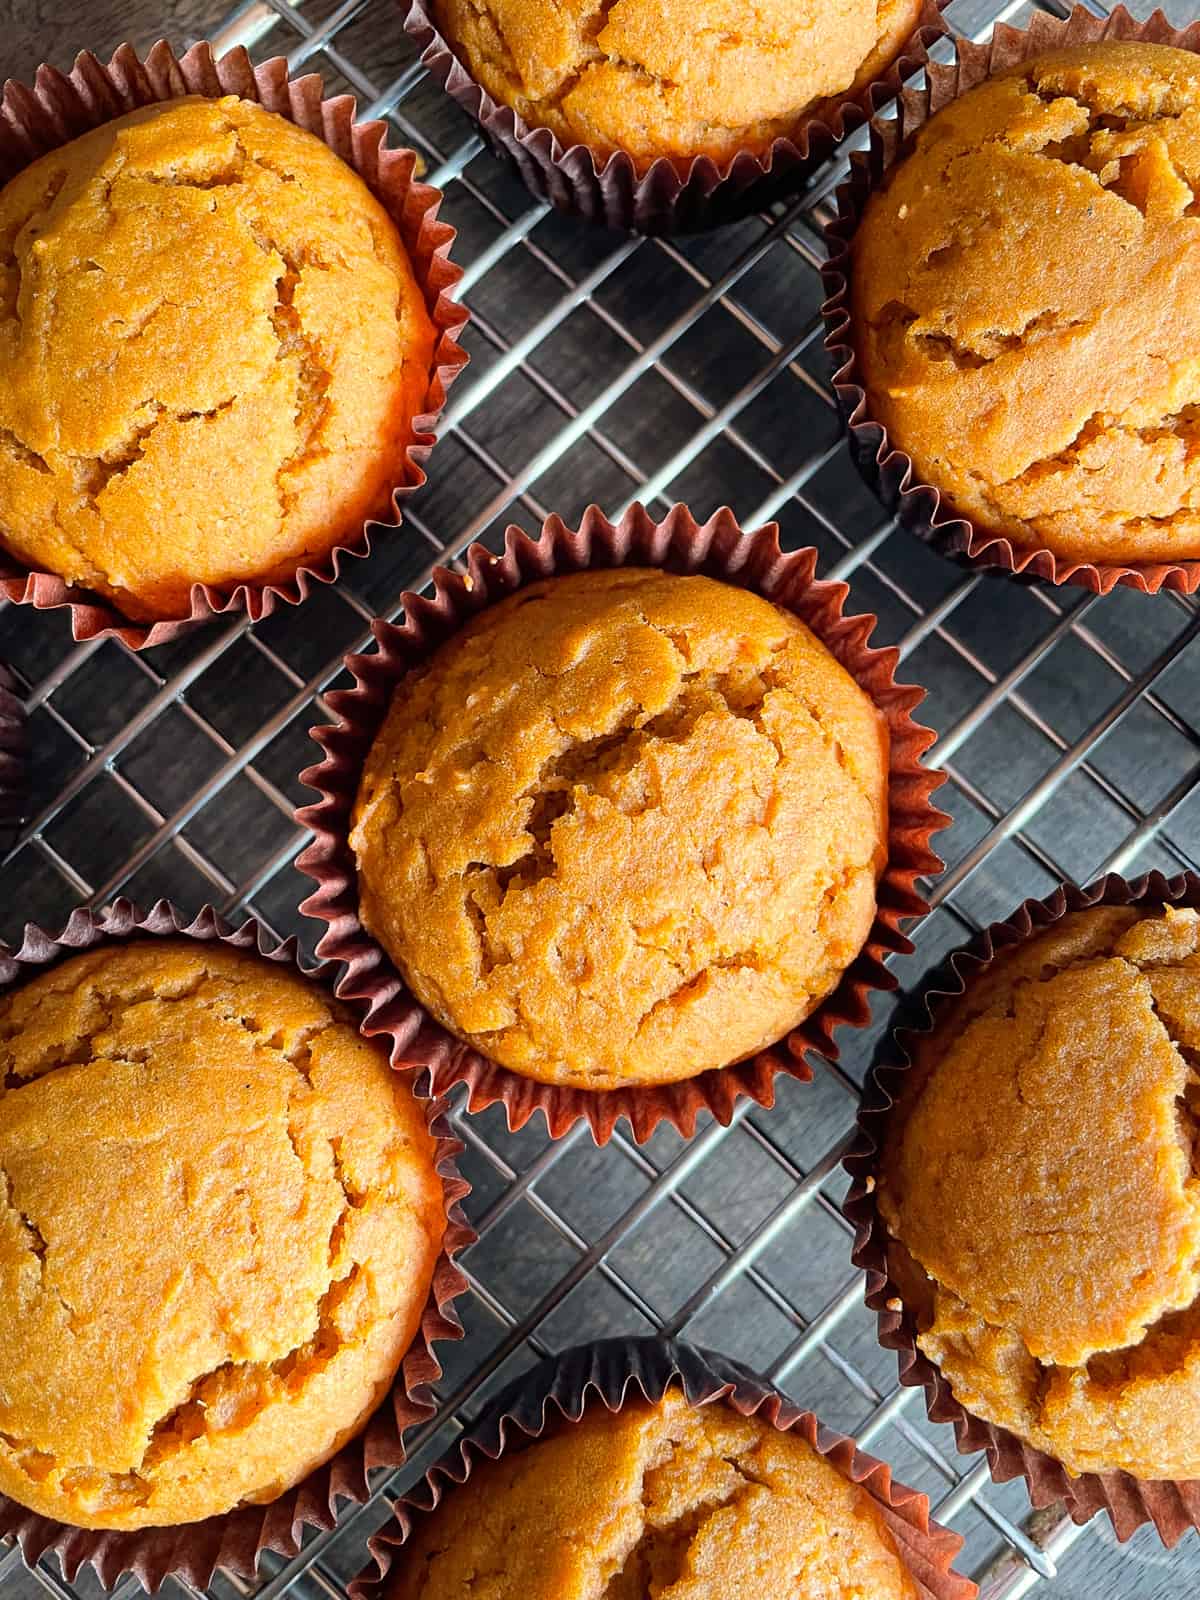
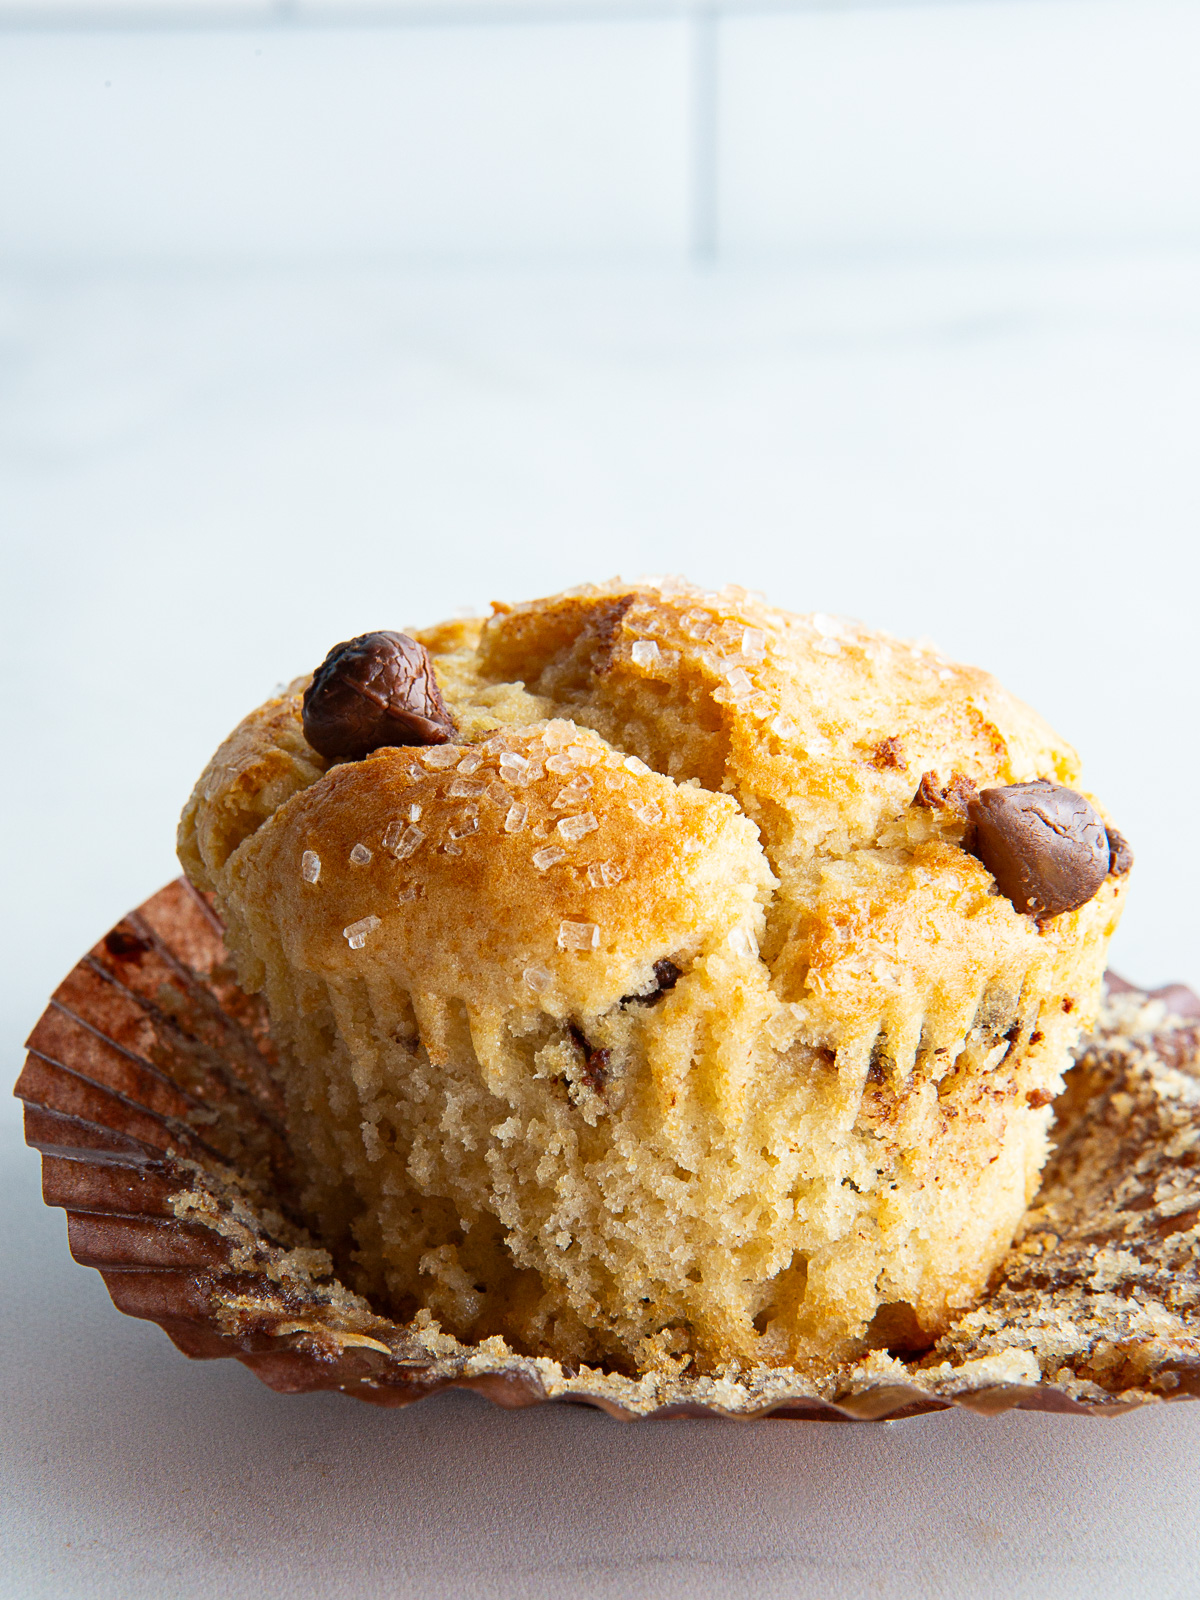
    A batch of these gluten-free chocolate chip muffins take about 18 minutes to bake. Check the muffins by inserting a cake tester into the center. It should come out dry or with one or two crumbs clinging to it. 

    Let the muffins cool in the pan for about five minutes. Then remove them and let them cool on a wire rack. 

    Tips for Baking Perfect Gluten-Free Muffins. 

    Gluten-free chocolate chip muffin unwrapped on a counter.
    • Use a muffin scoop. It not only makes it easy to fill the muffin pan, it ensures each cup is filled with the same amount of batter. 
    • Use a Metal Pan. Gluten-free muffins baked in a metal pan brown nicer than those baked in a silicone pan. 
    • Fill the muffin cups almost to the top. For an extra-tall muffin, fill each muffin cup almost to the top. If you’re worried about the pan overflowing, place a baking sheet on the rack below the muffin pan. 
    • Bake the muffins in a hot oven. Muffins baked in a preheated oven helps the muffins to rise quickly. 

    Storage Instructions.

    Store your cooled gluten-free chocolate chip muffins in an airtight container on the counter. They last about 3 to 4 days at room temperature. Gluten-free muffins stored in the refrigerator tend to dry out. 

    If you need to keep them longer, freeze them. 

    Place the muffins in a freezer-safe container. Freeze for up to three months. When you’re ready to eat, thaw the

    Gluten-free chocolate chip muffins cooling on a rack.
    4.95 from 17 votes
    Print

    Gluten-Free Chocolate Chip Muffins

    Bakery-style muffins studded with chocolate chips. Makes either 15 standard muffins or 6 jumbo muffins.
    Prep Time 15 minutes
    Cook Time 20 minutes
    Total Time 35 minutes
    Servings 12 muffins

    Ingredients

    • 2 cups gluten-free baking flour (10 ounces; 283 grams)
    • ¾ cup light brown sugar (5 ½ ounces; 155 grams)
    • 1 teaspoon baking powder
    • ½ teaspoon baking soda
    • ½ teaspoon salt
    • 1 stick butter, melted (4 ounces; 113 grams)
    • 2 large eggs
    • 1 cup sour cream (8 ounces; 226 grams)
    • 1 teaspoon vanilla extract
    • 1 cup mini chocolate chips (6 ¼ ounces; 177 grams)
    • ¾ cup chopped walnuts, optional (3 ounces; 85 grams)
    • coarse sugar, optional

    Instructions

    1. Preheat oven to 350℉. Spray a 12-count regular muffin pan or a 6 count jumbo muffin pan with nonstick spray or line with cupcake liners.

    2. Whisk gluten-free flour, baking powder, baking soda, and salt in a large bowl. Add melted butter, brown sugar, eggs, sour cream, and vanilla extract. Blend until the batter is thick and creamy. Stir in the chocolate chips and walnuts, if using.

    3. Spoon the batter into the pan, filling them about ⅔ full. Sprinkle each muffin with a little coarse sugar.

    4. Bake until golden brown. A cake tester inserted in the center of a muffin should come out clean, about 18 minutes for standard muffins and about 22 minutes for jumbo muffins.

    5. Allow muffins to cool in the pan for 5 minutes before transferring to a wire rack to cool completely.

    6. Store muffins, wrapped, on the counter for up to three days or freeze for up to two months.

    Recipe Notes

    Gluten-Free Flour: This recipe was developed and tested with Bob’s Red Mill 1:1 Gluten-Free Flour Blend. Use a gluten-free flour that contains xanthan or guar gum. If yours doesn’t whisk a ½ teaspoon into the flour before using.

    Chocolate Chips: Use your favorite chocolate chips for these muffins. Mini, regular, and chocolate chunks all work. And a combination is lovely too. 

    Gluten-Free Snickerdoodles

    A stack of gluten-free snickerdoodles. The top cookie is broken in half.

    This easy recipe makes gluten-free snickerdoodles that are crisp on the edges and soft in the center. Before baking, they’re rolled in cinnamon-sugar. The coating gives the cookies a lovely flavor and a pretty “crackled” appearance. But the best part might be how easy they are to make. From start to finish, a batch takes about 30 minutes.

    A stack of gluten-free snickerdoodles. The top cookie is broken in half.

    Snickerdoodles look and taste a lot like sugar cookies. But there’s one important difference: classic snickerdoodles are made with cream of tartar. Since cream of tartar is acidic, it gives the cookies a subtle and lovely tangy flavor. This one ingredient sets them apart from classic sugar cookies. 

    Just like gluten-free chocolate chip cookies, snickerdoodles are a “drop” cookie. All you need to do is mix the dough, roll it in the coating, drop it onto a prepared baking sheet, and bake. No chilling or rolling is required. This means not only are these cookies tasty, but they’re easy to make too!

    Ingredients

    Here’s what you need to make a batch of gluten-free snickerdoodles. It’s always a good idea to measure all your ingredients before you start mixing the dough. This way you know you’ve got everything you need to make the cookies.

    Gluten-free snickerdoodle ingredients on the counter.
    • Gluten-free Flour. Use a gluten-free flour that contains xanthan or guar gum. Without it, the cookies spread too much. I tested the recipe with Bob’s Red Mill 1:1 Gluten-Free Baking Flour. 
    • Cream of tartar. This works with the baking soda to give the cookies a slightly puffy texture and a very subtle tangy flavor. You can replace the cream of tartar and baking soda with one teaspoon baking powder. Snickerdoodles made with baking powder instead of cream of tartar taste similar to sugar cookies. Different but still delicious. 
    • Baking soda. Combines with the cream of tartar to give the cookies lift. 
    • Salt. Use fine (table) salt. It blends easily into the dough and enhances the flavor. 
    • Cinnamon. There’s ground cinnamon in the dough and in the coating.
    • Butter. Softened butter gives these cookies a rich flavor and tender texture. For a dairy-free version, use a dairy-free butter that’s suitable for baking. 
    • Sugar. Use granulated sugar for the classic snickerdoodle texture. If you want your cookies extra soft and chewy, use brown sugar. 
    • Egg. One egg brings the dough together. 
    • Vanilla Extract. A teaspoon of vanilla extract adds flavor. 

    How to Make Gluten-Free Snickerdoodles.

    If you’ve ever made gluten-free sugar cookies or chocolate chip cookie dough, you’ll recognize these steps. It’s a simple dough to make. The key to success? Start with softened butter.

    Steps for making gluten-free snickerdoodles. 1. The snickerdoodle dough in a bowl. 2. A cookie scoop full of dough. 3. Dough rolled in cinnamon-sugar. 4. Cookie dough on a baking pan.
    1. Cream the batter and sugar. Mix softened butter with the sugar until it’s smooth and creamy. This step gives the cookies a nice light texture. 
    2. Scrape the bowl. After mixing the butter and sugar with the egg, stop the mixer. Scrape it down. This removes the thick layer of butter that clings to the bowl. After you give the bowl a good scrape, run the mixer again. This blends everything together. 
    3. Use a cookie scoop. My favorite tool for making cookies is a cookie scoop. It makes shaping the dough so easy. And every cookie is the same size! This means they all take the same time to bake. 
    4. Press the dough down. After you put the dough on the pan, press it down. Do this with your hand or the bottom of a glass. This step helps the cookies spread evenly.
    5. Don’t over bake! If you love cookies that are tender in the center, bake until the edges just start to turn golden brown. For crisp cookies, bake them an extra minute or two.
    Gluten-free snickerdoodles on the counter.

    Storage Tips

    Store the cooled cookies on the counter in a container with a lid for up to five days. 

    How to Freeze Baked Cookies.

    Place the cooled cookies in a freezer container. To keep the cookies from sticking, place a layer of wax or parchment paper between each layer. Freeze for up to three months. 

    How to Freeze Cookie Dough.

    Gluten-free snickerdoodle dough freezes very well.

    • Prepare the cookie dough as directed.
    • After rolling it in cinnamon-sugar, place the cookies on a pan.
    • Space the cookies apart so the dough doesn’t stick together.
    • Freeze for about an hour. Once the cookie balls are frozen, transfer them to a freezer container or bag. 
    • When you’re ready to bake: preheat the oven to 375°F. Place the frozen cookie dough on a cookie sheet lined with parchment paper. Bake until set, about 12 minutes. 
    A stack of gluten-free snickerdoodles. The top cookie is broken in half.
    4.67 from 3 votes
    Print

    Easy Gluten-Free Snickerdoodle Recipe

    Easy recipe for gluten-free snickerdoodles. These buttery sugar cookies are rolled in cinnamon-sugar before baking. Making the cookies tasty and pretty! (Dairy-free variation included.)

    Prep Time 10 minutes
    Cook Time 12 minutes
    Total Time 22 minutes
    Servings 24 cookies

    Ingredients

    For the Gluten-Free Snickerdoodle Dough

    • 1 ⅓ cups Bob’s Red Mill Gluten-free Baking Flour (6 ⅔ ounces; 185 grams)
    • 1 teaspoon cream of tartar, see note 1
    • ½ teaspoon baking soda
    • ½ teaspoon ground cinnamon
    • ½ teaspoon salt
    • 1 stick butter, softened (4 ounces; 113 grams)
    • ¾ cup granulated sugar (5 ¼ ounces; 150 grams)
    • 1 large egg

    For the Cinnamon-Sugar Coating

    • ¼ cup granulated sugar (1 ¾ ounces; 50 grams)
    • 2 teaspoons ground cinnamon

    Instructions

    1. Preheat oven to 375℉. Line two baking sheets with parchment paper or grease lightly.

    2. Whisk the gluten-free flour, cream of tartar, baking soda, cinnamon, and salt in a medium bowl.

    3. In a large bowl, mix the butter and sugar together until smooth. Add the egg. Mix on medium-high speed. Stop the mixer once and scrape the bottom and sides of the bowl.

    4. Stop the mixer. Add the gluten-free flour mixture. Blend until the dough comes together.

    5. Prepare Cinnamon-Sugar Coating: stir together cinnamon and sugar in a small bowl. 

    6. Scoop the dough, about one tablespoon each, into balls. Roll in cinnamon-sugar. Place on baking sheet, about an inch apart to allow for spreading. If you want, sprinkle a little extra cinnamon-sugar on each cookie. Flatten the dough a little with your hand or the bottom of a drinking glass dipped in gluten-free flour.

    7. Bake until edges are golden brown and cookies have set, about 12 minutes.

    8. Allow cookies to cool on the baking sheet for five minutes. Then transfer to a wire rack and let cool completely.
    9. Store cookies wrapped on the counter for up to five days or freeze cooled cookies in a freezer bag for up to four months.

    Recipe Notes

    Note 1: Cream of Tartar. If you don’t have cream of tartar, replace it and the baking soda with 1 teaspoon baking powder.

    Dairy-Free Variation: To make these cookies dairy-free, replace the softened butter with your favorite dairy-free buttery spread. Be sure to use one that’s suitable for baking. 

    Gluten-Free Chocolate Cookies

    Gluten-Free Chocolate Cookie with warm chocolate chips on top.

    Easy recipe for gluten-free chocolate cookies. To make a batch: mix the dough, drop it onto a baking sheet, and bake. If you love chocolate, add chocolate chips to the batter.

    Gluten-Free Chocolate Cookies on a cooling rack.

    These gluten-free chocolate cookies taste like a cross between a brownie and a chocolate chip cookie. They’re crisp on the edges and tender in the middle. For an extra burst of chocolate, add some chocolate chips. Dairy-free options are included. 

    (And if you love the sound of that, put my gluten-free brownie recipe and gluten-free chocolate chip cookie recipe on your “to-do” list.)

    Ingredients for gluten-free chocolate cookies.

    Ingredients You Need to Make These Cookies.

    Gluten-Free Flour. Makes the cookies soft and tender. Use a blend that contains xanthan gum. 

    Cocoa Powder. For dark, rich cookies, use Dutch-processed cocoa powder. If you can’t find it, natural cocoa powder works but the cookies won’t be as dark. 

    Baking soda. gives the cookies a light texture

    Salt. A little salt enhances all the other flavors. 

    Butter. Melted butter makes the cookie dough easy to mix together. For a dairy-free version, use your favorite dairy-free butter for baking. 

    Brown and Granulated Sugar. Combining brown and granulated sugar gives these cookies a hint of molasses that goes great with the chocolate. 

    Egg. Helps bring the dough together 

    Vanilla extract. Adds a nice homemade flavor

    Chocolate Chips. For an added chocolate flavor, stir a cup of chocolate chips into the dough.

    How to Make the Cookies. 

    Think of this dough as a “stir and drop”. You simply stir the dough together and then drop it onto a baking sheet. It’s that easy. Here’s what to do.

    Gluten-Free Chocolate Cookie Dough.

    Step One: Make the Dough.

    Start by whisking together the gluten-free flour with the other dry ingredients. (Except for the sugars!) Doing this ensures that the baking soda and salt are evenly mixed throughout the dough.

    In a large bowl, mix together the butter, sugars, eggs, and vanilla extract until it’s smooth and creamy. The mixture almost looks like caramel sauce at this step. 

    Add the dry ingredients and stir until a dough forms. At this point, I like to stop and scrape the bottom and sides of the bowl. Gluten-free flour loves to stick to the bowl and we want to mix it in completely. 

    If you’re adding chocolate chips or nuts, stir them in now.

    This dough is much softer than many gluten-free cookie doughs. It’s almost as soft as brownie batter but not quite. After mixing, I like to let it sit for about five minutes. It sets up a little and makes it easier to scoop into balls.

    If you want to make the dough in advance, you can. Make it as directed, cover the bowl, and then refrigerate. This really gives the flavors time to develop. Cookies made with premade dough don’t spread as much as cookies baked right away.

    Gluten Free Chocolate Cookies on a Cooling Rack

    Step Two: Shape and Bake.

    Line a baking sheet with a piece of parchment paper or lightly grease it with nonstick spray. Scoop the dough into balls and drop it onto the baking sheet. There’s no need to roll the dough into balls. In fact, it’s too soft to roll. 

    I love to use a cookie scoop for this step. Not only is it fast, all the cookies come out the same size. Win-win. 

    If you’re using chocolate chips or nuts, you can always press a few extra into the top of the cookies. It gives them a really pretty appearance when baked. 

    Bake until the cookies look set and puffed. A pan of these cookies takes about 10 minutes.

    Stack of four gluten-free chocolate cookies.

    Step Three: Cool and Enjoy.

    The cookies are really delicate when they come out of the oven. If you move them right away, they can break. Let them cool on the pan for about three minutes before transferring them.

    Variations

    Inside-Out Chocolate Chip Cookies: Stir a cup of white chocolate chips into the batter.

    Spicy Chocolate Cookies: Add 1 teaspoon ground cinnamon and 1/4 teaspoon ground cayenne along with the gluten-free flour.

    Gluten-Free Chocolate Cookies on a cooling rack.
    Print

    Gluten-Free Chocolate Cookies

    These gluten-free chocolate cookies taste like a cross between a brownie and a chocolate chip cookie. They’re crisp on the edges and tender in the middle. For an extra burst of chocolate, add some chocolate chips. Dairy-free options are included.
    Prep Time 10 minutes
    Cook Time 12 minutes
    Total Time 22 minutes
    Servings 24 cookies
    Calories 140 kcal

    Ingredients

    • 1 ¼ cups gluten-free flour, see note (7 ½ ounces; 212 grams)
    • ¼ cup cocoa powder, Dutch-process suggested (¾ ounce; 20 grams)
    • ½ teaspoon baking soda
    • ½ teaspoon salt
    • 8 tablespoons butter, melted (1 stick) (4 ounces; 113 grams)
    • ½ cup dark brown sugar (3 ¾ ounces; 106 grams)
    • ⅓ cup granulated sugar (2 ⅓ ounces; 66 ounces)
    • 1 large egg
    • 2 teaspoons vanilla extract
    • 1 cups chocolate chips, optional (6 ounces; 170 grams)
    • 1 cup chopped nuts, optional (4 ounces; 113 grams)

    Instructions

    1. Preheat oven to 350℉. Line a baking sheet with parchment paper.

    2. Whisk together gluten-free flour, cocoa powder, baking soda, and salt in a medium bowl.
    3. In a large bowl, whisk together the melted butter, brown sugar, granulated sugar, egg, and vanilla extract. Mix until smooth.
    4. Add the dry ingredients. Mix until a thick soft dough forms. Stir in chocolate chips and nuts, if using.
    5. Drop dough by the tablespoon onto the prepared baking sheet. Bake until the edges are set, about 12 minutes.

    6. Let cookies cool on the pan for about three minutes and then transfer to a wire rack.
    7. Store cooled in an airtight container for up to four days or place cookies into a freezer container and freeze for up to two months.

    Recipe Notes

    Gluten-Free Flour: Cookies were tested with Bob’s 1:1 Gluten-Free Baking Flour. You might get a different result (texture and flour) if you use a different flour.

    Butter: For dairy-free cookies, use a dairy-free butter spread. 

    Chocolate Chips: Use regular or mini chocolate chips. Milk, semi-sweet, and white chocolate chips all work. Use what you love.

    Gluten-Free Banana Muffins

    A basket of gluten-free banana muffins.

    This is the best recipe for gluten-free banana muffins. It makes classic, homestyle muffins. For the best flavor and texture, use really overripe bananas. The recipe is naturally dairy-free but if you love buttery muffins, use melted and cooled butter. The easy one-bowl recipe comes together in just minutes!

    A basket of gluten-free banana muffins.

    I love these banana muffins. They’re one of those “You can’t tell this is gluten-free!” recipes. I promise that there isn’t a hint of grittiness that some gluten-free muffins contain.  

    Since these are so good, I often double the recipe. Just like my gluten-free blueberry muffins, these freeze beautifully. So when I’m in the mood for a muffin–but not in the mood to bake–there’s always a few in the freezer along with gluten-free chocolate chip cookies and a loaf of sandwich bread. 

    Gluten-free banana muffin recipe ingredients on a counter.

    Ingredients.

    • Bananas. For the best flavor and texture, you really want to use overripe bananas. They’re sweeter and contain more moisture than yellow bananas. It’s easy to tell when bananas are overripe. The skin gets very brown–it can even turn black. And the banana gets soft and mushy. 
      Substitute: There’s really no substitute for bananas in this recipe. But if you don’t have overripe bananas, use yellow bananas and add two teaspoons of additional brown sugar plus two teaspoons of water or milk.
    • Dark Brown Sugar. These muffins have a nice sweetness thanks to the dark brown sugar. Use dark brown sugar that’s soft. If it’s gotten hard in the bag, soften it by placing a lightly damp paper towel over the sugar and warm it on low heat in the microwave.
      Substitute: Replace the dark brown sugar with either light brown sugar or granulated sugar. I don’t recommend honey or maple syrup for this recipe because it can make the muffins too moist. For sugar-free muffins, use a sugar replacement that’s suitable for baking. 
    • Gluten-Free Flour. I tested this recipe with Bob’s Red Mill 1:1 Gluten-Free Baking Flour. It makes great muffins. Use a gluten-free flour blend that contains xanthan or guar gum. Without it, the muffins can turn out dense. 
      Substitute: If you don’t want to use a premade gluten-free flour blend, whisk together: 1 ¼ cups white rice flour. ½ cup cornstarch and ¼ cup sweet rice with ½ teaspoon xanthan gum.
    • Eggs. Two large eggs bring the batter together and give the muffins a nice crumb.
      Substitute: Do you want to make these muffins egg-free? Here’s what to do: use a “flax egg”. To make it, whisk together two tablespoons of ground flaxseed and five tablespoons of hot water. Let that sit for about five minutes and then use it like you’d use the egg. By the way, it’s important to use ground flaxseeds. Sometimes the bags are labeled “flaxmeal.” Whole flaxseeds don’t work as well for an egg replacement. 
    • Oil. The oil is an important ingredient in this recipe. It makes the muffins moist and rich, plus it helps keep them fresh. So it’s not an ingredient you want to skip. Use a neutral flavored oil, like vegetable or canola oil. 
      Substitute: Butter works great in this recipe. To use it, melt the butter and let it cool slightly before adding it to the muffins. 
    • Baking Powder, Baking Soda, and Salt. These three ingredients contribute a lot. The baking soda and baking powder help the muffins to rise and the salt enhances the flavor. 

    Optional Ingredients.

    • Chocolate Chips. Banana muffins and chocolate chips go great together. Use regular or mini-chips. Both taste great. 
    • Chopped Nuts. If you love banana-nut muffins, add a cup of your favorite chopped nuts to the batter. 
    • Vanilla Extract. You’ll notice this recipe doesn’t call for vanilla extract. Since the bananas and brown sugar are so flavorful, it doesn’t require it. But if you love vanilla, add a teaspoon of extract along with the eggs, sugar, and oil. It adds a lovely flavor to the muffins.
    • Cinnamon. For spiced banana muffins, add a teaspoon of ground cinnamon along with the vanilla extract.
    Bowl of gluten-free banana muffin batter.

    How to Make Gluten-Free Banana Muffins: Steps for Success.

    This muffin recipe is so easy to make. All you need do is mix the simple batter. Let it rest. And bake the muffins. You got this!

    Make the Batter.

    You only need one bowl to make this batter. Start by mashing the bananas. Do this with a fork or an electric mixer both work great. Then add the brown sugar, eggs, oil, and vanilla. Mix everything together until it’s almost smooth. If you see a few lumps of bananas, that’s fine.

    Stop the mixer and add the remaining ingredients. Stir until a batter forms. This takes about 30 seconds. You’ll notice that the batter is thick. So it’s a good idea to stop the mixer and scrape the bottom of the bowl. A lot of times, there’s a thin layer of flour clinging to the bottom or sides of the bowl. Mix any flour or other ingredients into the batter before you let it rest.

    Gluten-free banana muffin batter in a muffin pan.

    Let the Batter Rest. 

    A lot of people believe that after they mix a batter they need to get it into the oven as fast as possible or the muffins won’t rise. This isn’t true. As long as the batter contains double-acting baking powder, the batter can rest. And muffins turn out better if it does. 

    Let’s quickly talk about double-acting baking powder since it’s the key to letting the batter rest. Unlike baking soda, which releases gas once when it interacts with the acid and liquid in a recipe, double-acting baking powder works twice. It first releases gas when it comes in contact with liquid and then again when it’s heated.

    If you’re going to let your batter rest, be sure the label says “double-acting.” The good news is that most do.

    Resting batter simply means mixing it, covering the bowl, and waiting a little while before baking. But how long should you wait? Good question. 
    I’ve found that a 30-minute rest gives you the best results. It’s long enough to allow the starches to soften but not so long that a batch of muffins becomes a day-long task.

    But what if you don’t have 30 minutes to wait? For this recipe, it’s fine. The muffins still rise and turn out really well. They might not be as tender but if you’re in a rush, I wouldn’t worry about it.

    Prepare and Fill the Muffin Pan.

    This recipe makes about 16 standard-size muffins. I say “about” because the size of muffin pans varies depending on the manufacturer. You might get 15 muffins if your pan is large or 18 if it’s smaller.

    To prevent the muffins from sticking to the pan, I like to line the pan with paper liners. It makes it so easy to get the muffins out of the pan. If you want to skip the paper liners, grease each muffin cavity lightly with oil to prevent the muffins from sticking. Do this even if your muffin pan is nonstick.

    As an added layer of protection from the muffins sticking, I spray the top of the pan with nonstick cooking spray. This way, if the muffin batter overflows, it won’t stick to the top of the pan.

    Fill each muffin cup about ⅔ full. I like to use a muffin scoop to do this because it makes the task so quick. If you don’t have one, use a ¼ cup measuring spoon.

    Gluten-free banana muffin split in half.

    Bake Until Brown.

    These muffins take about 22 minutes to bake. Baking time varies depending on your oven and the size of the pan. Check the muffins for doneness by inserting a toothpick into the center. Testing the center is important. The outside of the muffins bake faster than the center. Always aim the toothpick for the very center of the muffin. If you hit the bottom of the pan, you’ve gone too far down.

    Since gluten-free baked goods have a slightly denser crumb than wheat baked goods, some folks like to use a thermometer to test for doneness. If you prefer to use a thermometer, you want the temperature to reach 203℉ to 205℉.

    Cool on a Rack.

    If you learn one thing about gluten-free baking from me, I hope it’s this: use a cooling rack. Hot baked goods contain a lot of steam. And if they’re allowed to cool in the pan, things can get soggy or gummy. There are a few exceptions, like gluten-free coffee cake, but most things do better when cooled on a wire rack.

    When the muffins are done, remove the pan from the oven. Let the muffins cool in the pan for about five minutes. Then transfer the hot muffins to a cooling rack. This allows steam to easily escape and keeps the muffins from getting soggy on the bottom.

    How to Freeze Gluten-Free Banana Muffins.

    Gluten-free muffins freeze really well as long as you follow a few steps.

    1. Let the muffins cool. You don’t want to freeze warm muffins. When muffins are warm, they contain a lot of extra moisture. If you pop them in the freezer, this moisture turns to ice crystals. When the muffins thaw, you’ll notice they’re soggy and dry. It’s easy to avoid this! Just let the muffins cool completely before you freeze them. 
    2. Use a freezer container. Place the muffins in a freezer bag or container. This keeps them from drying out in the freeze.
    3. Freeze for up to three months. For the best texture, freeze the muffins for up to three months. When you’re ready to enjoy them, remove the muffins from the freezer. Allow them to thaw at room temperature. 
    A basket of gluten-free banana muffins.
    4.9 from 88 votes
    Print

    Gluten-Free Banana Muffins

    These gluten-free banana muffins are tender, moist, and really easy-to-make. You'll need three large bananas for this recipe. For the best flavor and texture, use overripe bananas. They're sweet and add a

    Prep Time 45 minutes
    Cook Time 22 minutes
    Total Time 1 hour 7 minutes
    Servings 16 muffins
    Calories 135 kcal

    Ingredients

    • 3 medium very ripe bananas (about 15 ounces; 425 grams)
    • ¾ cup lightly packed dark brown sugar (5 ½ ounces; 155 grams)
    • ½ cup oil or (1 stick) butter, melted and slightly cooled (4 ounces; 113 grams)
    • 2 large eggs, whisked (about 4 ounces; 113 grams)
    • 2 cups Bob’s Red Mill 1:1 Gluten-Free Baking Flour (9 ounces/ 260 grams)
    • 1 teaspoon baking powder
    • 1 teaspoon baking soda
    • ½ teaspoon salt
    • ½ cup chocolate chips, optional (3 ounces; 85 grams)
    • ½ cup chopped walnuts, optional (3 ounces, 85 grams)

    Instructions

    1. In a large bowl, mash the bananas with a fork or potato masher. Add brown sugar, oil, and eggs. Add the gluten-free flour, baking powder, baking soda, and salt. Mix until batter is thick. Stir in chocolate chips and nuts if using.

    2. Cover the bowl and let the batter rest for 30 minutes. (This step is optional. It makes the muffins more tender and helps them to rise more.)

    3. Preheat oven to 350℉. Grease or line 16 standard size muffins cups with paper liners. Fill prepared muffin cups ⅔ full with batter.

    4. Bake for about 22 minutes or until a toothpick inserted in the center comes out clean. Cool muffins in the pan for 5 minutes; remove from pan and place on a wire rack to cool completely.

    5. Store, wrapped, on the counter for up to three days or freeze for up to three months.

    Recipe Notes

    Ingredient Substitutions.

    Gluten-Free Flour Blend. If you prefer to mix your own flour, use 1 ¼ cups white rice flour, ½ cup cornstarch, ¼ cup sweet rice, and ½ teaspoon xanthan gum. Whisk together. Use in place of the premade flour blend.

    Dark Brown Sugar. Use an equal amount of light brown sugar or granulated sugar. Muffins made with granulated sugar bake up a little lighter than those made with brown sugar. 

    Eggs. Replace the two eggs with a flax egg. To make it: stir together two tablespoons of ground flaxseed and five tablespoons of hot water. Let the mixture sit for five minutes. It will thicken during this time.  Add it to the recipe along with the brown sugar and oil.

    Oil. Melted butter is a great substitute for the oil. Melt one stick (4 ounces) of butter and allow it to cool slightly before adding it to the batter.

    Gluten-Free Apple Crisp

    Four bowls of gluten-free apple crisp.

    This easy gluten-free apple crisp recipe is made with sliced apples and a crunchy and sweet gluten-free topping. It’s great served warm with vanilla ice cream. 

    Four bowls of gluten-free apple crisp.

    Apple crisps are one the easiest gluten-free desserts to make. All the results will wow you every time. To make this recipe, start with the topping. This way it’s ready to sprinkle over the apple filing before the apples turn brown on you. The combination of gluten-free oats, melted butter, and brown sugar pairs perfectly with the apples. 

    Speaking of apples, use a variety of sweet and tart apples for a filling that flavorful but not too sweet or mushy.

    What you need to make a gluten-free apple crisp.

    An apple crisp is made up of two parts: the apple filling and a sweet, gluten-free oat topping. Here are the ingredients you’ll need.

    • Apples. The best apple crisp starts with good apples. I’m particularly fond of a blend of granny smith apples honey crisp, and McIntosh. The granny smiths are tart and firm. The honey crisp brings a bright, sweetness while remaining pleasantly firm, and the McIntosh melts into an almost applesauce-like texture. The combination makes a delicious gluten-free apple crisp.
    • Lemon. One fresh lemon adds a bit of freshness to the apples. If you don’t have a lemon on hand, omit it.
    • Brown Sugar. There’s a little brown sugar in both the filling and the topping. If you prefer a less-sweet apple crisp, you can skip the sugar in the filling. 
    • Butter: Metled butter is stirred into the topping to give it body and richness. If you’re dairy-free, use a dairy-free butter replacement. 
    • Gluten-Free Flour. The gluten-free flour thickens the filling and helps hold the topping together.
    • Gluten-Free Whole Oats: Gluten-free oats add a nice crunch to the topping. As always, be sure to use gluten-free oats. If you avoid oats, replace them with quinoa flakes. 
    • Cinnamon: I keep the spice simple when it comes to apple crisp: I use ground cinnamon. However, if you prefer a blend of apple pie spices, like nutmeg, clove, and ginger, go ahead and use them. 
    • Salt. A pinch of salt brings out the flavors in the filling and the topping. 
    • Nuts, optional: Some folks love their gluten-free apple crisp with a nutty crunch. You can add up to one cup of chopped nuts (almonds, walnuts, or pecans) if you’d like. 

    How to make a gluten-free apple crisp.

    Step One: Turn on the oven and prepare your pan.

    Before you start peeling apples and measuring ingredients, turn your oven on to 350℉. It’s also a good idea to butter your baking dish. This way, it’s ready after you make the filling.

    Step Two: Make the Topping.

    Whenever I make a fruit crisp, I always prepare the topping first—even though it goes on last. This way, the apples don’t sit around and turn brown while I make the topping. To make the topping, stir together the gluten-free oats, flour, brown sugar, cinnamon, and salt in a medium bowl. If you notice lumps of brown sugar, break them up with your fingers or a fork.

    Add the melted butter and mix until the topping looks crumbly. If you’re adding nuts, add them now. Set the bowl aside until the filling is made. If you want to make the topping ahead, place it into a zip-top bag and refrigerate for up to one week.

    Step Three: Make the Filling.

    You need about five pounds of apples for this recipe. That’s usually seven large apples or about 10 cups of peeled, sliced apples. For the best texture, I like to slice some apples thin and chop others into thick chunks. Right after cutting the apples, stir them together with the lemon zest and juice, brown sugar, gluten-free flour, cinnamon, and salt. After all the apples are evenly coated, spread the filling evenly into the prepared baking dish.

    One of the great things about making a gluten-free apple crisp is that you can add more filling. If you look at your pan and want more filling, add more.

    Step Four: Top and Bake.

    Sprinkle the topping evenly over the filling. Place the uncovered pan into the oven and bake until the filling bubbles. A pan of gluten-free apple crisp usually takes about an hour to bake. And those bubbles are important: the filling must come to a boil to thicken. If you don’t see a few bubbles, keep baking the crisp.

    How to Serve a Gluten-Free Apple Crisp.

    Gluten-free apple crisps taste best when served warm, not piping hot. Wait about 15 minutes after baking to serve the crisp. If you aren’t serving it right away, re-warm it in a 250℉ before serving.

    Optional but Tasty Toppings

    • Ice cream, vanilla or caramel flavors are especially nice.
    • Whipped cream
    • A drizzle of caramel sauce or maple syrup.
    Four bowls of gluten-free apple crisp.
    Print

    Gluten-Free Apple Crisp

    This easy gluten-free apple crisp recipe is made with sliced apples and a crunchy and sweet gluten-free oat topping.

    Course Dessert
    Prep Time 20 minutes
    Cook Time 45 minutes
    Total Time 1 hour 5 minutes
    Servings 8 servings
    Calories 250 kcal

    Ingredients

    Topping

    • 1 cup gluten-free old-fashioned whole oats, see note 1 (3 ½ ounces; 100 grams)
    • ¾ cup gluten-free flour (4 ounces; 115 grams)
    • ½ cup packed light or dark brown sugar (3 ¾ ounces; 110 grams)
    • 1 teaspoon ground cinnamon
    • ¼ teaspoon salt
    • ½ cup butter, melted (1 stick; 4 ounces; 115g)

    Filling

    • 5 pounds apples, cut into thick slices (about 7 to 8 large apples, 10 cups sliced.)
    • Zest and juice of one lemon
    • ¼ cup packed light or dark brown sugar, see note
    • ¼ cup gluten-free flour
    • 1 teaspoon ground cinnamon
    • ¼ teaspoon salt

    Instructions

    1. Preheat oven to 350℉ (177 ℃). Lightly grease a 9×13-inch baking pan with softened butter or nonstick cooking spray.

    Prepare the Topping

    1. Whisk together the gluten-free oats, gluten-free flour, brown sugar, cinnamon, and salt. Stir in melted butter with a wooden spoon until crumbly. Set aside.

    Prepare the Filling

    1. Stir together the apple slices, lemon zest and juice in a large bowl. Add the brown sugar, gluten-free flour, cinnamon, and salt. Stir until all the apple slices are evenly coated.

    2. Spread the apples into an even layer in the prepared pan. Sprinkle the topping evenly over the apple slices.
    3. Bake until the apples are soft and the filling bubbles, about 45 minutes. Remove the pan from the oven. Allow apple crisp to cool for about 15 minutes before serving.

    4. Store leftover apple crisp covered in the refrigerator for up to four days. Reheat before serving in the microwave on low heat for about 30 seconds.

    Recipe Notes

    Note 1: As always, be sure to use gluten-free oats. If you avoid oats, replace them with quinoa flakes. 

    Easy Gluten-Free Oatmeal Cookies

    Gluten-free oatmeal cookies cooling on a wire rack. A brightly colored tea-towel sits under the wire rack. Two cookies are on the board off to the right.

    This gluten-free oatmeal cookie recipe is easy to make. Simply mix all the ingredients together in one bowl, drop the dough onto a baking sheet, and bake. The cookies turn out thick, chewy, and flavorful.

    Are you looking for more gluten-free cookie recipes? Try this buttery gluten-free shortbread recipe or make a batch of classic gluten-free chocolate chip cookies.

    Gluten-free oatmeal cookies cooling on a wire rack. A brightly colored tea-towel sits under the wire rack. Two cookies are on the board off to the right.

    Gluten-Free Oatmeal Cookies: Ingredients and Substitutions.

    • Gluten-Free Oats. My favorite oats to use in this recipe are old-fashioned oats. They’re nicely oat-y and have a great, chewy texture. Quick cook and instant oats work but the flavor isn’t as strong. Cookies made with quick oats are cakey instead of chewy. If you love cakey oatmeal cookies, use instant oats or a blend of the two.

      Ingredient Note: Be sure to use gluten-free oats. Oats are naturally gluten-free. However, during growing, handling, and processing, they can be contaminated with gluten. This is why it’s important to use oats labeled gluten-free by the manufacturer. 
    • Gluten-Free Flour. For the best texture, use a blend that contains xanthan gum. It helps the cookies hold their shape. 
    • Cinnamon. I love the flavor cinnamon brings to oatmeal cookies. If you don’t like it, simply leave it out. If you love cinnamon, double the amount called for in the recipe.
    • Baking Soda. A little baking soda helps the cookies to rise. 
    • Salt. Use fine (table) salt. It blends easily into the dough. 
    • Butter. Melted regular or dairy-free butter adds richness. 
    • Brown Sugar. The sweetness comes from brown sugar. If you like molasses flavor, use dark brown sugar. For a lighter, more caramel-like flavor, use light brown sugar. No brown sugar in the kitchen? No problem! Use an equal amount of granulated sugar. 
    • Egg. A large egg helps to hold the dough together. If you want to make these cookies egg-free, the best egg replacer for this recipe is a flax egg. I’ve included the recipe below.
    • Vanilla Extract. A splash of vanilla extract adds a nice flavor. 
    • Chocolate Chips or Raisins. These cookies don’t need chocolate chips or raisins. But they sure are a lovely addition! Add your favorite. I love the combination of both chocolate chips and raisins. 

    Variation: Egg-Free and Dairy-Free Oatmeal Cookies.

    This recipe can easily be adapted for egg-free and dairy-free needs.

    Egg-Free. Replace the one egg with one tablespoon of ground flaxseeds (flax meal) and two and half tablespoons of hot water. Mix the two together and let sit for about five minutes. Add to the dough in place of the egg. Gluten-free oatmeal cookies made without an egg are very similar to those made with an egg.

    Dairy-free. Replace the melted butter with dairy-free butter and use dairy-free chocolate chips. Follow the recipe as written.

    How to Make Gluten-Free Oatmeal Cookies. Step by Step. 

    Step One: Heat the oven and prep your pan. 

    Cookies bake best in a hot oven. I like to preheat my oven before I begin measuring ingredients. If you forget to turn on your oven before you make your dough, simply heat it before baking your first pan of cookies. 

    Gluten-free oatmeal cookie dough being mixed in a glass bowl. Gluten-free flour sits ontop of the butter and egg mixture. A yellow spatula is in the bowl.

    Step Two: Grab a bowl and make the dough. 

    This dough comes together in one mixing bowl. First, stir together the melted butter and brown sugar. Then add the egg and vanilla extract. This is my favorite step. The mixture gets nice and thick. It almost looks like caramel sauce. 

    Add the gluten-free flour, cinnamon, baking soda, and salt. Stir everything together using a sturdy wooden spoon or electric mixer. It’s up to you. At this point, the dough should feel smooth and thick. Remember to get down to the bottom of the bowl. Sometimes flour likes to hang out there. You want to mix everything into the dough. 

    Once the dough is thick, stir in the oats and chocolate chips or raisins. At first, it might seem like there are too many oats for the dough. There aren’t; I promise. Just stir for a few seconds until everything comes together.

    A cookie scoop filled with gluten-free oatmeal cookie dough. A bowl of dough is in the backdround.

    Step Three: Scoop the dough. 

    Scoop the dough onto a parchment-lined baking sheet. I like to use a cookie scoop for this step. The scoop makes cookies all the same size. When cookies are the same size, the entire pan bakes evenly. No more small overbaked cookies or large underbaked cookies.  If you don’t own a cookie scoop, use about two tablespoons of dough per cookie. 

    Step Four: Bake and cool.

    A pan of these cookies takes about 12 minutes to bake. They’ll puff as they bake but they won’t spread much. Look for the edges to turn a light golden brown. That’s a good way to tell when they’re done.

    After baking, let the cookies cool on the pan for a few minutes. They’re really delicate when they first come out of the oven. If you move them too soon, they can break. Let the cookies cool for two to three minutes before transferring them to a cooling rack. 

    A stack of three gluten-free oatmeal cookies. The top two cookies are broken in half to show the chocolate chips insides.

    How to Store and Freeze.

    The cookies keep well for about four or five days on the counter. How long they remain fresh depends on the temperature and humidity of your kitchen. To keep them fresh, keep them covered. 

    To freeze, allow the cookies to cool. Place in a freezer container or bag and freeze for up to three months.

    A stack of three gluten-free oatmeal cookies. The top two cookies are broken in half to show the chocolate chips insides.
    4.88 from 16 votes
    Print

    Gluten-Free Oatmeal Cookies

    Thick and chewy gluten-free oatmeal cookies are easy-to-make. This one-bowl recipe is loaded with gluten-free oats, chocolate chips (or raisins, it’s up to you!), and just a hint of cinnamon.
    Course Cookies
    Prep Time 10 minutes
    Cook Time 12 minutes
    Total Time 22 minutes
    Servings 24 cookies
    Calories 150 kcal

    Ingredients

    • ½ cup butter, melted and cooled slightly (4 ounces; 113 grams)
    • ¾ cups firmly packed brown sugar see note (6 ounces; 170 grams)
    • 1 large egg (about 2 ounces; 57 grams, out of shell)
    • 1 teaspoon vanilla extract
    • 1 cup gluten-free flour, see note (5 ¼ ounces; 150 grams)
    • 1 teaspoon ground cinnamon
    • ½ teaspoon baking soda
    • ½ teaspoon salt
    • 1 ½ cups gluten-free old-fashioned oats (uncooked ) (5 ¼ ounces; 148 grams)
    • 1 cup chocolate chips, optional (about 6 ounces; 170 grams)
    • 1 cup raisins, optional (5 ¼ ounces; 148 grams)

    Instructions

    1. Adjust oven rack to the middle position and heat the oven to 350°F. Line two baking sheets with parchment paper.

    2. Stir together melted butter and brown sugar until smooth in a large bowl. Add the egg and vanilla extract. Mix until thick and smooth. The mixture will look like caramel sauce. Add the gluten-free flour, cinnamon, baking soda, and salt. Sir until you don't see any streaks of flour. Add the oats and chocolate chips and raisins, if using. Mix until combined.

      Gluten-free oatmeal cookie dough with chocolate chips in a glass bowl. A yellow spatula is in the bowl with the cookie dough.
    3. Drop dough, about two tablespoons each, onto one of the prepared baking sheets. Space dough about one inch apart. These don’t spread much. Bake until the edges are light brown and the cookies are set, about 12 minutes.
      A cookie scoop filled with gluten-free oatmeal cookie dough. A bowl of dough is in the backdround.
    4. Remove the pan from the oven and allow the cookies to cool on the pan for minutes. While they cool, bake the remaining dough on the second baking sheet. Transfer cooled cookies to a wire rack and allow to cool completely.
      Gluten-free oatmeal cookies cooling on a wire rack. A brightly colored tea-towel sits under the wire rack. Two cookies are on the board off to the right.
    5. Keep the cookies covered on the counter for up to four days or freeze for up to three months.

      To freeze cookies: place in a freezer container and separate layers with a piece of wax or parchment paper. Thaw overnight on the counter.

    Recipe Notes

    Ingredient Notes

    Gluten-Free Flour. This recipe was developed with Bob’s Red Mill’s 1:1 Gluten-free Baking flour. Using a different gluten-free flour might affect the texture of the cookies.

    Sugar. Use light or dark brown sugar. Dark brown sugar gives the cookies a more pronounced molasses flavor.

    Egg-free: Replace the egg with one (1) tablespoon of ground flax seeds (flax meal) and two and half (2 ½ tablespoons of hot water. Mix the ground flax seeds together with the hot water. Let sit for five minutes. Stir into the recipe along with the vanilla extact.

    Dairy-Free: Replace the melted butter with a dairy-free butter. Use dairy-free chocolate chips or omit the chocoalte chips.

    How to Make the Best Gluten-Free Shortbread

    Gluten-free shortbread on a white plate.

    This gluten-free shortbread recipe makes cookies that are rich and flavorful. They’re not too sweet and the texture is wonderful: slightly crumbly in the best way. The cookies are egg-free and can be made dairy-free.

    Gluten-free shortbread on a white plate.

    Gluten-free shortbread cookies are rich, buttery, and only require five ingredients to make. Unlike classic gluten-free sugar cookies, shortbread is naturally egg-free. The butter and vanilla are the real stars of the show here. The dough contains just enough gluten-free flour to hold everything together.

    Some classic recipes for shortbread contain rice flour. This means the texture of a gluten-free shortbread cookie is very similar to its wheat counterpart. It’s crisp and delicate. 

    Since the basic recipe is so simple, it welcomes variations. I’ve included a few of my favorites but feel free to play around with this recipe.

    Ingredients for gluten-free shortbread. Two sticks of butter are up front on a plate. Gluten-free flour, sugar, vanilla, and salt are in the background.

    Key Ingredients.

    • Gluten-Free Flour. A gluten-free flour blend helps the cookies hold their shape during baking. Look for a blend that contains xanthan or guar gum. (If your blend doesn’t, whisk  ¼  teaspoon  into the gluten-free flour before using.)
    • Butter. Butter is an essential ingredient in shortbread cookies. It gives the cookies flavor and a rich texture. Both salted and unsalted butter work in this recipe but butter is my preference. The salt gives the cookies a deeper flavor and helps to balance the sugar. For gluten-free and dairy-free shortbread cookies, use your favorite dairy-free butter. (See note below for information on gluten-free and dairy-free shortbread cookies.)
    • Granulated Sugar. Shortbread’s delicate sweetness comes from granulated sugar. Don’t use maple syrup or honey in this recipe or the cookies will spread. 
    • Vanilla Extract. A teaspoon of vanilla extract adds flavor. 
    • Salt. Use fine (table) salt. It blends easily and evenly into the dough. If you only have flaky Kosher salt in the house, increase the salt to 1 ½ teaspoons.
    Gluten-free shortbread dough on a counter. Rubber spatula is on the right side.

    How to Make Gluten-Free Shortbread Dough. Steps for Success.

    Gluten-free shortbread is a little tricky to make. Since it lacks liquid, sometimes the dough can be crumbly. Here’s how to make the perfect gluten-free shortbread dough every time.

    1. Start with Softened Butter. 

    The most important step in this recipe is using softened butter. Aim for it to be about 65 to 68℉. You want the butter to feel cool to the touch. If you poke it, look for the butter to give a little resistance but not crack.

    If the butter is too cold, the shortbread dough won’t come together. If the butter is too warm, the cookies will spread during baking and turn out greasy.

    Thick, creamed butter for gluten-free shortbread.

    2. Mix the Sugar Until Creamy, Not Fluffy.

    The texture of shortbread cookies is one of the things that sets them apart from other butter-based cookies. It’s dense and almost sandy. To achieve this lovely texture, blend the butter with the sugar until it’s thick, not fluffy. If the butter-sugar mixture gets fluffy, like it does for gluten-free pound cake, it traps air. That’s what makes it fluffy. That air causes the cookies to puff and rise, which we don’t want. 

    Simply mix the room-temperature butter with the sugar and salt until its thick and creamy. This only takes about a minute. It’s a good idea to stop the mixer once and scrape the sides of the bowl. There’s usually a thick layer of butter clinging to the bowl. Mix this in so there aren’t streaks of butter in the finished cookies.

    Gluten-free shortbread dough in the bowl of a stand mixer.

    3. Make the Dough.

    Since these cookies contain no eggs or liquid ingredients, there’s no moisture to coax the ingredients quickly into a dough. Once the dry ingredients are added to the butter and sugar, it takes a minute or so for a dough to form.  

    Gluten-free shortbread dough mixed in a stand mixer comes together differently than if mixed with a handheld mixer. 

    Baker’s Note: How to Make Gluten-Free Shortbread Dough with a Handheld Mixer.

    Crumbly gluten-free shortbread dough in a bowl.

    Shortbread dough can look incredibly crumbly and refuse to come together when you use a handheld mixer. This happens because of the shape of the beaters and the power of the mixer. In fact, if you’re using a handheld mixer, you might think there’s something wrong with the recipe at this point.

    Gluten-free shortbread dough pressed into a small ball. Crumbly dough is in a bowl in the background.

    If you’re using a handheld mixer and you notice the dough is sandy or crumbly, stop the mixer. Give the dough a squeeze. If it easily holds its shape, stop using the mixer. Press the dough into a ball with your hands or a rubber spatula. I do this right in the mixing bowl. You can also turn the dough onto a lightly floured counter and knead it a few times. 

    If you squeeze the dough and it doesn’t hold its shape, add one teaspoon of water. After you add the water, the dough still might appear crumbly. That’s fine. Give it a squeeze. It should come together. 

    The exception to this is if the butter is very cold. If the dough is cold, let it warm up and try mixing again.

    4. Shape the Dough.

    From baking the cookies right in a pan to using your favorite cookie cutter, you’ve got options when it comes to shaping these cookies. 

    Gluten-free shortbread dough rolled into a log.

    Roll into a log.

    To make “slice and bake” shortbread cookies, divide the dough in half. Roll into a log about 2 to 2¼ inches across. Cut into rounds. If the dough crumbs when you cut it, gently press it into a round on the cookie sheet.

    Gluten-free shortbread cookies cut into rounds.

    Use a Cookie Cutter. 

    You can use cookie cutters with this dough. Since it spreads a little during baking, basic shapes, like rounds, rectangles, and stars work best. To use a cookie cutter, dust your counter with gluten-free flour. Roll the dough out to about 1/4-inch thick. Dip your cutter in gluten-free flour and cut. 

    After cutting out the shapes, gather the remaining dough and re-roll. Since these cookies are gluten-free, they won’t get tough when re-rolled. If you notice the dough is warm after working with it, chill for 20 minutes before re-rolling.

    Gluten-free shortbread dough pressed into a pan and scored into squares.

    Bake in a Pan. 

    The easiest way to shape shortbread cookies is to press the dough into a 9×13-inch pan or two 8-inch round cake pans. 

    Line the pan(s) with parchment paper and grease the sides lightly with nonstick spray. Press the dough evenly into the pan. Score the dough into shapes. I like to make rectangles in the 9×13 inch pan and triangles if I use a round pan. This makes it easy to break the cookies apart after baking. 

    Gluten-free shortbread cookie in a pan. Lower left cookie crumbled because it was cut when hot.

    After baking, let the cookies cool in the pan. If you try to move them or cut them right after baking, they’ll crumble. 

    5. Poke Before Baking.

    Whatever method you use to shape the cookies, it’s important to poke the tops gently with a fork. These tiny holes help the steam to escape during baking and keep the cookies from bubbling. To do this, press a fork gently into the tops of each cookie. There’s no need to press all the way through the dough. This might crack it. Instead, press the fork about halfway through the dough.

    Two gluten-free shortbread on a white plate.

    6. Bake Until Set

    Shortbread cookies are baked at a lower temperature than most cookies. This low temperature keeps the cookies pale in color and gives them that delicate texture. 

    So how do you know when the cookies are done? Look for the edges to be a very light brown. The cookies should look set. If they seem shiny or appear dough-like, bake them a little longer. Small hairline cracks often appear on the surface of gluten-free shortbread cookies. This is normal and nothing to worry about.

    7. Cool. 

    Cooling is an important step for these cookies. Since they’re so buttery, they can crumble when warm. If you make individual cookies, transfer them to a wire rack to cool. If you bake your shortbread in a pan, cool them in the pan for at least 30 minutes and then remove them. 

    Variations.

    • Gluten-Free Lemon Shortbread. Add the zest of one lemon and one teaspoon of lemon extract to the dough. 
    • Gluten-Free Chocolate Chip Shortbread. Replace the granulated sugar with half granulated sugar and half light brown sugar. Add 6 ounces, about one cup, of chocolate chips or chopped dark chocolate. 
    • Gluten-Free and Dairy-Free Shortbread. For a gluten-free and dairy-free shortbread, replace the butter with your favorite dairy-free butter for baking. If the dough seems too soft, add a tablespoon or so of additional gluten-free flour and chill the dough for 30 minutes before baking.
    Gluten-free shortbread cookies on a brown, wrinkled piece of parchment paper. Two rows of round cookies and one row of square cookies.

    How to Store Gluten-Free Shortbread

    Gluten-free shortbread dough and cookies are good “keepers.” Here’s how to make them in advance and store them. 

    How to Store Shortbread Dough.

    You can make the dough ahead and store it, tightly wrapped in plastic wrap, for up to one week in the refrigerator, or 2 months in the freezer. 

    Gluten-free shortbread dough gets very hard when stored in the refrigerator. Let it come to almost room temperature before rolling or it will crack. You can cut the cookies into rounds before storing them. If you do, remove the cookies from the refrigerator, place them on a parchment-lined baking sheet and bake them in a preheated oven. 

    How to Store Baked Gluten-Free Shortbread Cookies. 

    To store at room temperature: Place the cooled cookies in an airtight container. They keep at room temperature for up to 5 days. 

    To freeze the cookies: place them into a freezer container. You can separate layers with a piece of parchment or waxed paper. Freeze the cookies for up to two months. 

    To thaw the frozen dough or cookies: place on the counter for several hours. 

    Solving Common Gluten-Free Shortbread Problems.

    My cookie dough isn’t coming together, what do I do?

    1. Give it a squeeze. If your dough looks crumbly but easily holds together when squeezed, press it into ball with your hands or a sturdy spatula. Some mixers aren’t strong enough 
    2. Check the temperature. Cold gluten-free shortbread doesn’t come together easily. If your dough feels cold to the touch, let it warm for about 20 minutes and then try mixing again. 
    3. Add a tiny bit of water. If you’ve checked numbers one and two and the dough still won’t come together, stop your mixer and add two teaspoons of water. This should help it come together. 

    Note: If after checking the butter temperature and adding water, the dough still won’t come together, I’d check how much flour you added. If you accidentally added too much, the cookie dough will remain too dry. 

    The shortbread dough is very soft and hard to roll/shape. 

    If your dough is sticky and hard to roll, feel it. If the dough feels warm or at room temperature, cover it and chill it in the refrigerator for 30 minutes. If the dough feels cool, add a tablespoon of additional gluten-free flour.

    The dough is firm and hard to roll. 

    If your dough is cracking and hard to roll, cover it and let sit for 20 minutes. It might be too cold. If that doesn’t fix the problem, add a teaspoon of water and mix until a dough forms.

    The Cookies Spread.

    These shortbread cookies should hold their shape during baking. If they spread into thin cookies, a few things could have happened. 

    1. The butter might have been too warm. If you make the dough with very soft butter or the dough warms up (gets squishy) before baking, the cookies can spread. 

      Next time, keep the butter at room temperature. If the dough gets warm before baking, chill it for about 15 to 20 minutes before baking the cookies. 
    1. Too much liquid was added. More than about two teaspoons of liquid can cause the cookies to spread.
    2. The gluten-free flour. Each brand of gluten-free flour bakes differently. I tested this recipe with Bob’s Red Mill 1:1 Gluten-Free Baking Flour. Be sure your blend contains xanthan or guar gum. This is key to helping the cookies hold their shape.
    3. Measuring mistake. It happens to even the best baker: a measuring error. If the cookies didn’t have enough flour or contained too much butter, they will spread.
    Gluten-free shortbread on a white plate.
    4.56 from 56 votes
    Print

    Gluten-Free Shortbread

    This gluten-free shortbread recipe makes cookies that are rich and flavorful. The texture is wonderful: slightly crumbly in the best way. The cookies are egg-free and can be made dairy-free.

    Course Cookies
    Cuisine American
    Keyword gluten-free, gluten-free cookies, gluten-free shortbread
    Prep Time 15 minutes
    Cook Time 30 minutes
    Total Time 45 minutes
    Servings 24
    Calories 145 kcal
    Author GlutenFreeBaking.com

    Ingredients

    • 1 cup butter, softened (about 68℉) (2 sticks; 8 ounces; 198 grams)
    • 1 teaspoon salt
    • ¾ cup granulated sugar (5 ¼ ounces; 148 grams)
    • 1 teaspoon vanilla extract
    • 2 ½ cups gluten-free flour blend, see note (12 ounces; 345 grams)

    Instructions

    1. Preheat oven to 325°F.

    2. Combine softened butter, granulated sugar, and salt in the bowl of a stand mixer or in a large mixing bowl.

      Mix until thick and creamy, about one minute. Use high speed with a handheld mixer and medium-high speed on a stand mixer.

      Stop the mixer and scrape the bottom and sides of the bowl. Add the vanilla extract. Mix for an additional minute. Add the gluten-free flour.

    3. Stand Mixer directions: mix for about two minutes on medium-high speed. Be sure to use the flat paddle attachment.

      Stand mixer directions: Mix on high speed. If the dough seems crumbly after two minutes, stop the mixer. Squeeze the crumbs. If they hold together, press the dough into a ball with your hands or a sturdy rubber spatula. If the dough does not hold together when squeezed, see note below.

    4. Shape the Dough.

      For slice and bake cookies: divide the dough in half. Dust your counter with gluten-free flour. Knead the. dough a few times until smooth. Then roll out into a log, about 2 inches in diameter. Use a sharp knife and cut into rounds, about ½-inch thick. Place the cookies onto a parchment-lined baking sheet, about 1 inch apart.

      For cut-out cookies: Lightly white rice flour your countertop. Turn dough out onto counter and shape dough into a disk. Using a rolling pin, roll dough out, about ½-inch thick.

      Cut into shapes. Dip your cutter into gluten-free flour to keep the dough from sticking to the cutter. Place the cookies onto a parchment-lined baking sheet, about 1 inch apart. Gently knead leftover dough into a ball and re-roll. If the dough gets warm, chill it for about 20 minutes.

      For a pan of cookies: Lightly grease one 9×13-inch pan or two 8-inch round pans. Line with parchment paper. Press dough evenly into the pan. Score into 24 cookies for the 9×13-inch pan and cookies and about 8 triangles each for the 8-inch round pans.

    5. Poke small holes into the tops of each cookie. Do this for the slice and bake, cutouts, and pan of cookies. You want about three rows of holes per cookie.

      Bake until the cookies are set, about 35 minutes. Look for the edges to be lightly golden brown.

      Transfer individual cookies to a wire rack. For a pan of cookies, allow the cookies to cool right in the pan.

    6. Store cookies in an airtight container for up to one week. Or freeze the cooled cookies for up to two months in a freezer container.

    Recipe Notes

    Gluten-Free Flour.

    Use a gluten-free flour blend that contains xanthan gum. If your blend doesn’t contain xanthan gum, whisk ¼ teaspoon into the flour before using.

    How to Fix Crumbly Dough. 

    If your dough is crumbly and isn’t coming together, here’s how to fix it:

    1. Give it a squeeze. If your dough looks crumbly but easily holds together when squeezed, press it into ball with your hands or a sturdy spatula. Some mixers aren’t strong enough
    2. Check the temperature. Cold gluten-free shortbread doesn’t come together easily. If your dough feels cold to the touch, let it warm for about 20 minutes and then try mixing again.
    3. Add a tiny bit of water. If you’ve checked numbers one and two and the dough still wont’ come together, stop your mixer and add two teaspoons of water. This should help it come together.

      Note: If after checking the butter temperature and adding water, the dough still won’t come together, I’d check how much flour you added. If you accidentally added too much, the cookie dough will remain too dry.

    Easy Gluten-Free Chocolate Cake

    Gluten-free chocolate cake slice on a plate.

    There’s a lot to love about this gluten-free chocolate cake recipe. It makes a dense, rich cake that is loaded with chocolate flavor, and, the best part, it’s so easy to make. Mix the batter in one bowl and you’re ready to bake.

    This cake is perfect for birthday parties and other celebrations. And, just like my gluten-free vanilla cake recipe, this recipe can be used for a layer cake or a sheet cake. 

    Gluten-free chocolate cake slice with chocolate frost on plate.

    A good chocolate cake is a thing of beauty. It should be worthy of celebrations, easy enough to whip up at the last minute, and, of course really chocolatey. This recipe succeeds on all fronts.

    This recipe was inspired by classic chocolate layer cakes. You know the kind? They’re always piled high with frosting and served at birthday parties, BBQs, and any other occasion that calls for cake. After one bite, you’ll know why this is my favorite gluten-free cake to bake.

    Gluten-free chocolate cake ingredients in bowls and measuring cups.

    Gluten-Free Chocolate Cake Ingredients.

    • All-Purpose Gluten-Free Flour. Using a gluten-free flour blend makes it easy to make this cake. A good blend should give the cake a nice crumb and texture. Use a blend that contains xanthan or guar gum. Without it, the cake can turn out dense. If your blend doesn’t contain xanthan or guar gum, add one teaspoon to the recipe. 
    • Cocoa Powder. Adds a rich chocolatey flavor and reacts with the baking soda to help the cake rise. You can use either natural cocoa powder or Dutch-process. Natural cocoa powder gives the cake a nice chocolate flavor. Dutch-process cocoa powder, which has been treated with an alkaline solution, makes a very dark and chocolatey cake. 
    • Granulated Sugar. Adds sweetness. Regular granulated (table) sugar is perfect for this recipe.
    • Baking Powder and Baking Soda. The combination of baking powder and baking soda gives the cake a lovely rise. 
    • Salt. One teaspoon of salt enhances the chocolate notes. It’s an important ingredient in this cake. Table salt is best for baking.
    • Eggs. Three eggs help the cake rise and provide a lovely texture and flavor. This recipe has not been tested with an egg replacer. 
    • Oil. A half-cup of oil makes the cake rich and tender. It also makes the cake dairy-free! Be sure to use a neutral-flavored oil, such as vegetable oil, for the best flavor.
    • Milk or Coffee. Milk or coffee make this a smooth silky batter. Use dairy milk or dairy-free milk. For a mocha-like flavor, replace the milk with one cup of cooled coffee. 

    Ingredient Substitutions 

    Gluten-Free and Dairy-free Cake. 

    Since the cake recipe uses  Replace the milk called for with an equal amount of dairy-free milk or coffee.

    Almond flour or Coconut flour.

    Grain-free flour, like almond flour or coconut flour, doesn’t work with this recipe. Please use my recipe for either almond flour chocolate cake or coconut flour chocolate cake if you want to bake with almond or coconut flour.

    Gluten-free chocolate cake batter in a mixing bowl.

    How to Make Gluten-Free Chocolate Cake. Five Steps for Success.

    This recipe is almost like making a box cake mix. The big difference is that you need to measure the ingredients. Other than that, it’s almost the same. Mix everything in a large bowl and bake. 

    1. Preheat Oven. 

    Cakes bake best when placed in a hot oven. I always turn my oven on before I start measuring ingredients. This way it’s ready after I’ve mixed the batter.

    If you forget to preheat your oven, no problem. It’s okay to let the batter wait in the pan while the oven heats. 

    2. Make the Batter.

    To make the batter, you’ll need a large mixing bowl and a whisk. You can use a handheld whisk or electric mixer. It’s up to you. 

    Grab a large bowl or use a stand mixer. Whisk together the gluten-free flour, cocoa powder, granulated sugar, baking powder, baking soda, and salt. This step helps distribute the baking powder and soda throughout the flour and sugar. 

    Add the milk, eggs, and oil. Mix until the batter is smooth. It only takes about a minute or so. Stop and scrape the bottom of the bowl with a rubber spatula. Sometimes the dry ingredients like to cling to the bottom of the bowl. Scraping it ensures all the ingredients are mixed into the batter.

    3. Bake the Cake. 

    Spread the batter evenly into the pan. For this recipe, you can use two 8-inch round pans or one 9-x13-inch pan. If you want to make cupcakes, use this recipe for gluten-free chocolate cupcakes. 

    Bake the cake until a toothpick inserted into the center comes out with only a few dry crumbs clinging to it. Two 8-inch rounds take about 30 minutes and a 9×13-inch pan takes about 40 minutes. 

    4. Cool.

    When the cake is done, remove it from the oven. Let the cake cool in the pan for about ten minutes. If you take it out of the pan too soon, it can break. 

    After about ten minutes, turn the cake out onto a wire rack. Cakes cooled in the pan can stick. If you want to serve the cake in the pan, you can let it cool right in the pan and then frost it.

    5. Finish with Frosting.

    Did you know that if you frost a warm cake, the frosting can melt and run off the cake? So it’s important to wait until the cake is totally cool before frosting it.

    I’ve included a yummy chocolate frosting with the recipe. It’s so good and rich! If you’re using canned frosting, remember to read the label to make sure it’s gluten-free. 

    Gluten-free chocolate cake on a cake stand.

    How to Store and Freeze a Gluten-Free Cake.

    Cover the leftover cake and store it on the counter for up to three days. 

    To freeze the cake, allow it to cool completely. Wrap the cake tightly with plastic wrap and then freeze it for up to three months. 

    You can freeze a frosted cake too. Place the cake into the freezer until the frosting is very hard, about two hours. Remove and wrap tightly. Frosted cakes freeze really well. 

    To thaw the cake, remove it from the freezer and allow it to thaw at room temperature. If your cake is frosted, remove the plastic wrap before thawing.

    Gluten-free chocolate cake slice on a plate.
    5 from 27 votes
    Print

    One Bowl Gluten-Free Chocolate Cake

    This gluten-free chocolate cake is so easy to make. Simply mix all the ingredients on a bowl and bake. It's a moist, rich cake with a really tender crumb. Perfect for birthdays and other celebrations.

    Prep Time 15 minutes
    Cook Time 30 minutes
    Total Time 45 minutes
    Servings 12 slices

    Ingredients

    Gluten-Free Chocolate Cake

    • 1 ¾ cups Bob’s Red Mill 1:1 Gluten-Free Baking Flour, see note (9 ounces; 255 grams)
    • 1 ¾ cups granulated sugar (12 ½ ounce; 354 grams)
    • 1 cup natural cocoa powder (3 ounces; 85 grams)
    • 2 teaspoons baking powder
    • 1 teaspoon salt
    • ½ teaspoons baking soda
    • 1 cup milk or coffee (8 ounces; 226 grams)
    • ½ cup vegetable oil (3 ½ ounces; 100 grams)
    • 3 large eggs (about 6 ounces; 170 grams out of shell)

    Chocolate Frosting

    • 4 cups powdered sugar (16 ounces; 453 grams)
    • ½ cup natural cocoa powder (1 ½ ounces; 42 grams)
    • 1 cup butter, softened (8 ounces; 226 grams)
    • 4 tablespoons milk, divided (2 ounces; 56 grams)
    • ½ teaspoon salt

    Instructions

    For the Gluten-Free Chocolate Cake

    1. Preheat oven to 350°F. Prepare your pan(s). Lightly grease: two 8" round cake pans OR one 9" x 13"- pan with nonstick cooking spray.

    2. Whisk together gluten-free flour, sugar, cocoa powder, baking powder, baking soda, and salt in a large bowl. Add milk, vegetable oil, and eggs. Whisk batter until smooth.

      Gluten-free chocolate cake batter in a mixing bowl.
    3. Divide batter evenly between the two 8-inch prepared round cake pans OR spread evenly into 9 x13-inch pan.

      Gluten-free cake batter in a pan.
    4. Bake until a cake tester inserted into the center of the cakes comes out clean.

      For 8-inch round cakes: about 30 minutes.

      For 9×13-inch pan: about 40 minutes.

    5. Allow cakes to cool in the pan for 10 minutes. Remove cake(s) from the pan and place on a wire rack to cool.

      Gluten-free chocolate cakes cooling on a wire.
    6. When cool, frost with chocolate frosting. Wrap cake and store at room temperature for up to three days.

    For the Chocolate Frosting

    1. Cream butter until light and fluffy. Add powdered sugar, cocoa powder, salt, and milk. Mix on low speed for about 30 seconds. Increase mixer speed to medium-high.

      Beat frosting until fluffy and smooth. If frosting seems too thick, add the additional tablespoon milk. 

      Bowl of gluten-free chocolate frosting with yellow spatula.

    Recipe Notes

    Gluten-Free Flour

    If using a flour blend that does not contain xanthan or guar gum, add 1 teaspoon xanthan gum to the batter. Add the xanthan gum to the gluten-free flour. Whisk. And then follow the recipe as written.

    Gluten-Free Cornbread

    Gluten-free cornbread in a skillet.

    This gluten-free cornbread is easy to make. Simply combine all the ingredients in a bowl, mix until a batter forms, and bake until golden brown. That’s it. For an extra touch of richness, spread a pat of butter on the cornbread when it comes out of the oven. 

    It’s great enjoyed on its own or served as a side dish. The recipe includes a dairy-free option.

    Gluten-free cornbread in a skillet.

    Cornbread at its best is deeply flavorful with a tender crumb. And, most importantly, it shouldn’t be dry. This recipe meets all of those requirements plus one: it’s easy to make. 

    Whether you like your cornbread savory or sweet, this recipe is for you. Adjust the sugar content to suit your tastes. 

    For the best texture, bake the cornbread in a well-seasoned cast iron skillet. It makes cornbread that’s golden brown on the bottom with an almost crunchy crust.  

    And if you want to make corn muffins, follow this recipe for gluten-free corn muffins. The bake time and method are slightly different than they are for cornbread.

    Gluten-free cornbread ingredients in individual bowls.

    Gluten-Free Cornbread Ingredients.

    • Gluten-Free Cornmeal. The key ingredient in this recipe is cornmeal. If you prefer a cake-like cornbread, use finely ground cornmeal. Use a medium ground cornmeal if you prefer a coarse, almost crumbly cornbread.

      Note: Although corn is a naturally gluten-free grain, some brands of cornmeal aren’t considered gluten-free by their manufacturer because of how they’re processed. Use a cornmeal that’s labeled gluten-free.
    • Gluten-Free Flour. A little gluten-free flour gives this cornbread a tender crumb. It also helps to keep it moist for a day or so. 

      Since there’s such a small amount of flour, most gluten-free flours should work. (This recipe was developed with Bob’s Red Mill 1:1 Gluten-Free Baking Flour.) Don’t use almond or coconut flour. The almond flour makes for a heavy, greasy cornbread, and coconut flour will give you an unpleasantly spongy cornbread.
    • Sugar. This isn’t a sweet, cake-like cornbread, but it does contain two tablespoons of sugar. The sugar helps the cornbread to brown and enhances the natural sweetness of the cornmeal. In fact, if you try this cornbread with sugar and without, the recipe made with sugar tastes more “corn-y” than the one made without. 

      If you want a sweet cornbread, increase the sugar. You can use up to 1/2 cup granulated sugar. And if you don’t want to use sugar, leave it out of the recipe. Most of the time omitting sugar from a baking recipe is a no-no. But it works great in this recipe.
       
    • Baking Powder. The rise and tender crumb come from a full tablespoon of baking powder. For a very dense cornbread, reduce the baking powder to one teaspoon. 
      Always use fresh baking powder for baking. The container should have an expiration date on it. If you’re unsure about its freshness, test it. Stir one teaspoon of baking powder into a half cup of hot water. The mixture should bubble immediately.
    • Salt. A little salt helps enhance the flavor of the cornbread. Without salt, bread tastes flat. Use table salt (fine salt) for this recipe. It blends easily into the batter.
    • Eggs. Two eggs give the cornbread lift, moisture, and flavor. I haven’t tested the recipe with egg alternatives. So I can’t say if this recipe works egg-free.
    • Milk. Since I rarely have buttermilk in the house, I stopped using it in my cornbread. Not only is this great for making last-minute cornbread, but it also benefits folks who are on a dairy-free diet. If you follow a dairy-free diet, replace the milk with your favorite dairy-free alternative. Avoid using full-fat coconut milk. It’s too thick and rich for this cornbread.
    • Oil (or Butter). Any baking oil (corn, canola, or soy) works well. If you include dairy in your diet and prefer the flavor of butter, swap the oil for melted butter. After melting the butter, cool it before adding it to the batter.
    Gluten-free cornbread batter in bowl and falling off a whisk.

    How to Make Gluten-Free Cornbread.

    Gluten-Free Cornmeal

    It’s easy to make a batch of this cornbread. Follow these steps and you’ll have a pan of cornbread in under 30 minutes.

    1. Preheat the oven. 

    For the best rise and crumb, preheat your oven before baking cornbread. Most ovens take about 15 minutes to preheat. Small countertop ovens preheat much faster. 

    If you’re using a cast iron skillet, place it in the oven to preheat. A hot skillet gives the cornbread a crunchy exterior. Don’t have a skillet? No problem. Use a cake pan. (Don’t preheat an empty cake pan. If it has a coating, the heat can damage it.)

    2. Make the batter.

    All you need to make this batter is a large bowl and a whisk. Start by whisking together the dry ingredients. Don’t skip this step. It removes any lumps and helps distribute the sugar, baking powder, and salt throughout the cornmeal and gluten-free flour.  This gives the cornbread a great texture. 

    Then add the milk, eggs, and oil. Stir until the batter is smooth. It’ll be a little thick. If you’re using finely ground cornbread and the batter seems too thick to spread, add two tablespoons more milk.

    Bottom of a slice of gluten-free cornbread. It's evenly golden brown.

    3. Bake Until Brown.

    If you’re using a skillet, the cornbread should take about 15 minutes to bake. Cornbread baked in a cake pan takes about 18 minutes. 

    To check the cornbread for doneness, insert a toothpick into the center of the bread. It should come out clean. You can also gently press the top of the cornbread with your hand. It should feel firm and spring back to the touch.

    Baking Gluten-Free Cornbread in a Skillet

    I think a cast iron skillet is one of the best pieces of equipment you can have in your kitchen. You can use it to make a steak or make a cake. (Or, in this case, cornbread.)

    If you have an 8-inch cast iron skillet, use it. Pop it in the oven before you turn it on to preheat. A hot skillet gives gluten-free cornbread a crispy and brown exterior. And if you’ve ever baked gluten-free, you know how challenging it can sometimes be to get a nice brown crumb on baked goods.

    When the oven is at temperature and your batter is ready to go, remove the skillet from the oven. Grease it generously. Use either cooking oil or nonstick cooking spray. If you use vegetable oil, swirl it around in the pan to coat the pan evenly.

    Spread the batter into the hot pan. It might sizzle a little. Quickly return the pan to the oven. 

    Cornbread baked in a hot skillet bakes a little faster than cornbread baked in a cake pan. Check the cornbread after 15 minutes. 

    When the cornbread comes out of the oven, you can spread a pat of butter over the top. It’ll melt right away. Doing this adds a little richness and flavor.

    A slice of gluten-free cornbread with a pat of butter and a drizzle of honey.

    4. Cool and Serve⁠.

    Before serving, cool the cornbread for about 5 minutes. If you cut the cornbread as soon as it comes out of the oven, it can crumble. Cut into pieces and enjoy.

    You can enjoy this cornbread on its own. A lovely way to eat a slice is to butter it and toast it in a skillet. Or serve it as a side dish. It’s great with chili or roast chicken. 

    If you like your cornbread on the sweeter side, drizzle a little honey over the top. It’s so good.

    How to Store Gluten-Free Cornbread. 

    Cornbread tastes best the day it’s baked. Wrap leftovers and store on the counter for up to two days. 

    If you’d like to reheat the cornbread, place it in a warm oven or butter it and toast it on a griddle or in a hot pan.

    This cornbread freezes really well. Allow the cornbread to cool. Then wrap tightly or place into a freezer container. Freeze for up to three months.

    Gluten-free cornbread in a skillet.
    4.72 from 35 votes
    Print

    Gluten-Free Cornbread

    Easy gluten-free cornbread recipe. Mix all ingredients in one bowl and bake until brown. Dairy-free variation included.

    Prep Time 10 minutes
    Cook Time 15 minutes
    Servings 6 servings

    Ingredients

    • 1 ½ cups coarse/medium ground gluten-free cornmeal (see note) (8 ounces; 226 grams)
    • ½ cup gluten-free flour, see note (2 1/2 ounces; 70 grams)
    • 2 tablespoons granulated sugar, see note (1 ounce; 28 grams)
    • 1 tablespoon baking powder
    • ½ teaspoon salt
    • ¾ cup milk, see note for dairy-free option (6 ounces; 170 grams)
    • 2 large eggs (about 4 ounces out of shell; 114 grams)
    • ⅓ cup vegetable oil (2 1/3 ounces; 66 grams)

    Instructions

    1. Heat oven. Preheat oven to 425°F.

      If using an 8-inch cast iron skillet, place into oven before preheating.

    2. Whisk together gluten-free cornmeal, flour, sugar, baking powder, and salt in a large bowl. Add the milk, eggs, and oil. Whisk until combined. Batter will be thick. If it's too thick to spread, add two tablespoons of additional milk.

      Gluten-free cornbread batter in bowl and falling off a whisk.
    3. If using a skillet, remove it from the oven and place it on a heatproof surface. Grease with nonstick cooking spray or brush generously with vegetable oil.

      If using an 8-inch round cake pan, grease the pan lightly with nonstick cooking spray.

      Spread batter into pan. Bake until set, about 15 minutes. The cornbread should spring back when touched.

      Gluten-free cornbread batter in a skillet.
    4. Allow cornbread to cool for about five minutes before cutting into pieces.

      Gluten-free cornbread in a skillet.
    5. To store: Wrap cornbread and store on the counter overnight. Or cool thoroughly, wrap tightly, and freeze for up to two months. Allow cornbread to thaw on the counter.

    Recipe Notes

    Cornmeal

    This recipe was developed for coarse and medium-ground cornmeal. If you use finely ground cornmeal, the batter might be thick. If that occurs, add 1/4 cup additional milk. 

    Gluten-Free Flour

    Bob’s Gluten-Free 1:1 Baking Flour is recommended. 

    Dairy-Free Option

    Replace milk with a dairy-free alternative, such as rice milk or soy. Full-fat coconut milk is not recommended because the fat content makes for a very rich, almost greasy, cornbread. 

    Sugar. 
    For a sweet cornbread, increase sugar to a ½ cup.

    For a savory cornbread, omit the sugar. Gluten-free cornbread baked without sugar doesn’t brown as much. Check for doneness by using a toothpick.

    12 Gluten-Free Recipes for Mother’s Day

    Clockwise from left: gluten-free white cake, banana muffins, almond flour pancakes, chocolate chip cookies.

    Celebrate the moms in your life by baking up a gluten-free treat—or two! Whether you’re starting the day with brunch, baking her a cake, or making some simple cookies, these easy recipes help you create a day to remember.

    1. Almond Flour Pancakes

    Stack of eight almond flour pancakes with maple syrup.

    Start Mother’s Day with a stack of fluffy almond flour pancakes. Thanks to the finely ground almond flour, they’re just as light as regular gluten-free pancakes!

    To make them, whisk all the ingredients together in one bowl. Then heat your griddle or nonstick pan. Spoon the batter onto the pan and cook until you see bubbles all over the surface of the pancakes. Since these pancakes are gluten-free and grain-free, take care when flipping. They can be delicate.

    You can keep the pancakes warm in a 200°F oven for an hour before serving. Enjoy the pancakes with maple syrup, fresh fruit, or, for an added treat, a dollop of whipped coconut cream.
    Get the Recipe for Almond Flour Pancakes.

    2. Gluten-Free Scones.

    Gluten-free scone cooling on a wire rack.

    There’s just something about a scone! Light, delicate, and perfect for breakfast, dessert, or whenever.

    The dough for these gluten-free scones rests for about 30 minutes before baking. This time allows the gluten-free flour to fully absorb the liquid. This means you get scones that don’t spread and are wonderfully soft and tender.

    If you like blueberry, chocolate chip or lemon scones, we’ve got you covered! The recipe includes yummy variations.

    Get the recipe for Gluten-Free Scones.

    3. Gluten-Free Banana Muffins.

    Basket of gluten-free banana muffins.

    A basket of muffins is such a lovely way to start the day.

    These gluten-free muffins are moist, loaded with flavor, and really easy to make. They start with a few overripe bananas. So if you’ve got a few of those on the counter, this one’s for you!

    Mix everything together–and if mom loves chocolate add a few chocolate chips to the batter! Bake until brown and enjoy.

    Get the recipe for Gluten-Free Banana Muffins

    4. Gluten-Free Biscuits.

    Three gluten-free biscuits stacked on a plate.

    How much do I love biscuits? Let me count the ways! If your Mother’s Day includes strawberries, whip up a batch of these biscuits. To make a quick gluten-free strawberry shortcake: split a biscuit, top with strawberries and whipped cream, and enjoy!

    A batch of biscuits is also great for brunch or alongside a BBQ dinner. You really can’t go wrong with biscuits.

    Get the recipe for Gluten-Free Biscuits.

    5. Gluten-Free Chocolate Cake.

    Slice of almond flour chocolate cake on a plate.

    Chocolate cake with chocolate frosting always feels like a celebration!

    To make this gluten-free chocolate cake, all you need is one bowl! simply mix the ingredients together. Spread the batter into a greased pan. (Remember to grease the pan or the cake will stick.) And bake.

    Once the cake is cool, frost it with your favorite frosting.

    Get the Recipe for Gluten-Free Chocolate Cake.

    6. Gluten-Free White Cake.

    Slice of gluten-free white cake on plate.

    If you’re in the mood for some pleasure baking, make this gluten-free white cake. The batter includes sour cream, which makes the cake tender and moist.

    You’ll need three cake pans for this recipe. If you don’t have three pans, don’t worry! You can always make two 8-inch layers and a pan of cupcakes. Or you could bake two layers. Let a pan cool and bake the final layer. The batter is fine sitting for a bit.

    Get the Recipe for Gluten-Free White Cake

    7. Gluten-Free Cupcakes.

    Gluten-free vanilla cupcake. Frosted with vanilla frosting. Bite taken out.

    “Cupcakes make it a party!”—anonymous.

    Other than a cupcake pan, you don’t need any special kitchen tools to make gluten-free cupcakes. But, f you want perfectly even cupcakes, grab a muffin scoop. (It looks like an ice cream scoop.) Fill each cup ⅔ full. Using a scoop makes this easy and less messy.

    Get the recipe for Gluten-Free Cupcakes.

    8. Gluten-Free Carrot Cake.

    Slice of Gluten-Free Carrot Cake

    A carrot cake recipe that’s easy to make? You bet!

    Carrot cake, like a gluten-free marble cake, is one of those cakes that’s often overlooked. And that’s too bad! Because it’s delicious. Like a gluten-free spice cake, it’s rich with flavor and, of course, contains lots of carrots. Whether it includes raisins or pineapple is up to you!

    Get the recipe for Gluten-Free Carrot Cake.

    9. Gluten-Free Sugar Cookies.

    Stack of gluten-free sugar cookies.

    Grab your favorite cookie cutters! It’s time to make sugar cookies.

    Buttery and slightly sweet, these are my favorite sugar cookies. The dough, which starts with a gluten-free flour blend, is a dream to work with. Just remember to leave enough time to chill the dough before baking.

    Get the Recipe for Gluten-Free Sugar Cookies.

    10. Gluten-Free Chocolate Chip Cookies.

    Gluten-free chocolate chip cookies on a piece of parchment paper.

    When was the last time you enjoyed a homemade chocolate chip cookie? It’s been too long, right? (Even if you had one yesterday, it’s been too long. Heh.)

    Did you know that gluten-free chocolate chip cookies bake best in a preheated oven? Before measuring the ingredients, turn the oven on. If you start cookies in a cool oven, the dough gets too soft and they can spread and flatten. Baking cookies in a preheated oven helps them to spread the right amount.

    Get the Recipe for Gluten-Free Chocolate Chip Cookies.

    11. Gluten-Free Peanut Butter Cookies.

    Stack of gluten-free peanut butter cookies on a baking sheet.

    While I was growing up, my mom made a lot of peanut butter cookies. She’d always call me over and let me press the criss-cross pattern into the cookie. It was my favorite part! (Besides eating the cookies, of course!)

    The classic criss-cross pattern on a peanut butter cookie isn’t there just for decoration. It serves a purpose. Flattening the cookies before baking helps the cookies bake evenly. If you don’t want to use a fork, you can use the bottom of a glass or flatten the cookies with your fingers. Rolling them in sugar before you flatten helps whatever you use not to stick.

    Get the recipe for Gluten-Free Peanut Butter Cookies.

    12. Gluten-Free Sparkle Cookies.

    Baked gluten-free sugar cookies rolled in red and pink sugar.

    Does your mom love sparkles? If the answer is yes, then these are the cookies for her!

    The recipe makes buttery sugar cookies and, unlike cutout cookies, you don’t need to chill the dough. Simply mix all the ingredients together. Shape the dough into balls and then, the best part, roll the cookie dough into colored sugar. (Always make sure the colored sugar is gluten-free!) As they bake, the sugar sticks to the cookies. Making them sparkle!

    Get the Recipe for Gluten-Free Sparkle Sugar Cookies.

    How to Make Gluten-Free Scones

    Gluten-free scone cooling on a wire rack.

    The best gluten-free scones are light, slightly sweet, and made with a few simple ingredients. The method for making them is similar to gluten-free biscuits. You start by whisking the dry ingredients together, add some cold butter, and then stir in buttermilk or cream, and an egg. (If you’re dairy-free, you’ll find substitutions for dairy included.) Then simply pat the dough into a round and let it chill before baking.

    That last step might catch your attention. Chilling the dough gives the gluten-free flour time to hydrate. This means your scones won’t spread and bake up light and delicious. While you might be tempted to skip this step, don’t. Soon you’ll be enjoying perfect gluten-free scones with your cup of coffee or tea!

    Gluten-free scone cooling on a wire rack.

    What you need to know about making gluten-free scones.

    • Use a gluten-free flour blend that contains xanthan gum to give the scones a light and tender texture.
    • Cold butter or a dairy-free spread helps the scones to rise.
    • You can mix the butter into the flour by hand or with a food processor. But stir in the liquid by hand. This ensures the right amount of liquid is added.
    • Chilling the dough is an important step. It allows the gluten-free flour to absorb the liquid.
    Ingredients for gluten-free scones in individual bowls.

    Ingredients and Dairy-Free Options.

    • Gluten-Free Baking Flour. Use a gluten-free baking flour that contains xanthan gum. Xanthan gum prevents the scones from spreading. If your flour doesn’t contain xathan gum, whisk a half teaspoon of xanthan gum into your flour. Then follow the recipe as written. 
    • Granulated Sugar. These scones are mildly sweet. If you like a sweet, dessert-like scone, increase the sugar to a half-cup. If you want something that’s more savory, reduce the sugar to 2 tablespoons. Not only does the sugar add sweetness, or cit also helps the scones to brown. If you reduce or omit the sugar, the scones won’t be as dark. 
    • Baking Powder. Scones are in the “quick bread” family. This means their rise comes from baking powder and not yeast. Always use fresh baking powder. (There should be an expiration date on the jar.)  If you’re unsure if your baking powder is fresh, test it. Combine 1/2 cup of hot water with 1 teaspoon of baking powder. You want it to bubble and foam vigorously. If there are only a few–or no!–bubbles, you need a new jar. 
    • Salt. A little bit of salt makes a big difference. It enhances the flavor of the scones. Without it, gluten-free scones taste flat.  Table salt is best for baking. It blends easily into the dough. If you only keep flaky salt in the house, use double the amount of salt called for in the recipe. The reason for this is that flaky salt takes up more space than table salt. 
    • Butter. The key to excellent scones is to use cold butter. If your kitchen is warm, measure your butter first, before you even turn on the oven. Cut the butter into small pieces and return it to the refrigerator. Then turn on your oven and measure the remaining ingredients.
      Dairy-Free Options: Replace the butter with an equal amount of dairy-free baking spread or use coconut oil. If you use coconut oil, it should be cold but not brittle.  
    • Buttermilk or Cream. This recipe can be made with either buttermilk or cream. So which should you use? It depends on what you want. Scones made with buttermilk have a tangy flavor. Scones made with cream are rich and don’t stale as quickly. 
      Dairy-Free Option: Use full-fat coconut milk. Whisk the coconut milk until smooth before measuring it.
    • Egg. One egg helps the scones hold their shape and gives them a nice flavor.  
      Egg-Free Option: If you want an egg-free scone, use an additional 1/4 cup of either buttermilk or cream. Egg-free and gluten-free scones tend to spread a little more than scones made with an egg. 

    How to Make Perfect Gluten-Free Scones.

    Gluten-free scone dough cut into wedges.

    Let’s talk about how to make gluten-free scones step-by-step. Making them isn’t hard but it does take a little practice. If you follow these tips, you’ll make perfect scones in no time. 

    Make the Dough.

    Whisk the dry ingredients. 

    It’s important to mix the gluten-free flour together with the baking powder, sugar, and salt. This step helps evenly distribute the baking powder, ensuring that your scones bake up light and tender. 

    To do this, either mix the ingredients together in a large bowl or use a food processor. If you use a food processor, run the processor for about 20 seconds.

    Gluten-free flour with small piece of butter in a glass bowl.

    Add Cold Butter.

    Cold butter is the key to making great gluten-free scones. If the butter is soft before adding it to the flour, it makes for heavy, dense scones. To avoid this, cut the butter into small pieces. If you have warm hands, work the butter into the flour with a pastry cutter. If your hands are cold, rub the butter into the flour with a snapping motion of your fingers. Stop mixing when the flour looks coarse. You should see small pieces of butter throughout the flour. If you grab a small handful of dough and give it a squeeze, the flour should hold together.

    If you’d rather use a food processor, add the butter and pulse the processor a few times to cut in the butter. It’s easy to overmix the butter when using a food processor. Stop a few times, remove the lid, and check the mixture. It’s done when little pieces of butter are sprinkled throughout the flour.

    Mix Until a Dough Forms.

    Gluten-free scone dough in a bowl.

    Stir in the buttermilk (or cream) and the egg. If you added the butter with a food processor, transfer the mixture to a mixing bowl. It’s best to add the liquid by hand. It’s easy to overmix gluten-free scone dough in a food processor.


    Stir until a dough forms. Check the bottom of the bowl for dry flour. If you see any, mix a few seconds longer. If it remains, the dough might need additional liquid.

    To test the consistency of the dough, pick up a piece. Gently press it in your hand. If it easily holds together, it’s all set. If the dough falls apart or you see lots of white spots of flour, it needs more liquid. Add a tablespoon of additional buttermilk until the dough easily holds together but isn’t wet or tacky. 

    Shape.

    Gluten-free scone dough pressed out on a piece of parchment.

    Lightly dust your counter with gluten-free flour. Knead the dough once or twice so that it holds together. Place the dough onto a parchment-lined baking sheet. Then, pat it into an 8 to 9-inch round. Cover the dough with plastic wrap or a dry towel.

    Why not use a rolling pin?

    Good question! Rolling out gluten-free scone dough works the butter further into the dough. The more the butter mixes with the flour, the heavier the scones. Patting the dough into a round with your hands keeps the scones light.

    Chill.

    Chill the dough for 30 minutes. This gives the gluten-free flour time to absorb the buttermilk and egg. This prevents the scones from spreading as they bake and also reduces grittiness. 

    Bake the Gluten-Free Scones.

    Gluten-free scones cut on a baking sheet. Scones are not baked.

    Preheat the Oven.

    It’s important that scones are baked in a hot oven. After the dough chills for 30 minutes turn on the oven. Once it reaches temperature, I let it run for another five minutes. This ensures the inside of the oven is evenly heated.

    Cut into Pieces.

    For triangle scones: remove the dough from the refrigerator and cut it into eight pieces, like you’d cut a pie.
    For round scones: cut the dough with a small round cookie cutter. Don’t twist the cutter. Doing that seals the edges and the scones won’t rise as high.

    Separate the Scones.

    Place the scones a few inches apart on the baking sheet. They shouldn’t spread but if they do, spacing them before baking prevents them from sticking.

    Sprinkle with Sugar (Optional).

    Before baking, sprinkle a little sugar on top of each scone. This is optional. You can use table sugar or, for more texture and a little sparkle, coarse sugar.

    Bake Until Brown.

    Gluten-free scones take about 20 minutes to bake. Like many gluten-free baked goods, they remain fairly pale. To check for doneness, use a small spatula, lift the scone slightly off the baking sheet, and check the underside. It should look evenly brown. If it’s light, return the pan to the oven for a few minutes. 

    Variations.

    Think of this recipe as a master gluten-free scone recipe. You can adapt it to many different flavors.

    • Blueberry Scones. Stir 1 cup of fresh blueberries into the dough. 
    • Lemon Scones. Reduce the buttermilk by 2 tablespoons. Add 2 teaspoons of fresh lemon zest and two tablespoons of fresh lemon juice.
    • Chocolate Chip Scones. Add 1 cup of dark or milk chocolate chips. Top scones with a sprinkle of coarse sugar.

    How to Store Gluten-Free Scones.

    Freshly baked gluten-free scones only last about 1 to 2 days when stored at room temperature. To store scones at room temperature: cover with foil or plastic wrap or place in a plastic bag or sealed container.

    If you don’t think you’ll enjoy all the scones within two days, it’s best to freeze them. Let the scones cool completely. Then place them into a freezer bag or container. They keep for up to three months in the freezer. When you’re ready to enjoy a scone, remove it from the freezer and let thaw.

    Gluten-free scone cooling on a wire rack.
    5 from 1 vote
    Print

    Gluten-Free Scones

    These gluten-free scones are lightly sweet, tender, and easy to make. Turn them into blueberry, lemon, or chocolate chip scones by following the variations listed below.
    Prep Time 15 minutes
    Cook Time 20 minutes
    Chill Time 30 minutes
    Total Time 1 hour 5 minutes
    Servings 8 scones

    Ingredients

    • 2 cups gluten-free flour (10 ounces; 283 grams)
    • ⅓ cup granulated sugar 2 ⅓ ounces; 65 grams
    • 1 tablespoon baking powder
    • ½ teaspoon salt
    • 6 tablespoons cold butter cut into small pieces (3 ounces; 85 grams)
    • ¾ cup buttermilk or heavy cream, plus more as needed (6 ounces; 170 grams)
    • 1 large egg (2 ounces; 56 grams out of shell)

    Instructions

    1. To mix the dough by hand: Combine the gluten-free flour, sugar, baking powder, and salt in a large bowl. Whisk to combine.

      Add the butter and stir to coat it with the gluten-free flour mixture. Quickly cut in the butter with a pastry cutter or your fingers. Look for the mixture to look coarse with small and large pieces of butter throughout the flour. Proceed to step three.

      Gluten-free flour with small piece of butter in a glass bowl.
    2. Food processor directions: Place the gluten-free flour, sugar, baking powder, and salt in the bowl of a food processor. Pulse food processor, about 20 seconds each, to combine.

      Remove the lid and add the butter. Pulse the food processor, about five times, to incorporate the butter into the gluten-free flour.

    3. Add the buttermilk and egg. Stir until the dough comes together. If dry flour remains in the bowl, add a tablespoon more buttermilk. If the dough is very wet and sticky, add an additional tablespoon of gluten-free flour.
      Gluten-free scone dough in a bowl.
    4. Dust your counter with gluten-free flour. Turn the dough out onto the counter and knead it until almost smooth.
    5. Line a baking sheet with parchment paper. Place the dough in the center of the pan. Pat it into an 8-inch round. Cover the dough with plastic wrap or a dry towel. Chill for 30 minutes.
      Gluten-free scone dough pressed out on a piece of parchment.
    6. Preheat oven to 375°F. Remove the pan from the refrigerator and remove the plastic wrap. Cut the dough into 8 triangles. Gently separate the scones. (For round scones, see the variations in the notes below.) Sprinkle with sugar. (optional.)

      Gluten-free scones cut on a baking sheet. Scones are not baked.
    7. Bake scones until the bottoms are lightly brown, about 20 minutes. Let the scones cool on the pan for about 5 minutes and then transfer to a wire rack to cool completely.
      Gluten-Free scones cooling on a rack.
    8. Store the scones wrapped at room temperature for up to two days.To freeze: allow scones to cool. Place them into a freezer bag or container. Freeze up to three months. Thaw the scones in the refrigerator.

    Recipe Notes

    Dairy-Free Variations.

    Butter. Replace the butter with an equal amount of dairy-free baking spread or coconut oil. If using coconut oil, you want it firm but not brittle.

    Buttermilk or cream. Replace the buttermilk with full-fat coconut milk. Whisk the coconut milk until smooth before using.

    Egg-Free Variation.

    Replace the egg with a ¼ cup of additional buttermilk, cream, or coconut milk.

    Flavor Variations.

    Blueberry Scones. Stir 1 cup of fresh blueberries into the dough.

    Lemon Scones. Add the zest of one large lemon.

    Chocolate chip scones. Add 1 dark or milk chocolate chips. Top scones with a sprinkle of coarse sugar.

    How to Make Round Scones.

    Pat the dough into an 8-inch square. Cut the dough with a small round cookie cutter. Don’t twist the cutter. Doing this seals the edges and the scones won’t rise as high. You can gently knead the remaining and cut into rounds. Bake time depends on the size of the cutter you use. A 3-inch scone takes about 15 minutes to bake.

    Fluffy Almond Flour Pancakes

    Stack of eight almond flour pancakes with maple syrup.

    These light and fluffy almond flour pancakes are tasty and easy to make. Made with almond flour and a little tapioca starch, the pancakes are naturally gluten-free and grain-free. For a perfect pancake, use about a 1/4 cup of batter and spoon it onto a hot, greased griddle. 

    Stack of eight almond flour pancakes with maple syrup.

    How to Make Fluffy Almond Flour Pancakes.

    • Whisk the dry ingredients together. Almond flour tends to clump. Before adding other ingredients, break up any clumps with either a fork, whisk, or your fingers. Then add the tapioca starch, baking powder, and salt. Whisk to combine. This step distributes the baking powder throughout the flour, giving you fluffy pancakes.
    • Make the batter. Stir in eggs, milk, and vanilla extract. If you like almond flour pancakes with a hint of sweetness, add a little maple syrup.
    • Check the thickness. Almond flours vary by brand. If your pancake batter seems too thick, add additional milk. If the batter seems thin, add a tablespoon of almond flour.
    • Cook on a hot griddle. Pancake batter to sizzle when it hits the pan. This gives you pancakes with a lovely golden color. To test the griddle, drop a little water onto it. The water should bubble and evaporate quickly.
    • Flip once. The pancakes are ready to flip when the edges look set and a few bubbles appear on the batter. Cook the first side for about two minutes and the second side for about a minute.
    Almond flour pancake ingredients in glass bowls.

    Almond Flour Pancakes: Key Ingredients. What to use. What to avoid.

    Almond Flour.
    The main flour in this recipe is almond flour. It gives the pancakes a wonderful flavor. Due to the oil content, almond flour tends to clump. If your flour contains a lot of large pieces, sift it or whisk it with a fork to break up the clumps.
    Use finely ground blanched almond flour for light and fluffy pancakes.
    Avoid: very coarse almond flour. If the almond flour is gritty and coarse, the pancakes turn out heavy and lumpy.


    Tapioca Starch.
    The addition of tapioca starch makes the batter smooth and pancakes tender. It also helps the pancakes hold together and makes them easier to flip.
    Use: tapioca starch. This is sometimes labeled “tapioca flour” or “tapioca starch flour.”
    Avoid: Tapioca pearls. 


    Baking Powder.
    Helps the pancakes to rise. Commercial baking powder is “double-acting.” This means it rises when it comes in contact with liquid and again when it’s heated. If you use homemade baking powder, it only rises once, when it comes in contact with a liquid. Almond flour pancakes made with homemade baking powder don’t rise as high.

    Salt. 
    Adding salt to pancake batter enhances the other flavors.
    Use: table salt (fine salt).

    Eggs.
    The eggs help pancakes to rise, lend important structure since the batter is gluten-free, and give the pancakes a nice flavor.
    Use: large eggs.

    Maple Syrup. 
    The addition of maple syrup is optional. It gives the pancakes a subtle sweetness and helps them brown.
    Use: dark maple syrup for the best flavor.

    Milk.
    Helps to smooth out the batter and adds color and flavor.
    Use: Any milk you love. Almond milk, cow’s milk, soy milk, and oat milk work great in this recipe.
    Avoid: full-fat coconut milk. It’s too thick and rich for the batter.

    Vanilla Extract. 
    A teaspoon of vanilla extract helps balance the almond flavor and makes these pancakes taste like…pancakes!

    Ingredient Questions

    Does baking powder contain grain?

    It depends on the brand. If you want to use a grain-free baking powder, look for one made with tapioca starch or make homemade baking powder.

    Can I replace the almond flour with coconut flour?

    Coconut flour doesn’t work in this recipe. If you’d like to make pancakes with coconut flour, use the recipe for coconut flour silver dollar pancakes.

    Can I use gluten-free flour?

    This recipe was developed to use almond flour. Here’s a gluten-free pancake recipe that uses gluten-free flour.

    Common Pancake Questions Answered.

    What’s the Best Griddle Temperature for Pancakes?

    If you use an electric griddle, set it to 350 degrees F. If you a burner, set it to medium-high.

    To test that your griddle or pan is at the right temperature, spoon about a tablespoon of batter onto the griddle. Cook the pancake for about a minute and then flip. If it’s too pale, increase the heat. If it’s too dark, decrease the heat. And if it looks perfect, the pan is ready.

    How do you know when to flip a pancake?

    Look for the edges to look set and almost dry. The batter in the middle will have a few bubbles. Gently lift the pancake with a spatula. If it releases easily from the pan, the pancake is ready to flip.

    How long do you cook a pancake?

    These almond flour pancakes take about two to three minutes to cook on the first side and about a minute on the second side. Cook time varies depending on your griddle and your burner. It’s best to cook a test pancake and adjust the cooking time for each batch.

    Why are there light and dark spots on my pancakes?

    If you’ve ever made pancakes and they turned out “spotty”, you’re not alone. The cause of this is usually oil on the griddle. If there are tiny pools of oil on the pan, they keep heat from transferring from the pan to the batter, resulting in light spots. To prevent spotty pancakes: grease your griddle and then wipe it with a paper towel to remove any puddles of oil.

    Why do my almond flour pancakes fall apart when I flip them?

    Almond flour pancakes are gluten-free. This means they’re delicate since there is no gluten to hold them together.

    When developing this recipe, I noticed that pancakes made with only almond flour often fell apart during cooking. Adding tapioca starch helps the pancakes keep their shape. 

    As important as the tapioca starch is when you flip the pancakes. Allow the pancakes to cook on the griddle until the edges are set. If you flip them too soon, they won’t be cooked all the way through. Undercooked pancakes tend to break. 

    Forkful of almond flour pancakes above a stack of pancakes with butter and syrup.

    How to Freeze Pancakes and Reheat

    Cook the pancakes as directed. Let them cool on a wire rack. Place the pancakes in a freezer bag or container. To keep them from sticking, place a piece of parchment or wax paper between each pancake. Freeze the pancakes for up to two months. 

    When you’re ready to eat, heat the pancakes in a 350° F oven. A toaster oven is perfect for this.

    Almond Flour Pancake Variations

    Almond-Blueberry Pancakes. Spoon batter onto the griddle as directed. Place fresh or frozen blueberries onto each pancake. This ensures each pancake contains as many (or as few!) blueberries as you like. If you’re not comfortable placing blueberries onto the pancakes while in the pan, stir about 1/2 cup of fresh or frozen blueberries into the batter.

    Almond-Chocolate Chip Pancakes. Spoon batter onto griddle as directed. Sprinkle each pancake with chocolate chips. Cook pancakes as directed.


    Almond-Lemon Pancakes. The flavor of almond and lemon are fantastic. Stir in the zest of one lemon or 1/2 teaspoon lemon extract into the batter along with the eggs, milk, and vanilla extract. Cook pancakes as directed.

    Stack of eight almond flour pancakes with maple syrup.
    4.75 from 4 votes
    Print

    Almond Flour Pancakes

    Fluffy and light almond flour pancakes. These are perfect for weekend mornings. Grain-free, gluten-free, and dairy-free recipe.

    Course Breakfast
    Cuisine Gluten-Free
    Keyword almond flour, grain-free, pancakes
    Prep Time 10 minutes
    Cook Time 5 minutes
    Total Time 15 minutes
    Servings 8 pancakes
    Author Elizabeth

    Ingredients

    • 1 ¼ cups finely ground almond flour (5 ounces / 142 grams)
    • ½ cup tapioca starch, see note (2 ounces / 57 grams)
    • 1 ½ teaspoons baking powder
    • ½ teaspoon salt
    • 2 large eggs (about 4 ounces / 113 grams out of shell)
    • 2 tablespoons maple syrup, optional (about 1 ounce)
    • 6 tablespoons almond milk or dairy-free or traditional milk (3 ounces/ 85 grams)
    • 1 teaspoon vanilla extract

    Toppings, optional

    • maple syrup
    • butter

    Instructions

    1. Combine the 1 ¼ cups almond flour, ½ cup tapioca starch, 1 ½ teaspoons baking powder, and ½ teaspoon salt in a medium mixing bowl. Stir together with a fork to break up any lumps.

      Dry ingredients for almond flour pancakes in a bowl being whisked.
    2. Add 2 large eggs, 2 tablespoons maple syrup (optional), 6 tablespoons milk, and 1 teaspoon vanilla extract.

      Stir until a batter forms. If batter is too thick, add an additional tablespoon of milk.

      Almond flour pancake batter in a glass bowl with a pink spatula.
    3. Grease a nonstick griddle lightly with oil. Wipe griddle with paper towel to remove any puddles of oil. Heat pan over medium-high heat.

    4. Spoon batter, about ¼ cup per pancake, onto the hot griddle. Cook until the edges look set and bubbles appear on the pancake, about two minutes. Flip and cook for an additional minute or two.

      Cooked almond flour pancake on griddle. Second pancake in the background waits to be flipped.
    5. To keep warm: Place cooked pancakes in a preheated 200°F oven on a wire rack set in a pan.

    6. Serve with maple syrup and butter.

    7. To freeze pancakes: allow pancakes to cool. Place a piece of parchment or wax paper between each pancake to prevent them from sticking. Place pancakes in a freezer bag or container. Freeze up to three months.

      To reheat: place frozen pancakes in a 350°F oven until warm.

    Gluten-Free Recipes for a Snow Day

    Collage of gluten-free baked goods. Chocolate chip cookies. Chocolate cake. Yellow cake. Soft rolls. Corn muffins. Molasses cookies.

    There’s something special about baking on a snowy day. From cookies to cakes to breads, there’s something for every gluten-free baker on this list.

    Collage of six gluten-free baked goods.  Chocolate chip cookies. Chocolate cake. Yellow cake. Soft rolls. Corn muffins. Molasses cookies.

    Gluten-Free Cookies.

    Gluten-Free Chocolate Chip Cookies.

    Gluten-free chocolate chip cookies on a piece of parchment paper.

    Let’s start with a classic! Chocolate chip cookies. This recipe makes chocolate chip cookies that are buttery, crisp and loaded with chocolate chips. (Dairy-free options included!)

    Get the recipe —> Gluten-Free Chocolate Chip Cookies.

    Peanut Butter Cookies.

    Stack of gluten-free peanut butter cookies on a baking sheet.

    Peanut butter cookies are in my “top five” list of favorite cookies. Yes. I have a favorite cookie list, don’t you? On the list: chocolate chip cookies, molasses cookies, peanut butter cookies, sugar cookies, and spritz cookies.

    Get the recipe —> Gluten-Free Peanut Butter Cookies.

    Sugar Sparkle Cookies.

    Baked gluten-free sugar cookies rolled in red and pink sugar.

    These are sugar cookies with a sparkly finish. So pretty! If you don’t have sparkle sugar in the house, use regular sugar. They might not sparkle but they’ll still taste great.

    Get the recipe —> Gluten-Free Sparkle Cookies

    Gluten-Free Pumpkin Cookies.

    Gluten-free pumpkin cookies on a plate.

    Do you still have a can of pumpkin in the pantry from this year’s holiday baking? Make a batch of pumpkin cookies! They’re cakey, sweet, and have just the right amount of spice. 

    Get the recipe —> Gluten-Free Soft Pumpkin Cookies.

    Gluten-Free Cakes.

    Gluten-Free Banana Cake.

    Gluten-Free Banana Cake with Cream Cheese Frosting

    If you’ve got a few overripe bananas sitting on the counter, make a banana cake! It’s similar to banana bread but a bit more tender and sweet. 

    Get the recipe —> Gluten-Free Banana Cake.

    Easy Gluten-Free Chocolate Cake.

    Slice of Gluten-Free Chocolate Cake on a Plate.

    Snowy days and chocolate are meant for each other! This chocolate cake tastes better than a box mix and goes great with homemade vanilla gluten-free buttercream. 

    Get the recipe —> Gluten-Free Chocolate Cake.

    Gluten-Free White Cake.

    Slice of gluten-free white cake on plate.

    In the mood to spend some time in the kitchen? Bake this white cake. It makes a gorgeous three-layer cake that tastes as good as it looks.

    Get the recipe —> Gluten-Free White Cake.

    Gluten-Free Yellow Cake.

    Slice of gluten-free yellow cake with chocolate frosting

    Don’t feel like project-baking but in the mood for a vanilla cake? I got you. Skip the white cake and make an easy yellow cake. I like to frost it with homemade gluten-free chocolate frosting. 

    Get the recipe —> Gluten-Free Yellow Cake.

    Gluten-Free Mug Cake.

    Gluten-Free Mug Cake in White Mug. Topped with Whipped Cream and Sprinkles

    If you don’t want to bake an entire cake,  how about making a mug cake? It takes only minutes to make. 

    Get the recipe —> Gluten-Free Mug Cake.

    Gluten-Free Breads.

    Gluten-Free Cornbread.

    Gluten-Free Cornbread Sliced in Skillet

    A pan of cornbread goes great with a pot of soup or chili. You’ll love the not-too-sweet flavor and tender texture of this classic cornbread. 

    Get the recipe —> Gluten-Free Cornbread.

    Gluten-Free Soft Rolls.

    Gluten-Free Soft Dinner Roll Baked and Spread with Butter.

    I think one of life’s simple pleasures is a toasted roll with butter. This recipe makes about a dozen rolls. Enjoy some now and freeze some for later.

    Get the recipe —> Gluten-Free Soft Rolls.

    Gluten-Free Cinnamon Raisin Bread.

    Stack of toasted cinnamon raisin bread slices. Melted butter on top slice.

    Cinnamon-raisin bread makes amazing French toast. (It’s also terrific enjoyed toasted with butter or jam.) 

    Get the recipe —> Gluten-Free Cinnamon Raisin Bread.

    Gluten-Free Pumpkin Bread.

    Sliced gluten-free pumpkin bread on a cutting board.

    A thick slice of pumpkin bread and cup of hot coffee is a great snack after a morning or afternoon of shoveling. It’s also a great snack for a day of sitting on the couch. Or working from home. Or anything, really. 

    Get the recipe —> Gluten-Free Pumpkin Bread.

    Gluten-Free Muffins.

    Gluten-Free Banana Muffins.

    Basket of gluten-free banana muffins.

    This easy banana muffin recipe lets you make a batch of muffins however you love them. 

    Add chocolate chips. Or chopped nuts. Or…both! 

    Get the recipe —> Gluten-Free Banana Muffins.

    Gluten-Free Blueberry Muffins.

    Gluten-Free blueberry muffins on wire rack.

    Frozen blueberries work great in gluten-free blueberry muffins. Add a little zest for a taste of summer on a cold day. 

    Get the recipe —> Gluten-Free Blueberry Muffins.

    Gluten-Free Corn Muffins.

    Plate of Baked Gluten-Free Corn Muffins

    Are corn muffins and cornbread the same thing? There’s no right answer to this. For me, corn muffins are a little sweeter and cakier than cornbread. And, truth be told, I love them both.

    Get the recipe —> Gluten-Free Corn Muffins.

    Gluten-Free Pumpkin Muffins.

    Gluten-free pumpkin muffins on a cooling rack.

    Since this is the third pumpkin recipe on the list, you know by now I love pumpkin. These muffins are a gluten-free dream: soft, tender, and not heavy at all!

    Get the recipe —> Gluten-Free Pumpkin Muffins.

    Gluten-Free Sour Cream Muffins.

    Gluten-free sour cream muffins topped with powdered sugar. One is split to show texture.

    One of my favorite muffins is a sour cream muffin. Is it as popular as banana muffins or blueberry muffins? Not at all! But it’s my mission to get as many people as I can to make this recipe. You’re rewarded with delicate muffins with a slight tang of sour cream. If you have powdered sugar in the house, dust a little over the top. So good!

    Get the recipe —> Gluten-Free Sour Cream Muffins.

    29 Gluten-Free Christmas Cookie Recipes

    Gluten-free Christmas cookies are one of the best parts of the holiday season. And with these recipes, you can make everything from classic sugar cookies to soft and tender gluten-free pumpkin cookies.

    1. Gluten-Free Sugar Cookies

    Gluten-Free Cut out Sugar Cookies on a Plate.

    Get out the cookie cutters because we’re starting with a classic: gluten-free sugar cookies. This recipe makes buttery cookies that hold their shape during baking. (A dairy-free option is included.)

    Get the recipe —> Gluten-Free Sugar Cookies

    2. Gluten-Free Gingerbread Cookies

    Baked gluten-free gingerbread cookie with icing.

    What part of the gingerbread cookie do you eat first? The head, right? These gluten-free gingerbread cookies are delicate and loaded with that classic gingerbread flavor.

    Get the recipe —> Gluten-Free Gingerbread Cookies

    3. Gluten-Free Peanut Butter Blossoms

    Gluten-Free Peanut Butter Blossom with Red Colored Sugar for Christmas.

    When you see a peanut butter cookie topped with a chocolate kiss, you know the holidays are here. This is BEST gluten-free peanut butter blossom cookie recipe.  

    Get the recipe —> Gluten-Free Peanut Butter Blossoms

    4. Almond Flour Sugar Cookies

    Baked paleo sugar cookies on a pan with three cookie cutters.

    Almond flour sugar cookies are fun and easy to make. They’re delicate, taste great and are perfect for friends who prefer grain-free baked treats.

    Get the recipe —> Almond Flour (Paleo) Sugar Cookies

    5. Gluten-Free Soft Pumpkin Cookies

    Gluten-free pumpkin cookies on a plate. One is cut in half to show texture.

    Pumpkin isn’t just for Thanksgiving! These soft gluten-free pumpkin cookies are light and cakey with a lovely pumpkin flavor. So good. And so easy!

    Get the recipe —> Gluten-Free Soft Pumpkin Cookies

    6. Gluten-Free Sugar Cookie Bars

    Gluten-free sugar cookie bars on cutting board. Frosted with vanilla frosting and topped with colored sugar.

    These gluten-free sugar cookie bars are soft and tender. Top them with gluten-free vanilla buttercream. (And some sprinkles… of course!)

    Get the recipe —> Gluten-Free Sugar Cookie Bars

    7. Gluten-Free M&M Cookies

    Gluten-free M&Ms cookies with red and green M&Ms on a plate.

    Gluten-Free M&Ms Cookie Recipe. Buttery Sugar Cookies studded with M&Ms. What’s not to like?

    Get the recipe —> Gluten-Free M&M Cookies

    8. Gluten-Free Pizzelles

    Stack of Baked Pizzelles Dusted with Powdered Sugar.

    You need a pizzelle iron for this recipe but, if you’re like me, it’s worth it! These gluten-free pizzelles are thin and crisp and perfect for Christmas.

    Get the recipe —> Gluten-Free Pizzelles

    9. Gluten-Free Anginette Cookies

    Gluten-Free Anginetti Cookies on a wire rack.

    These cookies are a Christmas tradition in many Italian-American homes. They quickly become a favorite of everyone who tries them.

    Get the recipe —> Gluten-Free Anginette Cookies

    10. Gluten-Free Molasses Cookies

    Stack of gluten-free molasses cookies.

    Easy gluten-free molasses cookies. Soft and spicy. Santa loves these. He told me.

    Get the recipe —> Gluten-Free Molasses Cookies

    11. Gluten-Free Sparkle Cookies

    Baked gluten-free sugar cookies rolled in red and pink sugar.

    These gluten-free sparkle sugar cookies are light and crisp on the edges and soft in the center. They’re sweet and buttery (and a perfect recipe for beginners).

    Get the recipe —> Gluten-Free Sparkle Cookies

    12. Gluten-Free Snickerdoodles

    Stack of baked snickerdoodles on a plate.

    This recipe makes gluten-free snickerdoodles—a simple sugar cookie coated with cinnamon-sugar—that are crisp on the edge and chewy in the center.

    Get the recipe —> Gluten-Free Snickerdoodles

    13. Gluten-Free Spritz Cookies

    Gluten-free spritz cookies on baking sheet.

    Gluten-Free Spritz Cookies are buttery and tender. A gluten-free flour blend– and good cookie press–makes these one of the easiest Christmas cookies to bake. They are lovely on their own or decorated with a sprinkle of colored sugar.

    Get the recipe —> Gluten-Free Spritz Cookies

    14. Gluten-Free Chocolate Chip Cookie Bars

    Gluten-free chocolate chip cookie bars in a stack.

    Gluten-Free Chocolate Chip Cookie Bars are easy to make. Loaded with chocolate chips!

    Get the recipe —> Gluten-Free Chocolate Chip Cookie Bars

    15. Peanut Butter Marshmallow Bars

    Stack of three chocolate marshmallow bars with colorful fruit marshmallows.

    These marshmallow peanut butter bars are an easy—and tasty—treat to make for Christmas. They look amazing on a cookie platter! 

    Get the recipe —> 4 Ingredient Peanut Butter Marshmallow Bars

    16. Gluten-Free Peanut Butter Swirl Brownies

    Gluten-Free peanut butter brownies cut on a wire rack.

    Gluten-free peanut butter swirl brownies are so easy to make. This recipe, which is loaded with peanut butter, makes the best dessert for any peanut butter cup lovers in your life.

    Get the recipe —> Gluten-Free Peanut Butter Swirl Brownies

    17. Gluten-Free Lemon Bars

    Gluten-free lemon bars in a stack.

    These are the best gluten-free lemon bars! A rich and tender shortbread base with a thick, lemony topping. Not too tart; not too sweet! Lemon lovers will adore these bars.

    Get the recipe —> Gluten-Free Lemon Bars

    18. Gluten-Free Soft Sugar Cookies

    Gluten-free soft sugar cookies on a white platter.

    This easy recipe makes soft gluten-free sugar cookies. Inspired by the famous Lofthouse brand, these cookies are topped with frosting and finished with sprinkles.

    Get the recipe —> Gluten-Free Soft Sugar Cookies

    19. Gluten-Free Cinnamon Sugar Pretzels

    Small pretzel twists coated with cinnamon and sugar

    Easy gluten-free cinnamon-sugar pretzels. They’re a perfect sweet and salty treat.

    Get the recipe —> Gluten-Free Cinnamon Sugar Pretzels

    20. Gluten-Free Pumpkin Spice Snickerdoodles

    Stack of baked gluten-free snickerdoodles in a orange paper wrapper

    Who says we have to leave pumpkin spice behind in the fall? These thick snickerdoodles, coated with pumpkin spice, are just as welcome at Christmas as they are in October.

    Get the recipe —> Gluten-Free Pumpkin Spice Snickerdoodles

    21. Gluten-Free Pumpkin Cheesecake Brownies

    Pumpkin Cheesecake Brownies on a white plate.

    Cheesecake + Pumpkin + Brownies= A perfect holiday dessert! 

    Get the recipe —> Gluten-Free Pumpkin Cheesecake Brownies

    22. Gluten-Free Cream Cheese Pretzel Bars

    Five Minute Cheesecake Pretzel Bars cut into squares.

    Got 5 Minutes? Then you can make these over-the-top cream cheese pretzel bars. 

    Get the recipe —> 5-Minute Pretzel Cream Cheese Bars

    23. No-Bake Gluten-Free Chocolate Orange Cookies

    No Bake Chocolate-Dipped Orange Cookies.

    You know that orange-shaped chocolate that’s popular at Christmas? They inspired these easy no-bake cookies. 

    Get the recipe —> No-Bake Chocolate Orange Cookies

    24. Gluten-Free Easy Sugar Cookies

    Stack of gluten-free sugar cookies on a white plate.

    These sugar cookies don’t require a cookie cutter! Make the dough. Roll them in sugar. Place them onto a baking sheet. Annnnnnd….you’re done! 

    Get the recipe —> Easy Gluten-Free Sugar Cookies

    25. The World’s Easiest Cookies

    Paleo almond cookies on a white platter.

    You won’t believe how easy these cookies are to make. They’re just almond flour, maple syrup, and baking powder. That’s it. Seriously.

    Get the recipe —> The World’s Easiest Cookies

    26. Easy Gluten-Free Butter Cookies

    Gluten-free butter cookies with red and green sprinkles on a wire rack.

    These cute butter cookies take only minutes to make! The finished cookies come out of the oven already decorated with a sweet, buttery flavor.

    Get the recipe —> Easy Gluten-Free Butter Cookies

    27. Gluten-Free Chocolate Chip Cookies

    Gluten-Free Chocolate Chip Cookies on wire rack.

    Soft and tender gluten-free chocolate chip cookies. Also a favorite of Santa’s. (He has lots of favorite cookies. Lots.)

    Get the recipe —> Gluten-Free Chocolate Chip Cookies

    28. Gluten-Free Peanut Butter Cookies

    Gluten-free peanut butter cookies in a stack on a baking sheet.

    These gluten-free peanut butter cookies are so easy to make! All you need is one bowl and a few simple ingredients. The recipe calls for gluten-free flour, which gives them crisp edges and a tender center.

    Get the recipe —> Gluten-Free Peanut Butter Cookies

    29. Gluten-Free Peanut Butter Cookie Bars

    Gluten-free peanut butter blondies on a marble pan.

    Think of these gluten-free peanut butter blondies as the perfect marriage between a peanut butter cookie and a blondie.

    Get the recipe —> Gluten-Free Peanut Butter Blondies

    Gluten-Free Candy Corn List (Updated 2021)

    Gluten-Free Candy Corn Guide

    Gluten-Free Candy Corn List (updated 2021)

    Gluten-Free Candy Corn List

    Love it or loathe it, candy corn is a traditional part of Halloween. If you love it and follow a gluten-free diet, you might be surprised to learn that not all candy corn is considered gluten-free. Finding a gluten-free candy corn used to be almost impossible. Not anymore!

    Is Candy Corn Gluten-Free?

    It depends. Many brands of candy corn do not contain gluten. Due to processing, however, popular brands often carry a “may contain” warning for wheat/gluten. Always check with the manufacturer and/or look for candy corn that is clearly labeled gluten-free. 

    Gluten-Free Candy Corn List (2021)

    Items are gluten-free and prices are accurate at the time of publication. Please always check the gluten-free status of individual products as ingredients may change. 

    Bag of jelly belly candy corn.

    • Jelly Belly 
      • Labeled gluten-free.
      • Traditional candy corn and giant candy corn
      • Site: JellyBelly.com
        Bag of happy bites candy corn.
    • Happy Bites Candy
      • Labeled gluten-free.
      • Traditional candy corn
      • Site: https://www.eatplayhappy.com/products/happy-bites-candy-corn-1-pound

    Bag of Brach's gluten-free candy corn.

    • Brach’s Candy Corn
      • Brach’s Naturally Flavored Candy Corn.
        • Labeled gluten-free. (Brach’s naturally flavored candy corn review.)
      • Brach’s Traditional Candy Corn.
        • As of 2021, Brach’s candy corn ingredient list does not indicate gluten. The company does not maintain a gluten-free candy list. Please contact them directly for more information. 


    Easy Gluten-Free Chocolate Frosting

    Bowl of gluten-free chocolate frosting with yellow spatula.

    Simple and delicious gluten-free chocolate frosting. Perfect for birthday cakes, especially gluten-free yellow cake.

    Bowl of gluten-free chocolate frosting.

    Is Chocolate Frosting Gluten-Free?

    Good question. It really depends on the recipe. Classic American chocolate buttercream frosting, which is what many people think of as “chocolate frosting” tends to be gluten-free. However, some chocolate frosting recipes call for flour as a thickener. 

    As always, check ingredients to ensure their gluten-free status. The same goes for store-bought canned frosting. Always read labels to make sure the frosting is gluten-free.

    How to Make Gluten-Free Chocolate Frosting: Explained

    Just like my gluten-free vanilla frosting recipe, this simple buttercream comes together quickly and easily! 

    1. Sift together the powdered sugar, cocoa powder, and salt. Sifting or whisking the powdered sugar together with the cocoa powder and salt gets rid of clumps and prevents a lumpy frosting. 
    2. Cream the butter until light and smooth. For a creamy chocolate frosting, start by beating the butter (or dairy-free butter) until light. Use medium-low setting on an electric mixer and beat the butter for about four minutes before adding the other ingredients.

      The temperature of the butter matters. If it’s too cold, it won’t get nice and light. If it’s too warm, the frosting can turn out greasy. Aim for a temperature between 65 and 68 degrees F.  
    3. Add the powdered sugar mixture and milk. Once you mix the butter, stop the mixer and add the powdered sugar/cocoa mixture and milk. Mix until smooth and creamy. If you like a very light frosting, beat for several minutes. If you prefer a denser frosting, stop the mixer once the frosting is smooth. 

    Bowl of gluten-free chocolate frosting with yellow spatula.

    Gluten-Free Chocolate Frosting Tips

    • Use a Dutch-process cocoa powder. It has a more intense chocolate flavor than natural cocoa powder. 
    • Don’t skip the salt. Salt enhances the flavor and helps to control the sweetness a little. 
    • If the frosting seems thick, add a little more milk. 
    • If the frosting seems thin, add a little more powdered sugar.

    Five Gluten-Free Cakes Taste Great with Chocolate Frosting 

    1. Gluten-free yellow cake
    2. Gluten-free chocolate cake
    3. Almond flour yellow cake
    4. Almond flour chocolate cake.
    5. Coconut flour chocolate cake

    Bowl of gluten-free chocolate frosting with yellow spatula.
    3 from 1 vote
    Print

    Gluten-Free Chocolate Frosting

    Easy gluten-free chocolate frosting. Comes together in minutes. Only five ingredients.

    Prep Time 10 minutes
    Total Time 10 minutes
    Servings 3 cups frosting

    Ingredients

    • 4 cups powdered sugar (16 ounces; 455 grams)
    • ¾ cup dutch-process cocoa powder (2 ½ ounces; 75 grams)
    • ½ teaspoon salt
    • 1 cup softened butter (or dairy-free alternative) (8 ounces; 226 grams)
    • 4 tablespoons milk, more as needed (2 ounces; 56 grams)

    Instructions

    1. Sift together powdered sugar, cocoa powder, and salt. Set aside.

    2. Beat butter until light and creamy in a large bowl. Use medium-low speed on a mixer. Beat for about four minutes.

    3. Stop mixer. Add powdered sugar/cocoa powder mixture and milk. Turn mixer to low. Mix until powdered sugar is combined. Increase mixer speed to medium. Mix until fluffy. Stop mixer. Scrape the bottom and sides of the bowl. Turn the mixer on and beat for an additional minute. If frosting seems thick, add additional milk.

    4. Use to frost cooled cakes or cupcakes. Store leftover frosting in the refrigerator for up to one week. Allow frosting to come to room temperature and then beat for 30 seconds before using. 

    Recipe Notes

    Makes enough frosting to frost and fill one 8-inch round cake or 24 cupcakes. 


    Easy Coconut Flour Chocolate Cake

    Slice of coconut flour chocolate cake with vanilla frosting and sprinkles.

    You only need a few ingredients to make this easy coconut flour chocolate cake. This cake is deeply chocolatey and very tender.

    Slice of coconut flour chocolate cake with vanilla frosting and sprinkles.

    If you love my gluten-free chocolate cake recipe but are looking for a grain-free version. This recipe is for you. Like the almond flour chocolate cake recipe, this cake is snap to make and equally delicious. 

    Coconut Flour Chocolate Cake Recipe Overview

    • Easy-to-Make: One bowl plus 9 ingredients are all you need to make this cake.
    • Taste: Rich chocolate flavor with notes of coconut thanks to the flour. 
    • Texture: Moist and dense. 
    • Makes one layer. The perfect amount if you want just a little cake.
    • Gluten-free and grain-free.

    The Ingredients

    Coconut Flour. Made from defatted, dried coconut. This ingredient is unlike any other flour. It absorbs a lot of liquid. You’ll notice the batter for this cake is very thick. That’s because of the coconut flour
    Cocoa Powder. Natural cocoa powder (Not dutch-process cocoa powder) is used in this recipe. It’s naturally acidic and combines with the baking soda to help the cake rise.
    Baking Soda. Leavens the cake along with the eggs.
    Salt. A little salt helps to enhance the flavor. For the best results, use a fine (table) salt, not a coarse salt.
    Eggs. Since this is a grain-free and gluten-free cake, it needs the protein from the eggs to help with the structure.
    Coconut Oil. Adds richness. Use melted coconut oil that you’ve cooled a little before adding to the batter. If you prefer to use another oil, use a liquid oil, like grapeseed.
    Honey. A little honey sweetens this cake.

    How to Make a Coconut Flour Chocolate Cake: Tips for Success

    1. Preheat the oven. It’s important to bake this cake in a preheated oven. For most ovens, it’s a good idea to turn the oven on before you start measuring your ingredients. This way it’s heated to temperature when the batter is ready.
    2. Line the cake pans. Coconut flour cakes love to stick to the pan, more so than any other cake. To make it easy to remove the cake from the pan, line the pan with parchment paper and then grease the parchment with coconut oil.
    3. Spread the batter into the pans. This cake batter is really thick. After mixing, divide the batter evenly between the two prepared pans. Then smooth the batter, using the back of a spoon or small spatula, into an even layer.
    4. Bake until set. Bake the cake until a cake tester inserted into the middle of the cake comes out clean. Since coconut batter is so thick, test the cake in a few spots to ensure it’s done.
    5. Cool. Let the cakes cool in the pan for about 10 minutes before removing and placing on a wire rack. If you remove them too fast, the cakes can break. If they cool completely in the pan, they might stick.
    6. Frost. When the cakes are completely cool, frost with your favorite buttercream frosting.

    Slice of coconut flour chocolate cake with vanilla frosting and sprinkles.
    5 from 1 vote
    Print

    Easy Coconut Flour Chocolate Cake

    One-bowl coconut flour chocolate cake. Easy to make. Deep chocolate flavor with a light coconut flavor and a moist, tender crumb.

    Prep Time 10 minutes
    Cook Time 35 minutes
    Servings 6 slices

    Ingredients

    • ½ cup (50 grams) natural cocoa powder
    • ⅓ cup (37 grams) coconut flour
    • ½ teaspoon baking soda
    • ½ teaspoon salt
    • ⅓ cup (75 grams) coconut oil, melted and cooled slightly
    • 4 large eggs (200 grams out of shell)
    • ⅓ cup (113 grams) honey

    For the Vanilla Frosting

    • ½ cup (113 grams) butter, traditional or dairy-free spread
    • 2 cups (226 grams) powdered sugar, see note
    • 2 tablespoons milk, traditional or dairy-free, more if needed
    • ½ teaspoon vanilla extract

    Instructions

    1. Prepare the Cake. Adjust oven rack to middle position and preheat oven to 350 degrees F.

    2. Spray an 8-inch round pan (see note) with nonstick cooking spray or brush lightly with melted coconut oil. Place a piece of parchment in the bottom of the pan. Spray the parchment lightly with nonstick cooking spray or brush lightly with melted coconut oil.
    3. Whisk the cocoa powder, coconut flour, baking soda, and salt together in a medium mixing bowl. Break up any large pieces of coconut flour. Add eggs,coconut oil, and honey. Mix until batter is smooth.
    4. Spread the batter into the prepared pan. Batter thickens as it sets. Be sure to spread the batter evenly into the pan.
    5. Bake until a cake tester inserted into the center of the cake comes out clean, about 30 minutes.
    6. Allow the cake to cool in the pan for 10 minutes and then turn out onto a wire rack to cool completely.
    7. Prepare the frosting. Cream butter until light. Add the powdered sugar, milk, and vanilla extract. Mix until smooth and fluffy. If frosting seems thick, add additional milk.

    8. Frost when the cake is cooled completely. For a double layer cake, split the 8-inch round in half. Place one half on a cake plate. Spread frosting evenly over the top. Set the second half on top. Frost the side and top of the cake.
    9. Store the cake wrapped on the counter for three days or freeze for up to three months.

    Recipe Notes

    Ingredient Note

    Powdered Sugar. Many brands of powdered sugar contain corn starch. If you want a grain-free version, you can either make your own or look for a corn starch-free brand.

    Almond Flour Chocolate Cake

    Slice of almond flour chocolate cake on a plate.

    The Easiest Almond Flour Chocolate Cake Ever! A one-bowl recipe that makes a moist, dense chocolate cake. The recipe is gluten-free, grain-free, and dairy-free.

    Slice of almond flour chocolate cake on a plate.

    Why You’ll Love This Almond Flour Chocolate Cake Recipe

    Easy to Make. Like my almond flour yellow cake recipe, you only need a bowl and whisk to make this cake. If you’ve got an electric mixer, you can use it but it isn’t required.

    Flavor. This cake is for chocolate lovers. It’s got a deep chocolate flavor and a hint of almond. 

    Texture. Moist and dense without being heavy or gritty, the texture is a dream. It’s based on my popular gluten-free chocolate cake. Like that recipe, this cake is deeply chocolatey and is perfect for birthdays.


    Key Ingredients

    Finely Ground Almond Flour. For a delicate (not gritty) texture, use a finely ground almond flour. Almond meal, while similar, isn’t as fine and can make the cake heavy.

    Natural Cocoa Powder. Use natural cocoa powder in this recipe. Since it’s acidic, it works with the baking soda to help the cake to rise.

    Cane or Coconut Sugar
    . To sweeten this cake, you have two options: granulated (evaporated) cane sugar or coconut sugar. Using granulated cane sugar gives you a sweet flavor that’s similar to a traditional chocolate cake. Coconut sugar lends a mild caramel-like flavor. Both work well.

    Oil.
    A neutral liquid oil, like grapeseed or canola oil, give the cake a moist texture. Since this is an almond cake recipe, you could use almond oil if you keep it in the house.

    Eggs. This recipe uses a lot of eggs. They provide structure and texture. So don’t skip the six (yes, six!) eggs.

    Milk. To keep the cake moist and tender, milk is needed in the batter. You can use traditional milk or a dairy-free milk, like almond milk.

    Almond flour cake frosted with chocolate frosting and colored sprinkles.

    How to Make An Almond Flour Chocolate Cake. Keys for Success.

    1. Preheat your oven. Putting the cake pans into a hot oven ensures that the cakes rise high and evenly. Turn the oven on before you start mixing the batter.
    2. Make the Batter. Combine all the “dry” ingredients in a large bowl. (That’s the almond flour, sugar, cocoa powder, salt, and baking soda.) Whisk these ingredients together to evenly distribute the baking soda. If you see any lumps of almond flour or cocoa powder, break them up by rubbing them between your fingers. Add the oil, eggs, and milk. Mix until the batter is smooth. You can do this by hand with a large whisk or use an electric mixer. It’s really up to you. I’ve tested the recipe both ways and the cake comes out the same.
    3. Prep the Pans. Grain-free cakes love to stick to pans. To prevent this, line your cake pan with a parchment round and then brush the parchment with a little oil. (Or use a nonstick cooking spray.)
    4. Fill the Pans. For two even layers, divide the batter evenly among your two cake pans.
    5. Bake the Cake. This cake is done when a cake tester inserted into the center of the cake comes out clean or with only a few dry crumbs clinging to it.
    6. Cool on a Rack. Once you’ve let the cakes cool in the pan, gently turn them onto a wire cooling rack. If you let the cakes cool completely in the pan, they can stick.
    7. Frost the Cake. You don’t need to frost this cake. But if you want to finish it with frosting, let the cake cool completely and then frost with your favorite frosting, like this gluten-free buttercream.

    Slice being cut from an almond flour chocolate cake.

    Baking Questions Answered

    Can I use coconut oil in this recipe?

    Coconut oil makes the cake heavy and a little greasy. I don’t recommend it.

    Can I replace the almond flour with coconut flour?

    Coconut flour is very different from almond flour. It absorbs liquid quickly and it does not contain fat. It won’t work in this recipe.

    Can I replace the almond flour with gluten-free flour?

    You’ve got two options! If you want to use a gluten-free flour, my gluten-free chocolate cake is the perfect recipe for you. This coconut flour chocolate cake recipe is great if you want to use coconut flour. 

    Can I freeze this cake?

    Yes! Allow the layers to cool completely and then wrap well with plastic wrap and freeze for up to three months. Thaw the cake overnight in the refrigerator.

    Slice of almond flour chocolate cake on a plate.
    5 from 8 votes
    Print

    Almond Flour Chocolate Cake

    Easy to make almond flour chocolate cake. Deep chocolate flavor. Gluten-free and grain-free.

    Prep Time 10 minutes
    Cook Time 30 minutes
    Total Time 40 minutes
    Servings 16 servings

    Ingredients

    • 3 cups (340 grams) blanched almond flour
    • 1 cup (170 grams) coconut sugar or evaporated cane juice
    • 1 cup (100 grams) natural cocoa powder
    • 1 teaspoon baking soda
    • 1 teaspoon salt
    • ⅔ cup oil, like grapespeed oil
    • 6 large eggs (about 300 grams out of the shell)
    • ½ cup (113 grams ) milk, dairy-free or traditional

    Chocolate Buttercream Frosting

    • 4 cups (455 grams) powdered sugar (use corn-free to keep the recipe grain-free)
    • ¾ cup (75 grams) cocoa powder
    • 1/2 teaspoon salt
    • 1 cup (226 grams) softened butter or dairy-free butter spread
    • 4 tablespoons milk, traditional or dairy-free, plus more as needed

    Instructions

    For the Cake

    1. Preheat oven to 350 degrees F. Line two 8-inch cake pans with parchment rounds and grease with vegetable oil or nonstick cooking spray.

    2. Whisk the almond flour, sugar, cocoa powder, baking soda, and salt in a large mixing bowl. Break up any large pieces of almond flour with your fingers. Add the oil, eggs, and milk. Mix the batter until smooth. Use a handheld whisk or electric mixer.

    3. Divide the batter evenly between the two prepared pans. Tap the pans lightly on the counter to settle the batter.
    4. Bake until a cake tester inserted into the center of the cake comes out clean, about 30 minutes.
    5. Remove the pans from the oven. Place on a wire rack. After about 8 minutes, turn the cakes out of the pan and place directly onto the wire rack to cool completely.
    6. Frost cooled caked with frosting. Cover cake and store on the counter for up to three days or freeze up to three months.

    For the Frosting

    1. Whisk together powdered sugar,cocoa powder, and salt to combine in a small bowl.

    2. In a large bowl, cream the butter unitl light with a mixer. Stop mixer and add the powdered sugar mixture and milk. Turn mixer to low and mix utnil combined. Increase mixer speed to medium. Mix frosting until fluffy. If frosting seems too thick, add an additonal tablespoon of milk.


    • « Go to Previous Page
    • Page 1
    • Page 2
    • Page 3
    • Page 4
    • Page 5
    • Page 6
    • Interim pages omitted …
    • Page 20
    • Go to Next Page »

    Primary Sidebar

    Get Recipes Delivered to Your Inbox! (Free Weekly Newsletter!)


    Elizabeth Barbone

    I'm Elizabeth. Welcome to GlutenFreeBaking.com --- a judgment-free baking space. Here you'll find easy recipes, product reviews, and other good stuff that makes gluten-free living easy and a lot more fun!

    Read More About Elizabeth →

    • Facebook
    • Instagram
    • Pinterest

    Foods You Miss the Most

    • A stack of gluten-free pancakes topped with maple syrup and butter on a plate.
      The Best Gluten-Free Pancakes
    • Gluten-free chocolate chip cookies on a cooling rack.
      Gluten-Free Chocolate Chip Cookies
    • Loaf of Baked Gluten-Free Sandwich Bread on Red Cutting Board.
      How to Make the Best Gluten-Free Sandwich Bread: An Easy Recipe for Everyone!
    • Gluten-free flour tortillas on plate.
      How to Make the Best Gluten-Free Flour Tortillas

    Footer

    ↑ back to top

    Terms

    • Privacy Policy
    • Terms & Conditions
    • Accessibility Statement

    Follow Us

    • Facebook
    • Instagram
    • Pinterest

    About

    • Contact
    • About

    Copyright © 2025 Gluten-Free Baking